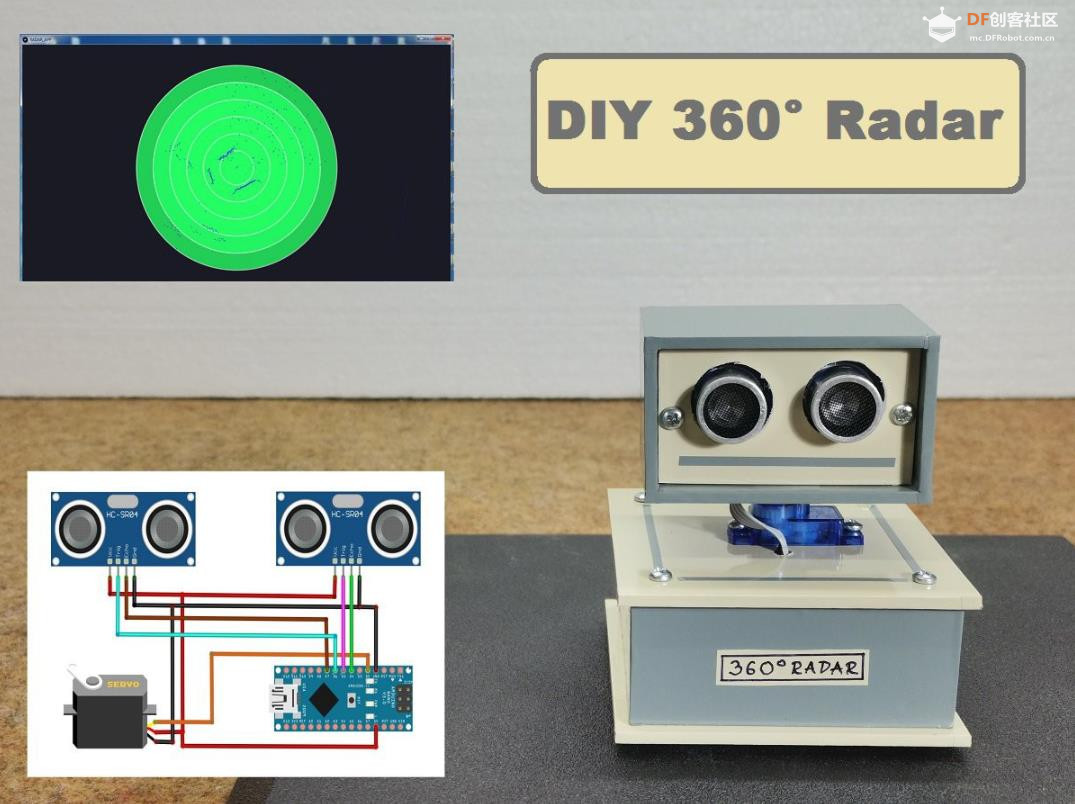
启动时,测试伺服电机的运动。此后,雷达立即开始扫描。接下来,我们在 PC 上启动 Processing 应用程序,然后需要输入与 Arduino 通信的正确串行端口。这样就会显示一个类似雷达的监视器,上面正在监视对象。需要说明的是,这个想法和代码是西班牙电子工程专业学生 Victor Casado 的作品。从图片中可以看到,该设备还包含一个压电蜂鸣器。这是因为我目前正在测试修改后的代码,根据物体的距离,发出具有特定频率的声音。如果成功,我将以更新的形式发布新代码。
#include <HCSR04.h>
#include <Servo.h>
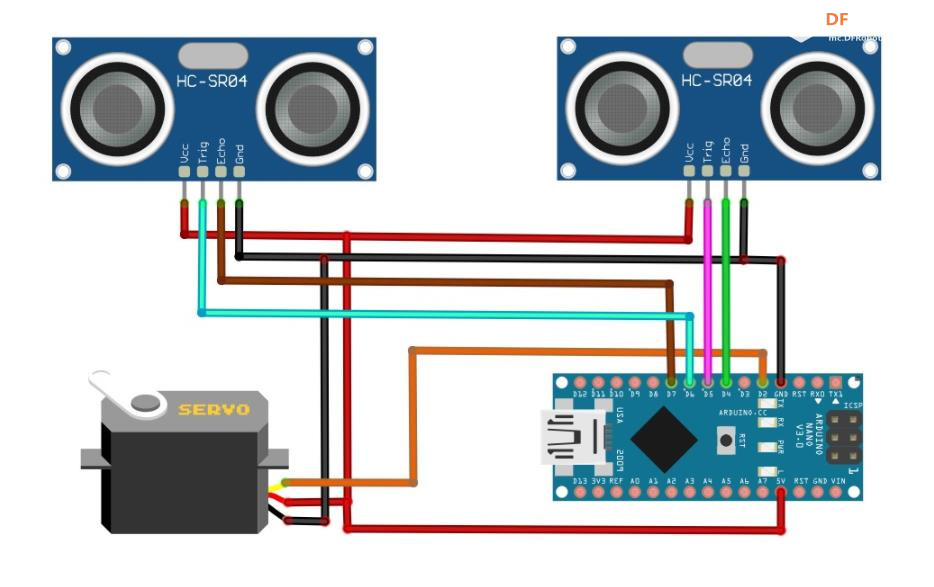
UltraSonicDistanceSensor distanceSensor(6, 7); //Create the 1st sensor object
UltraSonicDistanceSensor distanceSensor2(5, 4); //Create the 2nd sensor object
Servo servoMotor; //Create the Servo object
int delayTime = 5; //Delay value to wait for the servo to reach the 1 angle difference
long d; //Distance from 1st sensor calculated
long d2; //Distance from 2nd sensor calculated
void setup() {
Serial.begin(9600); //Initialize the Serial communication at 9600 bauds
servoMotor.attach(2); //Attach the servo to the Digital PWM pin 2
servoMotor.write(180); //Rotate the servo to the 180?
delay(1000); //Wait for the servo to reach 180?
servoMotor.write(0); //Rotate the servo to the 0?
delay(1000); //Wait for the servo to reach 0?
}
void loop() {
for (int i = 1; i < 180; i++) { //Move the Servo 180 degrees forward
readSensors(); //Read the sensors
Serial.print(i); //Print the angle
Serial.print(","); //Print a ","
Serial.print(d); //Print the 1st distance
Serial.print(","); //Print a ","
Serial.println(d2); //Print the 2nd distance with end line
servoMotor.write(i); //Set the sensor at the angle
delay(delayTime); //Wait for the servo to reach i?
}
for (int i = 180; i > 1; i--) { //Move the Servo 180 degrees backward
readSensors(); //Read the sensors
Serial.print(i); //Print the angle
Serial.print(","); //Print a ","
Serial.print(d); //Print the 1st distance
Serial.print(","); //Print a ","
Serial.println(d2); //Print the 2nd distance with end line
servoMotor.write(i); //Set the sensor at the angle
delay(delayTime); //Wait for the servo to reach i?


 沪公网安备31011502402448

 置顶卡
置顶卡 变色卡
变色卡 千斤顶
千斤顶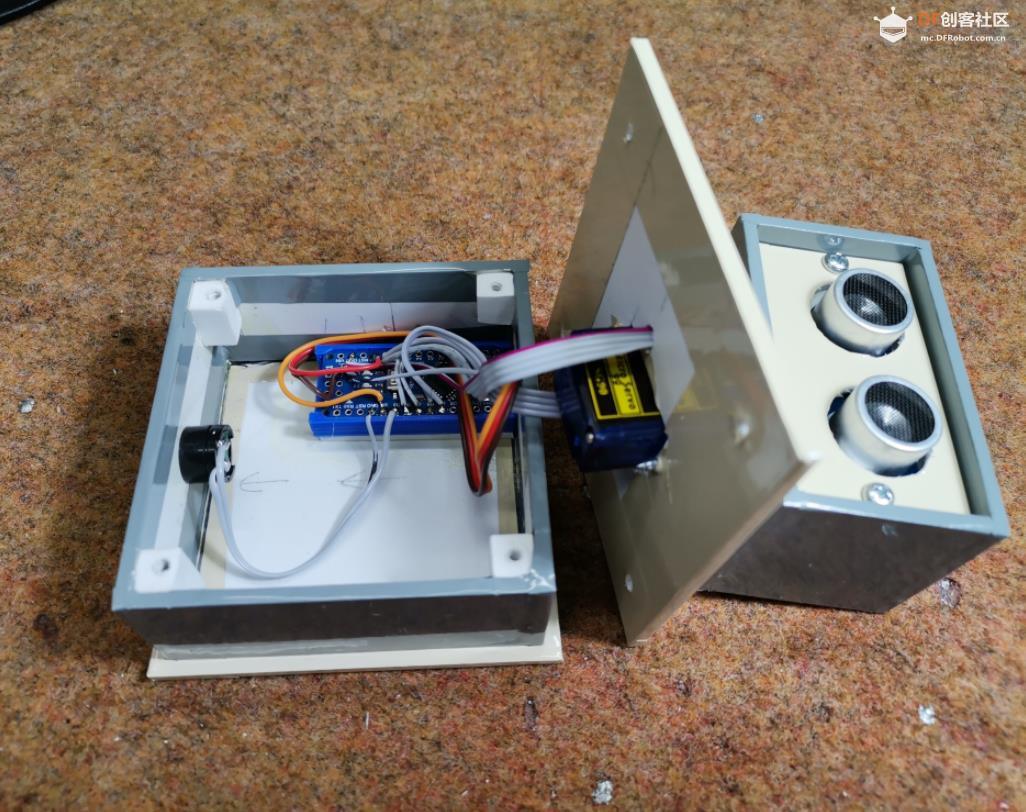

 萌萌哒新人
萌萌哒新人
 活跃会员
活跃会员
 宣传大使
宣传大使
 牛X认证
牛X认证
 创作达人
创作达人
 ARD DAY
 摸鱼团员
摸鱼团员
 志“童”道合
 编辑选择奖
编辑选择奖


