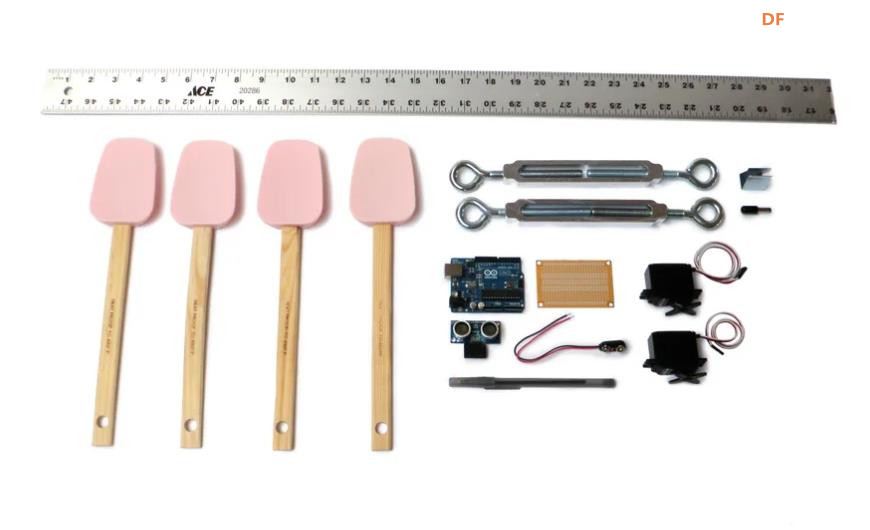
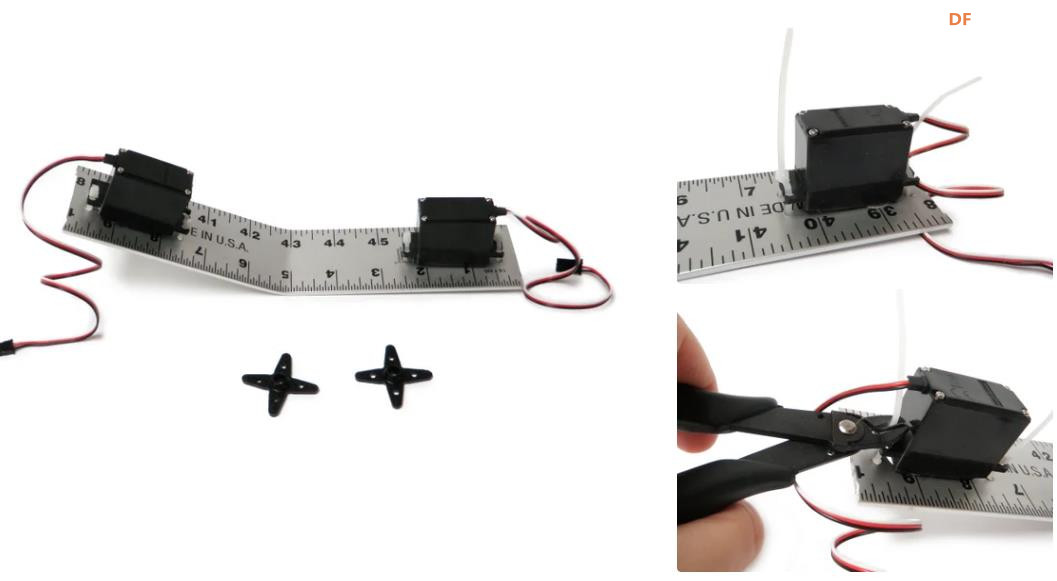
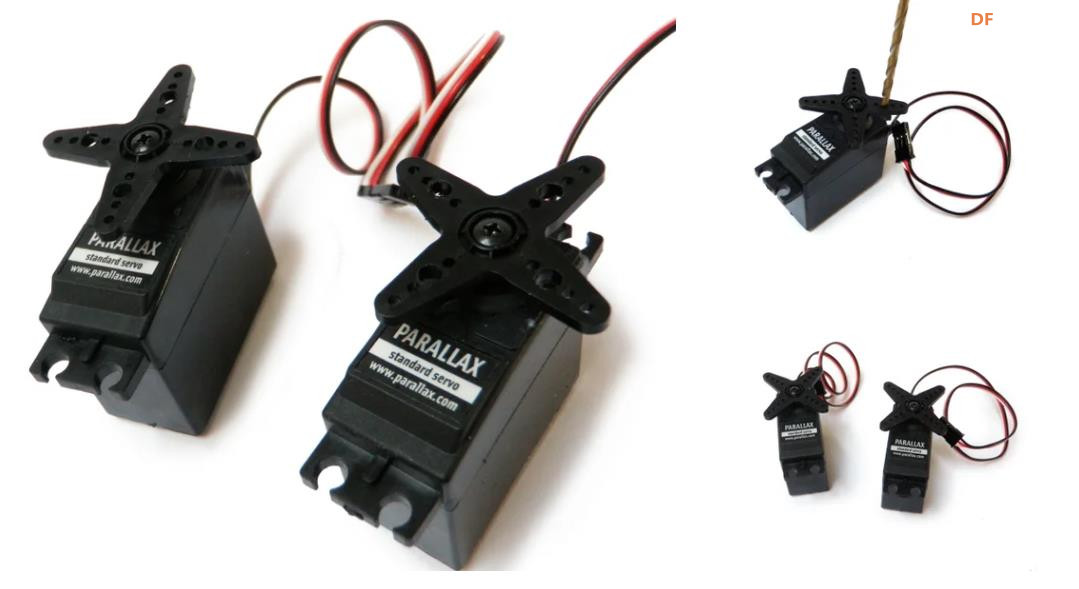
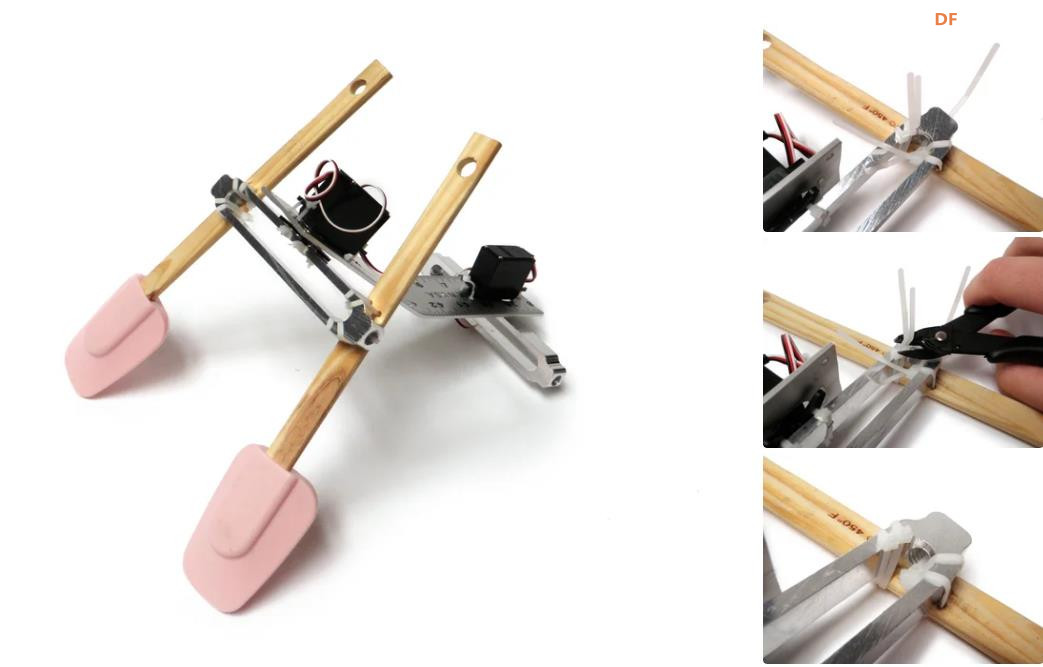
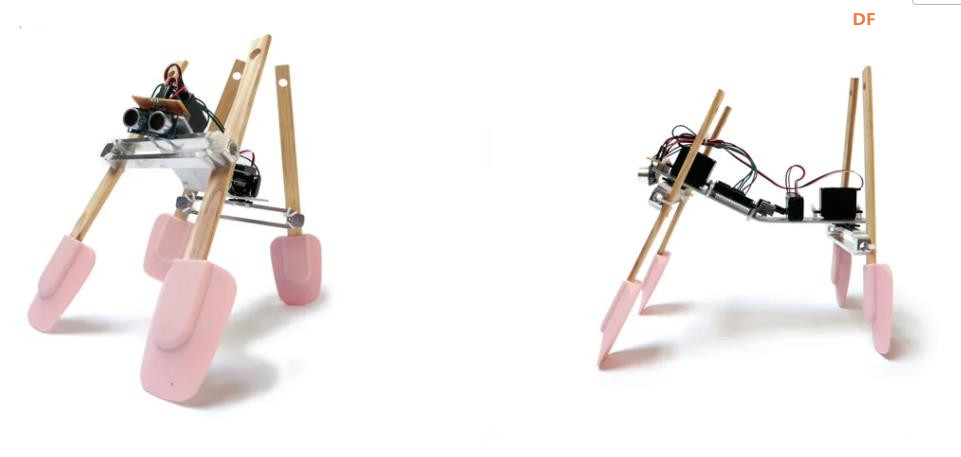
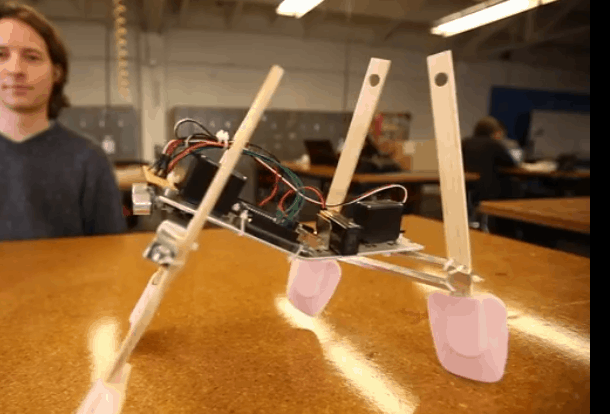
项目代码
- /*
- Simple Walker Robot
- by Randy Sarafan
-
- This code is for controlling a simple quadruped robot and having it respond to obstacles that approach.
-
- For more information visit the project page:
- https://www.instructables.com/id/Simple-Walker-Robot/
-
- This code is based on both the Arduino Sweep example by BARRAGAN
- and the Arduino Ping example by Tome Igoe
- */
-
- #include <Servo.h>
-
- Servo myservo; // create servo object to control a servo
- // a maximum of eight servo objects can be created
-
- Servo myservo1; // create a second servo object to control a servo
-
- int pos = 80; // variable to store the servo position for rear legs
- //changing this value changes the default position of the rear legs
- int pos1 = 70; // variable to store the servo position for front legs
- //changing this value changes the default position of the front legs
-
- //determines the rate at which the legs move
- int rate = 1000;
-
- // this constant won't change. It's the pin number
- // of the sensor's output:
- const int pingPin = 7;
-
- void setup()
- {
- myservo.attach(9); // attaches the servo on pin 9 to the servo object
- myservo1.attach(10); // attaches the servo on pin 10 to the servo object
-
- myservo.write(pos); // tell servo to go to position in variable 'pos' - sets center axis
- myservo1.write(pos1); // tell servo to go to position in variable 'pos' - sets center axis
- delay(5000);
- }
-
-
- void loop() {
-
- long duration, inches, cm;
-
- // The PING))) is triggered by a HIGH pulse of 2 or more microseconds.
- // Give a short LOW pulse beforehand to ensure a clean HIGH pulse:
- pinMode(pingPin, OUTPUT);
- digitalWrite(pingPin, LOW);
- delayMicroseconds(2);
- digitalWrite(pingPin, HIGH);
- delayMicroseconds(5);
- digitalWrite(pingPin, LOW);
-
- // The same pin is used to read the signal from the PING))): a HIGH
- // pulse whose duration is the time (in microseconds) from the sending
- // of the ping to the reception of its echo off of an object.
- pinMode(pingPin, INPUT);
- duration = pulseIn(pingPin, HIGH);
-
- // convert the time into a distance
- inches = microsecondsToInches(duration);
-
- //if something is closer than a foot, back away
- if(inches <= 12){
- backward();
- }
-
- //if nothing is closer than a foot, go forwards
- if(inches > 12){
- forward();
- }
-
- }
-
-
- //function for going forwards
- void forward(){
- myservo.write(pos + 20); // tell servo to go to position in variable 'pos'
- myservo1.write(pos1 - 20); // tell servo to go to position in variable 'pos'
-
- delay(rate);
-
- myservo.write(pos - 20); // tell servo to go to position in variable 'pos'
- myservo1.write(pos1 + 20); // tell servo to go to position in variable 'pos'
- delay(rate);
- }
-
- //function for backing away
- void backward(){
- myservo.write(pos + 25); // tell servo to go to position in variable 'pos'
- myservo1.write(pos1 + 50); // tell servo to go to position in variable 'pos'
-
- delay(rate);
-
- myservo.write(pos - 25); // tell servo to go to position in variable 'pos'
- myservo1.write(pos1 - 30); // tell servo to go to position in variable 'pos'
- delay(rate);
- }
-
- long microsecondsToInches(long microseconds)
- {
- // According to Parallax's datasheet for the PING))), there are
- // 73.746 microseconds per inch (i.e. sound travels at 1130 feet per
- // second). This gives the distance travelled by the ping, outbound
- // and return, so we divide by 2 to get the distance of the obstacle.
- // See: http://www.parallax.com/dl/docs/prod/acc/28015-PING-v1.3.pdf
- return microseconds / 74 / 2;
- }
| 


 沪公网安备31011502402448
 置顶卡
置顶卡 变色卡
变色卡 千斤顶
千斤顶
 萌萌哒新人
萌萌哒新人
 活跃会员
活跃会员
 宣传大使
宣传大使
 牛X认证
牛X认证
 创作达人
创作达人
 ARD DAY
 摸鱼团员
摸鱼团员
 志“童”道合
 编辑选择奖
编辑选择奖


