【花雕学编程】Arduino动手做(232)---ESP32S3 CAM流星流光灯
项目4.2带尾巴的流星流光灯在学习了PWM之后,我们可以使用它来控制LED条形图并实现带尾巴的流星流光灯。元器件清单、电路、硬件与上个项目流水灯完全一致(使用其中八个LED)。
【花雕学编程】Arduino动手做(232)---ESP32S3 CAM流星流光灯
Arduino实验接线示意图【花雕学编程】Arduino动手做(232)---ESP32S3 CAM流星流光灯
【Arduino】168种传感器模块系列实验(资料代码+仿真编程+图形编程)实验二百三十二:ESP32-S3 WROOM N16R8 CAM开发板WiFi+蓝牙模块
OV2640/5640摄像头模组
{花雕动手做}项目之十二:使用10位LED模块和ESP32-S3 CAM来制作带尾巴的流水灯(流星灯)
实验开源代码
/*
【Arduino】168种传感器模块系列实验(资料代码+仿真编程+图形编程)
实验二百三十二:ESP32-S3 WROOM N16R8 CAM开发板WiFi+蓝牙模块
OV2640/5640摄像头模组
{花雕动手做}项目之十二:使用10位LED模块和ESP32-S3 CAM来制作带尾巴的流水灯(流星灯)
*/
const byte ledPins[] = {21, 47, 38, 39, 40, 41, 42, 2};// 定义LED引脚
const byte chns[] = {0, 1, 2, 3, 4, 5, 6, 7};// 定义PWM通道
const int dutys[] = {0, 0, 0, 0, 0, 0, 0, 0,
1023, 512, 256, 128, 64, 32, 16, 8,
0, 0, 0, 0, 0, 0, 0, 0
};// 定义PWM占空比
int ledCounts;
int delayTimes = 50;// 流动速度,值越小速度越快
void setup() {
ledCounts = sizeof(ledPins);// 获取LED数量
for (int i = 0; i < ledCounts; i++) {// 设置PWM通道
ledcAttachChannel(ledPins, 1000, 10, chns);
}
}
void loop() {
for (int i = 0; i < 16; i++) {// 从一侧流动到另一侧
for (int j = 0; j < ledCounts; j++) {
ledcWrite(ledPins, dutys);
}
delay(delayTimes);
}
for (int i = 0; i < 16; i++) {// 从一侧流动到另一侧
for (int j = ledCounts - 1; j > -1; j--) {
ledcWrite(ledPins, dutys);
}
delay(delayTimes);
}
}
【花雕学编程】Arduino动手做(232)---ESP32S3 CAM流星流光灯
程序解释1、引脚定义:
const byte ledPins[] = {21, 47, 38, 39, 40, 41, 42, 2}:定义一个包含多个LED引脚的数组。
const byte chns[] = {0, 1, 2, 3, 4, 5, 6, 7}:定义PWM通道数组。
const int dutys[] = {...}:定义PWM占空比数组,用于控制LED亮度。
2、setup函数:
ledCounts = sizeof(ledPins):计算LED引脚数组的大小,即LED的数量。
for (int i = 0; i < ledCounts; i++) { ledcAttachChannel(ledPins, 1000, 10, chns); }:将每个LED引脚设置为PWM输出模式,并分配PWM通道。
3、loop函数:
顺序点亮每个LED:
for (int i = 0; i < 16; i++) { for (int j = 0; j < ledCounts; j++) { ledcWrite(ledPins, dutys); } delay(delayTimes); }:依次点亮每个LED,延时指定时间后熄灭。
逆序点亮每个LED:
for (int i = 0; i < 16; i++) { for (int j = ledCounts - 1; j > -1; j--) { ledcWrite(ledPins, dutys); } delay(delayTimes); }:依次逆序点亮每个LED,延时指定时间后熄灭。
这个代码的功能是:LED灯会依次顺序和逆序点亮和熄灭,形成流动效果。
实验场景图
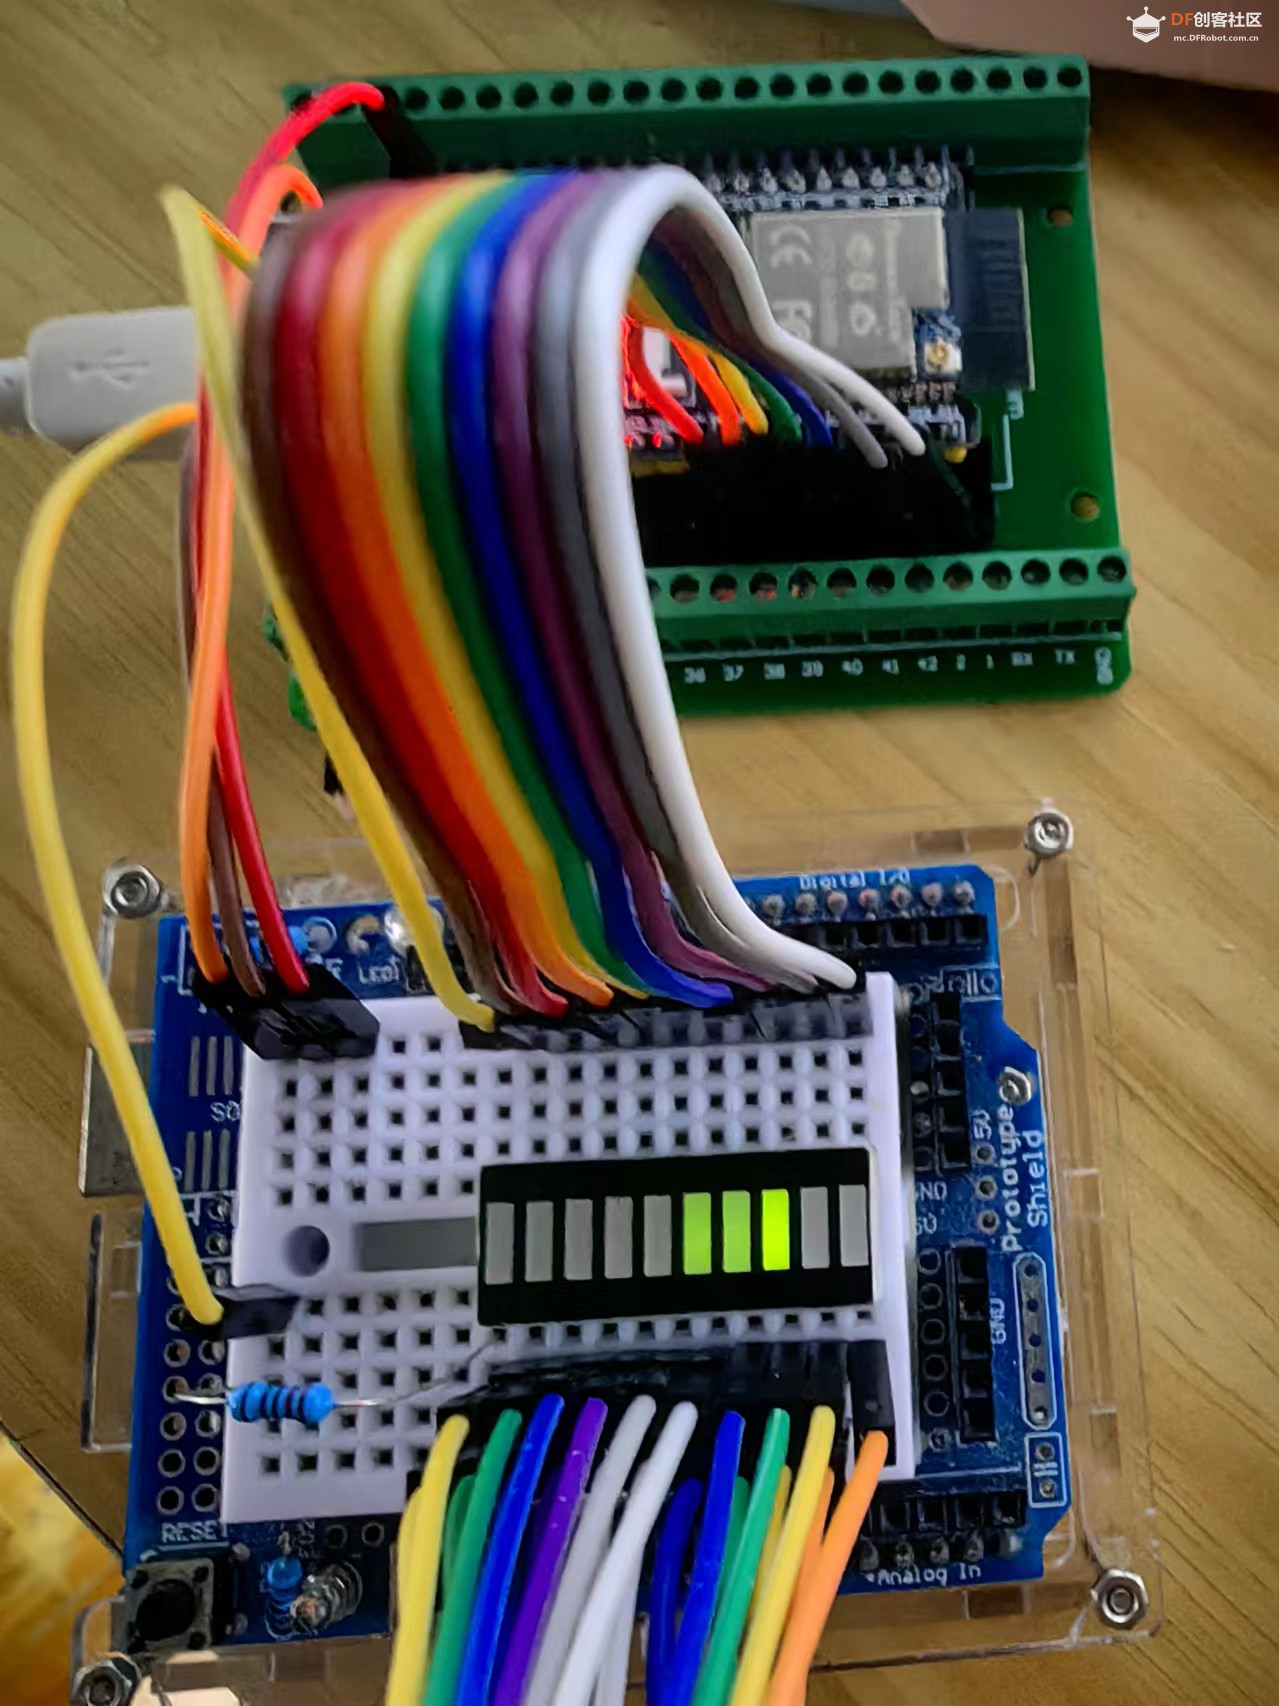
【花雕学编程】Arduino动手做(232)---ESP32S3 CAM流星流光灯
在loop() 中,嵌套的for循环用于控制PWM的脉冲宽度,并且LED条形图在第一个for循环中添加每个1之后移动一个网格,根据阵列占空比中的值逐渐变化。如下表所示,第二行的值是数组中的值
页:
[1]