 【追光】 【追光】
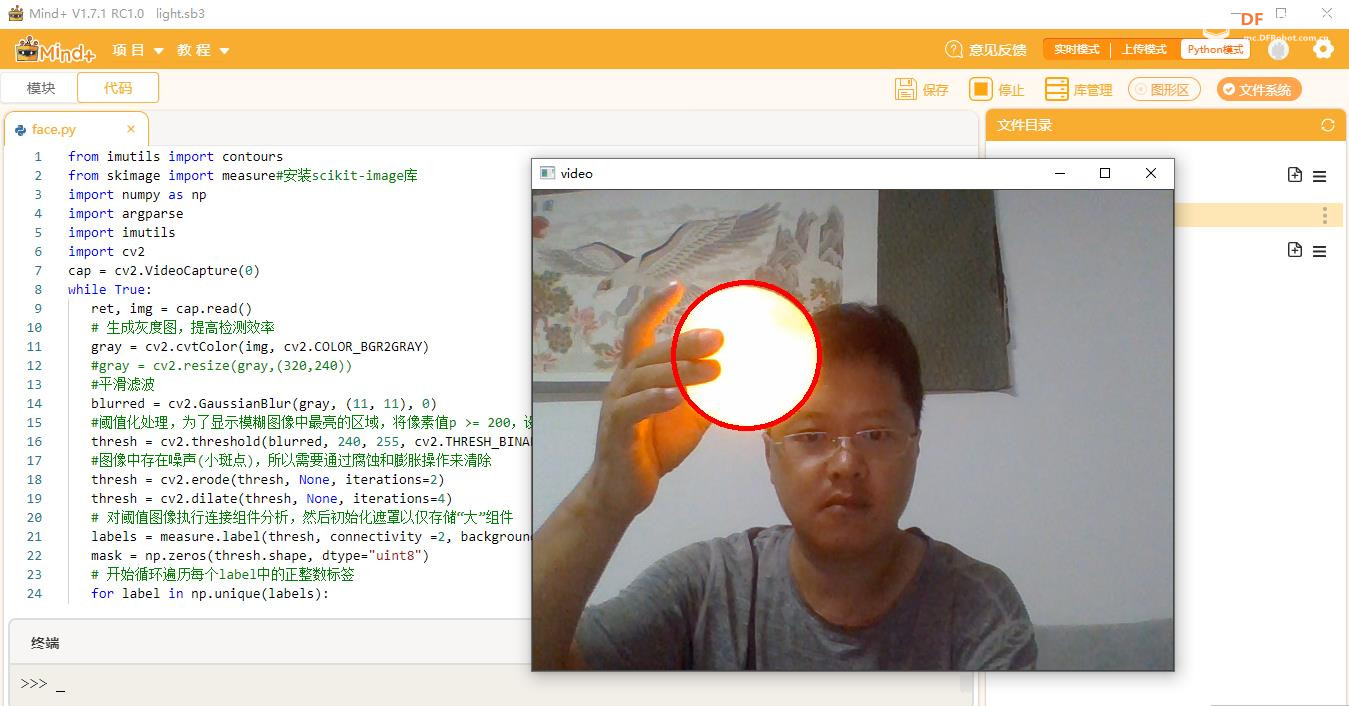
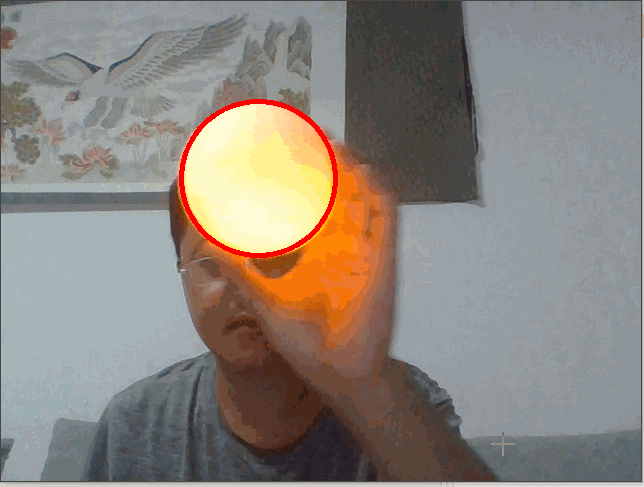
在Mind+Python模式中检测图像中灯光亮点(图像中最亮点)的教程
【python代码】
已注释的比较详细。
-
- from imutils import contours
- from skimage import measure#安装scikit-image库
- import numpy as np
- import argparse
- import imutils
- import cv2
- cap = cv2.VideoCapture(0)
- while True:
- ret, img = cap.read()
- # 生成灰度图,提高检测效率
- gray = cv2.cvtColor(img, cv2.COLOR_BGR2GRAY)
- #gray = cv2.resize(gray,(320,240))
- #平滑滤波
- blurred = cv2.GaussianBlur(gray, (11, 11), 0)
- #阈值化处理,为了显示模糊图像中最亮的区域,将像素值p >= 200,设置为255(白色),像素值< 200,设置为0(黑色)
- thresh = cv2.threshold(blurred, 240, 255, cv2.THRESH_BINARY)[1]
- #图像中存在噪声(小斑点),所以需要通过腐蚀和膨胀操作来清除
- thresh = cv2.erode(thresh, None, iterations=2)
- thresh = cv2.dilate(thresh, None, iterations=4)
- # 对阈值图像执行连接组件分析,然后初始化遮罩以仅存储“大”组件
- labels = measure.label(thresh, connectivity =2, background=0)
- mask = np.zeros(thresh.shape, dtype="uint8")
- # 开始循环遍历每个label中的正整数标签
- for label in np.unique(labels):
- # 如果标签为零,则表示正在检测背景并可以安全的忽略它否则,为当前区域构建一个掩码。
- if label == 0:
- continue
- # 否则,构建标签掩码并计算像素数
- labelMask = np.zeros(thresh.shape, dtype="uint8")
- labelMask[labels == label] = 255
- numPixels = cv2.countNonZero(labelMask)
- #对labelMask中的非零像素进行计数。如果numPixels超过了一个预先定义的阈值(在本例中,总数为300像素),那么认为这个斑点“足够大”,并将其添加到掩膜中。
- if numPixels > 300:
- mask = cv2.add(mask, labelMask)
- #在遮罩中找到轮廓,然后从左到右排序
- cnts = cv2.findContours(mask.copy(), cv2.RETR_EXTERNAL, cv2.CHAIN_APPROX_SIMPLE)
- cnts = imutils.grab_contours(cnts)
- if len(cnts)>0:
- cnts = contours.sort_contours(cnts)[0]
- #在轮廓上打圈
- maxwh=0
- for (i, c) in enumerate(cnts):
- #在图像上画出亮点
- (x, y, w, h) = cv2.boundingRect(c)
- if w*h>maxwh:
- maxwh=w*h
- cmax=c
- ((cX, cY), radius) = cv2.minEnclosingCircle(cmax)
- cv2.circle(img, (int(cX), int(cY)), int(radius),(0, 0, 255), 3)
- #cv2.putText(img, "#{}".format(i + 1), (x, y - 15),cv2.FONT_HERSHEY_SIMPLEX, 0.45, (0, 0, 255), 2)
- cv2.imshow('video',img)
- k = cv2.waitKey(30) & 0xff
- if k == 27: # press 'ESC' to quit
- break
-
- cap.release()
- cv2.destroyAllWindows()
| 


 沪公网安备31011502402448
 置顶卡
置顶卡 变色卡
变色卡 千斤顶
千斤顶
 活跃会员
活跃会员
 宣传大使
宣传大使
 牛X认证
牛X认证
 创客造
创客造
 编辑选择奖
编辑选择奖
 志“童”道合
 编辑选择奖
编辑选择奖
 编辑选择奖
编辑选择奖
 编辑选择奖
编辑选择奖
 编辑选择奖
编辑选择奖


