本帖最后由 云天 于 2022-2-5 12:47 编辑
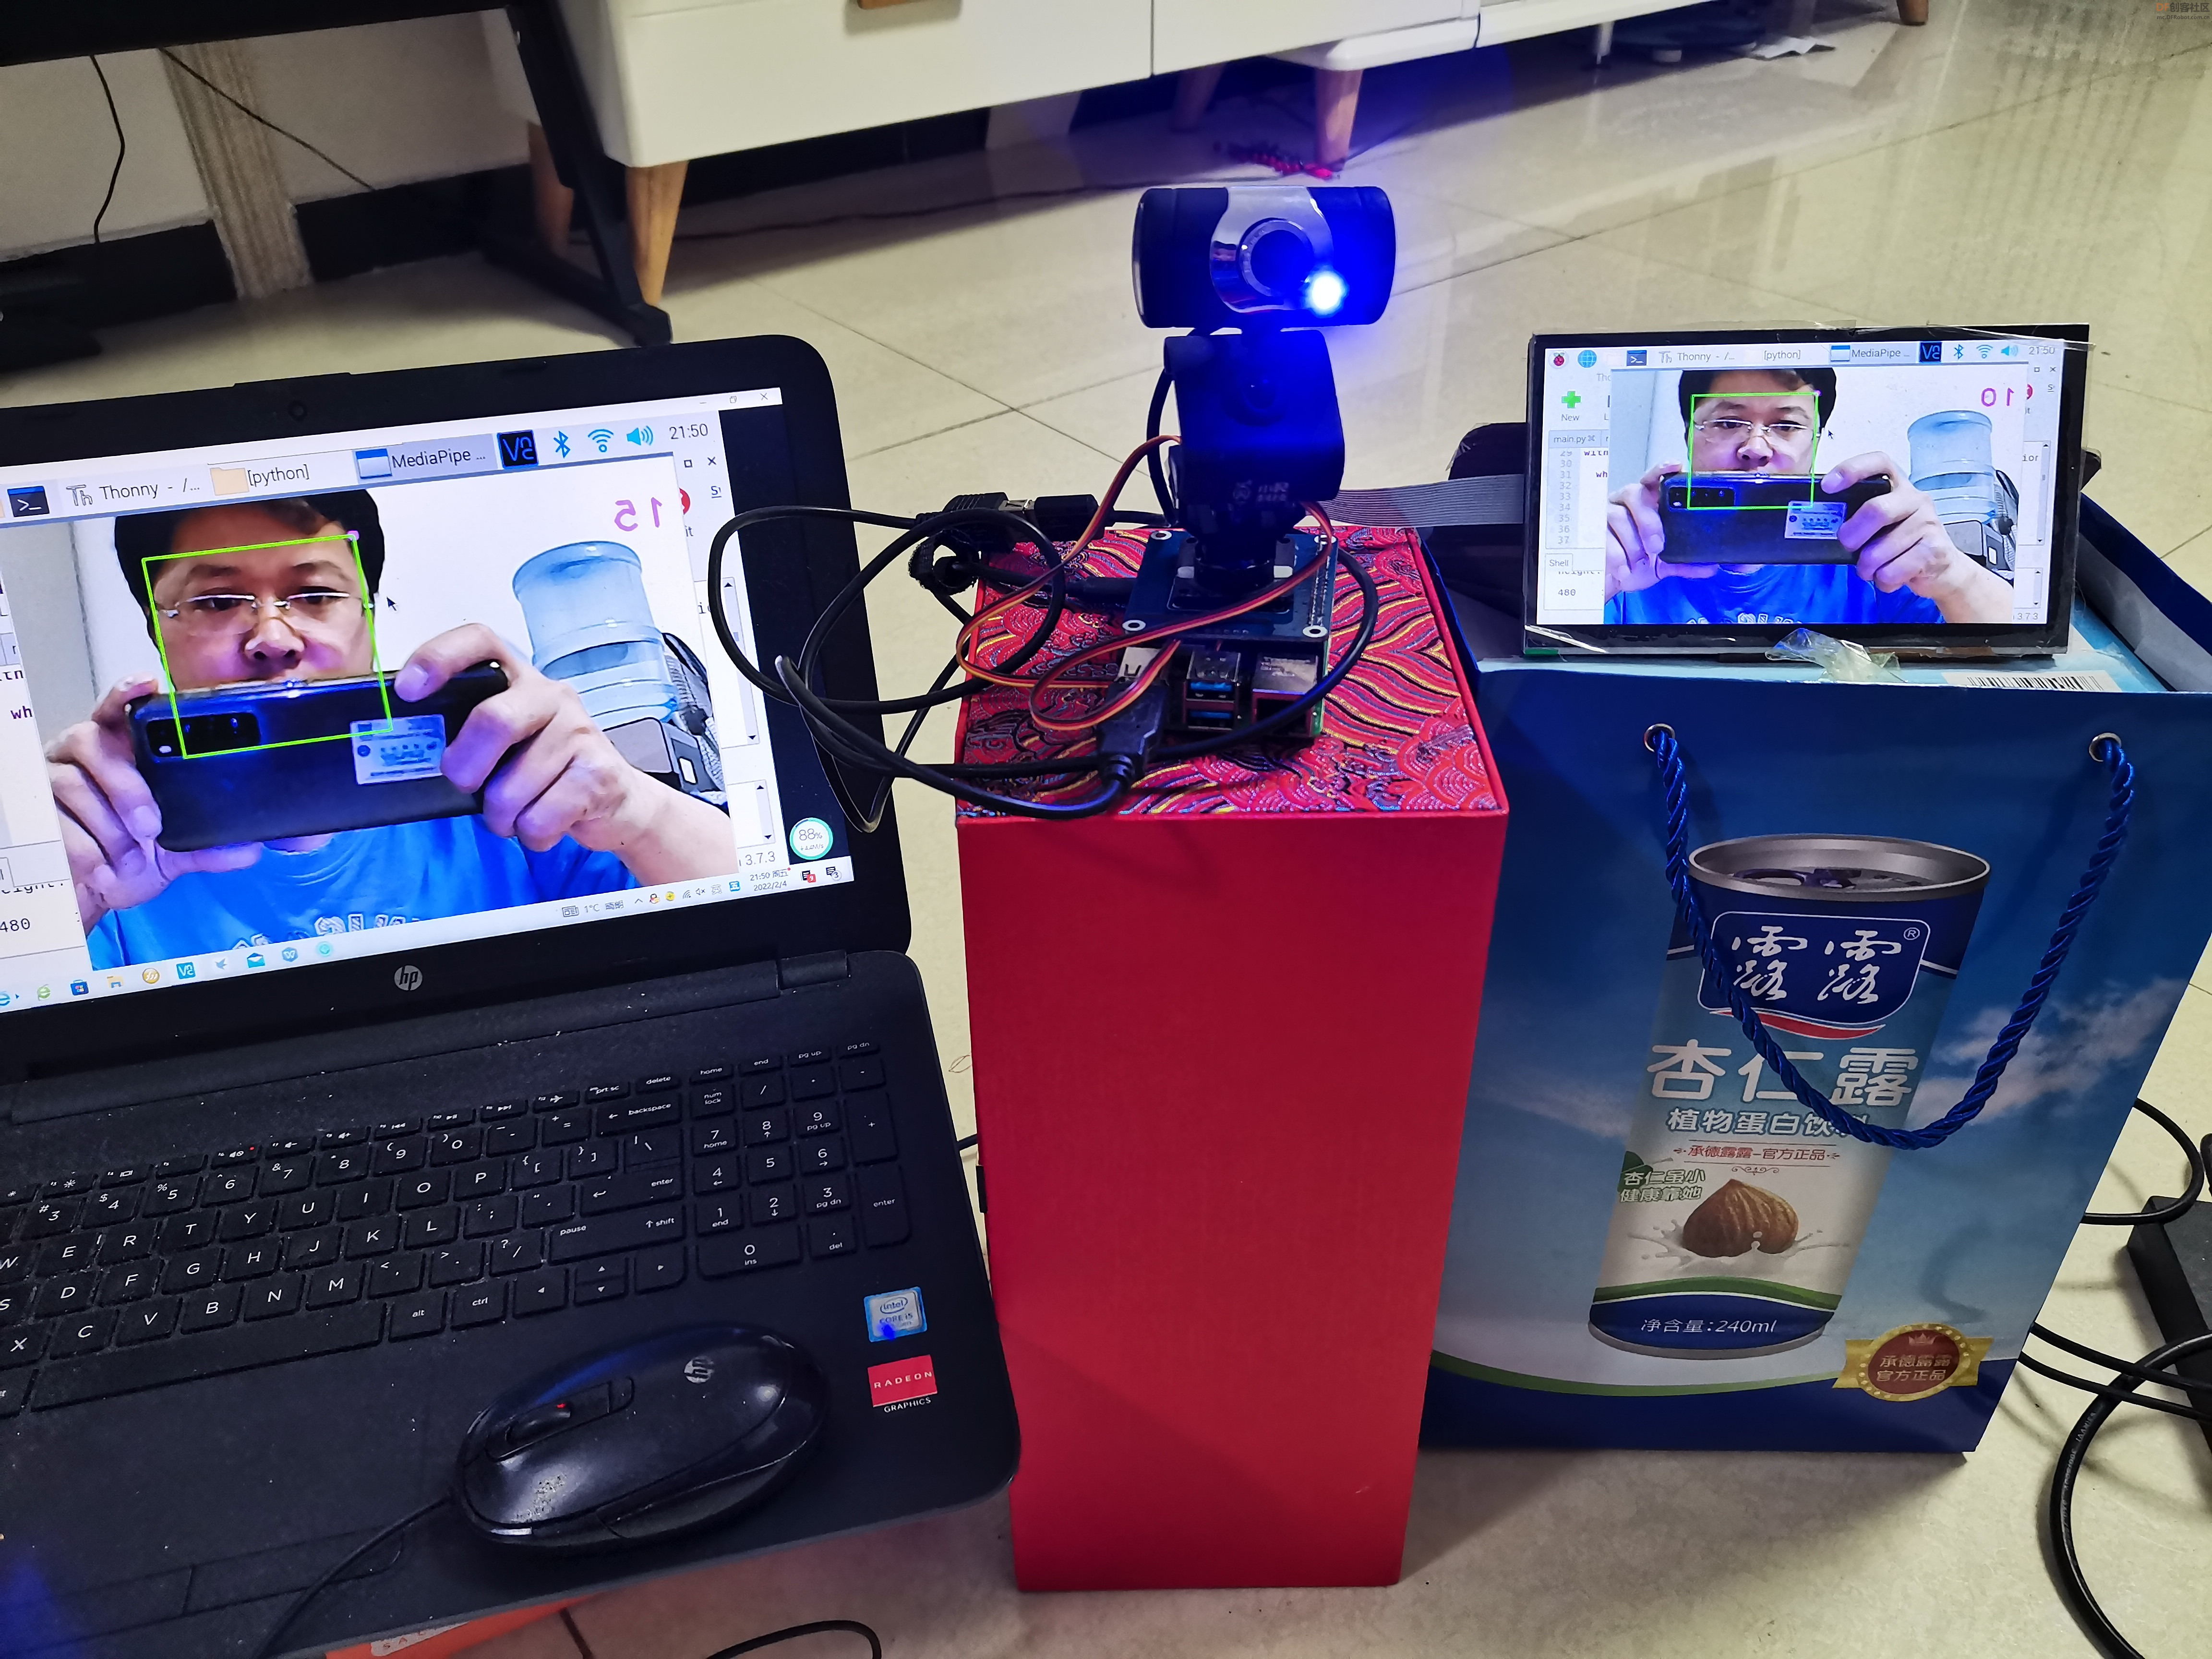
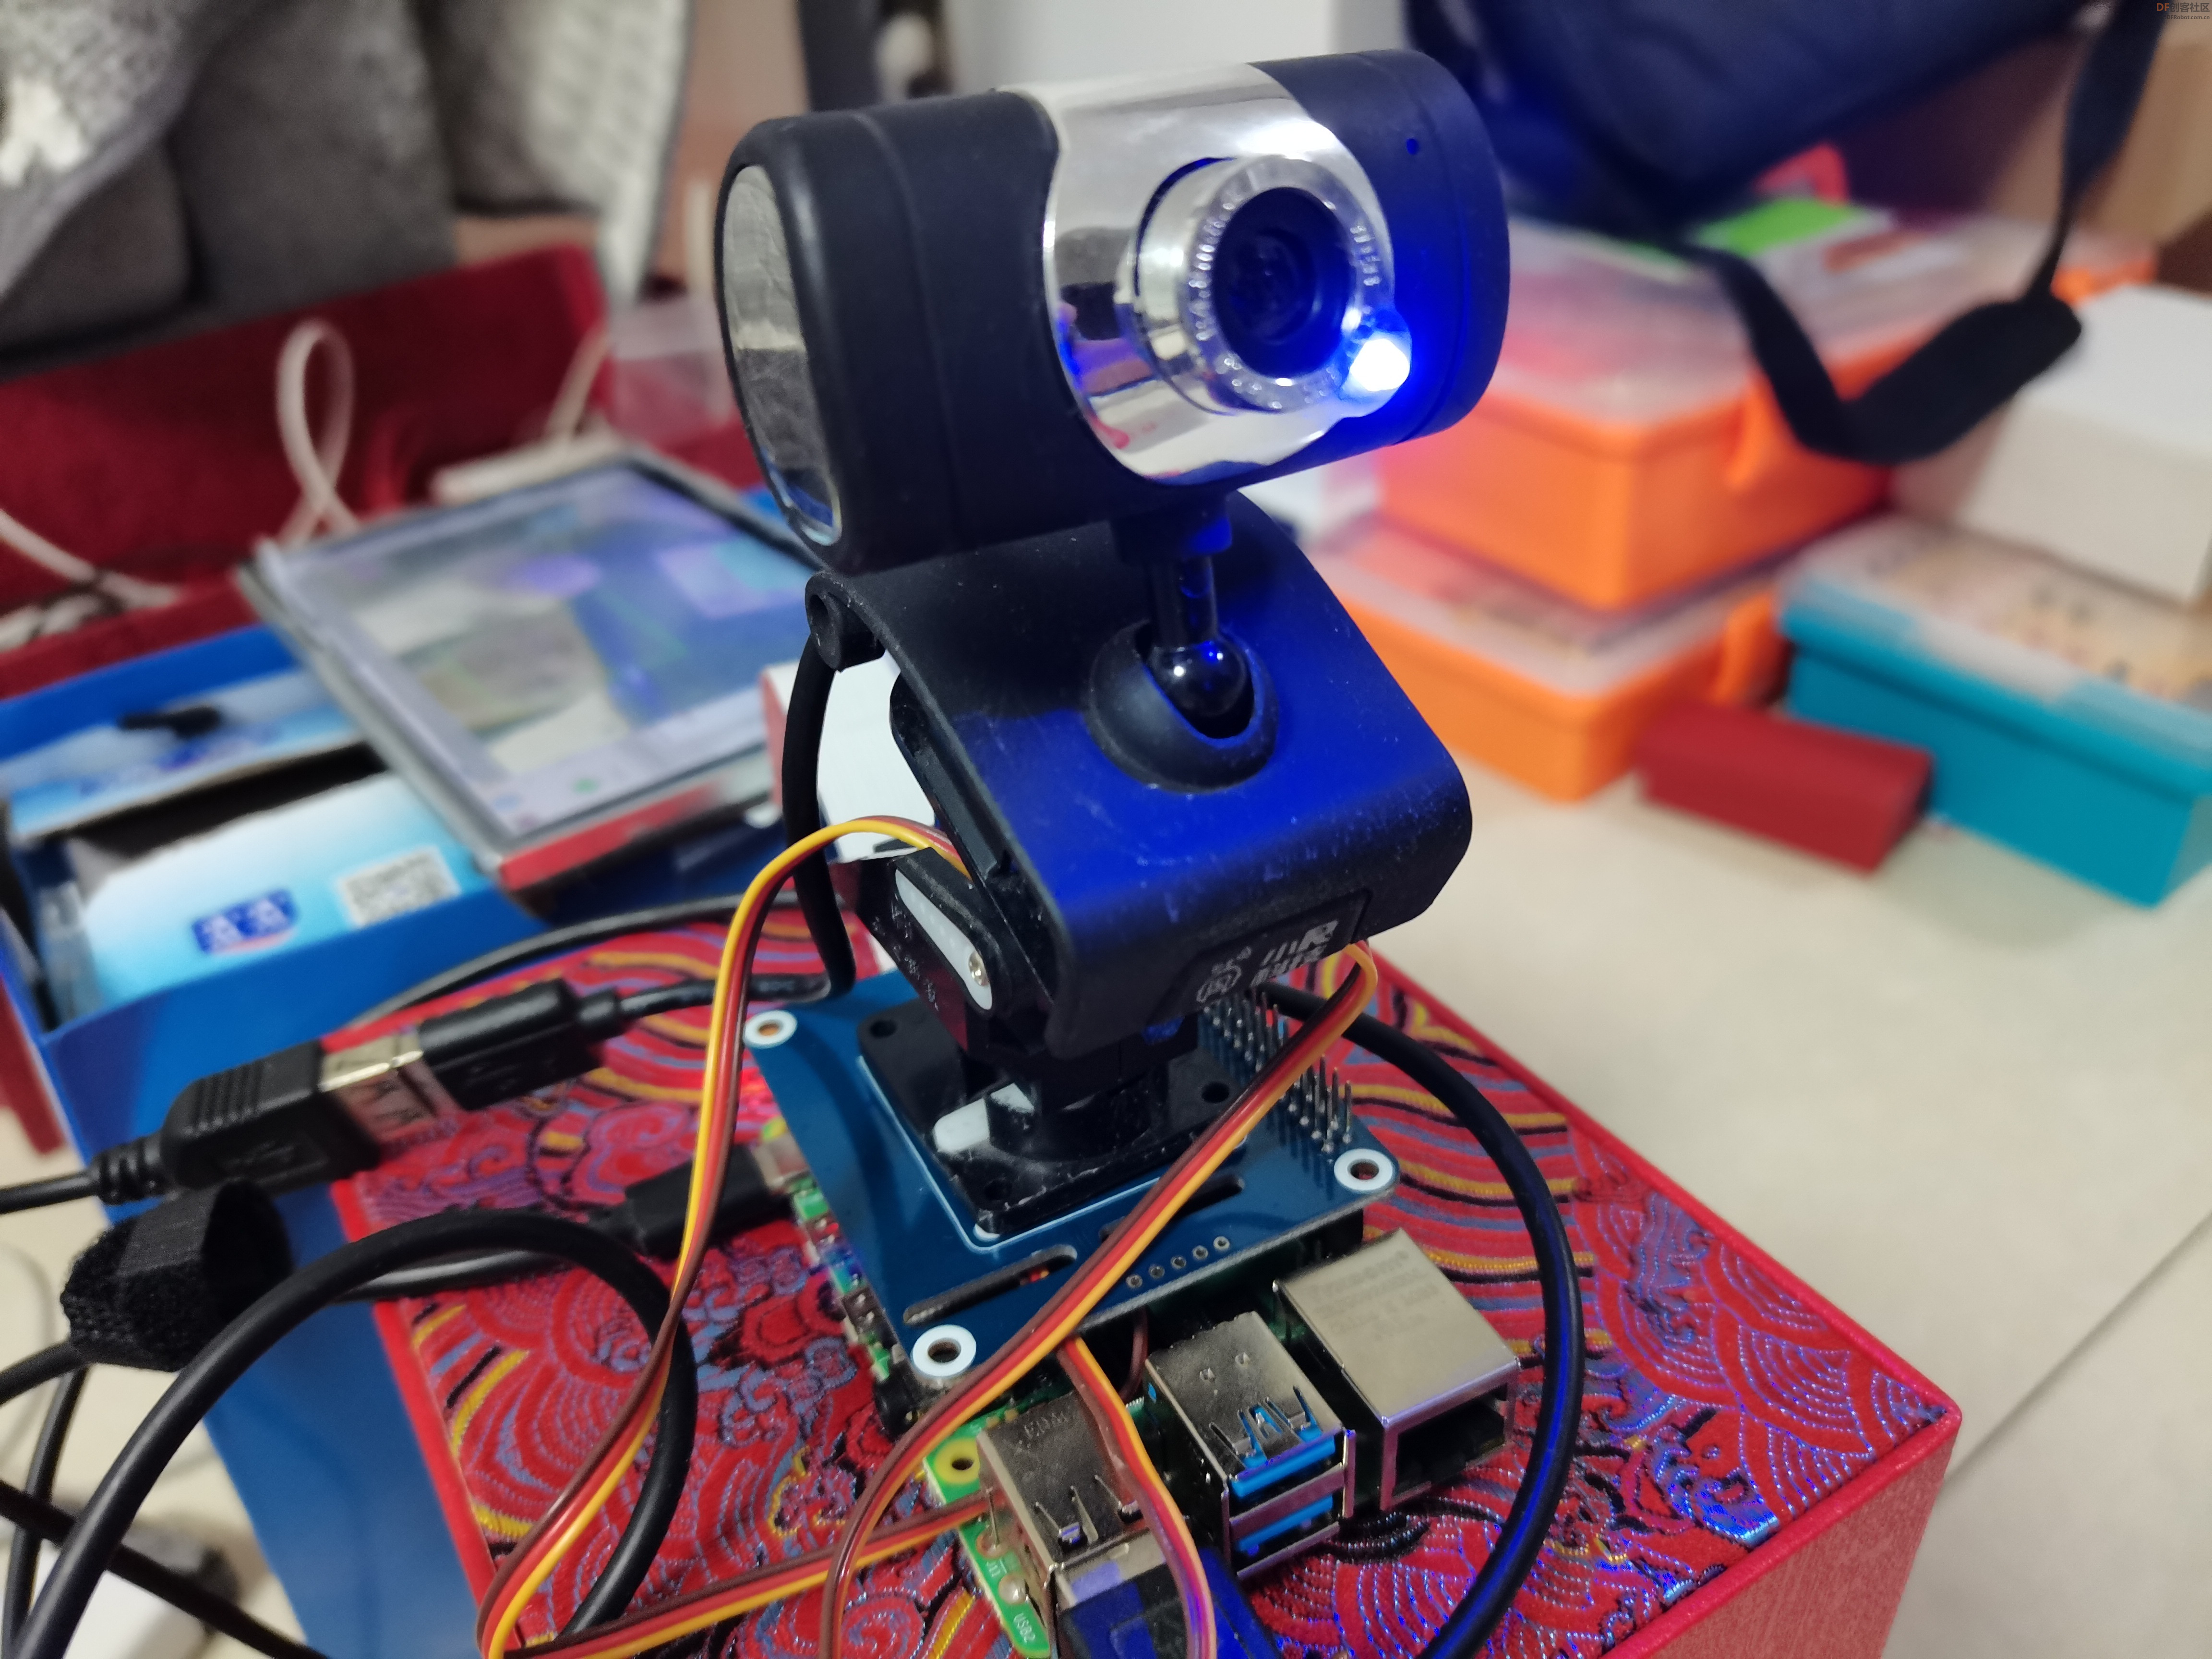
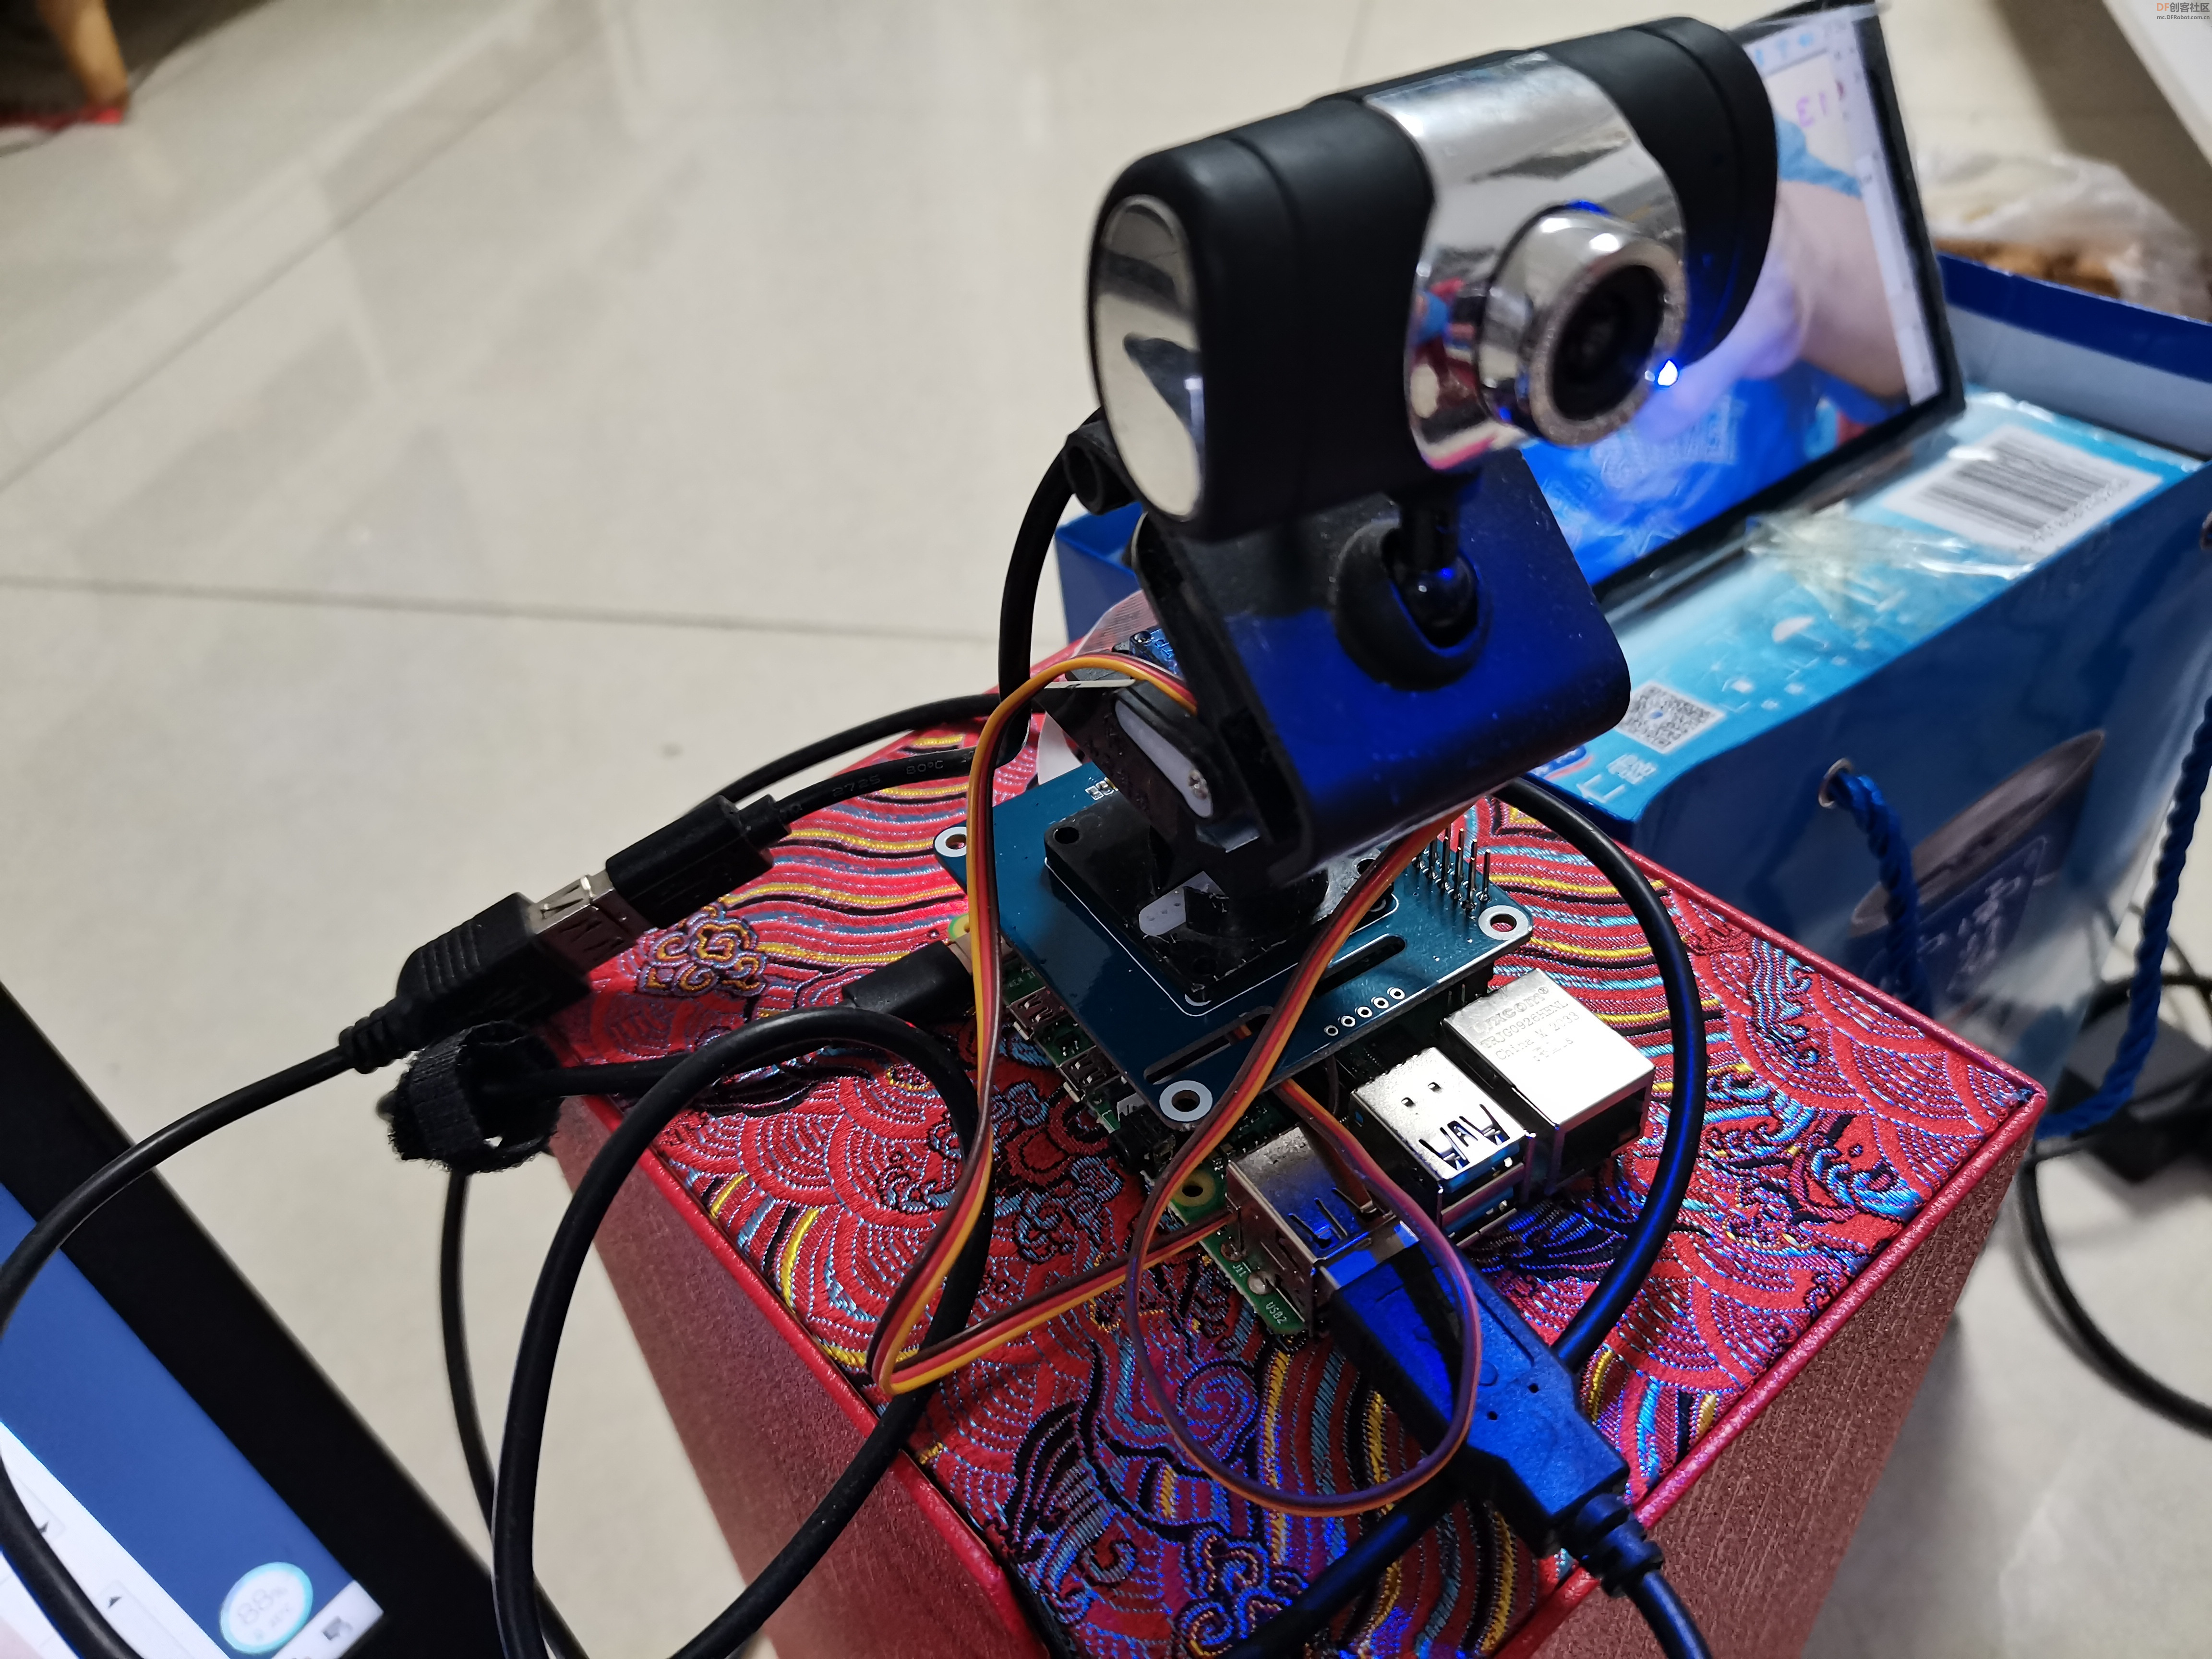
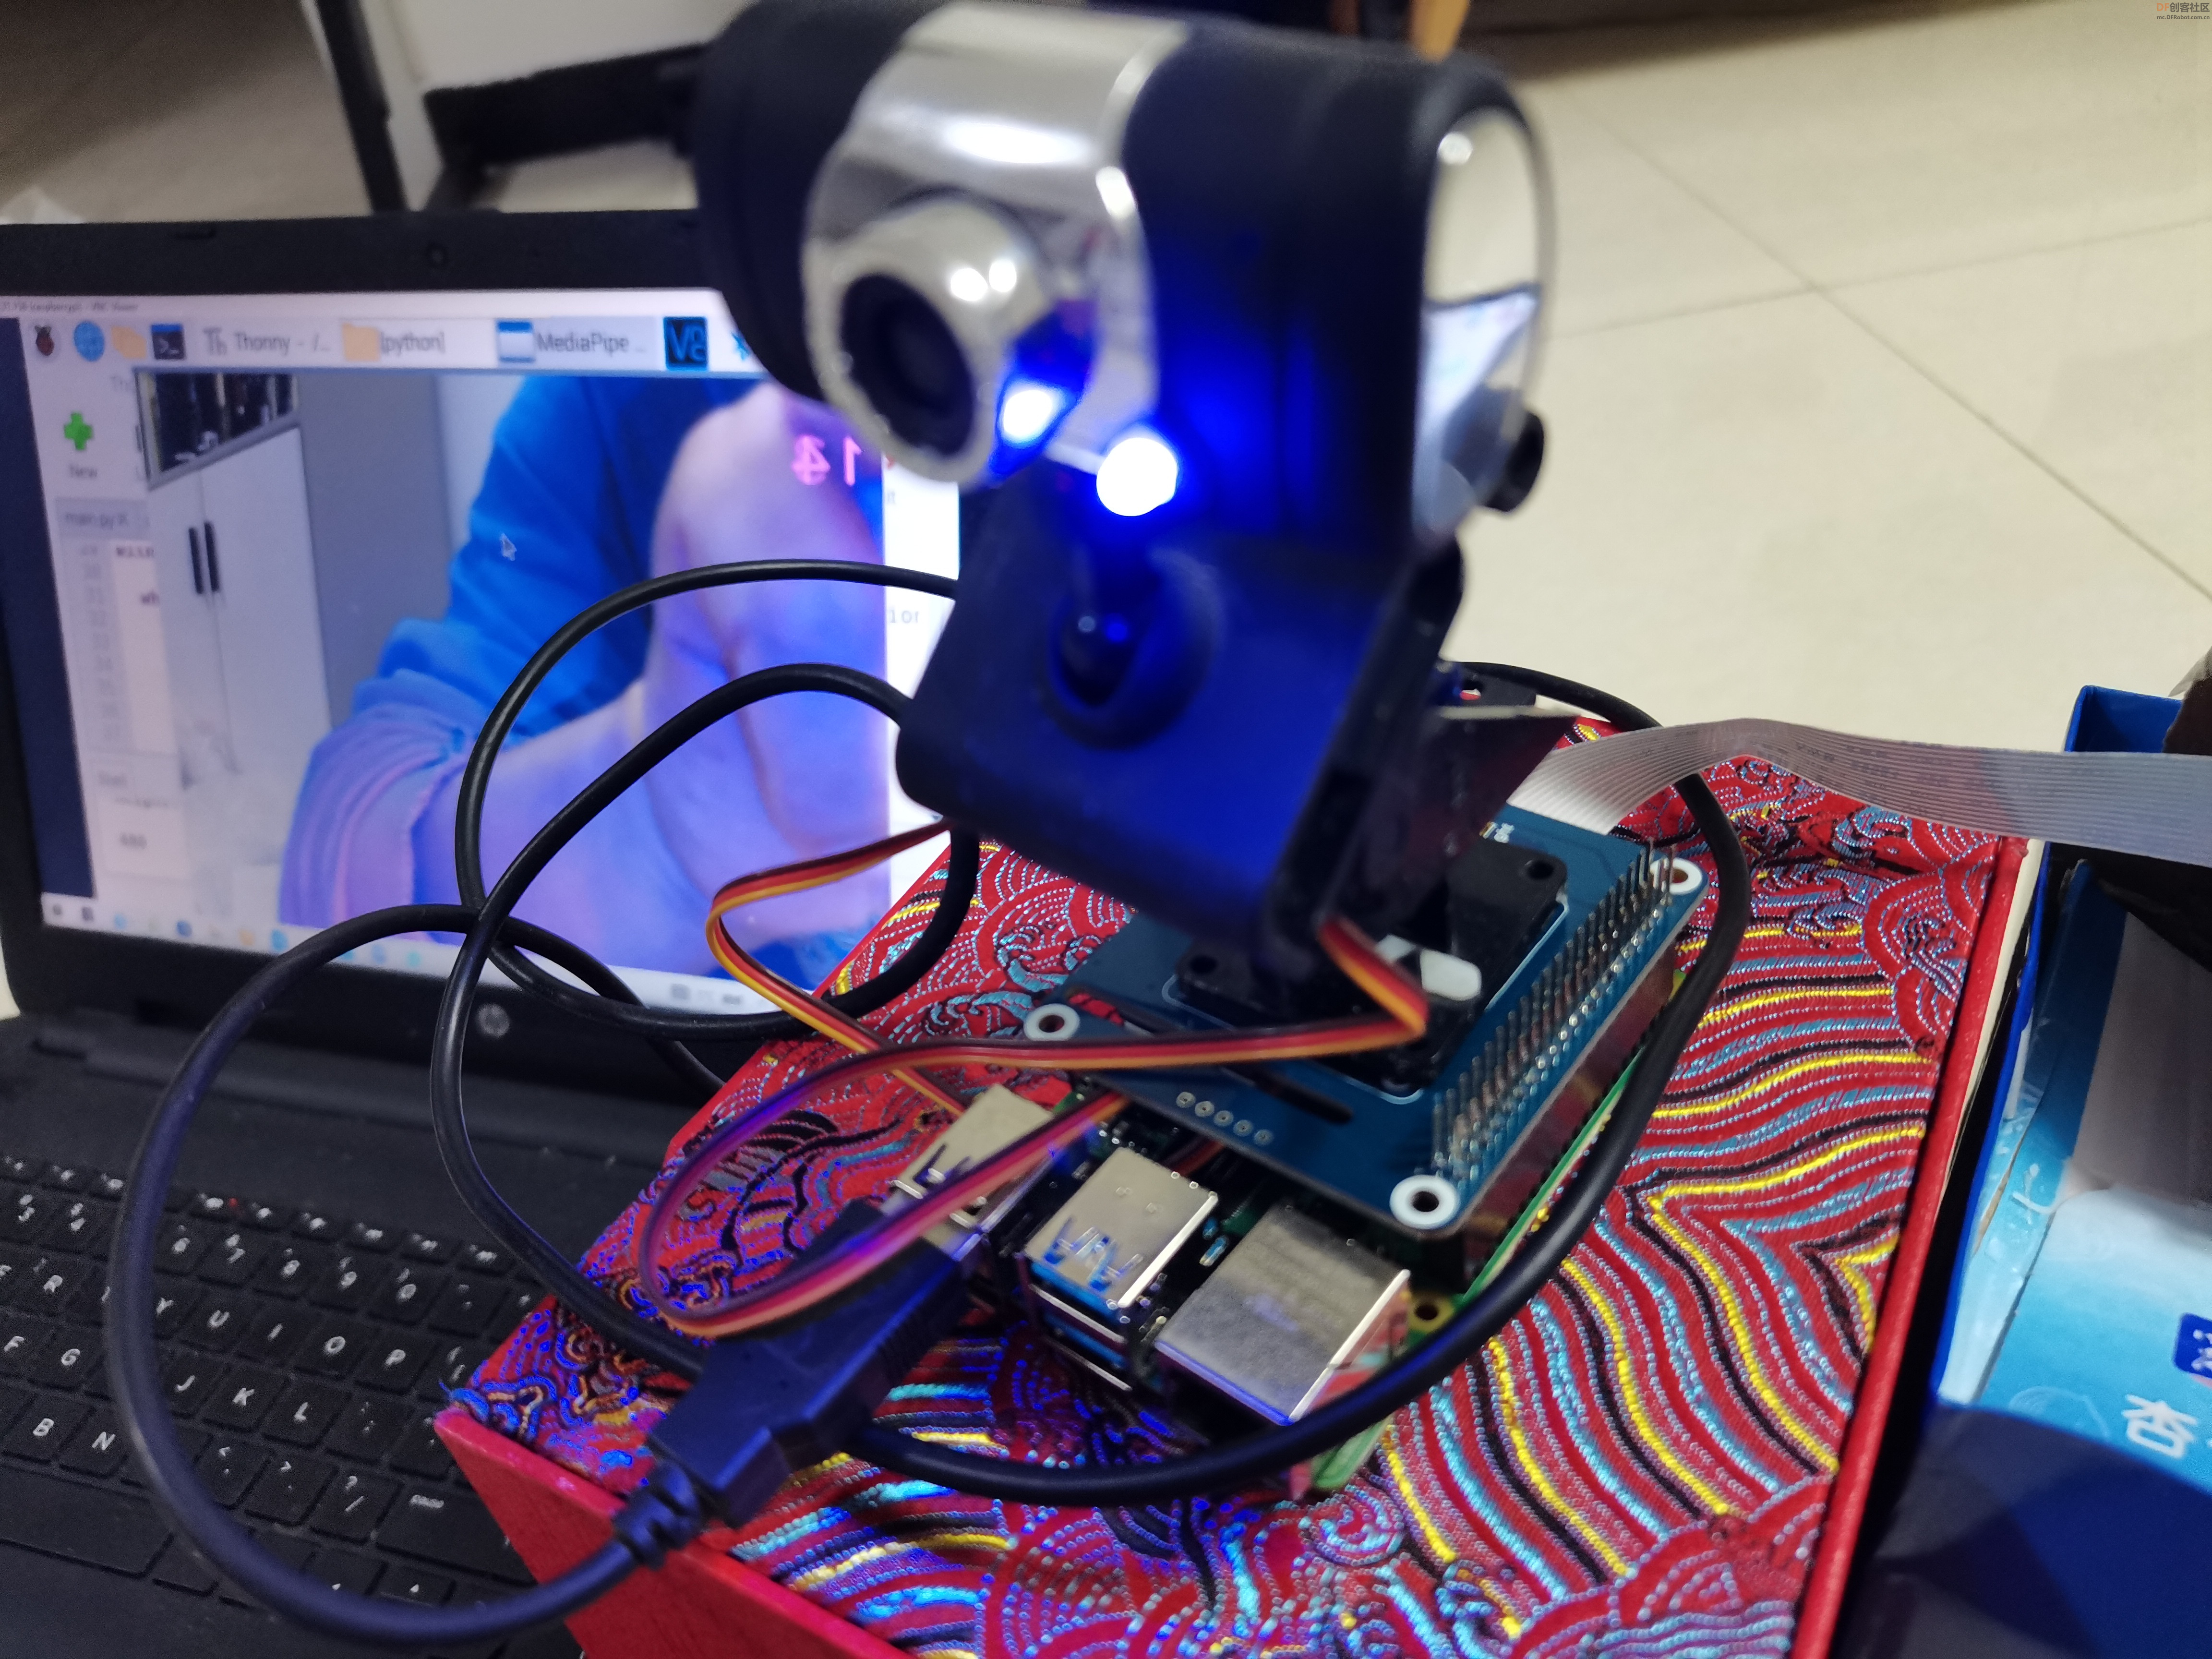
本教程中使用了“树莓派4b”+“树莓派两自由度云台”+“mediapipe”+“pid”,实现摄像头人脸跟随。
【树莓派】
4代B型4GB Raspberry Pi
树莓派最新发布的第四代产品 Raspberry Pi 4 B, 性能与树莓派 3B+相比无论是处理器速度,还是多媒体和内存上都有显著提升。Raspberry Pi 4 B拥有与入门级 x86 PC 系统相媲美的桌面性能,给您带来高品质体验。 Raspberry Pi 4 B 具备1.5Ghz运行的64位四核处理器,最高支持以60fps 速度刷新的4K分辨率的双显示屏,高达4GB RAM(可根据型号选择1GB、2GB、4GB),2.4/5.0 Ghz 双频无线LAN,蓝牙5.0/BLE,千兆以太网,USB3.0,和PoE功能。 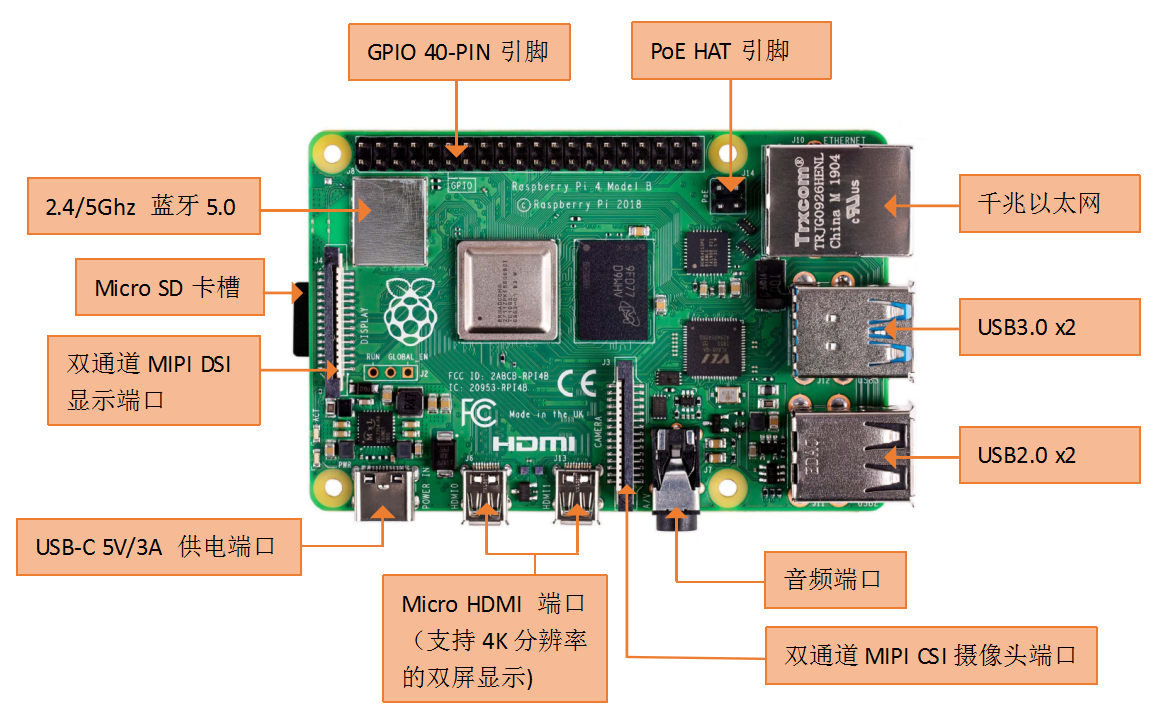
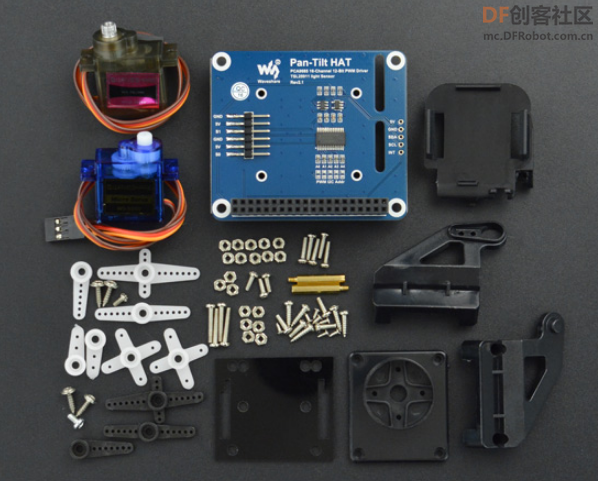
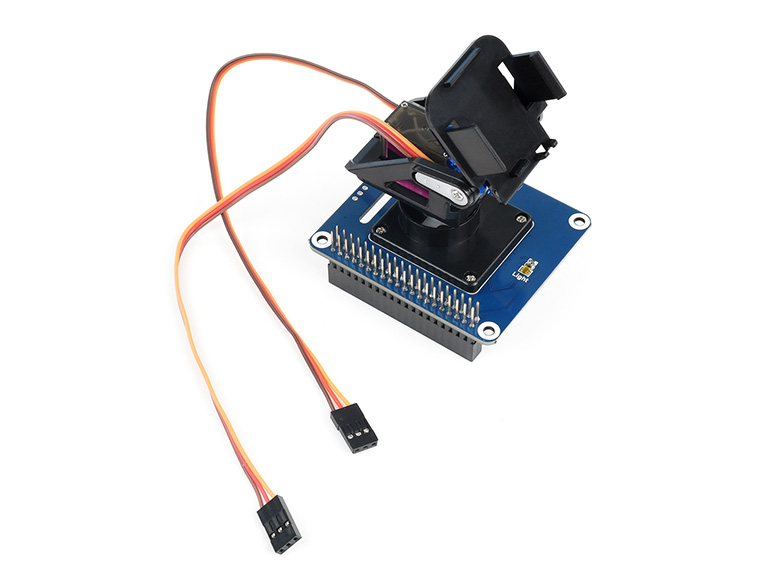
【树莓派两自由度云台】
这是一款专为树莓派设计的两自由度云台扩展板,基于树莓派40PIN GPIO接口设计,直接插入树莓派GPIO口即可使用,同时也将树莓派GPIO口插针引出,不影响树莓派GPIO口的使用。模块采用I2C接口控制,仅需2根信号线即可实现云台转动和光强检测,板载PCA9685芯片,可输出12位分辨率的PWM控制云台转动;板载TSL25911FN,内置ADC,能够得到近似人眼对光的反应,辅助模块工作;板载电平转换电路,兼容3.3V/5V的工作电平;配套专用亚克力板用以固定树莓派摄像头,将摄像头搭配在云台上,拍摄时更方便。
【mediapipe】
MediaPipe 是一款由 Google Research 开发并开源的多媒体机器学习模型应用框架。在谷歌,一系列重要产品,如 、Google Lens、ARCore、Google Home 以及 ,都已深度整合了 MediaPipe。

【安装配置】
1、配置云台
参考:https://wiki.dfrobot.com.cn/FIT0731%20%20%E6%A0%91%E8%8E%93%E6%B4%BE%E4%B8%A4%E8%87%AA%E7%94%B1%E5%BA%A6%E4%BA%91%E5%8F%B0
安装BCM2835库时,将“wget http://www.airspayce.com/mikem/bcm2835/bcm2835-1.68.tar.gz”中修改为:http://www.airspayce.com/mikem/bcm2835/bcm2835-1.71.tar.gz
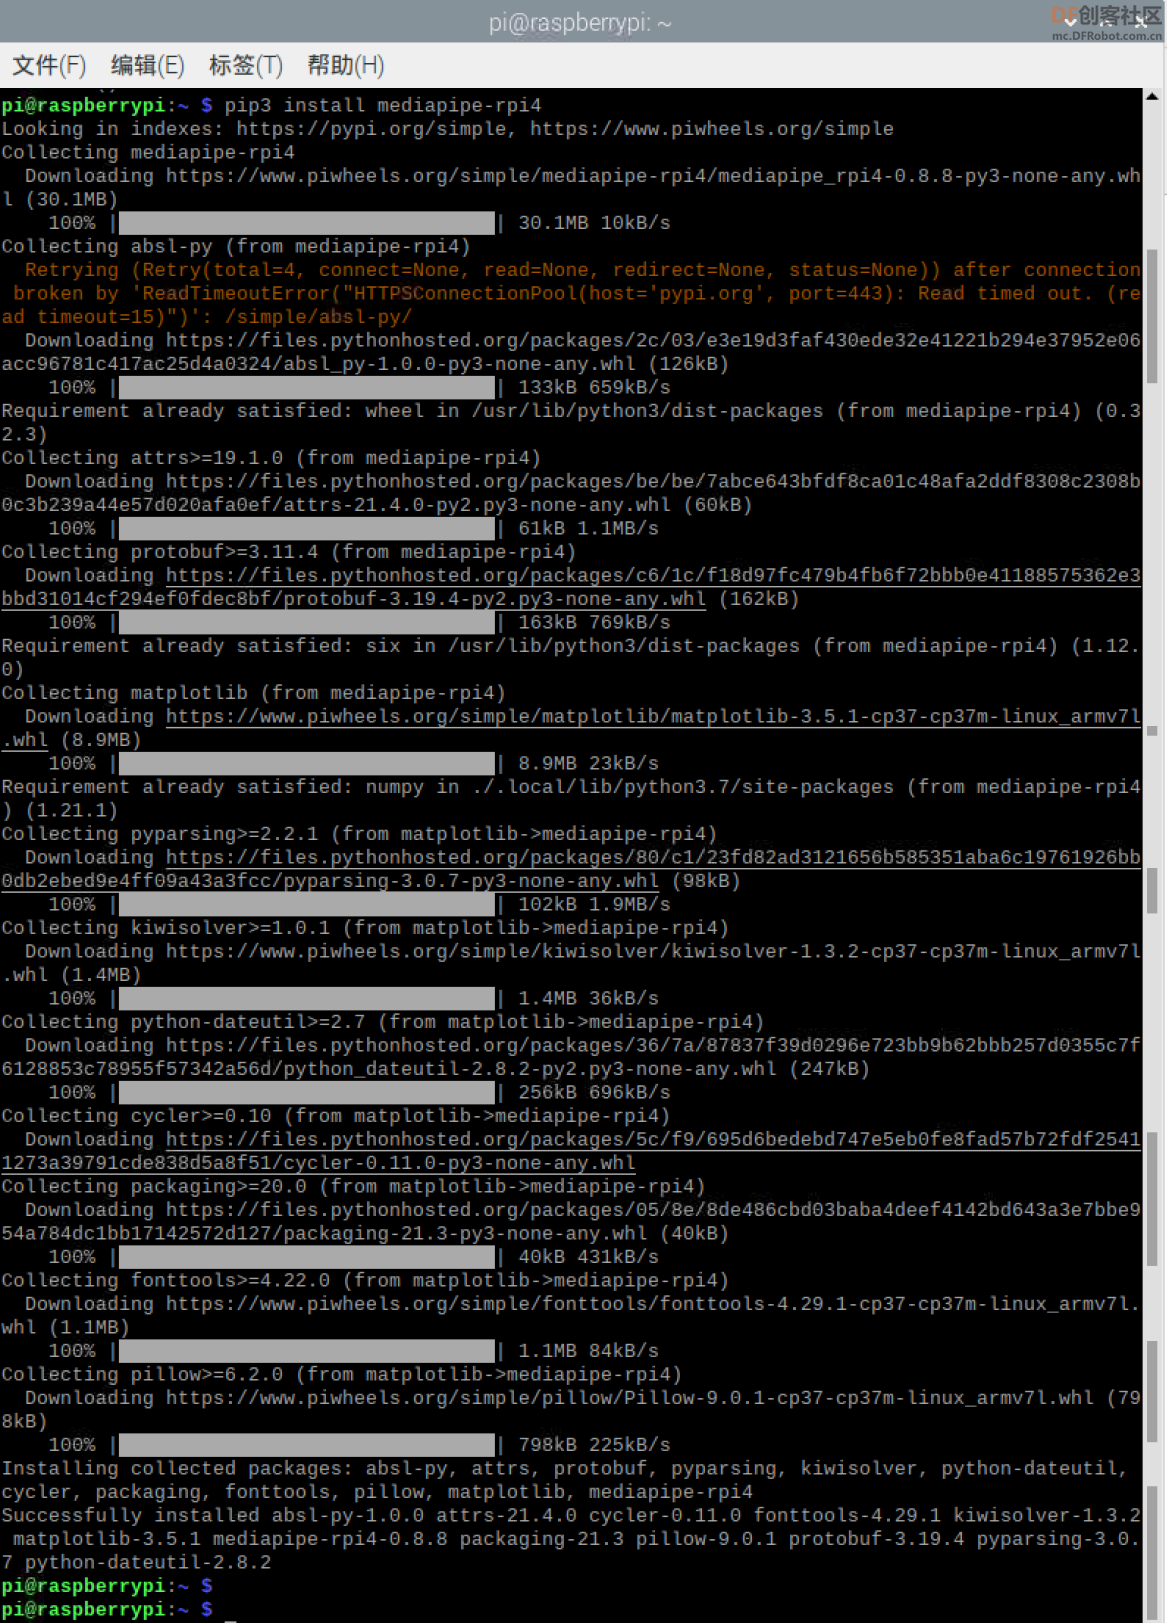
2、安装mediapipe库
在终端中使用:pip3 install mediapipe-rpi4
【测试云台程序】
-
- #!/usr/bin/python
- import time
- import RPi.GPIO as GPIO
- from PCA9685 import PCA9685
-
- pwm = PCA9685()
- try:
- print ("This is an PCA9685 routine")
- pwm.setPWMFreq(50)
- #pwm.setServoPulse(1,500)
- #pwm.setRotationAngle(1, 130)
-
-
- # setServoPulse(2,2500)
-
- pwm.setRotationAngle(0, 60)
-
-
- except:
- pwm.exit_PCA9685()
- print ("\nProgram end")
- exit()
-
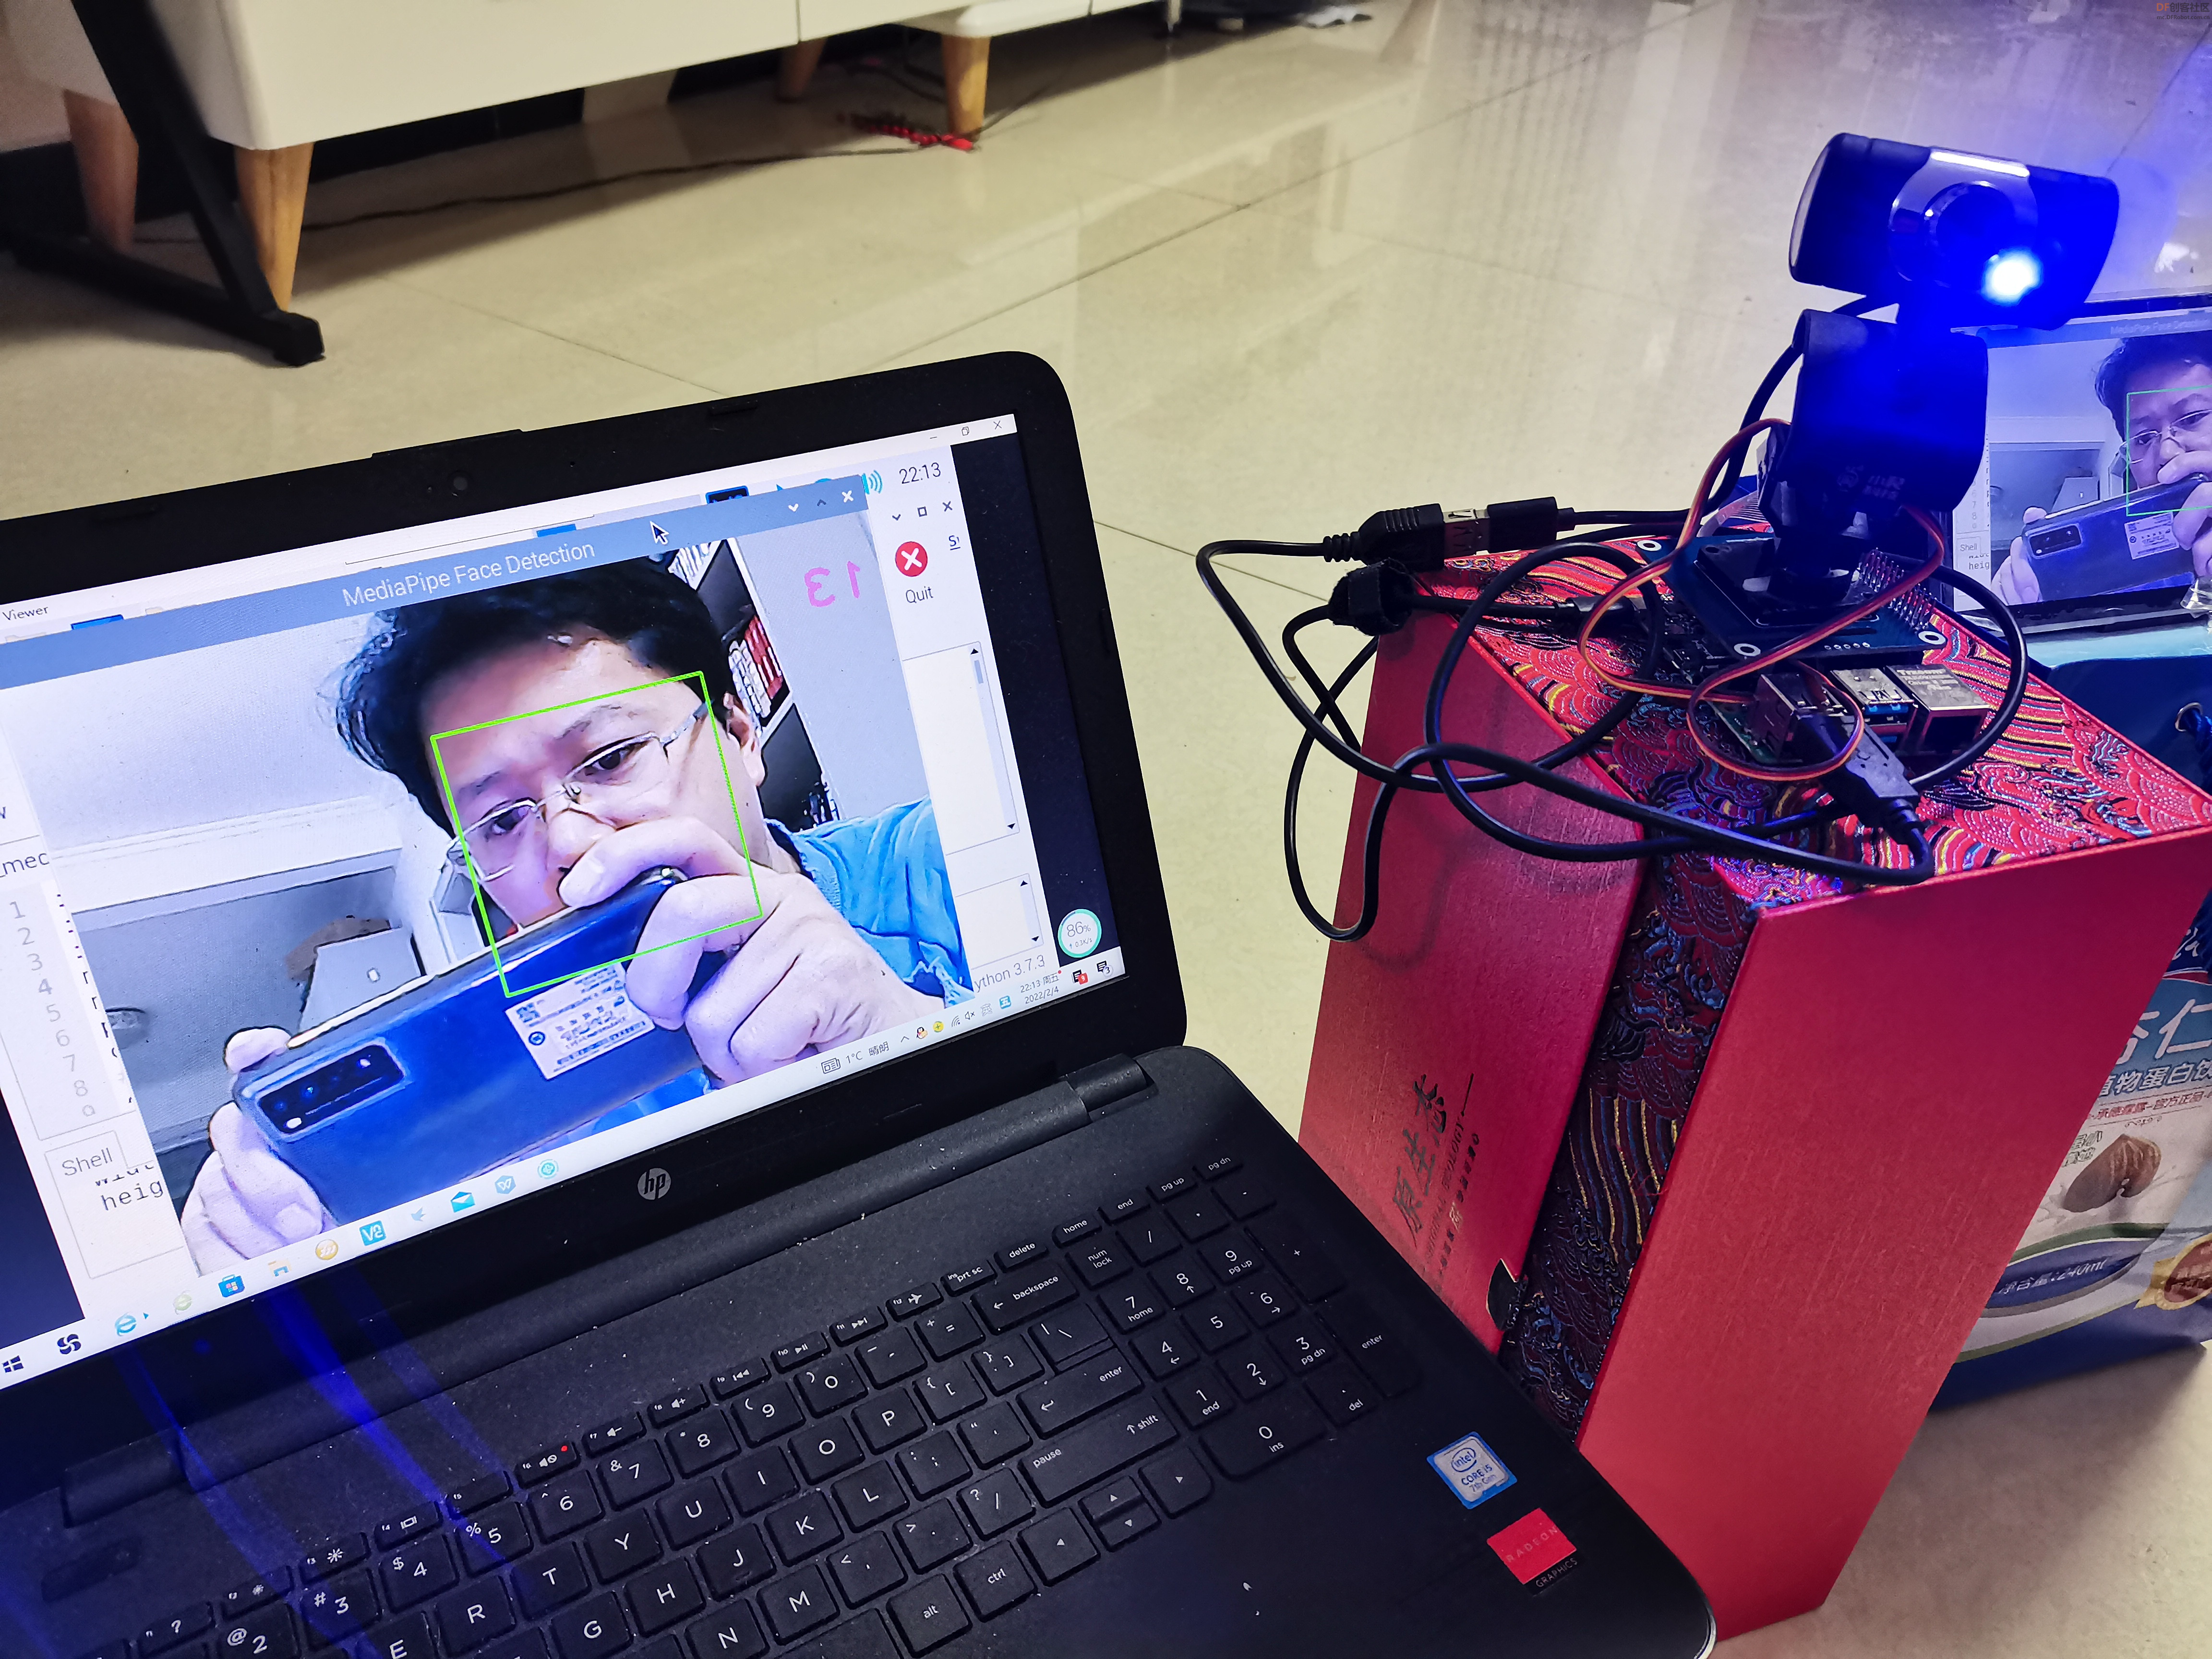
【测试mediapipe】
-
- import cv2
- import time
- import mediapipe as mp
- mp_face_detection = mp.solutions.face_detection
- mp_drawing = mp.solutions.drawing_utils
- pTime = 0
- cTime = 0
- # For webcam input:
- cap = cv2.VideoCapture(0)
- with mp_face_detection.FaceDetection(
- model_selection=0, min_detection_confidence=0.8) as face_detection:
- while cap.isOpened():
- success, image = cap.read()
- box=[]
-
- if not success:
- print("Ignoring empty camera frame.")
- # If loading a video, use 'break' instead of 'continue'.
- continue
-
- # To improve performance, optionally mark the image as not writeable to
- # pass by reference.
- h,w,c=image.shape
- image.flags.writeable = False
- image = cv2.cvtColor(image, cv2.COLOR_BGR2RGB)
- results = face_detection.process(image)
-
- # Draw the face detection annotations on the image.
- image.flags.writeable = True
- image = cv2.cvtColor(image, cv2.COLOR_RGB2BGR)
- if results.detections:
- for detection in results.detections:
- #mp_drawing.draw_detection(image, detection)
- print(detection.location_data.relative_bounding_box)
- box=detection.location_data.relative_bounding_box
- #cx,cy,cw,ch=box
- cx=box.xmin
- cy=box.ymin
- cw=box.width
- ch=box.height
- cv2.rectangle(image, (int(cx*w) , int(cy*h) ), (int((cx+cw)*w) , int((cy+ch)*h)),(0, 255, 0), 2)
- # Flip the image horizontally for a selfie-view display.
- cTime = time.time()
- fps = 1 / (cTime - pTime)
- pTime = cTime
-
- cv2.putText(image, str(int(fps)), (10, 70), cv2.FONT_HERSHEY_PLAIN, 3,(255, 0, 255), 3)
- cv2.imshow('MediaPipe Face Detection', cv2.flip(image, 1))
- if cv2.waitKey(5) & 0xFF == 27:
- break
- cap.release()
-
【完整程序】
-
- #!/usr/bin/python
- import time
- import RPi.GPIO as GPIO
- from PCA9685 import PCA9685
- import cv2
- import numpy as np
- import mediapipe as mp
- mp_face_detection = mp.solutions.face_detection
- mp_drawing = mp.solutions.drawing_utils
- pTime = 0
- cTime = 0
- # For webcam input:
- cap = cv2.VideoCapture(0)
- pwm = PCA9685()
- pwm.setPWMFreq(50)
- pwm.setRotationAngle(1, 110)
- pwm.setRotationAngle(0, 90)
-
- kp=0.01
- kd=0.01
- kp_y=0.02
- kd_y=0.01
- pre_x=90
- pre_y=110 #定义舵机初始角度
-
- pre_err_x=0
- pre_err_y=0
-
- with mp_face_detection.FaceDetection(
- model_selection=0, min_detection_confidence=0.65) as face_detection:
- while cap.isOpened():
- success, image = cap.read()
- #image=cv2.resize(image, None, fx=0.5, fy=0.5)
- box=[]
-
- if not success:
- print("Ignoring empty camera frame.")
- # If loading a video, use 'break' instead of 'continue'.
- continue
-
- # To improve performance, optionally mark the image as not writeable to
- # pass by reference.
- h,w,c=image.shape
- image.flags.writeable = False
- image = cv2.cvtColor(image, cv2.COLOR_BGR2RGB)
- results = face_detection.process(image)
-
- # Draw the face detection annotations on the image.
- image.flags.writeable = True
- image = cv2.cvtColor(image, cv2.COLOR_RGB2BGR)
- if results.detections:
- for detection in results.detections:
- #mp_drawing.draw_detection(image, detection)
- print(detection.location_data.relative_bounding_box)
- box=detection.location_data.relative_bounding_box
- #cx,cy,cw,ch=box
- cx=box.xmin
- cy=box.ymin
- cw=box.width
- ch=box.height
- cv2.circle(image, (int(cx*w), int(cy*h)), 5, (255, 0, 255), cv2.FILLED)
- cv2.rectangle(image, (int(cx*w) , int(cy*h) ), (int((cx+cw)*w) , int((cy+ch)*h)),(0, 255, 0), 2)
-
- err_x=(w/2-cx*w)
- err_y=(cy*h+ch*h-h/2)
- dis_err_x=err_x-pre_err_x
- dis_err_y=err_y-pre_err_y
-
-
-
- pre_x=(pre_x+kp*err_x+kd*dis_err_x)
- pre_y=(pre_y+kp_y*err_y+kd_y*dis_err_y)
- pre_err_x=err_x
- pre_err_y=err_y
- print(h," ",pre_y," ",int(cy*h)," ",err_y," ")
- #防止超调
- if pre_x<0:
- pre_x=0
- elif pre_x>180:
- pre_x=180
-
- if pre_y<90:
- pre_y=90
- elif pre_y>130:
- pre_y=130
- pwm.setRotationAngle(0, pre_x)
- pwm.setRotationAngle(1, pre_y)
-
-
- # Flip the image horizontally for a selfie-view display.
- cTime = time.time()
- fps = 1 / (cTime - pTime)
- pTime = cTime
-
- cv2.putText(image, str(int(fps)), (10, 70), cv2.FONT_HERSHEY_PLAIN, 3,(255, 0, 255), 3)
- cv2.imshow('MediaPipe Face Detection', cv2.flip(image, 1))
- if cv2.waitKey(5) & 0xFF == 27:
- pwm.exit_PCA9685()
- break
- cap.release()
-
【演示视频】
|


 沪公网安备31011502402448
 置顶卡
置顶卡 变色卡
变色卡 千斤顶
千斤顶


 活跃会员
活跃会员
 宣传大使
宣传大使
 牛X认证
牛X认证
 创客造
创客造
 编辑选择奖
编辑选择奖
 志“童”道合
 编辑选择奖
编辑选择奖
 编辑选择奖
编辑选择奖
 编辑选择奖
编辑选择奖
 编辑选择奖
编辑选择奖


