【Arduino】168种传感器模块系列实验(资料代码+仿真编程+图形编程)
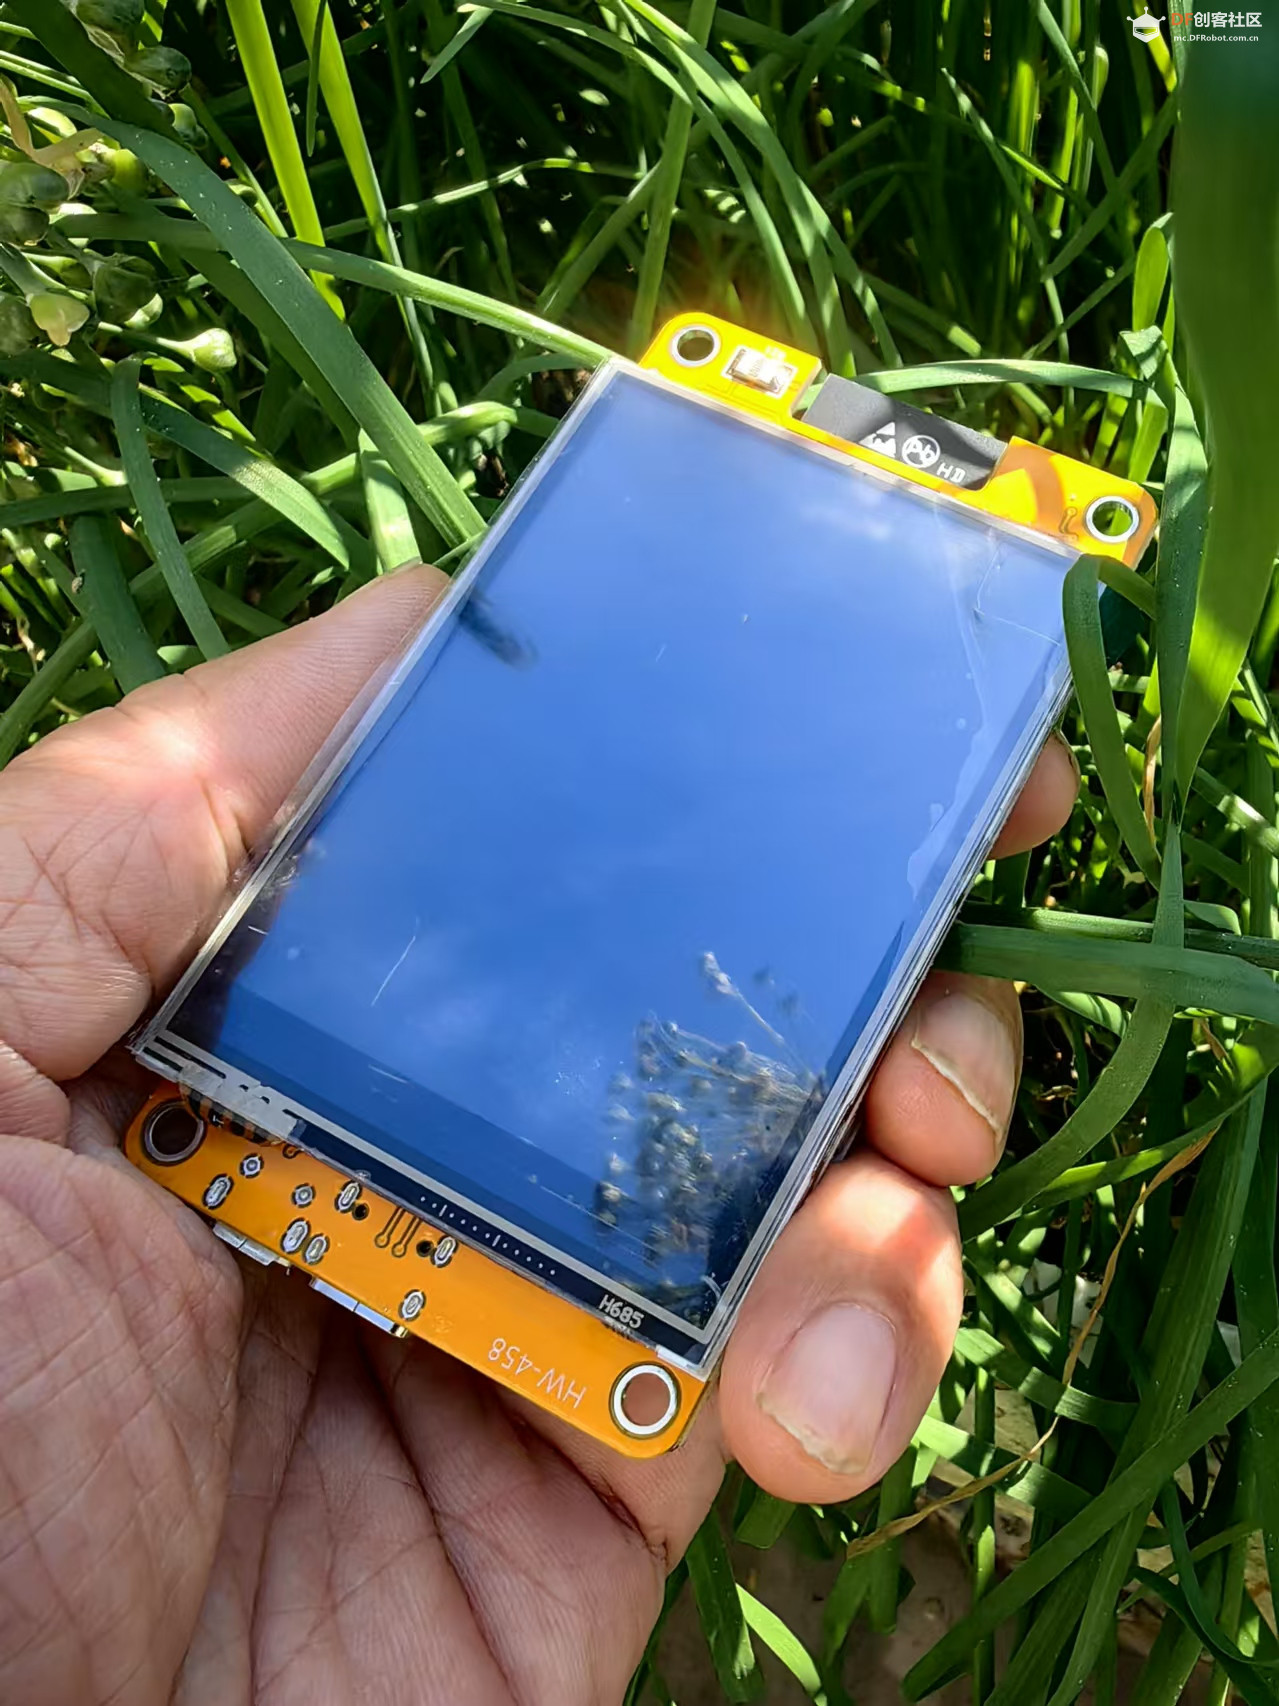
实验二百三十八:ESP32开发板WiFi蓝牙2.8寸240*320智能液晶显示屏带触摸屏TFT模块
项目实验之二十:ESP32 CYD液晶2.8寸开发板电阻式触摸屏校准
实验开源代码
- /*
- 【Arduino】168种传感器模块系列实验(资料代码+仿真编程+图形编程)
- 实验二百三十八:ESP32开发板WiFi蓝牙2.8寸240*320智能液晶显示屏带触摸屏TFT模块
- 项目实验之二十:ESP32 CYD液晶2.8寸开发板电阻式触摸屏校准
- */
-
- #include <lvgl.h> // 引入LVGL图形库
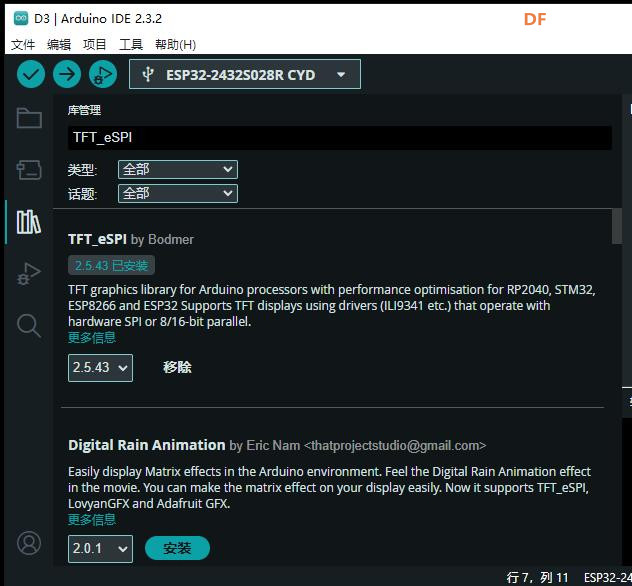
- #include <TFT_eSPI.h> // 引入TFT_eSPI库,用于驱动TFT显示屏
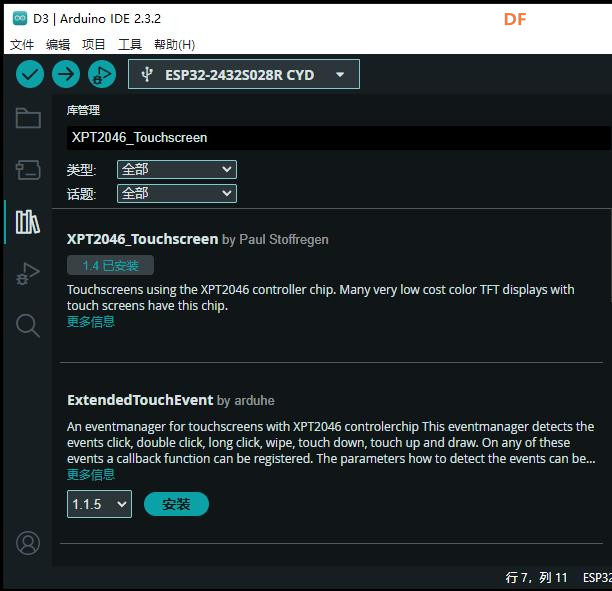
- #include <XPT2046_Touchscreen.h> // 引入XPT2046触摸屏库
- #include <BasicLinearAlgebra.h> // 引入线性代数库,用于计算触摸屏校准参数
-
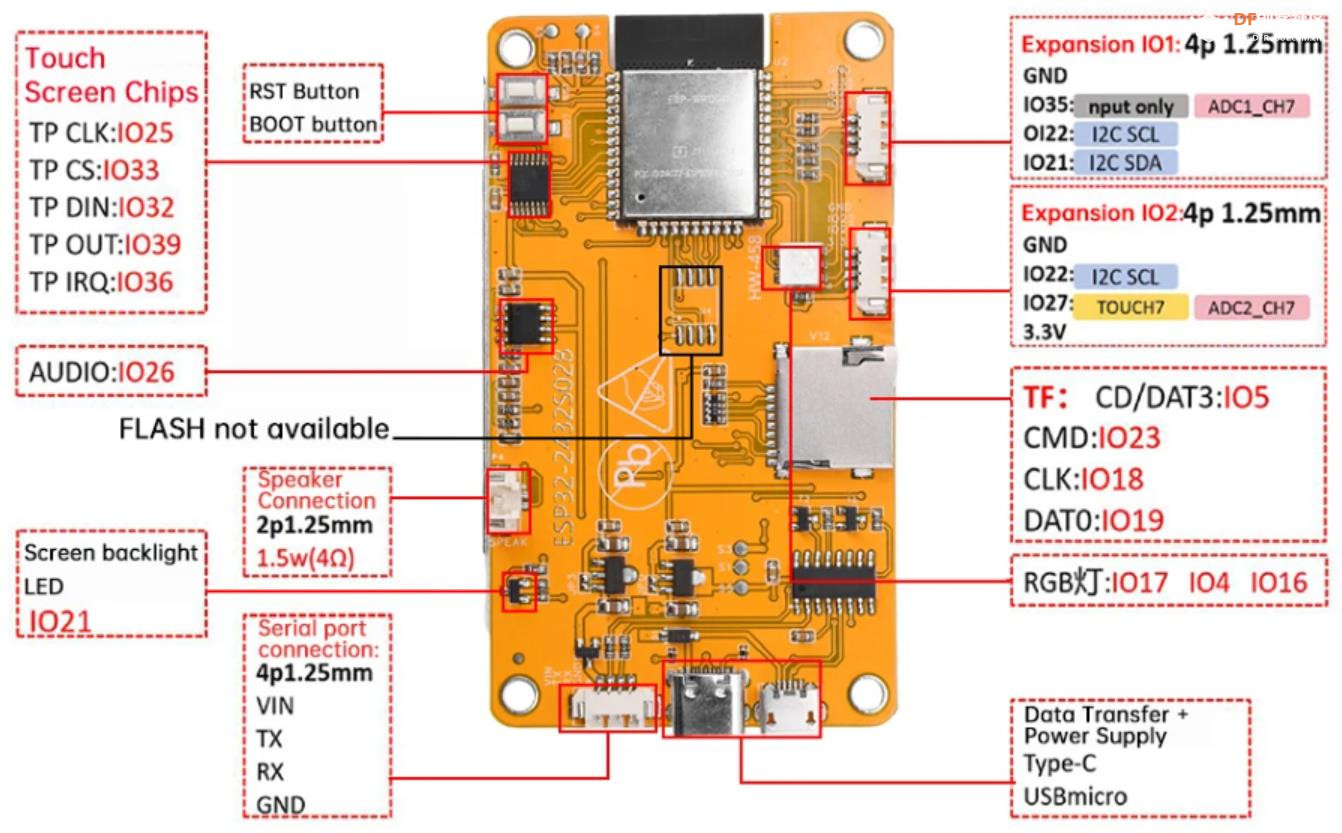
- // Touchscreen pins
- #define XPT2046_IRQ 36 // T_IRQ
- #define XPT2046_MOSI 32 // T_DIN
- #define XPT2046_MISO 39 // T_OUT
- #define XPT2046_CLK 25 // T_CLK
- #define XPT2046_CS 33 // T_CS
-
- unsigned long delay_start = 0;
- #define DELAY_1S 1000
- #define DELAY_5S 5000
-
- SPIClass touchscreenSPI = SPIClass(VSPI);
- XPT2046_Touchscreen touchscreen(XPT2046_CS, XPT2046_IRQ);
-
- #define SCREEN_WIDTH 240
- #define SCREEN_HEIGHT 320
-
- String s;
-
- int ts_points[6][2];
-
- /* define the screen points where touch samples will be taken */
- const int scr_points[6][2] = { {13, 11}, {20, 220}, {167, 60}, {155, 180}, {300, 13}, {295, 225} };
-
- struct point {
- int x;
- int y;
- };
-
- /* pS is a screen point; pT is a resistive touchscreen point */
- struct point aS = {scr_points[0][0], scr_points[0][1] };
- struct point bS = {scr_points[1][0], scr_points[1][1] };
- struct point cS = {scr_points[2][0], scr_points[2][1] };
- struct point dS = {scr_points[3][0], scr_points[3][1] };
- struct point eS = {scr_points[4][0], scr_points[4][1] };
- struct point fS = {scr_points[5][0], scr_points[5][1] };
-
- struct point aT;
- struct point bT;
- struct point cT;
- struct point dT;
- struct point eT;
- struct point fT;
-
- /* coefficients for transforming the X and Y coordinates of the resistive touchscreen
- to display coordinates... the ones with the "pref_" prefix are retrieved from NVS */
- float alphaX, betaX, deltaX, alphaY, betaY, deltaY;
- float pref_alphaX, pref_betaX, pref_deltaX, pref_alphaY, pref_betaY, pref_deltaY;
-
- #define DRAW_BUF_SIZE (SCREEN_WIDTH * SCREEN_HEIGHT / 10 * (LV_COLOR_DEPTH / 8))
- uint32_t draw_buf[DRAW_BUF_SIZE / 4];
-
- // If logging is enabled, it will inform the user about what is happening in the library
- void log_print(lv_log_level_t level, const char * buf) {
- LV_UNUSED(level);
- Serial.println(buf);
- Serial.flush();
- }
-
- // Declare function to get the Raw Touchscreen data
- void touchscreen_read_pts(bool, bool, int, int);
-
- /* Declare function to display a user instruction upon startup */
- void lv_display_instruction(void);
-
- /* Declare function to display crosshair at indexed point */
- void display_crosshair(int);
-
- /* Declare function to display crosshairs at given coordinates */
- void display_crosshairs(int, int);
-
- /* Declare function to display 'X's at given coordinates */
- void display_xs(int, int);
-
- /* Declare function to compute the resistive touchscreen coordinates to display coordinates conversion coefficients */
- void ts_calibration (
- const point, const point,
- const point, const point,
- const point, const point,
- const point, const point,
- const point, const point,
- const point, const point);
-
- void gather_cal_data(void) {
- //Function to draw the crosshairs and collect data
- bool reset, finished;
- int x_avg, y_avg;
-
- for (int i = 0; i < 6; i++) {
- lv_obj_clean(lv_scr_act());
- //lv_draw_cross(i);
- display_crosshair(i);
-
- reset = true;
- x_avg = 0;
- y_avg = 0;
-
- touchscreen_read_pts(reset, &finished, &x_avg, &y_avg);
-
- reset = false;
- while (!finished) {
- touchscreen_read_pts(reset, &finished, &x_avg, &y_avg);
-
- /* found out the hard way that if I don't do this, the screen doesn't update */
- lv_task_handler();
- lv_tick_inc(10);
- delay(10);
- }
-
- lv_obj_clean(lv_scr_act());
- lv_task_handler();
- lv_tick_inc(10);
- delay(10);
-
- ts_points[i][0] = x_avg;
- ts_points[i][1] = y_avg;
-
- String s = String("x_avg = " + String(x_avg) + " y_avg = " + String(y_avg) );
- Serial.println(s);
- delay(1500);
- }
- }
-
- void compute_transformation_coefficients(void) {
- /* finished collecting data, now compute correction coefficients */
- /* first initialize the function call parameters */
- aT = { ts_points[0][0], ts_points[0][1] };
- bT = { ts_points[1][0], ts_points[1][1] };
- cT = { ts_points[2][0], ts_points[2][1] };
- dT = { ts_points[3][0], ts_points[3][1] };
- eT = { ts_points[4][0], ts_points[4][1] };
- fT = { ts_points[5][0], ts_points[5][1] };
-
- /* compute the resisitve touchscreen to display coordinates conversion coefficients */
- ts_calibration(aS, aT, bS, bT, cS, cT, dS, dT, eS, eT, fS, fT);
- }
-
- void check_calibration_results(void) {
- int x_touch, y_touch, x_scr, y_scr, error;
-
- /* if we did our job well, the screen points computed below should match
- aS, bS, and cS defined near the top */
- for (int i = 0; i < 6; i++) {
- /* define some touch points and translate them to screen points */
- x_touch = ts_points[i][0];
- y_touch = ts_points[i][1];
-
- /* here's the magic equation that uses the magic coefficients */
- /* use it to convert resistive touchscreen points to display points */
- x_scr = alphaX * x_touch + betaX * y_touch + deltaX;
- y_scr = alphaY * x_touch + betaY * y_touch + deltaY;
-
- display_crosshairs(scr_points[i][0], scr_points[i][1]);
- display_xs(x_scr, y_scr);
-
- s = String("x_touch = " + String(x_touch) + " y_touch = " + String(y_touch) );
- Serial.println(s);
-
- s = String("x_scr = " + String(x_scr) + " y_scr = " + String(y_scr) );
- Serial.println(s);
-
- error = (int) sqrt( sq(x_scr - scr_points[i][0]) + sq(y_scr - scr_points[i][1]) );
- s = String("error = " + String(error) );
- Serial.println(s);
- Serial.println();
- }
-
- Serial.println("******************************************************************");
- Serial.println("******************************************************************");
- Serial.println("USE THE FOLLOWING COEFFICIENT VALUES TO CALIBRATE YOUR TOUCHSCREEN");
- s = String("Computed X: alpha_x = " + String(alphaX, 3) + ", beta_x = " + String(betaX, 3) + ", delta_x = " + String(deltaX, 3) );
- Serial.println(s);
- s = String("Computed Y: alpha_y = " + String(-alphaY, 3) + ", beta_y = " + String(-betaY, 3) + ", delta_y = " + String(SCREEN_WIDTH-deltaY, 3) );
- Serial.println(s);
- Serial.println("******************************************************************");
- Serial.println("******************************************************************");
- }
-
- void setup() {
- String LVGL_Arduino = String("LVGL Library Version: ") + lv_version_major() + "." + lv_version_minor() + "." + lv_version_patch();
- Serial.begin(115200);
- Serial.println(LVGL_Arduino);
-
- // Start LVGL
- lv_init();
- // Register print function for debugging
- lv_log_register_print_cb(log_print);
-
- // Start the SPI for the touchscreen and init the touchscreen
- touchscreenSPI.begin(XPT2046_CLK, XPT2046_MISO, XPT2046_MOSI, XPT2046_CS);
- touchscreen.begin(touchscreenSPI);
- // Set the Touchscreen rotation in landscape mode
- // Note: in some displays, the touchscreen might be upside down, so you might need to set the rotation to 0: touchscreen.setRotation(0);
- touchscreen.setRotation(2);
-
- // Create a display object
- lv_display_t * disp;
- // Initialize the TFT display using the TFT_eSPI library
- disp = lv_tft_espi_create(SCREEN_WIDTH, SCREEN_HEIGHT, draw_buf, sizeof(draw_buf));
- lv_display_set_rotation(disp, LV_DISPLAY_ROTATION_270);
-
- lv_display_instruction();
- delay_start = millis();
- while ((millis() - delay_start) < DELAY_5S) {
- lv_task_handler();
- lv_tick_inc(10);
- delay(10);
- }
-
- /* display crosshairs and have the user tap on them until enough samples are gathered */;
- gather_cal_data();
-
- /* crunch the numbers to compute the touchscreen to display coordinate transformation equation coefficients */
- compute_transformation_coefficients();
-
- /* display stored correction data and display generated vs measured screen points */
- check_calibration_results();
- }
-
- void loop() {
- lv_task_handler(); // let the GUI do its work
- lv_tick_inc(5); // tell LVGL how much time has passed
- delay(5); // let this time pass
- }
-
- /* Function to read a number of points from the resistive touchscreen as the user taps
- a stylus on displayed crosshairs. Once the samples have been collected, they are
- filtered to remove outliers and then averaged and the average x & y are returned to the caller. */
- void touchscreen_read_pts(bool reset, bool *finished, int *x_avg, int *y_avg) {
- /* nr_samples = samples taken; good_samples = samples used, samples = array of 100 samples */
- static int i, nr_samples, good_samples;
- static uint32_t samples[100][2];
-
- /* coordinates to shift and rotate touch screen coordinates to display coordinates */
- static float mean_x, mean_y, filt_mean_x, filt_mean_y, stdev_x, stdev_y;
-
- /* caller resets the sample run at each new displayed crosshair */
- if (reset) {
- nr_samples = 0;
- *x_avg = 0;
- *y_avg = 0;
- *finished = false;
- }
- // Checks if Touchscreen was touched, and prints X, Y
- if(touchscreen.tirqTouched() && touchscreen.touched()) {
- // Get Touchscreen points
- TS_Point p = touchscreen.getPoint();
- samples[nr_samples][0] = p.x;
- samples[nr_samples][1] = p.y;
-
- s = String("x, y = " + String(samples[nr_samples][0]) + ", " + String(samples[nr_samples][1]) );
- Serial.println(s);
-
- nr_samples++;
-
- /* first compute the x & y averages of all the samples */
- if (nr_samples >= 100) {
- mean_x = 0;
- mean_y = 0;
- for (i = 0; i < 100; i++) {
- mean_x += (float)samples[i][0];
- mean_y += (float)samples[i][1];
- }
- mean_x = mean_x / (float)nr_samples;
- mean_y = mean_y / (float)nr_samples;
- s = String("Unfiltered values: mean_x = " + String(mean_x) + ", mean_y = " + String(mean_y));
- Serial.println(s);
-
- /* now compute the x & y standard deviations of all the samples */
- stdev_x = 0;
- stdev_y = 0;
- for (i = 0; i < 100; i++) {
- stdev_x += sq((float)samples[i][0] - mean_x);
- stdev_y += sq((float)samples[i][1] - mean_y);
- }
- stdev_x = sqrt(stdev_x / (float)nr_samples);
- stdev_y = sqrt(stdev_y / (float)nr_samples);
-
- s = String("stdev_x = " + String(stdev_x) + ", stdev_y = " + String(stdev_y));
- Serial.println(s);
-
- /* now average the samples that are less than one standard deviation from the mean */
- /* this filtering is called "outlier rejection," and is included because outliers were observed in testing */
- good_samples = 0;
- filt_mean_x = 0;
- filt_mean_y = 0;
- for (i = 0; i < 100; i++) {
- if ((abs((float)samples[i][0] - mean_x) < stdev_x) && (abs((float)samples[i][1] - mean_y) < stdev_y)) {
- filt_mean_x += (float)samples[i][0];
- filt_mean_y += (float)samples[i][1];
- good_samples++;
- }
- }
-
- s = String("Good samples = " + String(good_samples));
- Serial.println(s);
-
- filt_mean_x = filt_mean_x / (float)good_samples;
- filt_mean_y = filt_mean_y / (float)good_samples;
- s = String("Filtered values: filt_mean_x = " + String(filt_mean_x) + ", filt_mean_y = " + String(filt_mean_y));
- Serial.println(s);
- Serial.println();
-
- *x_avg = (int)mean_x;
- *y_avg = (int)mean_y;
-
- *finished = true;
- }
- }
- else {
- // nada
- }
- }
-
- /* Function to display a user instruction on startup */
- void lv_display_instruction(void) {
- // Create a text label aligned center: https://docs.lvgl.io/master/widgets/label.html
- lv_obj_t * text_label = lv_label_create(lv_screen_active());
- lv_label_set_text(text_label, "Tap each crosshair until it disappears.");
- lv_obj_align(text_label, LV_ALIGN_CENTER, 0, 0);
- // Set font type and font size. More information: https://docs.lvgl.io/master/overview/font.html
- static lv_style_t style_text_label;
- lv_style_init(&style_text_label);
- lv_style_set_text_font(&style_text_label, &lv_font_montserrat_14);
- lv_obj_add_style(text_label, &style_text_label, 0);
- }
-
- /* function to display crosshair at given index of coordinates array */
- void display_crosshair(int cross_nr) {
-
- static lv_point_precise_t h_line_points[] = { {0, 0}, {10, 0} };
- static lv_point_precise_t v_line_points[] = { {0, 0}, {0, 10} };
-
- static lv_style_t style_line;
- lv_style_init(&style_line);
- lv_style_set_line_width(&style_line, 2);
- lv_style_set_line_color(&style_line, lv_palette_main(LV_PALETTE_RED));
- lv_style_set_line_rounded(&style_line, true);
-
- // Create crosshair lines
- lv_obj_t* crosshair_h = lv_line_create(lv_screen_active());
- lv_obj_t* crosshair_v = lv_line_create(lv_screen_active());
-
- lv_line_set_points(crosshair_h, h_line_points, 2); // Set the coordinates for the crosshair_h line
- lv_obj_add_style(crosshair_h, &style_line, 0);
-
- lv_line_set_points(crosshair_v, v_line_points, 2); // Set the coordinates for the crosshair_h line
- lv_obj_add_style(crosshair_v, &style_line, 0);
-
- lv_obj_set_pos(crosshair_h, scr_points[cross_nr][0] - 5, scr_points[cross_nr][1]);
- lv_obj_set_pos(crosshair_v, scr_points[cross_nr][0], scr_points[cross_nr][1] - 5);
- }
-
- /* function to display crosshairs at given coordinates */
- void display_crosshairs(int x, int y) {
-
- static lv_point_precise_t h_line_points[] = { {0, 0}, {10, 0} };
- static lv_point_precise_t v_line_points[] = { {0, 0}, {0, 10} };
-
- static lv_style_t style_line;
- lv_style_init(&style_line);
- lv_style_set_line_width(&style_line, 2);
- lv_style_set_line_color(&style_line, lv_palette_main(LV_PALETTE_BLUE));
- lv_style_set_line_rounded(&style_line, true);
-
- // Create crosshair lines
- lv_obj_t* crosshair_h = lv_line_create(lv_screen_active());
- lv_obj_t* crosshair_v = lv_line_create(lv_screen_active());
-
- lv_line_set_points(crosshair_h, h_line_points, 2); // Set the coordinates for the crosshair_h line
- lv_obj_add_style(crosshair_h, &style_line, 0);
-
- lv_line_set_points(crosshair_v, v_line_points, 2); // Set the coordinates for the crosshair_h line
- lv_obj_add_style(crosshair_v, &style_line, 0);
-
- lv_obj_set_pos(crosshair_h, x - 5, y);
- lv_obj_set_pos(crosshair_v, x, y - 5);
- }
-
- /* function to display 'X's at given coordinates */
- void display_xs(int x, int y) {
-
- static lv_point_precise_t u_line_points[] = { {0, 0}, {10, 10} }; //upsloping
- static lv_point_precise_t d_line_points[] = { {0, 10}, {10, 0} }; //downsloping
-
- static lv_style_t style_line;
- lv_style_init(&style_line);
- lv_style_set_line_width(&style_line, 2);
- lv_style_set_line_color(&style_line, lv_palette_main(LV_PALETTE_RED));
- lv_style_set_line_rounded(&style_line, true);
-
- // Create crosshair lines
- lv_obj_t* x_u = lv_line_create(lv_screen_active());
- lv_obj_t* x_d = lv_line_create(lv_screen_active());
-
- lv_line_set_points(x_u, u_line_points, 2); // Set the coordinates for the upsloping line
- lv_obj_add_style(x_u, &style_line, 0);
-
- lv_line_set_points(x_d, d_line_points, 2); // Set the coordinates for the downsloping line
- lv_obj_add_style(x_d, &style_line, 0);
-
- lv_obj_set_pos(x_u, x - 5, y - 5);
- lv_obj_set_pos(x_d, x - 5, y - 5);
- }
-
- /* function to compute the transformation equation coefficients from resistive touchscreen
- coordinates to display coordinates...
- This was based on the Texas Instruments appnote at:
- https://www.ti.com/lit/an/slyt277/slyt277.pdf
- It implements Equation 7 of that appnote, which computes a least-squares set of coefficients. */
- void ts_calibration (
- const point aS, const point aT,
- const point bS, const point bT,
- const point cS, const point cT,
- const point dS, const point dT,
- const point eS, const point eT,
- const point fS, const point fT) {
-
- bool defined;
- uint16_t screenWidth, screenHeight;
-
- BLA::Matrix<6, 3> A;
- BLA::Matrix<3, 6> transA;
- BLA::Matrix<6> X;
- BLA::Matrix<6> Y;
- BLA::Matrix<3, 3> B;
- BLA::Matrix<3, 6> C;
- BLA::Matrix<3> X_coeff;
- BLA::Matrix<3> Y_coeff;
-
- s = String("aS = " + String(aS.x) + ", " + String(aS.y));
- Serial.println(s);
- s = String("bS = " + String(bS.x) + ", " + String(bS.y));
- Serial.println(s);
- s = String("cS = " + String(cS.x) + ", " + String(cS.y));
- Serial.println(s);
- s = String("dS = " + String(dS.x) + ", " + String(dS.y));
- Serial.println(s);
- s = String("eS = " + String(eS.x) + ", " + String(eS.y));
- Serial.println(s);
- s = String("fS = " + String(fS.x) + ", " + String(fS.y));
- Serial.println(s);
-
- s = String("aT = " + String(aT.x) + ", " + String(aT.y));
- Serial.println(s);
- s = String("bT = " + String(bT.x) + ", " + String(bT.y));
- Serial.println(s);
- s = String("cT = " + String(cT.x) + ", " + String(cT.y));
- Serial.println(s);
- s = String("eT = " + String(dT.x) + ", " + String(dT.y));
- Serial.println(s);
- s = String("eT = " + String(eT.x) + ", " + String(eT.y));
- Serial.println(s);
- s = String("fT = " + String(fT.x) + ", " + String(fT.y));
- Serial.println(s);
- Serial.println();
-
- struct f_point {
- float x;
- float y;
- };
-
- struct f_point faS, fbS, fcS, fdS, feS, ffS, faT, fbT, fcT, fdT, feT, ffT;
-
- faS.x = (float)aS.x; fbS.x = (float)bS.x; fcS.x = (float)cS.x, fdS.x = (float)dS.x; feS.x = (float)eS.x; ffS.x = (float)fS.x;
- faS.y = (float)aS.y; fbS.y = (float)bS.y; fcS.y = (float)cS.y; fdS.y = (float)dS.y; feS.y = (float)eS.y; ffS.y = (float)fS.y;
-
- faT.x = (float)aT.x; fbT.x = (float)bT.x; fcT.x = (float)cT.x; fdT.x = (float)dT.x; feT.x = (float)eT.x; ffT.x = (float)fT.x;
- faT.y = (float)aT.y; fbT.y = (float)bT.y; fcT.y = (float)cT.y; fdT.y = (float)dT.y; feT.y = (float)eT.y; ffT.y = (float)fT.y;
-
- A = { faT.x, faT.y, 1,
- fbT.x, fbT.y, 1,
- fcT.x, fcT.y, 1,
- fdT.x, fdT.y, 1,
- feT.x, feT.y, 1,
- ffT.x, ffT.y, 1 };
-
- X = { faS.x,
- fbS.x,
- fcS.x,
- fdS.x,
- feS.x,
- ffS.x };
-
- Y = { faS.y,
- fbS.y,
- fcS.y,
- fdS.y,
- feS.y,
- ffS.y };
-
- /* Now compute [AtA]^-1 * AtA * X and [AtA]^-1 * AtA * Y */
- Serial.print ("A = ");
- Serial.println(A);
-
- transA = ~A;
- Serial.print ("transA = ");
- Serial.println(transA);
-
- B = transA * A;
- Serial.print ("Before inversion, B = ");
- Serial.println(B);
-
- if (!Invert(B) ) {
- Serial.println("Singular matrix in computation of inverse of B = transA*A!");
- }
- Serial.print ("After inversion, B = ");
- Serial.println(B);
-
- C = B * transA;
- Serial.print ("C = ");
- Serial.println(C);
-
- X_coeff = C * X;
- Y_coeff = C * Y;
-
- /* transfer the X and Y coefficients to the Greek-letter variables
- Note that BLA requires round brackets while MatrixMath requires square ones */
- alphaX = X_coeff(0); betaX = X_coeff(1); deltaX = X_coeff(2);
- alphaY = Y_coeff(0); betaY = Y_coeff(1); deltaY = Y_coeff(2);
-
- Serial.println();
- }
|


 沪公网安备31011502402448