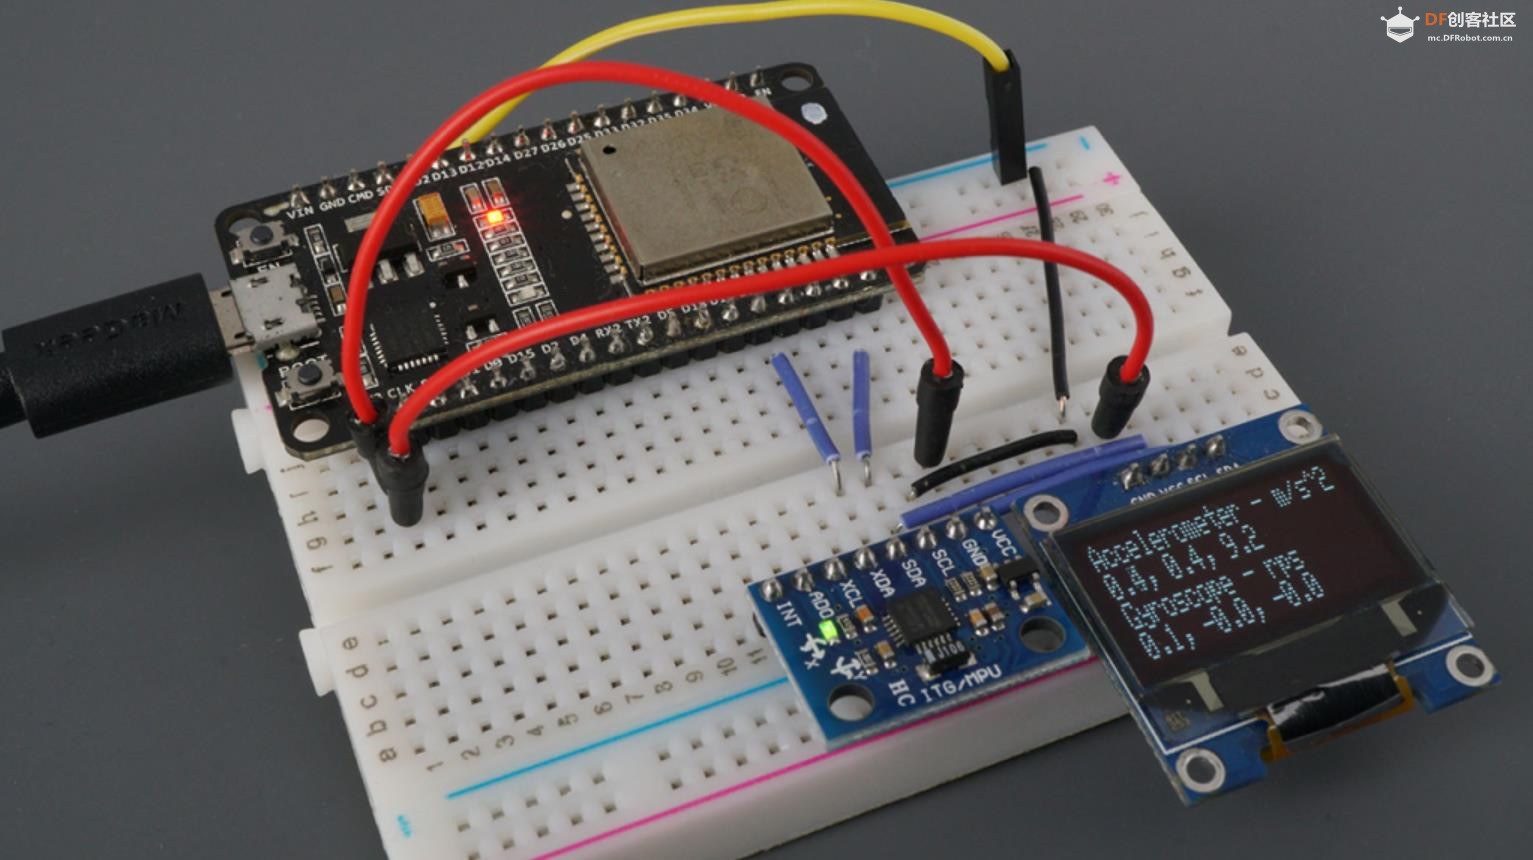
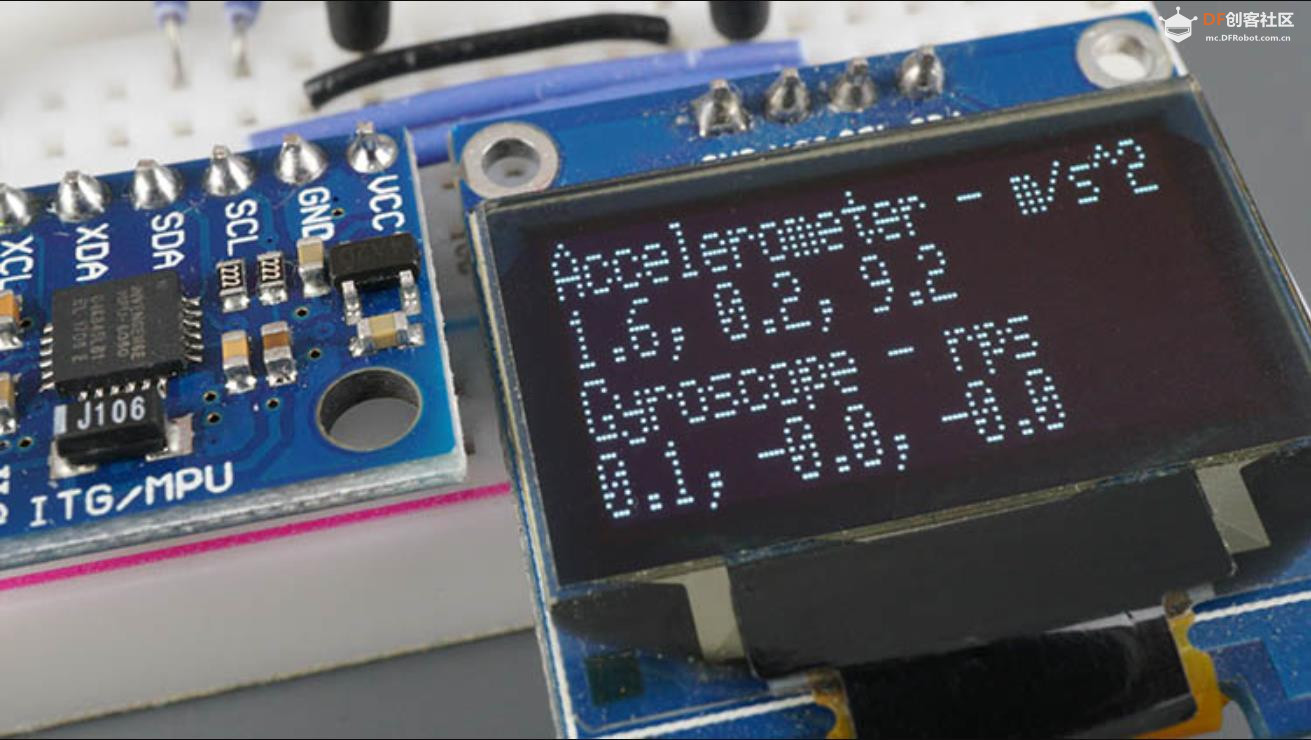
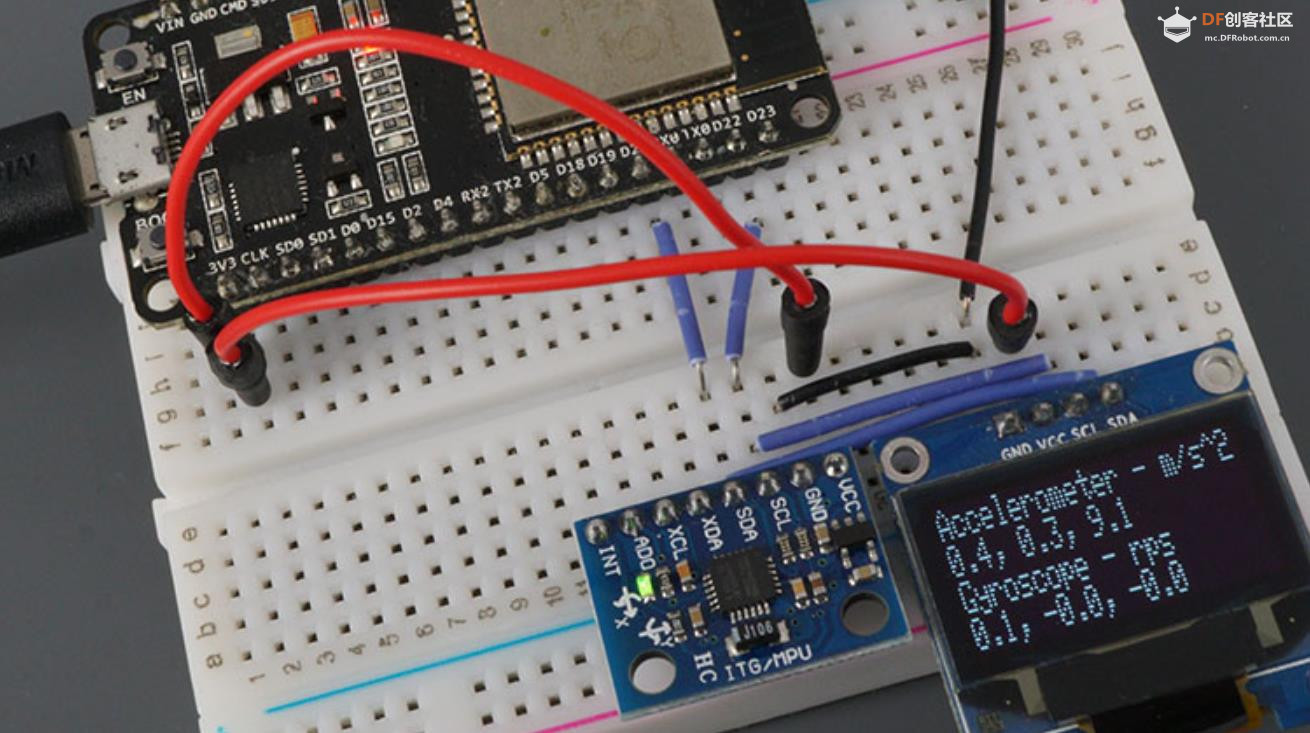
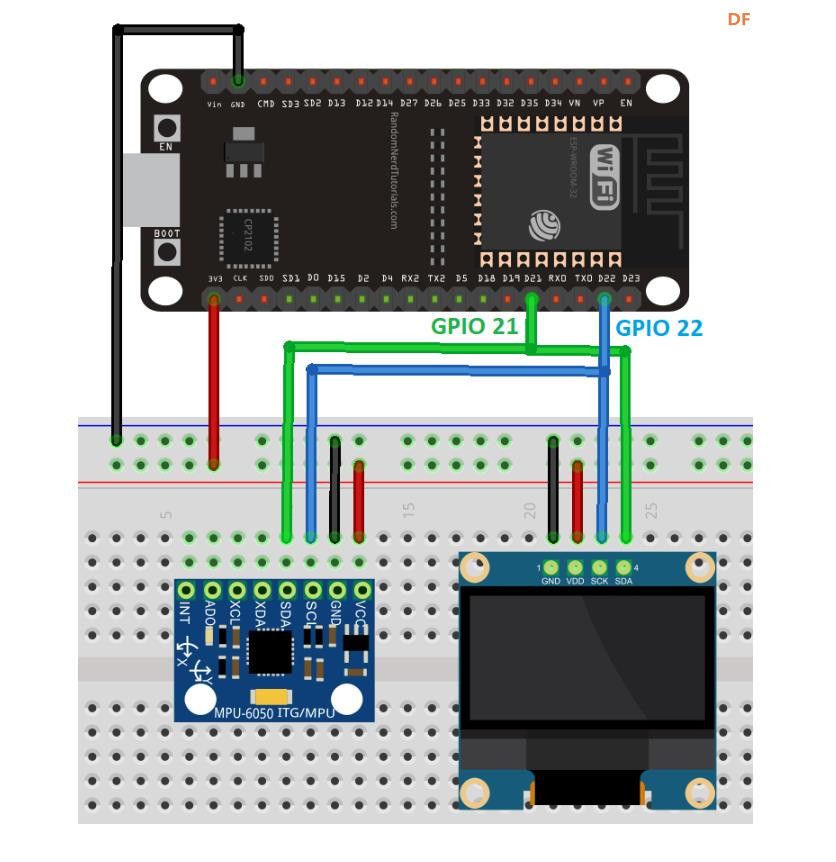
在 OLED 显示屏上显示陀螺仪和加速度读数
项目代码
- // Basic OLED demo for accelerometer readings from Adafruit MPU6050
-
- // ESP32 Guide: https://RandomNerdTutorials.com/esp32-mpu-6050-accelerometer-gyroscope-arduino/
- // ESP8266 Guide: https://RandomNerdTutorials.com/esp8266-nodemcu-mpu-6050-accelerometer-gyroscope-arduino/
- // Arduino Guide: https://RandomNerdTutorials.com/arduino-mpu-6050-accelerometer-gyroscope/
-
- #include <Adafruit_MPU6050.h>
- #include <Adafruit_SSD1306.h>
- #include <Adafruit_Sensor.h>
-
- Adafruit_MPU6050 mpu;
- Adafruit_SSD1306 display = Adafruit_SSD1306(128, 64, &Wire);
-
- void setup() {
- Serial.begin(115200);
- // while (!Serial);
- Serial.println("MPU6050 OLED demo");
-
- if (!mpu.begin()) {
- Serial.println("Sensor init failed");
- while (1)
- yield();
- }
- Serial.println("Found a MPU-6050 sensor");
-
- // SSD1306_SWITCHCAPVCC = generate display voltage from 3.3V internally
- if (!display.begin(SSD1306_SWITCHCAPVCC, 0x3C)) { // Address 0x3C for 128x64
- Serial.println(F("SSD1306 allocation failed"));
- for (;;)
- ; // Don't proceed, loop forever
- }
- display.display();
- delay(500); // Pause for 2 seconds
- display.setTextSize(1);
- display.setTextColor(WHITE);
- display.setRotation(0);
- }
-
- void loop() {
- sensors_event_t a, g, temp;
- mpu.getEvent(&a, &g, &temp);
-
- display.clearDisplay();
- display.setCursor(0, 0);
-
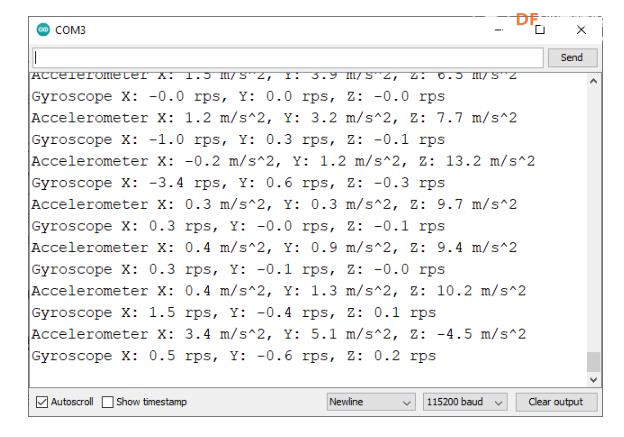
- Serial.print("Accelerometer ");
- Serial.print("X: ");
- Serial.print(a.acceleration.x, 1);
- Serial.print(" m/s^2, ");
- Serial.print("Y: ");
- Serial.print(a.acceleration.y, 1);
- Serial.print(" m/s^2, ");
- Serial.print("Z: ");
- Serial.print(a.acceleration.z, 1);
- Serial.println(" m/s^2");
-
- display.println("Accelerometer - m/s^2");
- display.print(a.acceleration.x, 1);
- display.print(", ");
- display.print(a.acceleration.y, 1);
- display.print(", ");
- display.print(a.acceleration.z, 1);
- display.println("");
-
- Serial.print("Gyroscope ");
- Serial.print("X: ");
- Serial.print(g.gyro.x, 1);
- Serial.print(" rps, ");
- Serial.print("Y: ");
- Serial.print(g.gyro.y, 1);
- Serial.print(" rps, ");
- Serial.print("Z: ");
- Serial.print(g.gyro.z, 1);
- Serial.println(" rps");
-
- display.println("Gyroscope - rps");
- display.print(g.gyro.x, 1);
- display.print(", ");
- display.print(g.gyro.y, 1);
- display.print(", ");
- display.print(g.gyro.z, 1);
- display.println("");
-
- display.display();
- delay(100);
- }
| 


 沪公网安备31011502402448
 置顶卡
置顶卡 变色卡
变色卡 千斤顶
千斤顶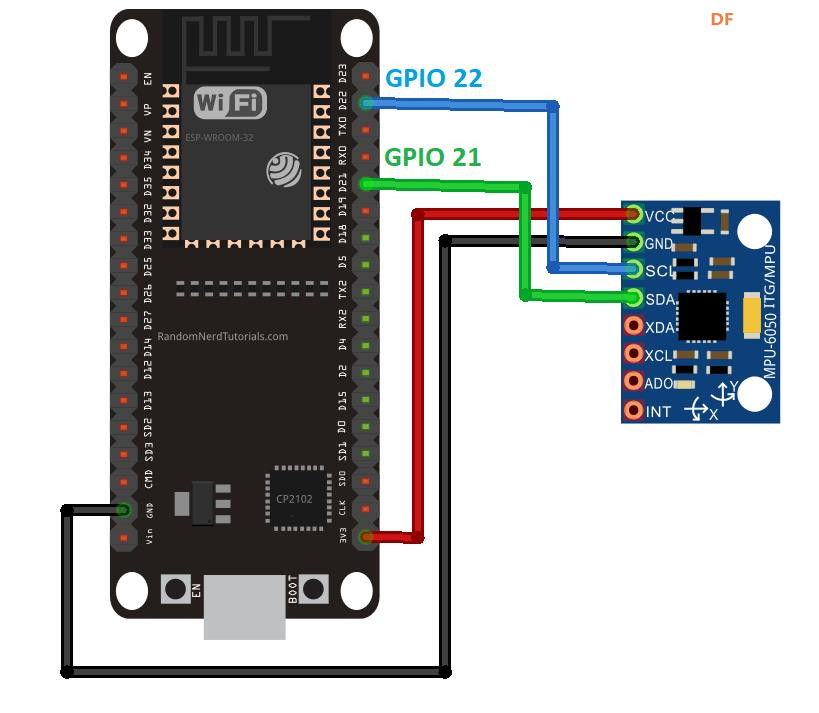

 萌萌哒新人
萌萌哒新人
 活跃会员
活跃会员
 宣传大使
宣传大使
 牛X认证
牛X认证
 创作达人
创作达人
 ARD DAY
 摸鱼团员
摸鱼团员
 志“童”道合
 编辑选择奖
编辑选择奖


