本帖最后由 云天 于 2022-2-17 20:28 编辑
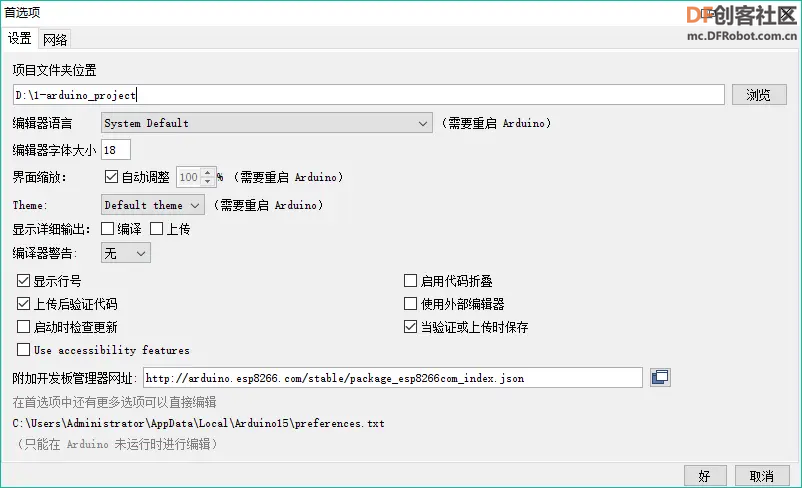
一直想实现一个小巧的WIFI开关,但想实现小巧,需要考虑电池、继电器、变压器、Wifi模块、控制器等的体积大小。近日在网上发现了ESP8266-01s模块应该能实现我的想法。购买回来之后,发现自己没有烧写程序的工具。 【DFRduino UNO R3烧写ESP8266-01s模块】 Arduino是一个世界级的电子原型开发平台,全球每天都有众多的电子爱好者,或者创客都在用它开发出令人脑洞大开又或者非常实用的小作品,而ESP8266则又是近几年大家都在讲的物联网界中的一批黑马,而且是总部位于上海的一家企业—乐鑫设计制造的,目前累计出货已经1亿多了,不仅创客非常喜欢玩这一款硬件,而且很多智能设备也都使用了这款芯片。 给ESP8266-01s烧写程序可使用USB -TTL模块,但我手里只有USB-Serial模块,两个的工作电压不同,USB -TTL模块为3.3V,而USB-Serial模块是5V。给ESP8266-01s烧写程序时,应使用3.3V。 解决方法:可使用DFRduino UNO R3作为 USB -TTL给ESP8266-01s烧写程序。 1、安装ESP8266板 这一步是非常重要的,因为Arduino支持开发非常多的硬件,但是不可能在安装包里就直接继承了这么多开发板的开发资源,因为很多硬件的架构和编译器都不一样,所以我们就需要安装一下附加开发板选项,也就是安装ESP8266的SDK和编译器之类的,但是由于SDK已经提供了Arduino的接口,所以我们就可以像开发UNO一样去开发ESP8266。我们依次点击文件->首选项->附加开发板管理器网址右侧的小图标,然后将以下内容添加进去:
- https://arduino.esp8266.com/stable/package_esp8266com_index.json
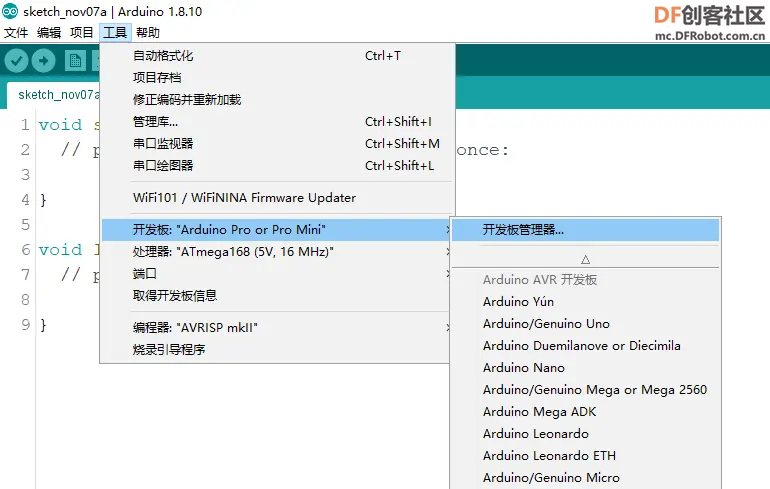
之后点击工具 - 开发板 - 开发板管理器,进入开发板管理器界面:
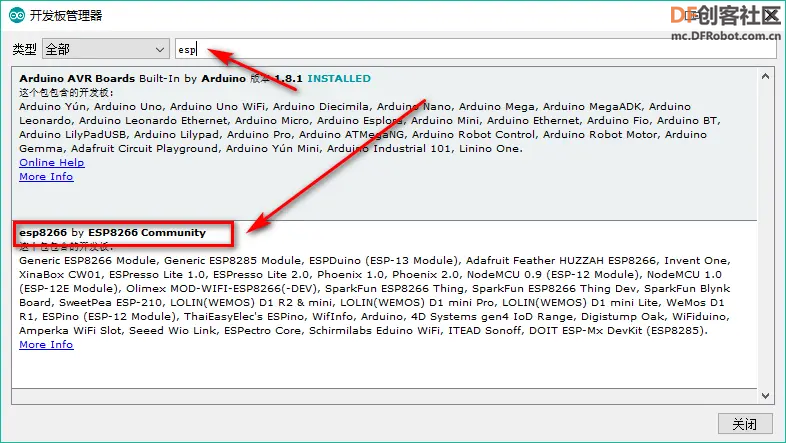
输入esp, 找到 esp8266 并安装;
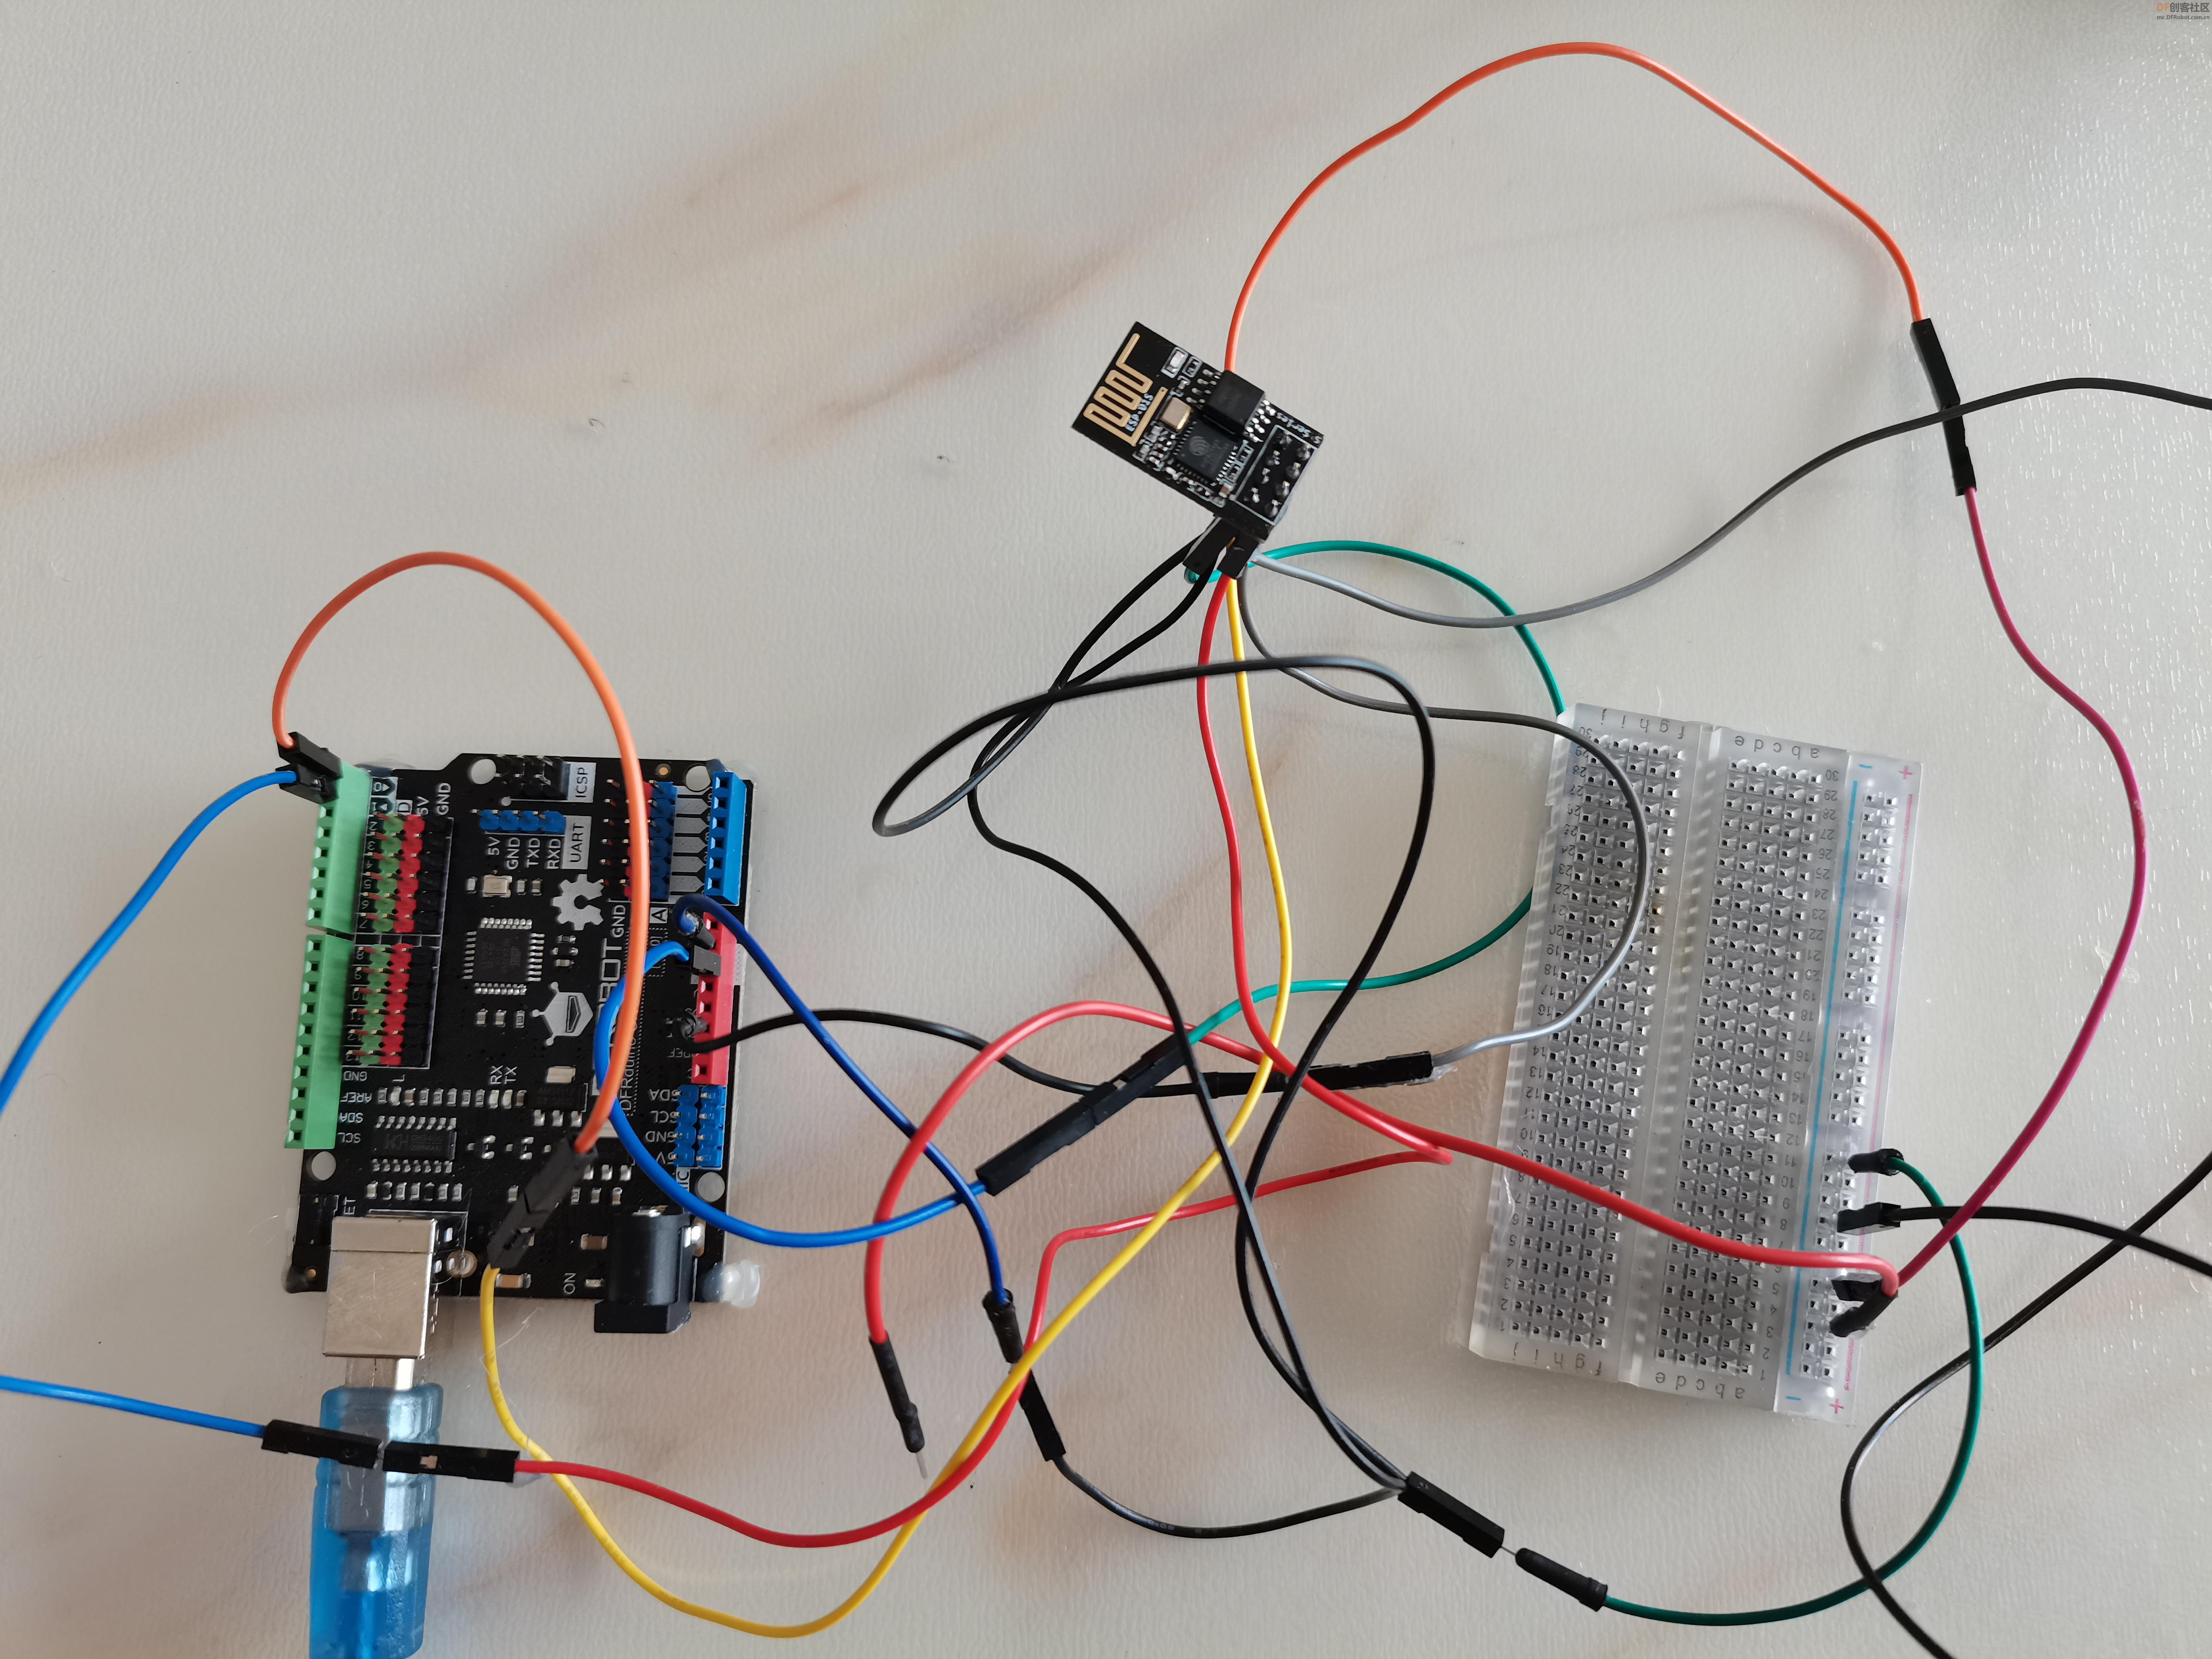
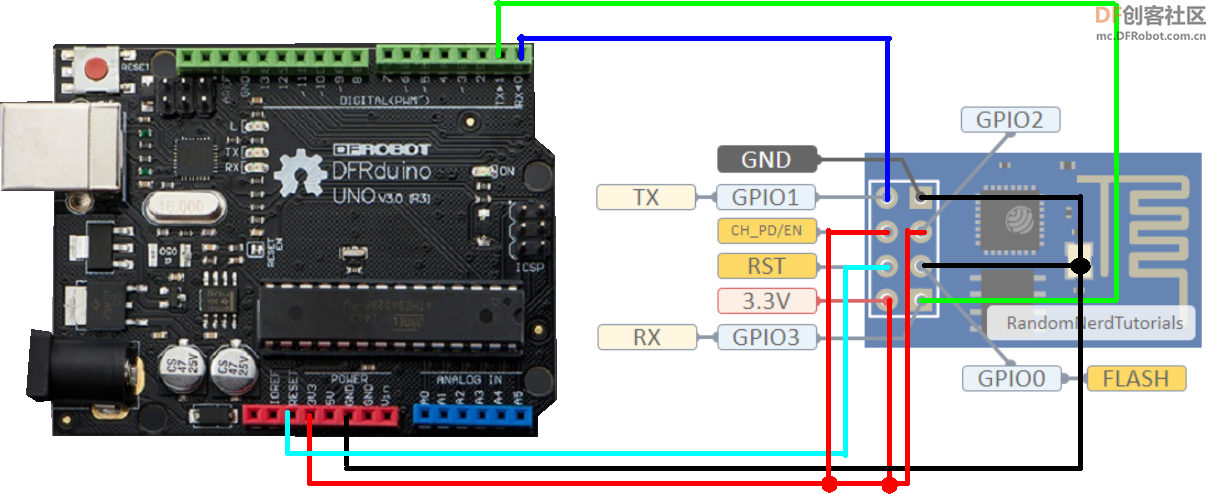
2、接线
ESP8266-01s模块与DFRduino UNO R3连接注意TX接TX, RX接RX(使板载USB转串口模块(FTDI/CH340G/PL2303/Atmega)的数据直接流转到其他设备,也因此Rx-Rx,Tx-Tx连接,无需像往常那样交叉连接。)。其它按下面的连接。
区分 下载模式和运行模式,就是GPIO0高低电平问题。 1、下载模式:CH_PD(EN)、RST、GPIO2、(接3.3V),GPIO0接地。 2、运行模式:CH_PD(EN)、RST、GPIO2、(接3.3V),GPIO0接3.3V。
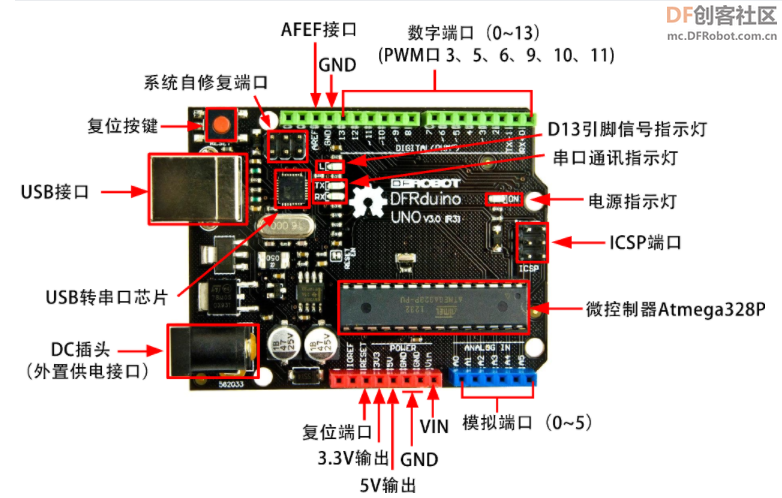
3、DFRduino UNO R3配置
DFRduino UNO R3中可先烧写一个空程序(我烧写了一个Blink程序),也可烧写如下程序:
- void setup()
- {
- pinMode(0,INPUT);
- pinMode(1,INPUT);
- }
- void loop()
- {
-
- }
可避免DFRduino UNO R3中原程序有使用到串口的代码,占用TX、RX引脚。
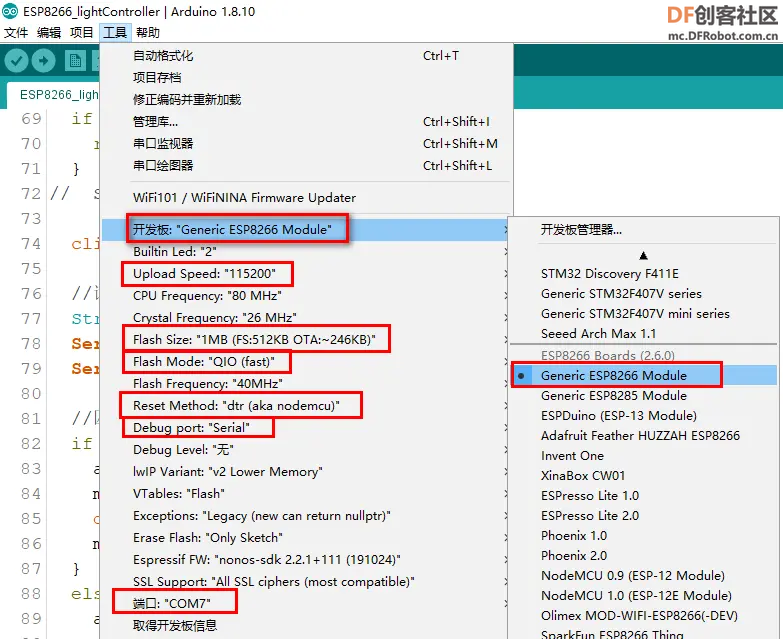
3、IDE进行如下设置:
4、上传ESP8266WIFI的相关程序
- /*
- This sketch demonstrates how to set up a simple HTTP-like server.
- The server will set a GPIO pin depending on the request
- http://server_ip/gpio/0 will set the GPIO2 low,
- http://server_ip/gpio/1 will set the GPIO2 high
- server_ip is the IP address of the ESP8266 module, will be
- printed to Serial when the module is connected.
- */
-
- #include <ESP8266WiFi.h>
-
- #ifndef STASSID
- #define STASSID "########"//自己WIFI的SSID
- #define STAPSK "########"//自己WIFI的密码
- #endif
- #define JDQ 0
- const char* ssid = STASSID;
- const char* password = STAPSK;
-
- // Create an instance of the server
- // specify the port to listen on as an argument
- WiFiServer server(80);
-
- void setup() {
- Serial.begin(115200);
-
- // prepare LED
- pinMode(LED_BUILTIN, OUTPUT);
- pinMode(0, OUTPUT);
- digitalWrite(LED_BUILTIN, 0);
-
- // Connect to WiFi network
- Serial.println();
- Serial.println();
- Serial.print(F("Connecting to "));
- Serial.println(ssid);
-
- WiFi.mode(WIFI_STA);
- WiFi.begin(ssid, password);
-
- while (WiFi.status() != WL_CONNECTED) {
- delay(500);
- Serial.print(F("."));
- }
- Serial.println();
- Serial.println(F("WiFi connected"));
-
- // Start the server
- server.begin();
- Serial.println(F("Server started"));
-
- // Print the IP address
- Serial.println(WiFi.localIP());
- }
-
- void loop() {
- // Check if a client has connected
- WiFiClient client = server.available();
- if (!client) {
- return;
- }
- Serial.println(F("new client"));
-
- client.setTimeout(5000); // default is 1000
-
- // Read the first line of the request
- String req = client.readStringUntil('\r');
- Serial.println(F("request: "));
- Serial.println(req);
-
- // Match the request
- int val;
- if (req.indexOf(F("/gpio/0")) != -1) {
- val = 0;
- } else if (req.indexOf(F("/gpio/1")) != -1) {
- val = 1;
- } else {
- Serial.println(F("invalid request"));
- val = digitalRead(LED_BUILTIN);
- }
-
- // Set LED according to the request
- digitalWrite(LED_BUILTIN, val);
- digitalWrite(JDQ, val);
- // read/ignore the rest of the request
- // do not client.flush(): it is for output only, see below
- while (client.available()) {
- // byte by byte is not very efficient
- client.read();
- }
-
- // Send the response to the client
- // it is OK for multiple small client.print/write,
- // because nagle algorithm will group them into one single packet
- client.print(F("HTTP/1.1 200 OK\r\nContent-Type: text/html\r\n\r\n<!DOCTYPE HTML>\r\n<html>\r\nGPIO is now "));
- client.print((val) ? F("high") : F("low"));
- client.print(F("<br><br>Click <a href='http://"));
- client.print(WiFi.localIP());
- client.print(F("/gpio/1'>here</a> to switch LED GPIO on, or <a href='http://"));
- client.print(WiFi.localIP());
- client.print(F("/gpio/0'>here</a> to switch LED GPIO off.</html>"));
-
- // The client will actually be *flushed* then disconnected
- // when the function returns and 'client' object is destroyed (out-of-scope)
- // flush = ensure written data are received by the other side
- Serial.println(F("Disconnecting from client"));
- }
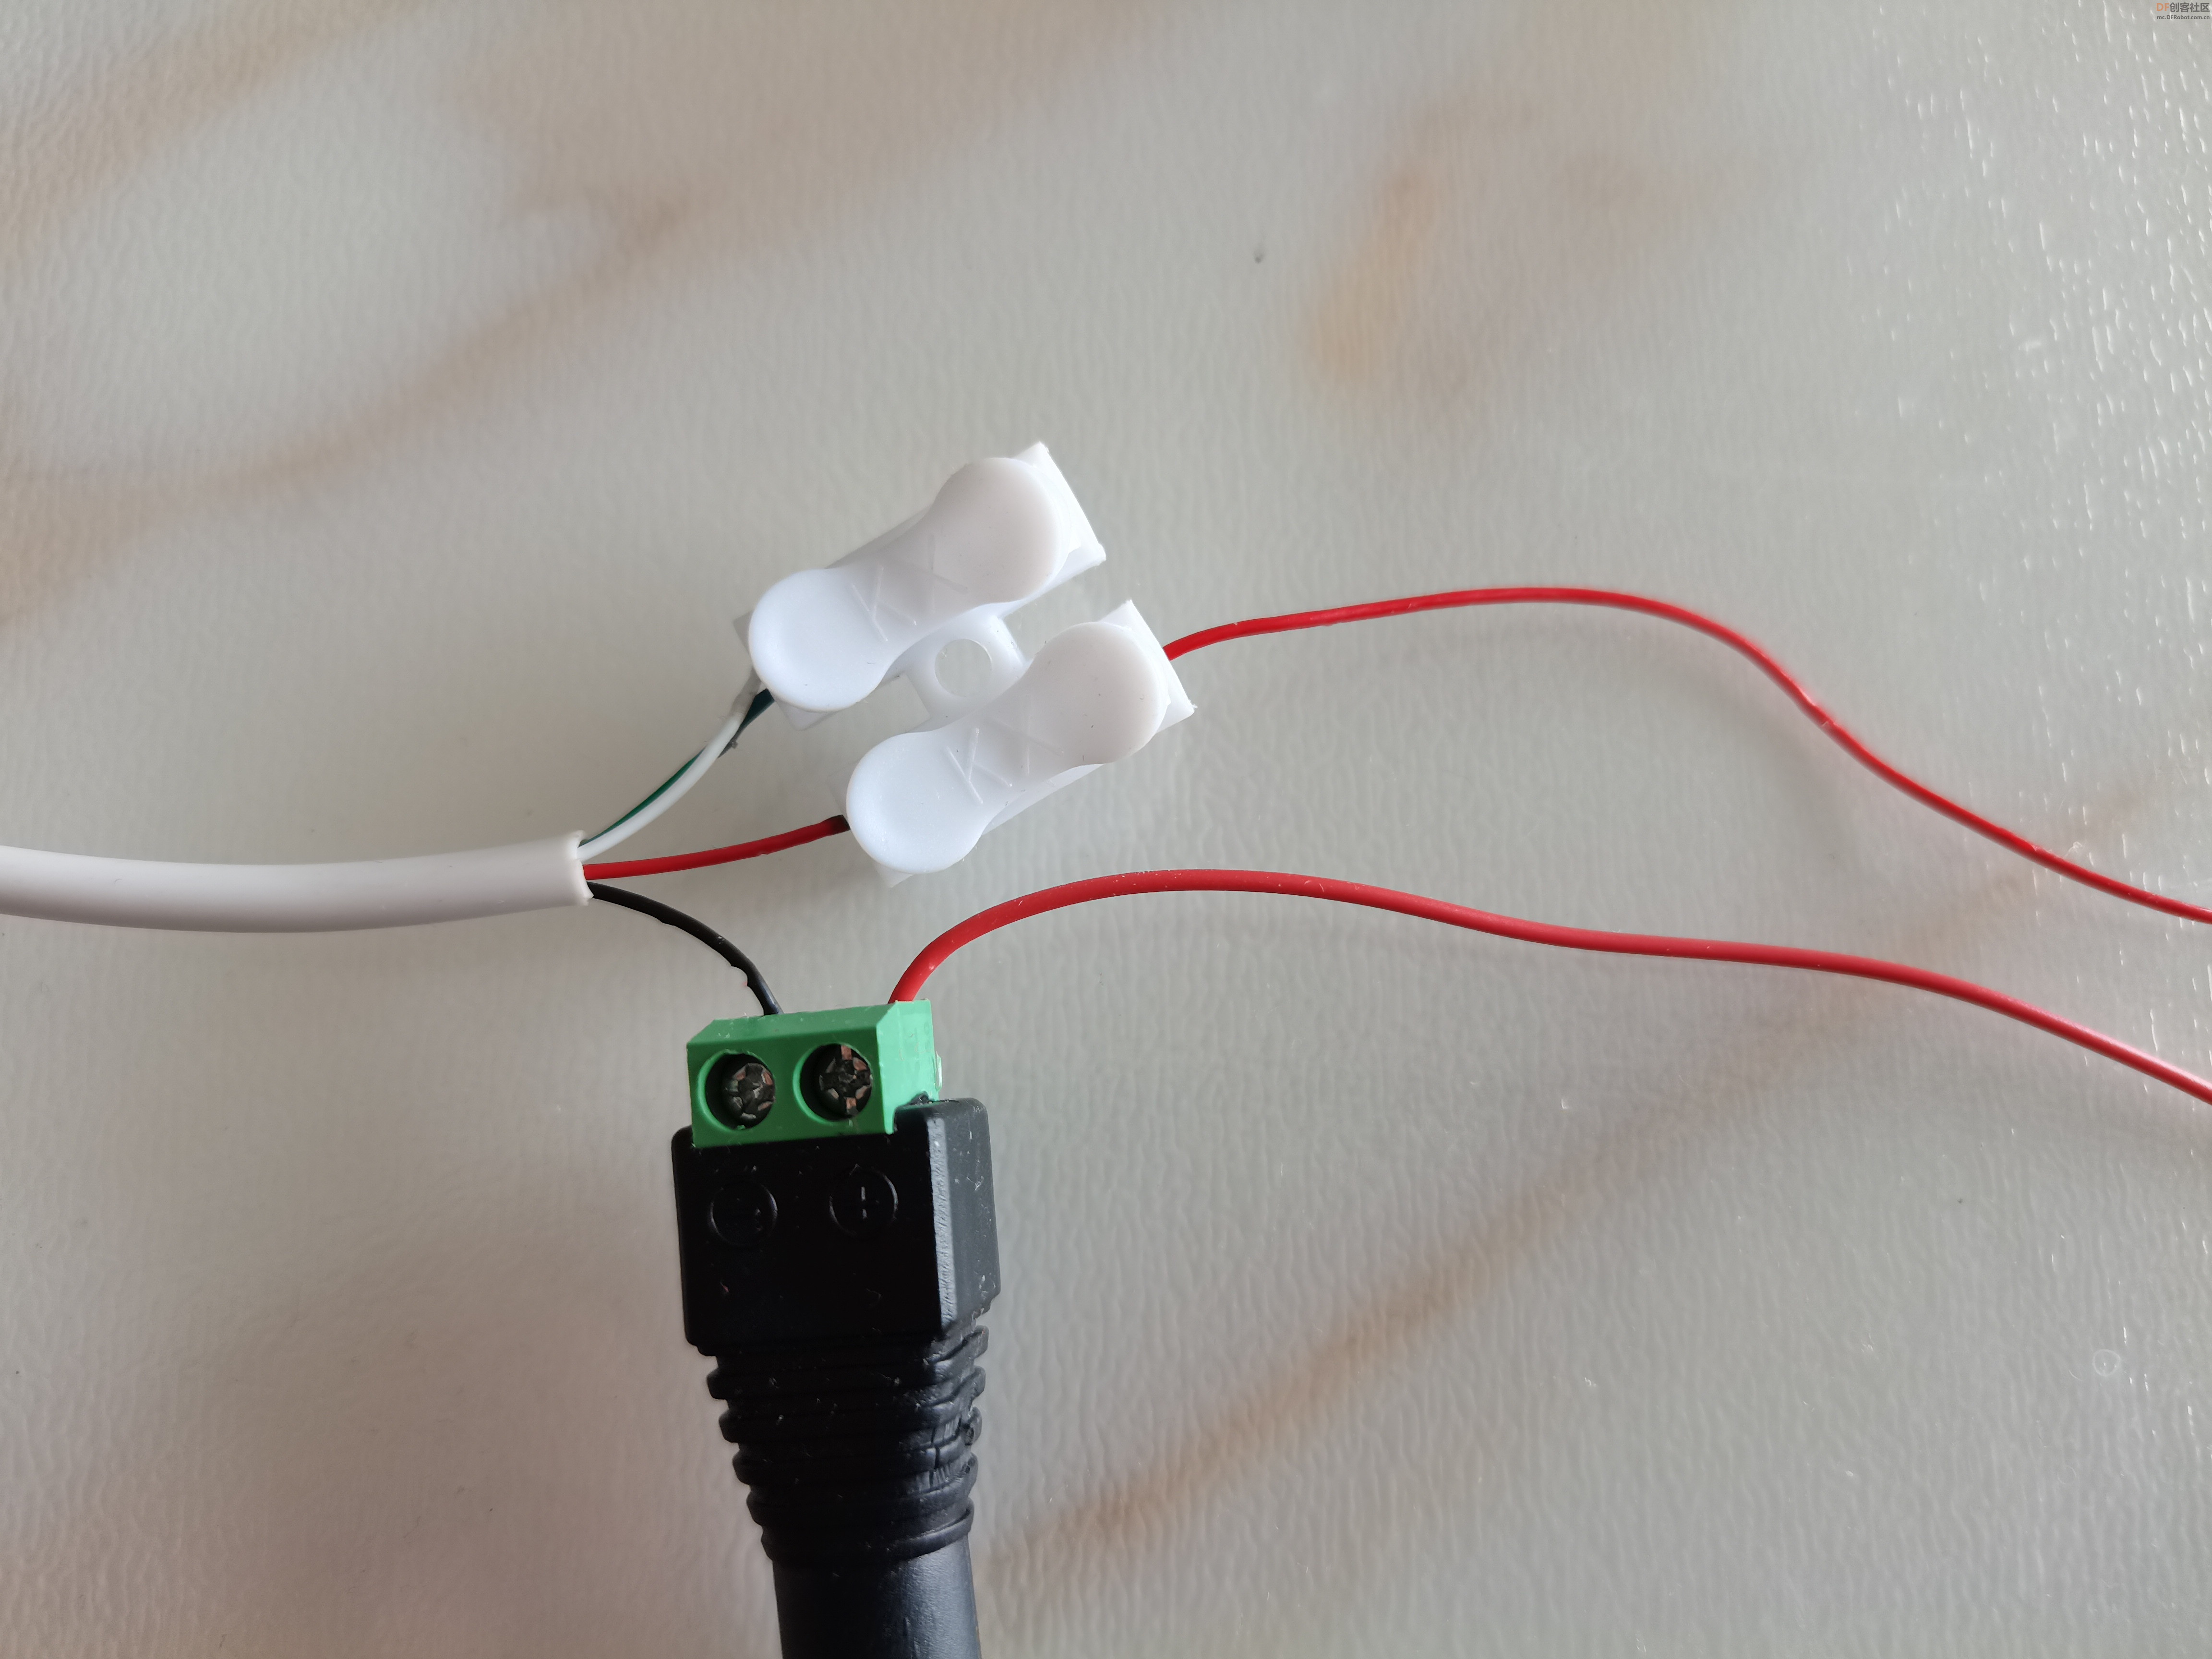
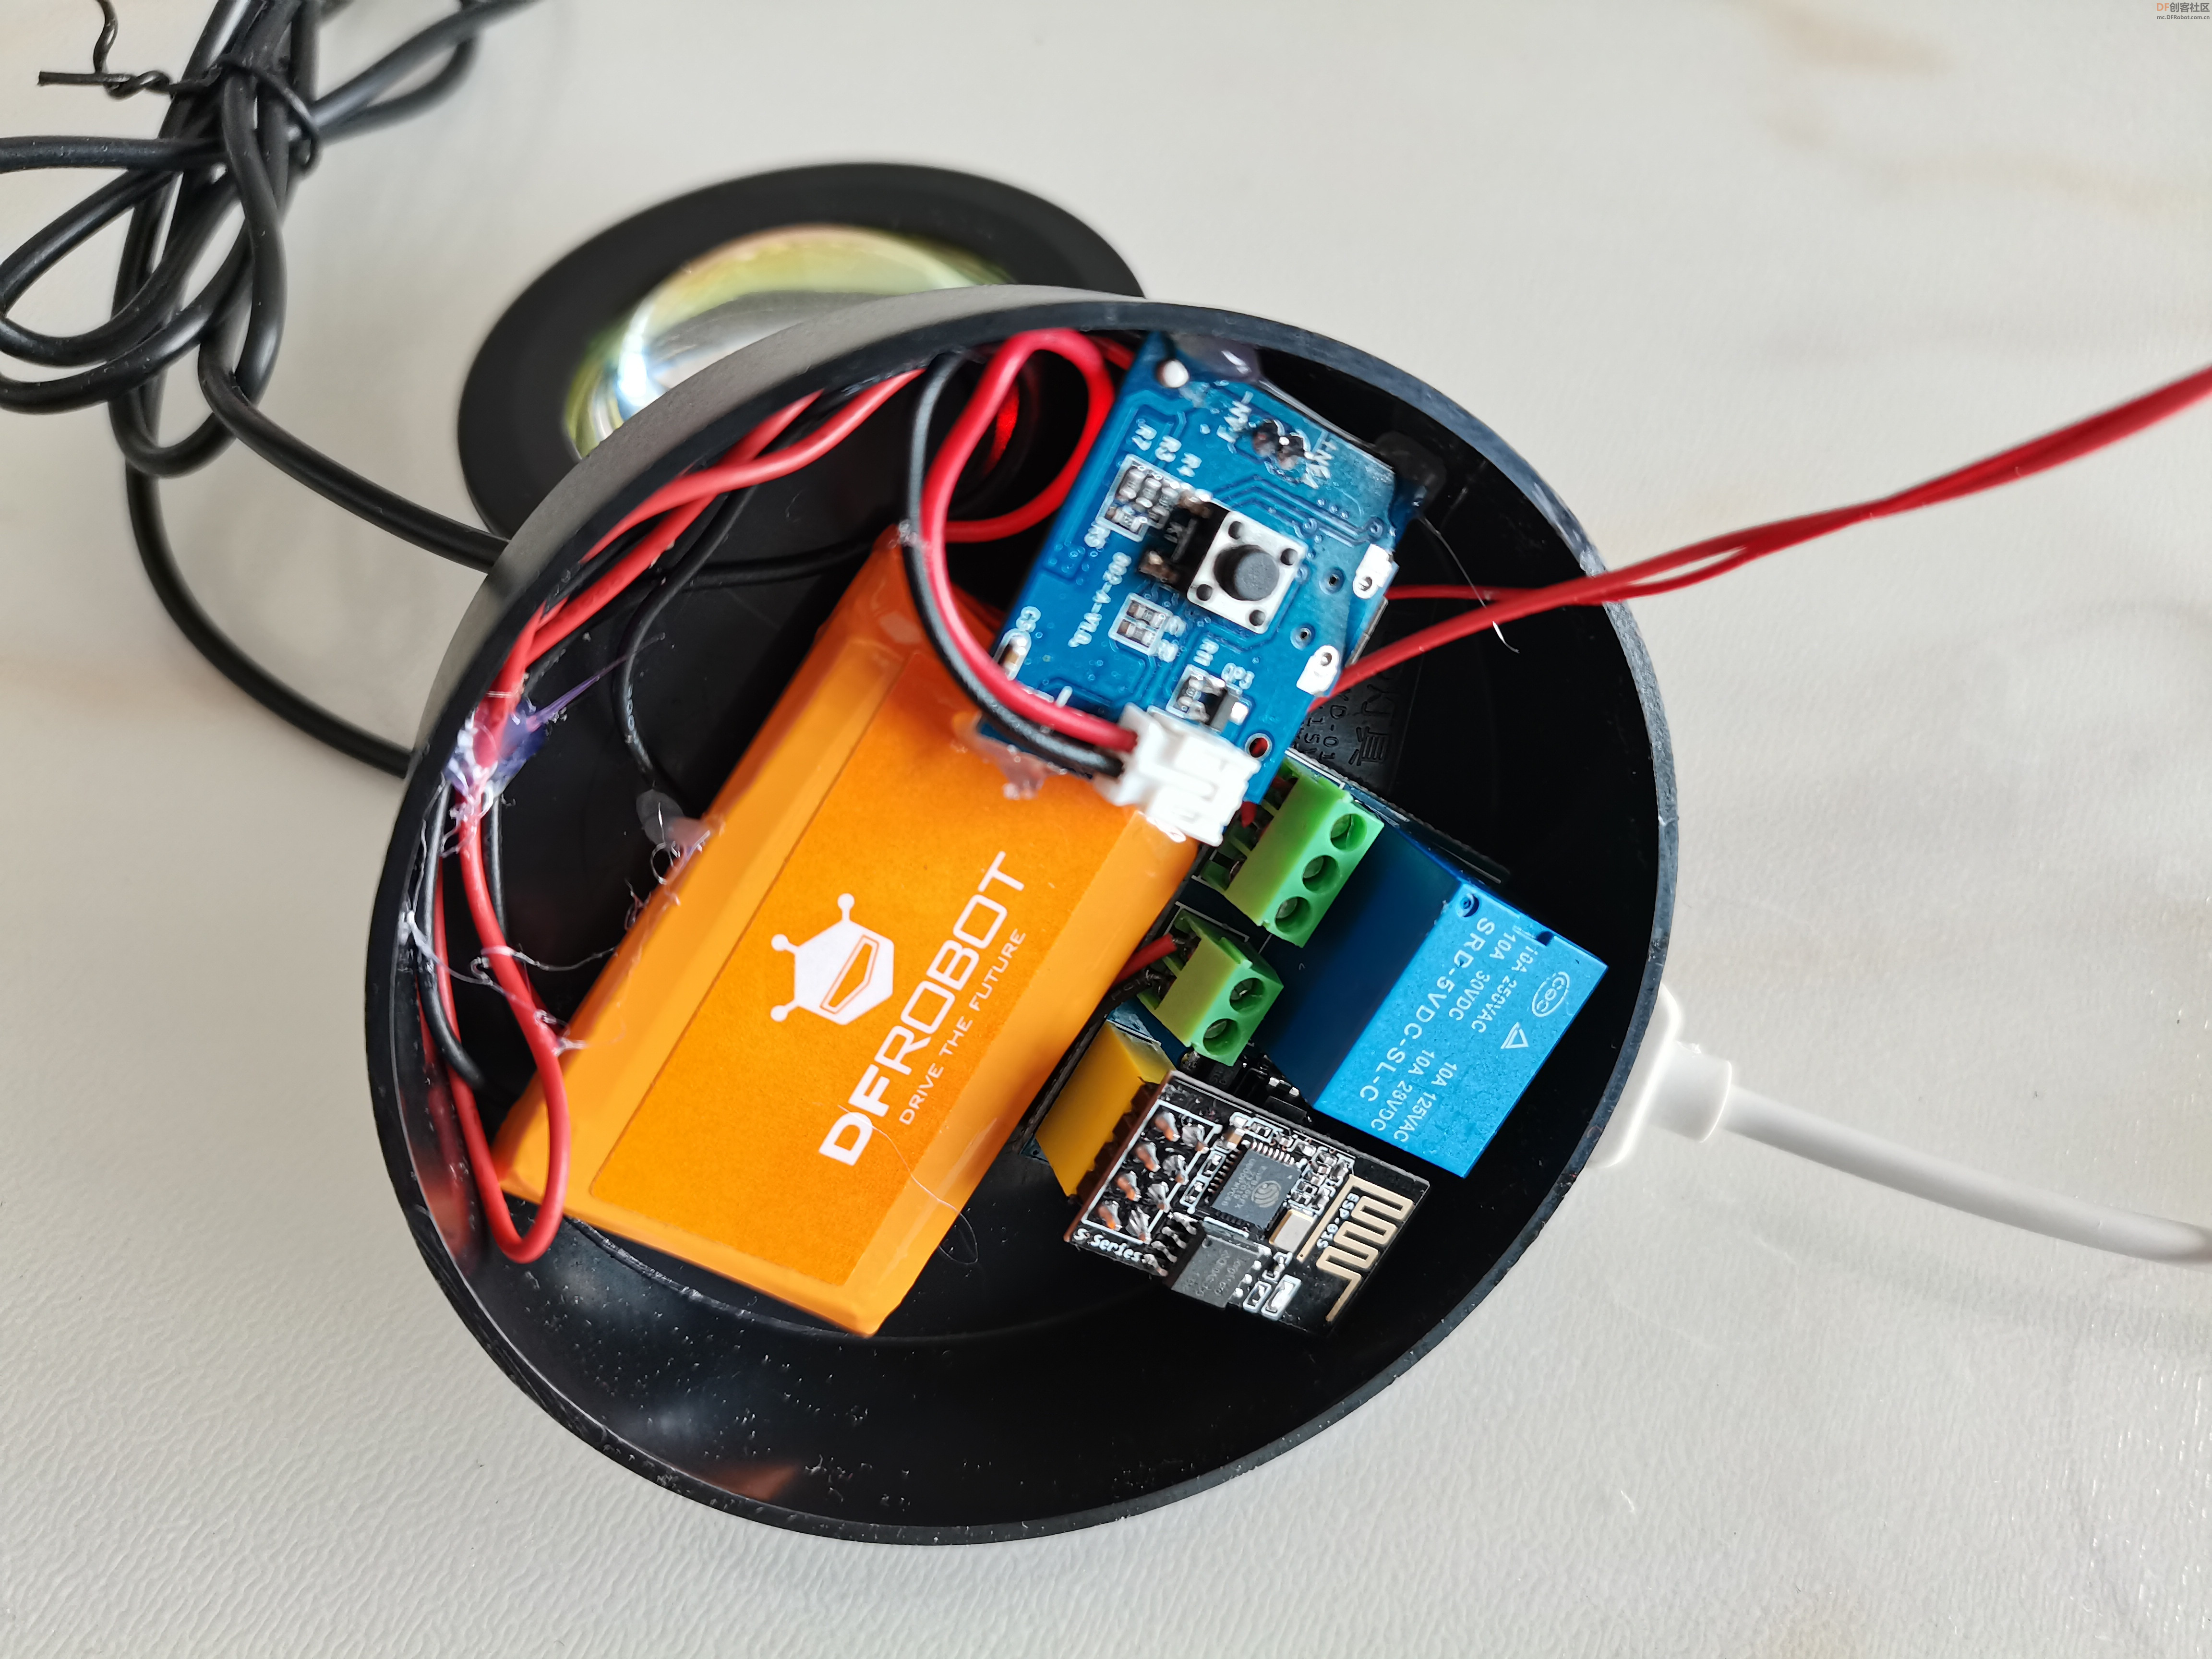
【硬件连接】
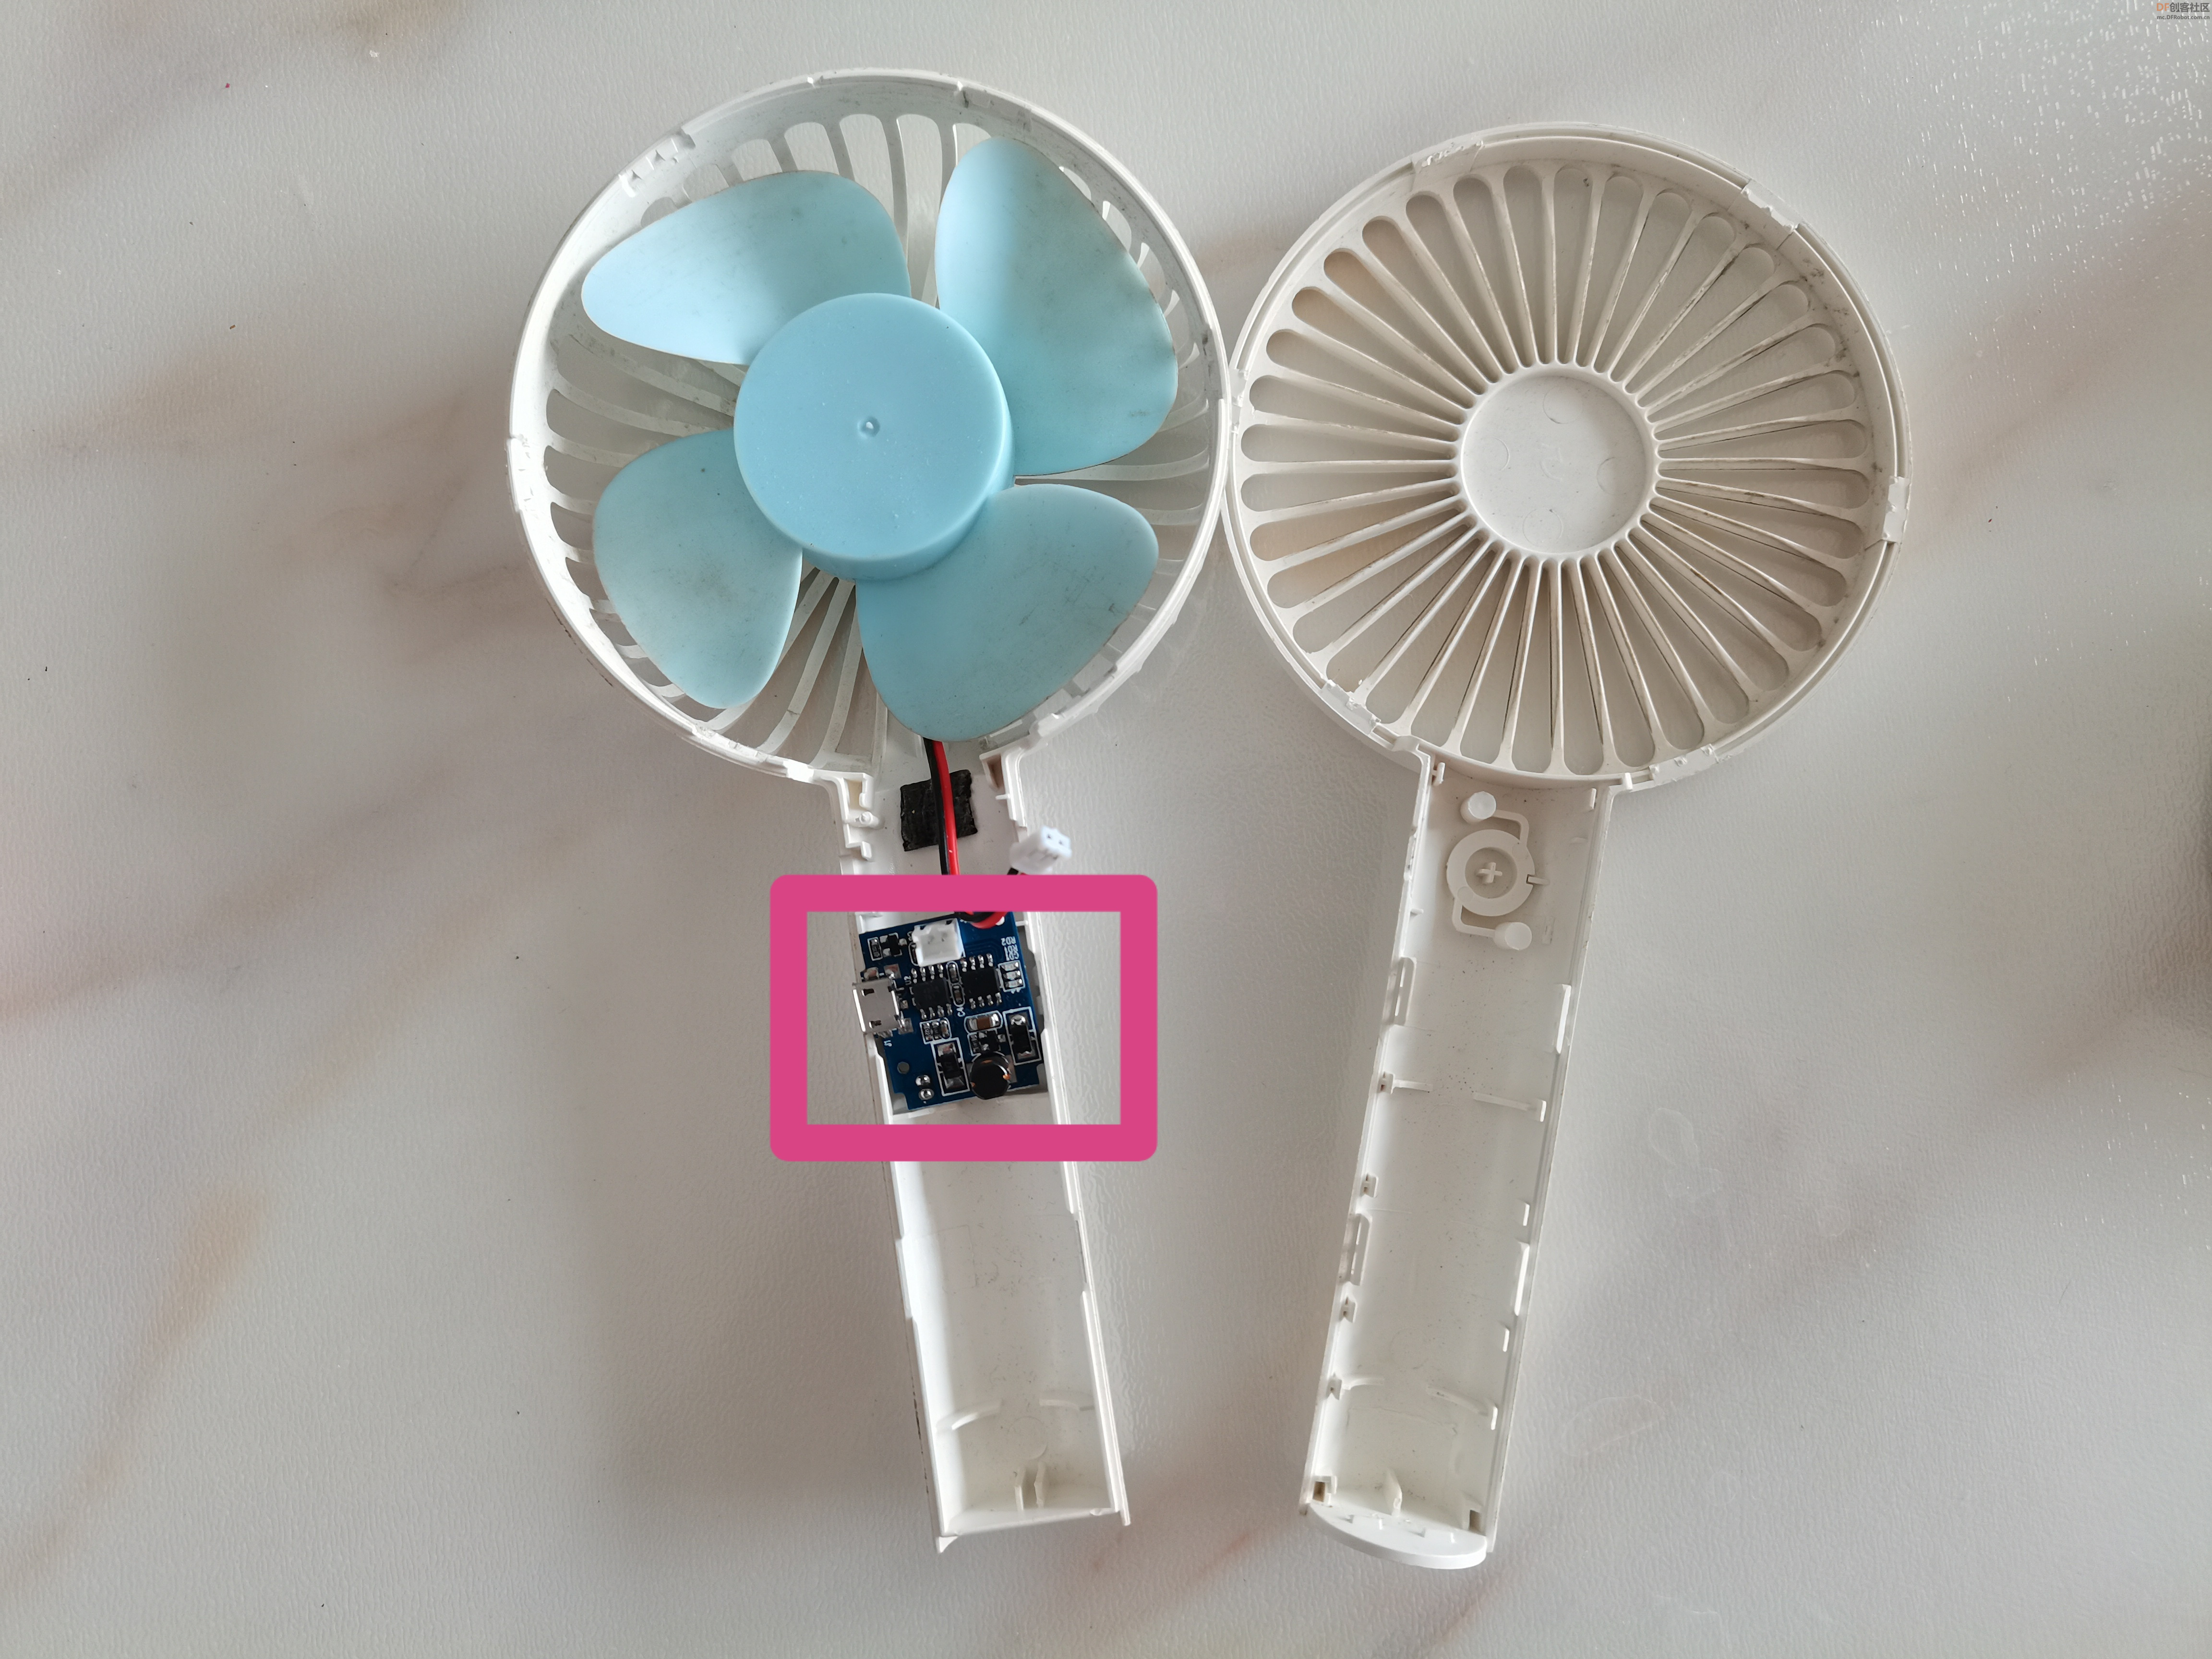
从旧风扇上拆下,变压模块,可由3.7V锂电池供电,升压到5-6V,可给ESP8266-01s继电器模块供电。
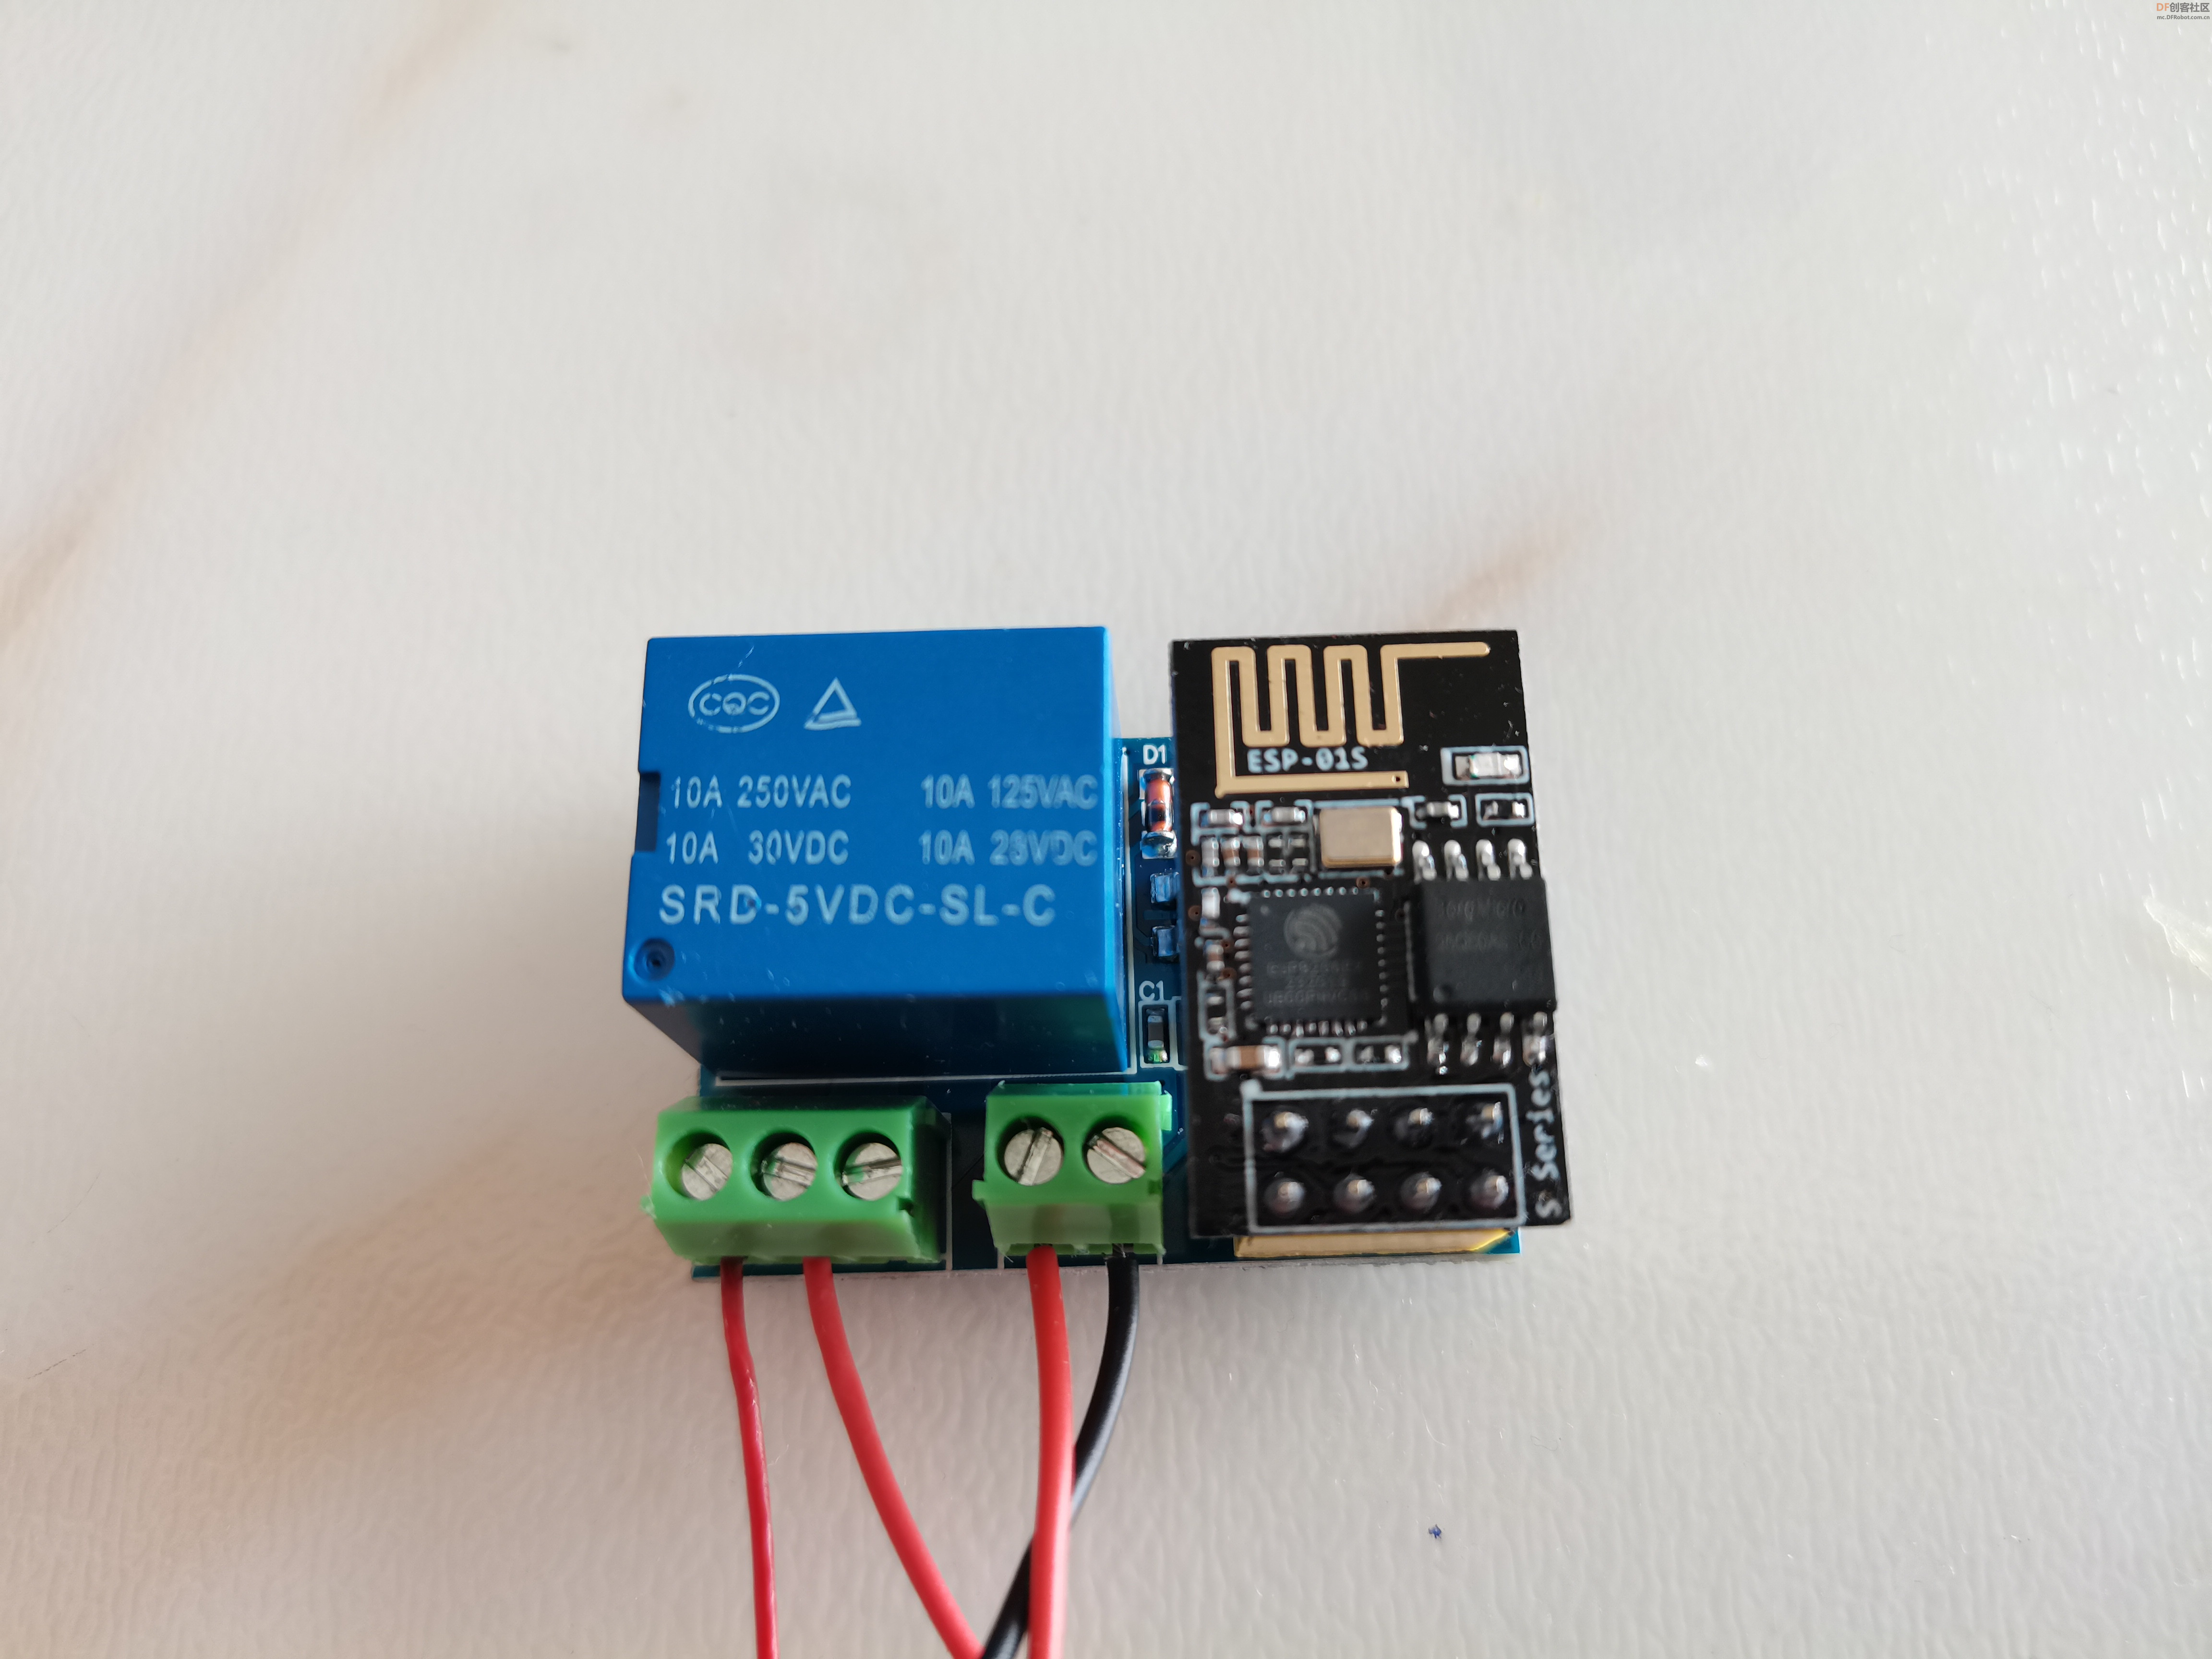
将ESP8266-01s插在继电器模块上
ESP8266-01s继电器模块供电
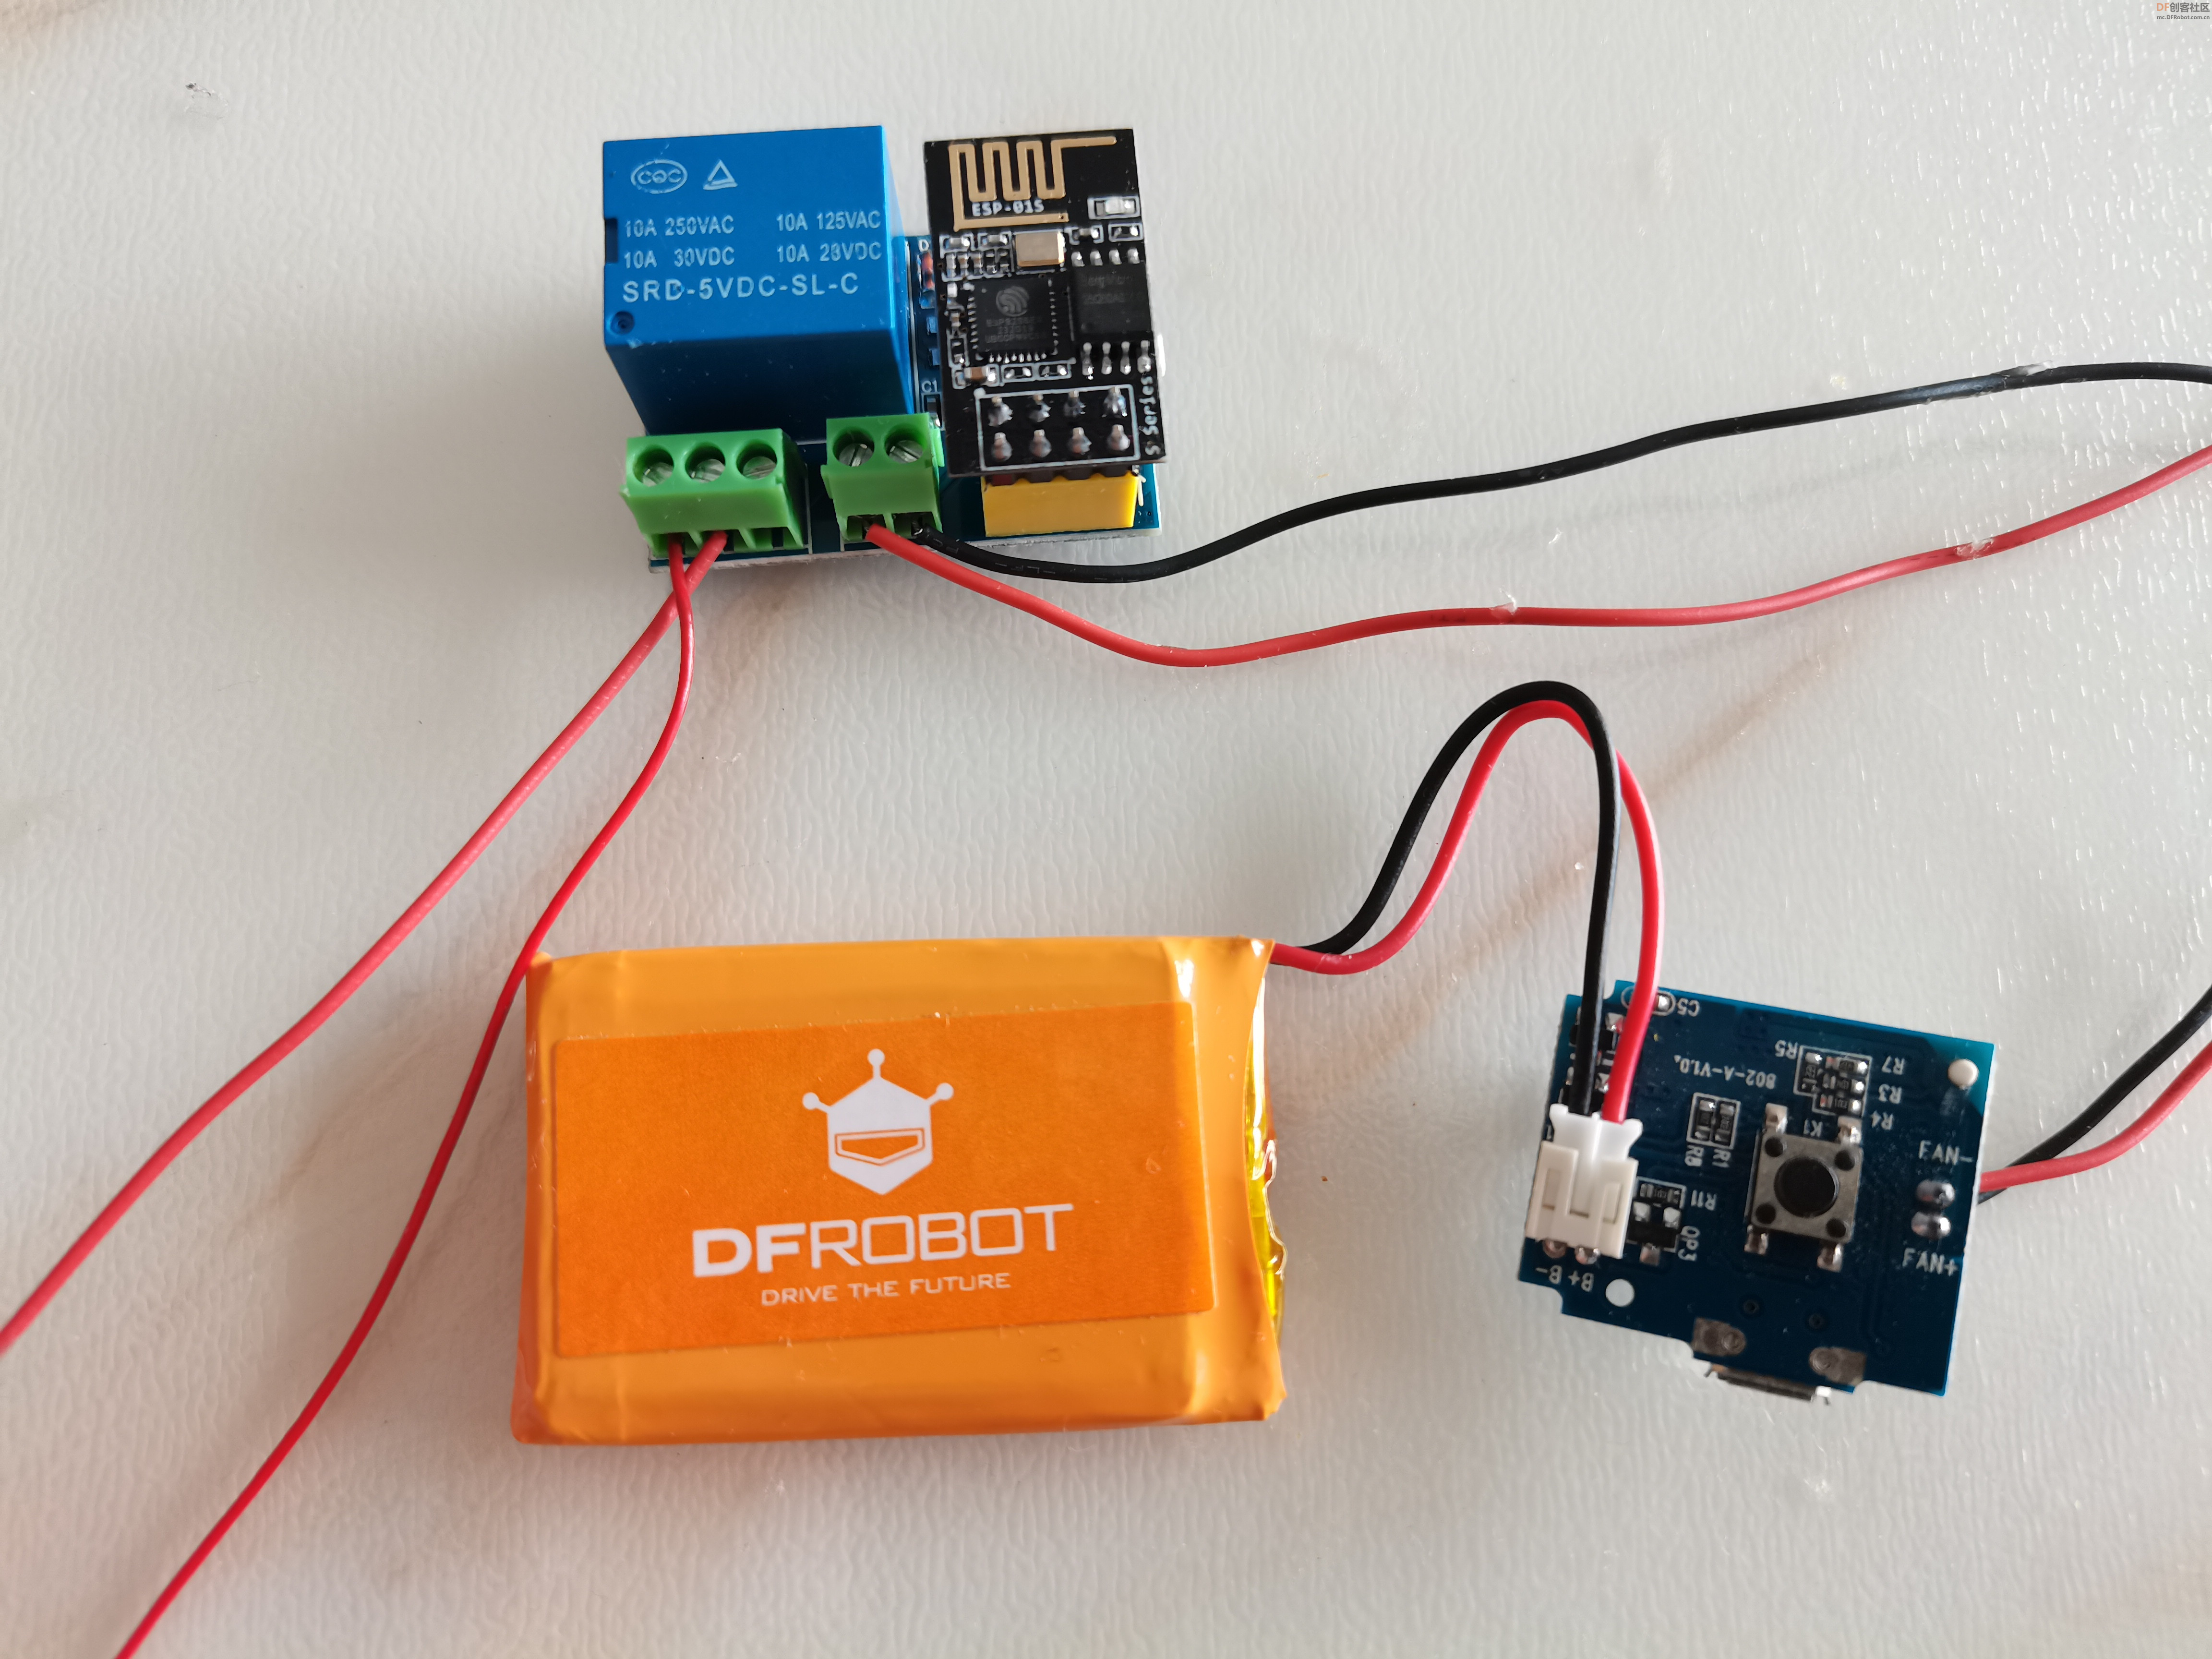
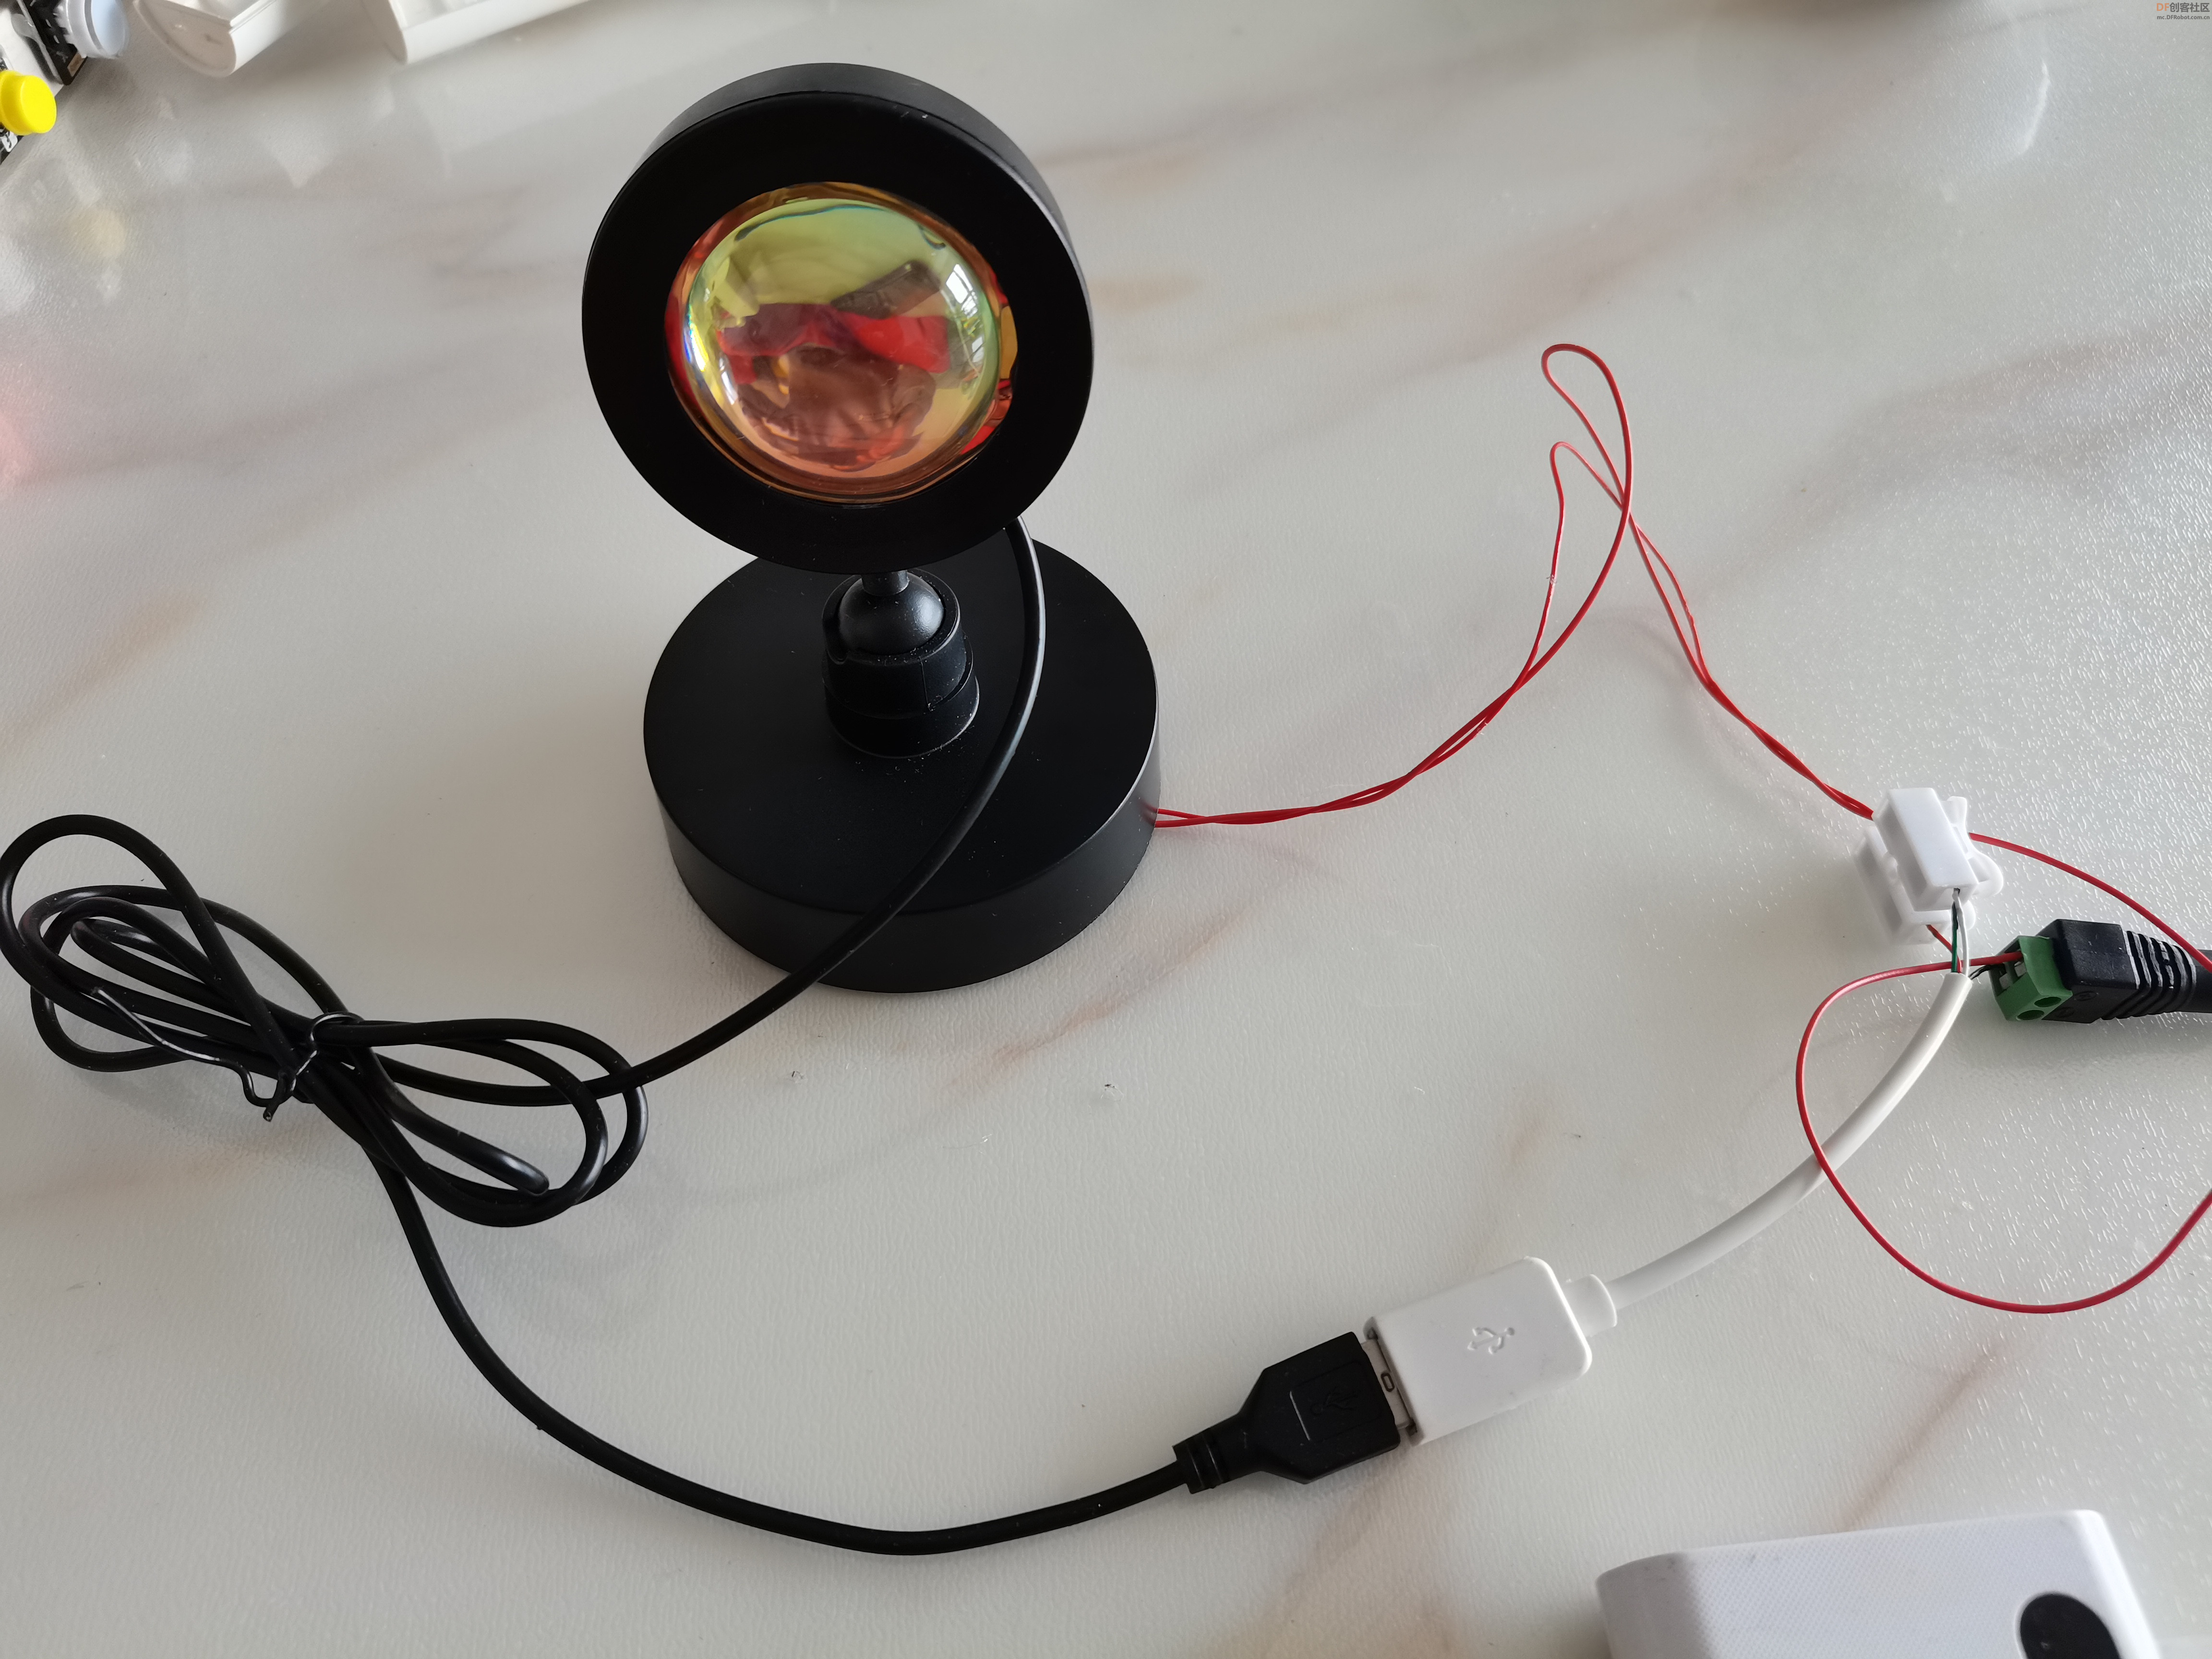
背景灯供电路与继电器连接

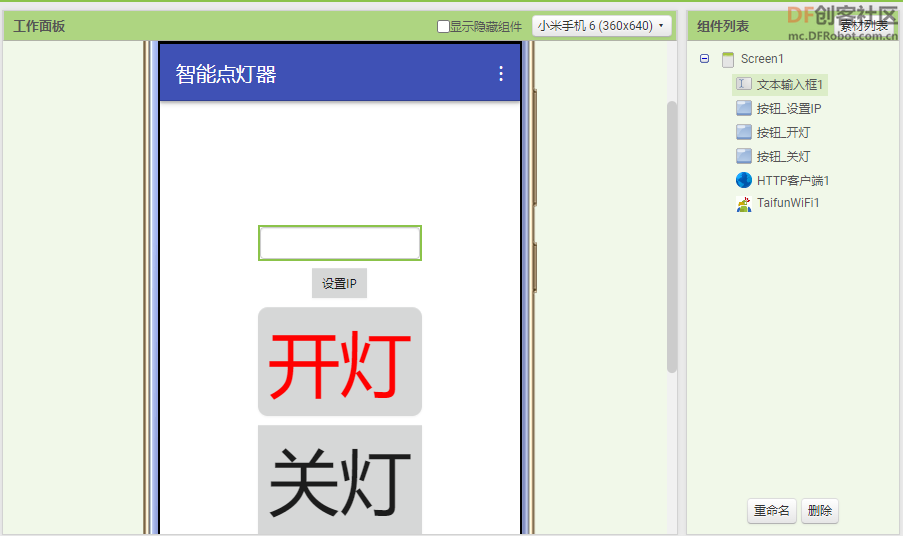
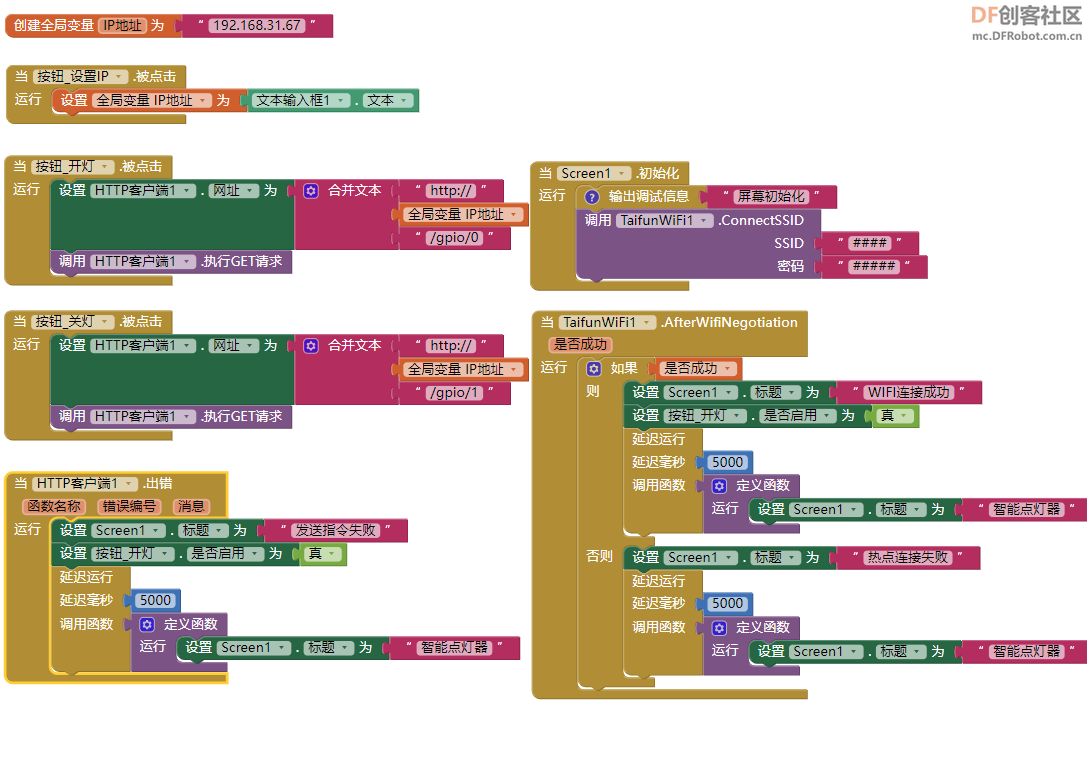
【APP Inventor2程序】
界面设计
逻辑设计
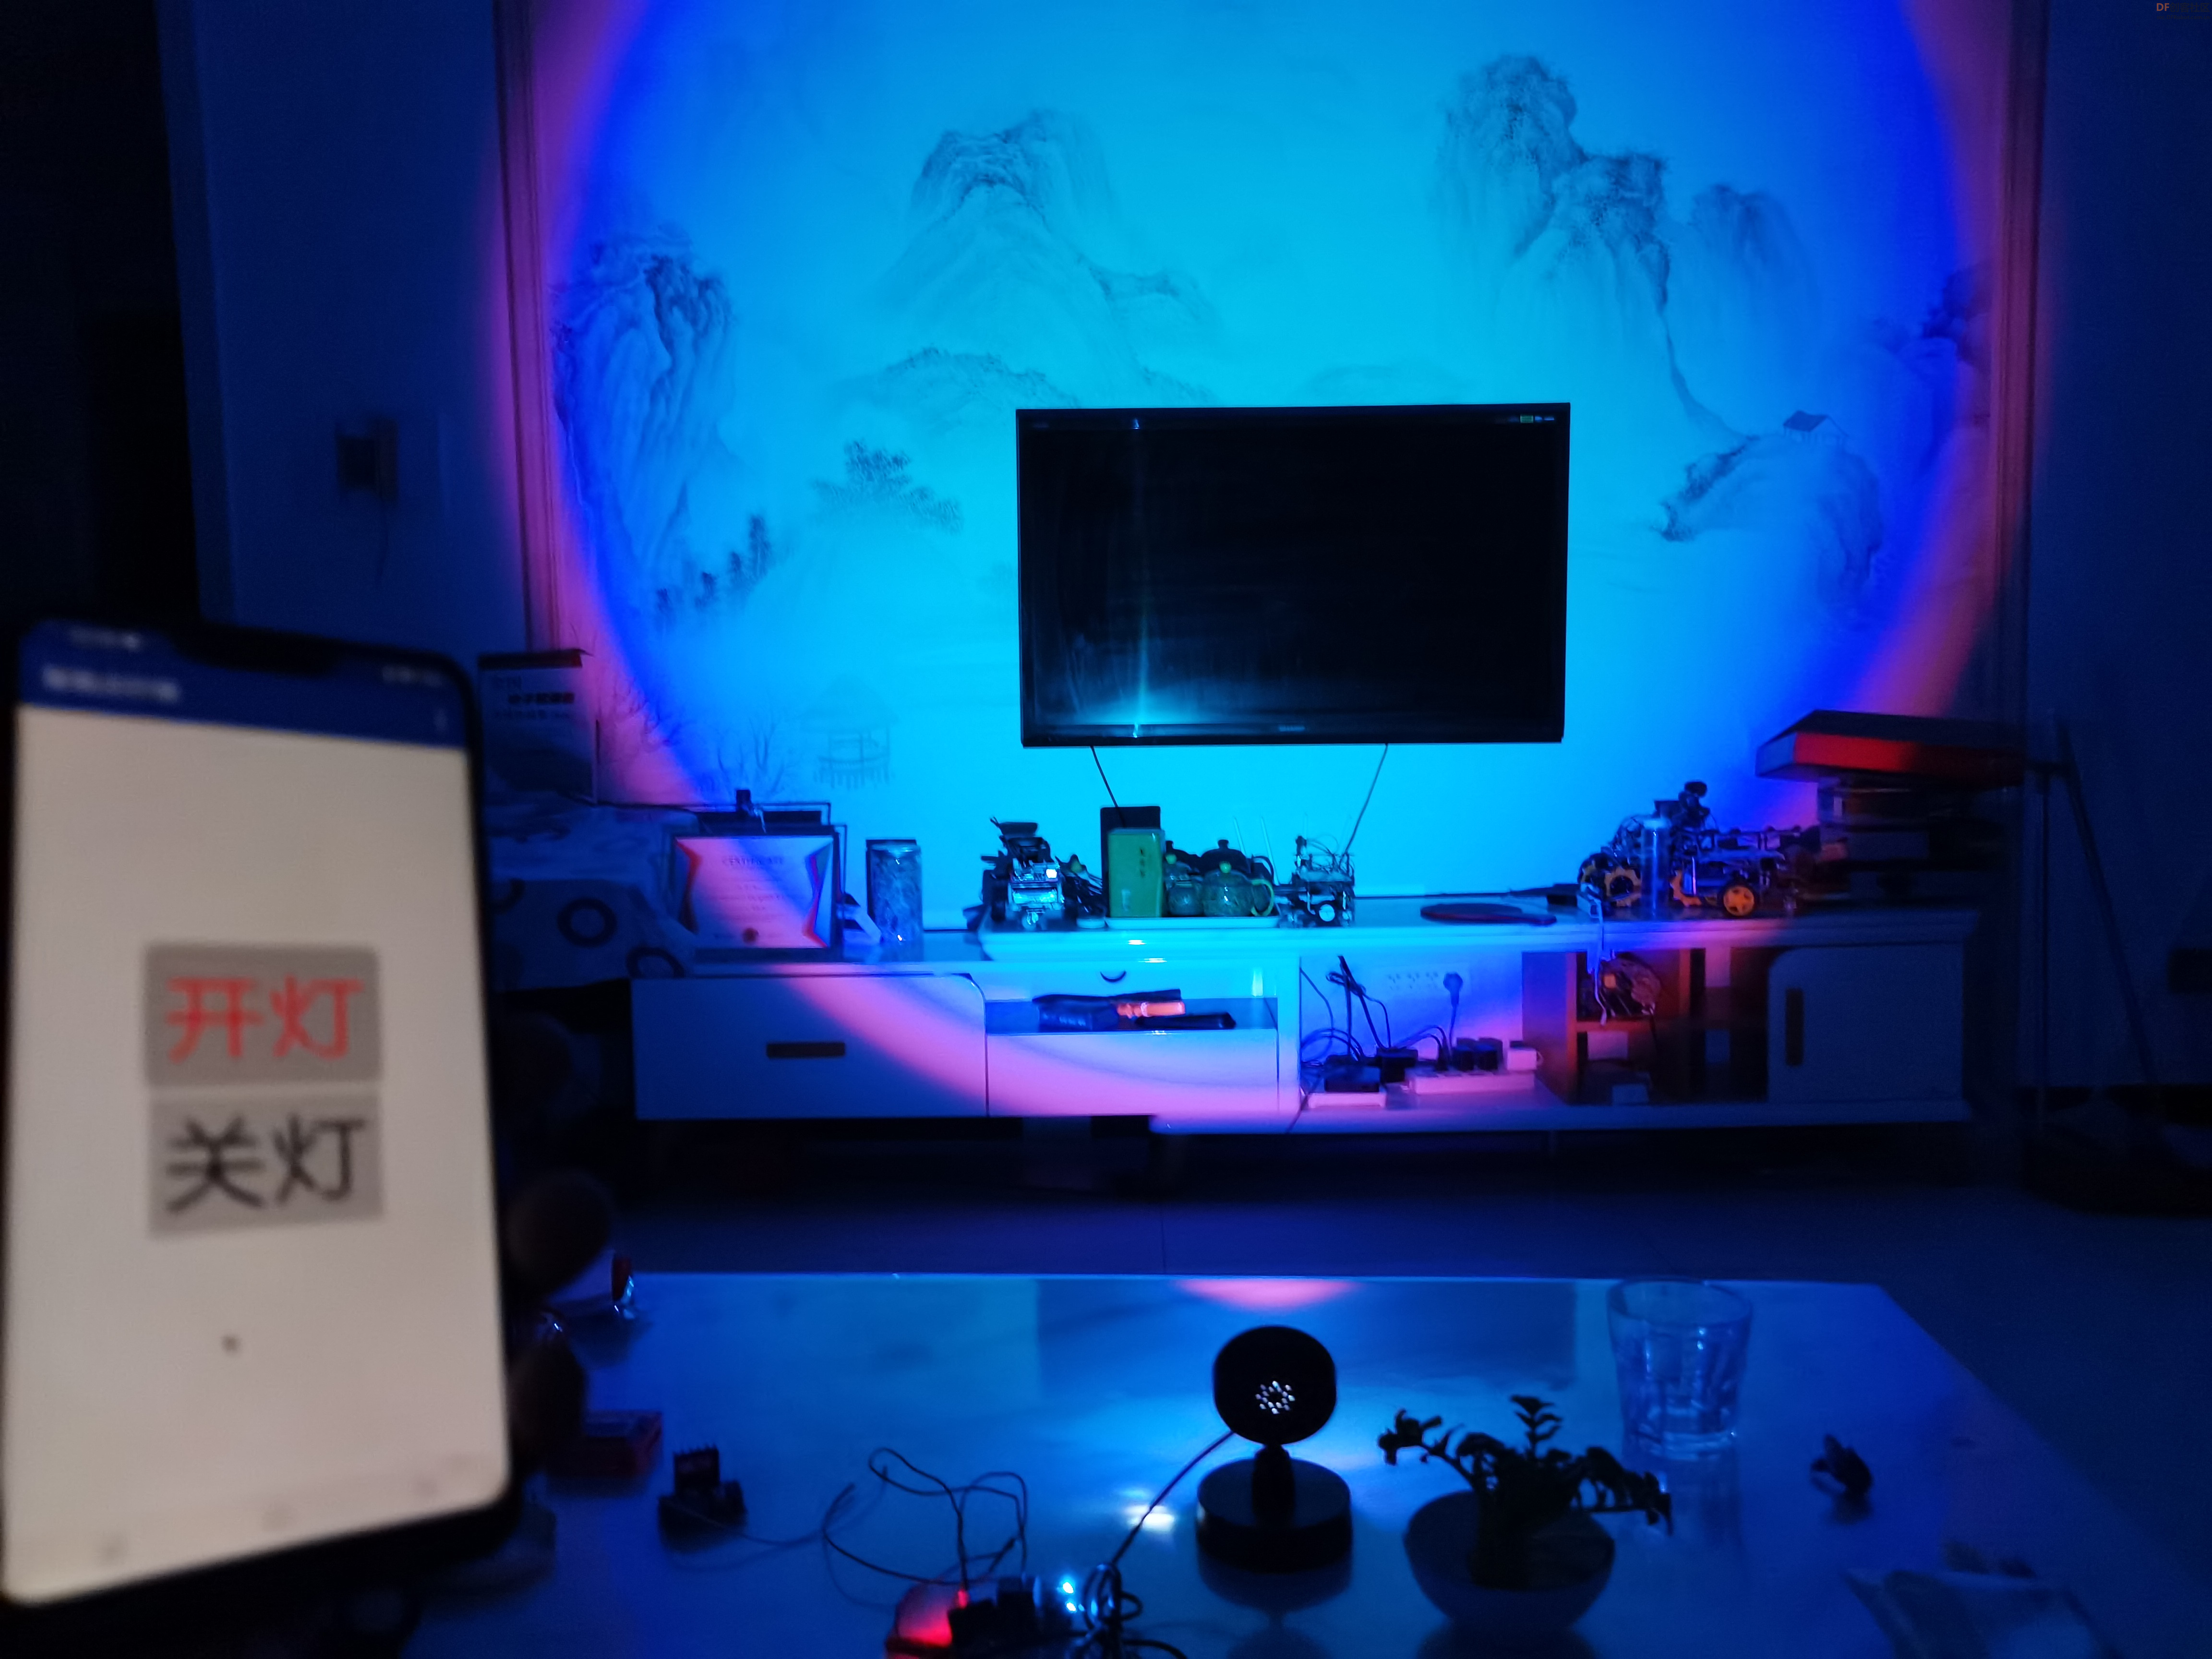
【App控制演示视频】
【组装灯】
| 


 沪公网安备31011502402448
 置顶卡
置顶卡 变色卡
变色卡 千斤顶
千斤顶

 活跃会员
活跃会员
 宣传大使
宣传大使
 牛X认证
牛X认证
 创客造
创客造
 编辑选择奖
编辑选择奖
 志“童”道合
 编辑选择奖
编辑选择奖
 编辑选择奖
编辑选择奖
 编辑选择奖
编辑选择奖
 编辑选择奖
编辑选择奖


