本帖最后由 kylinpoet 于 2023-9-6 08:15 编辑
一:初识产品
1. 实物图
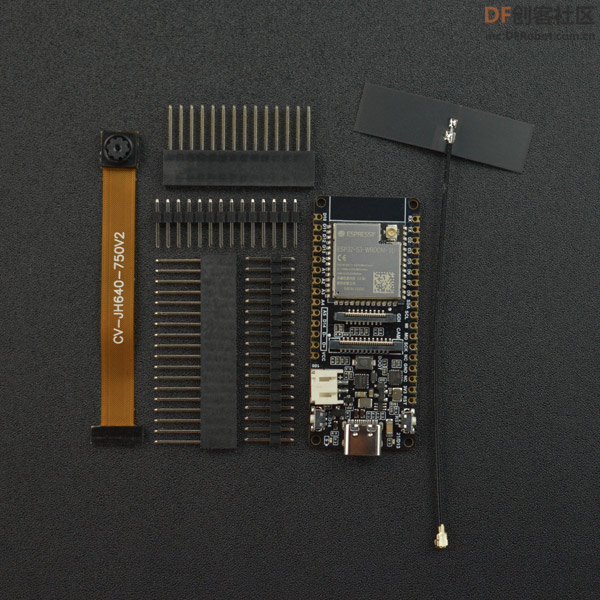
产品使用的芯片是:ESP32-S3-WROOM-1-N16R8,起初我对名字很感兴趣,我们可以发现,DF的商城里,有ESP32-S3 和 ESP32-S3-U 的区别,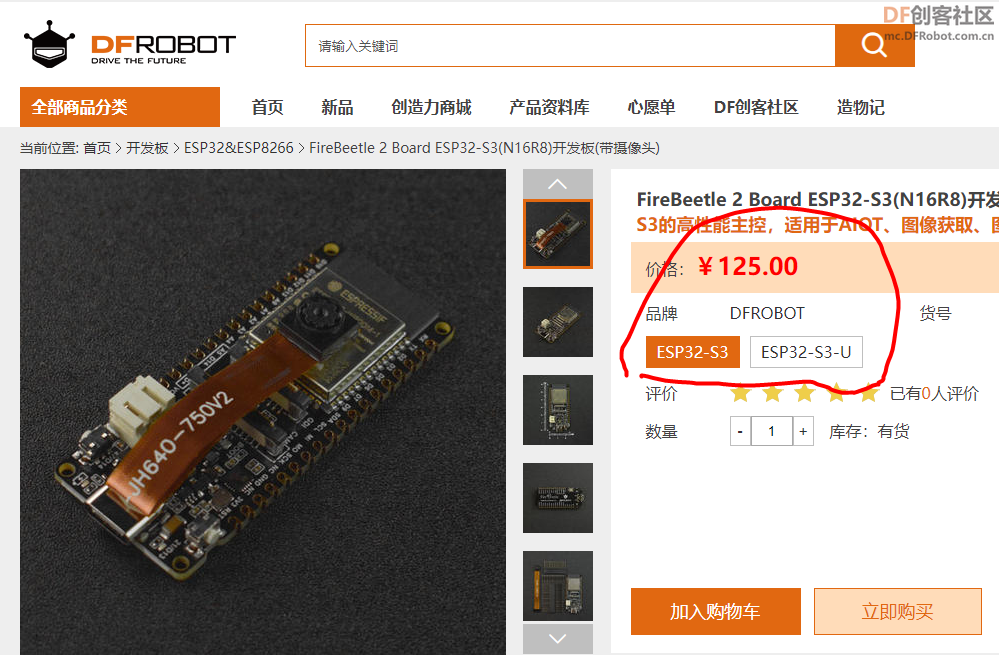
查了下资料,区别主要是:
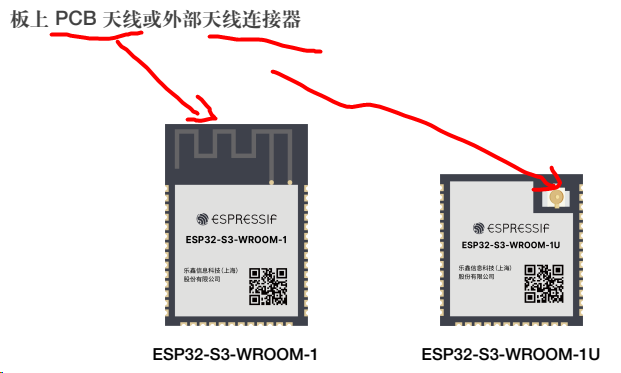
有外部天线连接器的,应该信号会好点。
N16R8 应该是指:16MB Flash和8MB PSRAM,但 WROOM 是什么鬼? google一圈好像只是命名而已,但具体是什么意思呢?希望DF的攻城狮帮忙解答下{:6_204:}
2. 产品文档
作为一个程序员(非标),虽然极不喜欢写产品文档,但是却要求别人的产品文档要好看、实用。所幸发现DF的产品文档还是比较丰富的。
https://wiki.dfrobot.com.cn/_SKU_DFR0975_FireBeetle_2_Board_ESP32_S3
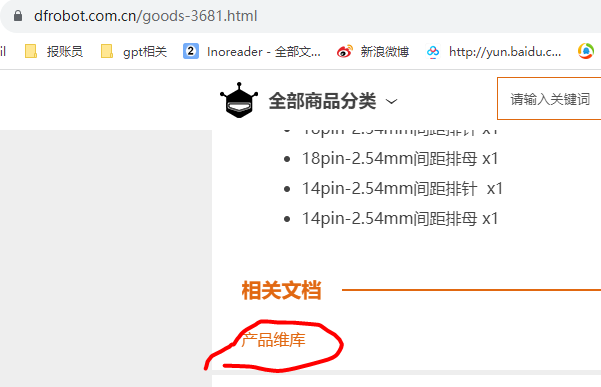
一般在DF商城的产品介绍最下面,会看到 产品维库 的字样:
二:产品初体验
因为ESP芯片的特殊性,首先需要配置开发环境。
1. Arduino开发环境配置
1.1 ESP32开发包的问题
因为ESP32的[开发板管理器](https://raw.githubusercontent.com/espressif/arduino-esp32/gh-pages/package_esp32_index.json)网址,很多人不能直接访问。因此,首要问题是如何解决ESP32开发包的配置问题。
1.1.1 不可描述访问法
因为是不可描述网络连接的访问法,这里就不展开讲了。懂得都懂(手动狗头)
1.1.2 修改hosts地址法
主要是https://raw.githubusercontent.com/的域名解析,百度之或者直接 修改 hosts 文件添加:
185.199.109.133 raw.githubusercontent.com
然后就可以愉快下载开发包了。
1.1.3 开发包本地安装
请看一下文章:
https://www.arduino.cn/thread-81194-1-1.html
1.2 Arduino开发设置
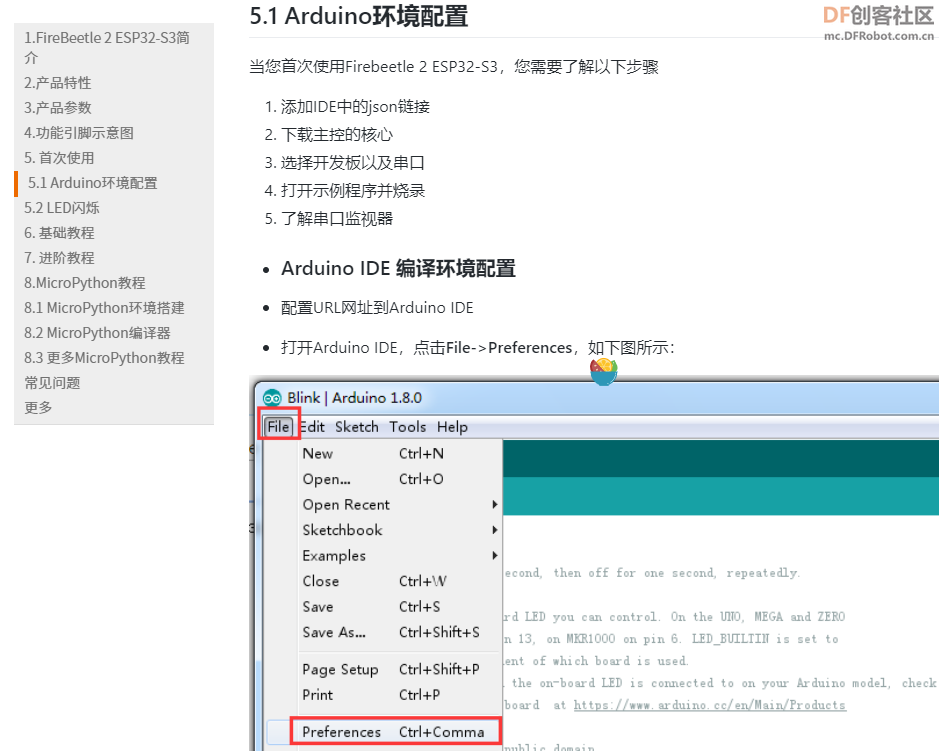
具体配置:在产品维库里都有介绍,这里就不展开讲了:
https://wiki.dfrobot.com.cn/_SKU_DFR0975_FireBeetle_2_Board_ESP32_S3#target_5
1.3 点亮板子才是第一步
这不是点灯贴,但是点灯才是最开心的事,插入TypeC连接线后,我们会发现两盏灯闪烁:
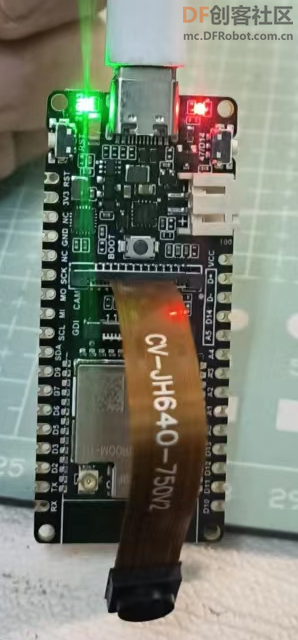 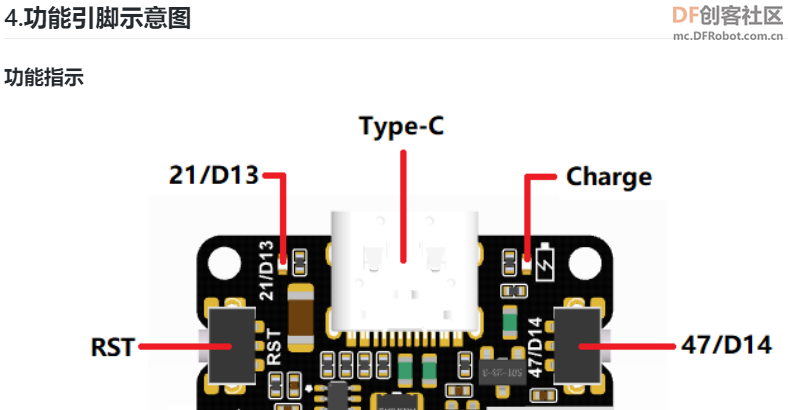
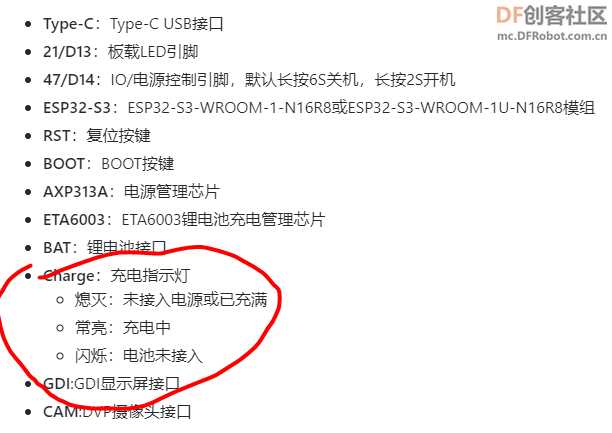
通过查阅示意图,我们会发现,绿灯是板载灯的默认程序,红灯是没有接入充电电池,可以不用理它。
修改实例代码,让灯常亮:
- int led = 21;
- void setup() {
- pinMode(led,OUTPUT);
- digitalWrite(led,HIGH);
- }
-
- void loop() {
-
- }
我们可以看到,程序处理正常:
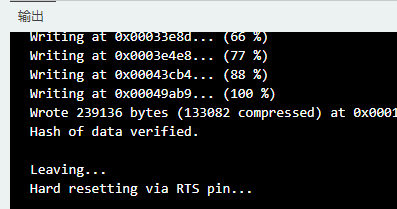
另外我们还注意到,这块板子上,自带了一个按钮。这是一件很舒服的事情。灯和开关都有了,我们直接写个代码,用这个按钮来控制灯。
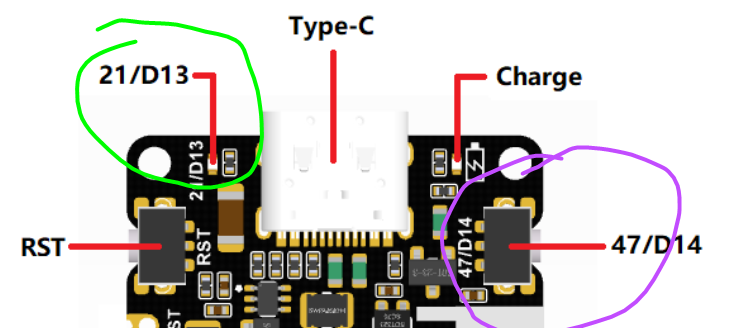
[indent]int led = 21;[indent]int button = 47;[indent]void setup() {
 pinMode(led,OUTPUT);[indent]pinMode(button ,PULL_UP);
 digitalWrite(led,HIGH);
}

void loop() {
 digitalWrite(led,digitalRead(button));[indent]}
这里为了演示,没有实现开关功能,直接高低电位控制了。这样,可以用这块板实现一个简单的闭环了。
三:稍微进阶
作为ESP32-S3的芯片,怎能没有WIFI+摄像头功能呢,我们可以直接使用ESP32库的实例,来体验下:
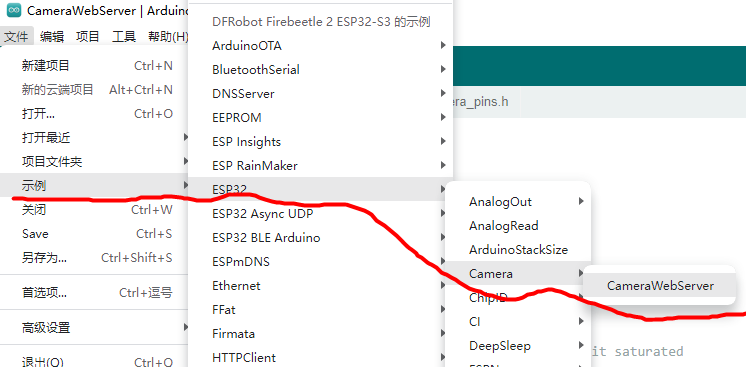
这里要注意的是,有几个地方要修改下:
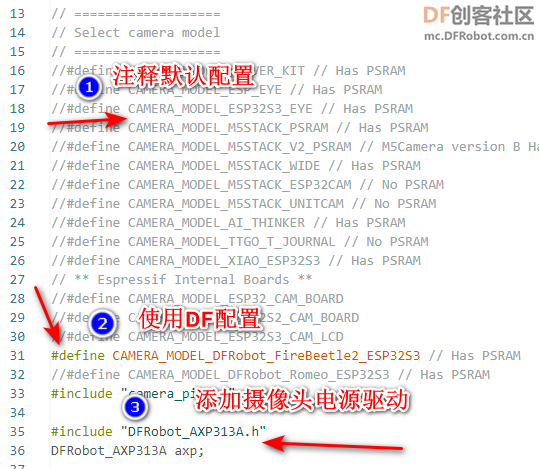
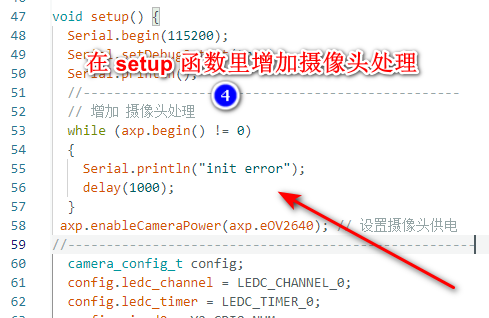
在此下载电源库,并导入
https://github.com/cdjq/DFRobot_AXP313A#installation
打开串口,看到,
WiFi connected
Camera Ready! Use 'http://192.168.6.219' to connect
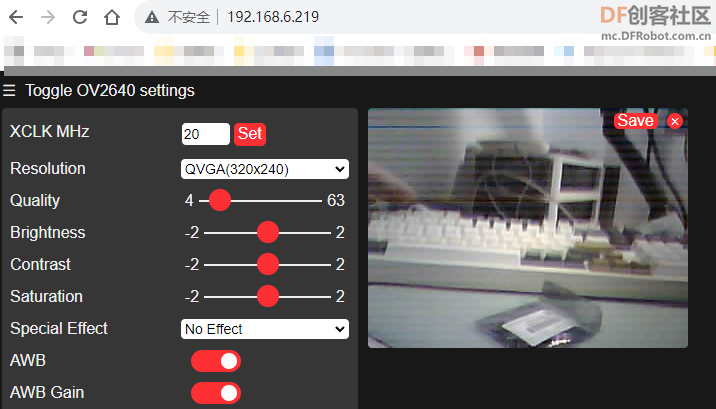
Bingo!
除了摄像头,我们可以直接让这块板子,作为一个简单的web服务器,控制板载灯的关或开:
- #include <WiFi.h>
-
- const char* ssid = "***";
- const char* password = "***";
- int LED = 21;
- WiFiServer server(80);
-
- void setup()
- {
- Serial.begin(115200);
- pinMode(LED, OUTPUT); // set the LED pin mode
-
- delay(10);
-
- // We start by connecting to a WiFi network
-
- Serial.println();
- Serial.println();
- Serial.print("Connecting to ");
- Serial.println(ssid);
-
- WiFi.begin(ssid, password);
-
- while (WiFi.status() != WL_CONNECTED) {
- delay(500);
- Serial.print(".");
- }
-
- Serial.println("");
- Serial.println("WiFi connected.");
- Serial.println("IP address: ");
- Serial.println(WiFi.localIP());
-
- server.begin();
-
- }
-
- void loop(){
- WiFiClient client = server.available(); // listen for incoming clients
-
- if (client) { // if you get a client,
- Serial.println("New Client."); // print a message out the serial port
- String currentLine = ""; // make a String to hold incoming data from the client
- while (client.connected()) { // loop while the client's connected
- if (client.available()) { // if there's bytes to read from the client,
- char c = client.read(); // read a byte, then
- Serial.write(c); // print it out the serial monitor
- if (c == '\n') { // if the byte is a newline character
-
- // if the current line is blank, you got two newline characters in a row.
- // that's the end of the client HTTP request, so send a response:
- if (currentLine.length() == 0) {
- // HTTP headers always start with a response code (e.g. HTTP/1.1 200 OK)
- // and a content-type so the client knows what's coming, then a blank line:
- client.println("HTTP/1.1 200 OK");
- client.println("Content-type:text/html");
- client.println();
-
- // the content of the HTTP response follows the header:
- client.print("Click <a href="/H">here</a> to turn the LED on pin 21 on.<br>");
- client.print("Click <a href="/L">here</a> to turn the LED on pin 21 off.<br>");
-
- // The HTTP response ends with another blank line:
- client.println();
- // break out of the while loop:
- break;
- } else { // if you got a newline, then clear currentLine:
- currentLine = "";
- }
- } else if (c != '\r') { // if you got anything else but a carriage return character,
- currentLine += c; // add it to the end of the currentLine
- }
-
- // Check to see if the client request was "GET /H" or "GET /L":
- if (currentLine.endsWith("GET /H")) {
- digitalWrite(LED, HIGH); // GET /H turns the LED on
- }
- if (currentLine.endsWith("GET /L")) {
- digitalWrite(LED, LOW); // GET /L turns the LED off
- }
- }
- }
- // close the connection:
- client.stop();
- Serial.println("Client Disconnected.");
- }
- }
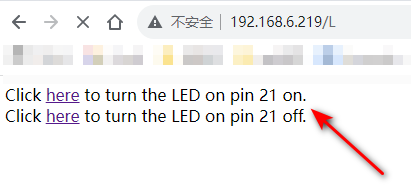
当我们点击相应的地方时,就可以控制灯了。
四:总结
我们可以看到,这块FireBeetle 2 ESP32-S3的板子,操作起来还是相当丝滑的。不过因为是ESP32的芯片,有可能操作起来熟悉的人,觉得简单;不熟悉的人还是觉得有点复杂的,正所谓:如果你爱他,请让他用ESP32,因为它是天使;如果你恨他,请让他用ESP32,因为它是恶魔!
我们在下一篇中,使用 MicroPython 进行这块板子的测试,以及其它应用。
以上!
| 


 沪公网安备31011502402448