本帖最后由 云天 于 2023-12-24 21:06 编辑
【项目背景】
互联网时代,日新月异的技术更迭让大众的娱乐方式变得更加多元化。越来越多线上娱乐体验成为新潮流,出现了AI人像特效、VR游景点、可交互影视剧、元宇宙等。
想要通过照片看到以前的自己或者未来几十年后的自己,放在之前肯定是没有办法实现,但是现在随着科技进步,AI技术已经融入到生活中的方方面面甚至是角角落落,不管在哪一个领域都能够看到它的存在,图片修复软件也会在AI技术之下变得更加完善。通过各种不同的特效,能够将我们照片更换出不一样的风格,也能够一键将人带到60年之后,看一看未来的自己究竟长得什么样。
【项目设计】
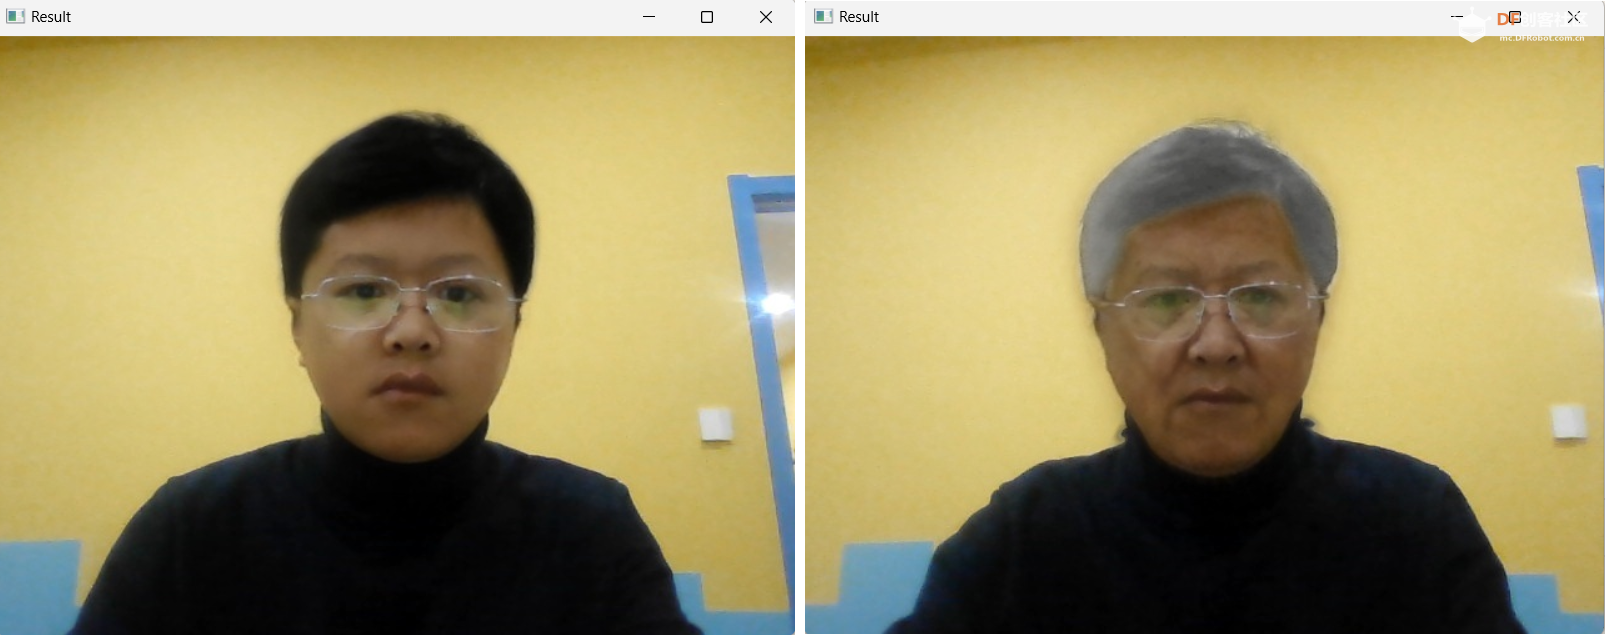
今天,我就用树莓派结合腾讯云AI人脸变换,把你带到未来,也能够把你带到以前。这主要是通过AI技术改变照片上人物的容貌而去推算出未来的自己将会变得怎么样。许多人在试用我这个项目特效之前,最初的意思是想看一看变老之后会是否依然美丽帅气,但是在体验的过程当中画风逐渐跑偏,很多人在看到自己变老后的样子被逗笑了,也有很多人看到之后被感动的哭的,有的朋友表示看到自己变老的照片,想到了自己已故的亲人。
通过智能识别照片中人的五官,然后一键能够改变照片中人物的年龄,甚至是6~85岁都能够看得到。下面请大家跟随我通过项目制作过程,踏上穿越的时光之旅,感受自己幼年到老年的变化。
【演示视频】
先上视频,看一下自测试效果。
【硬件设备】
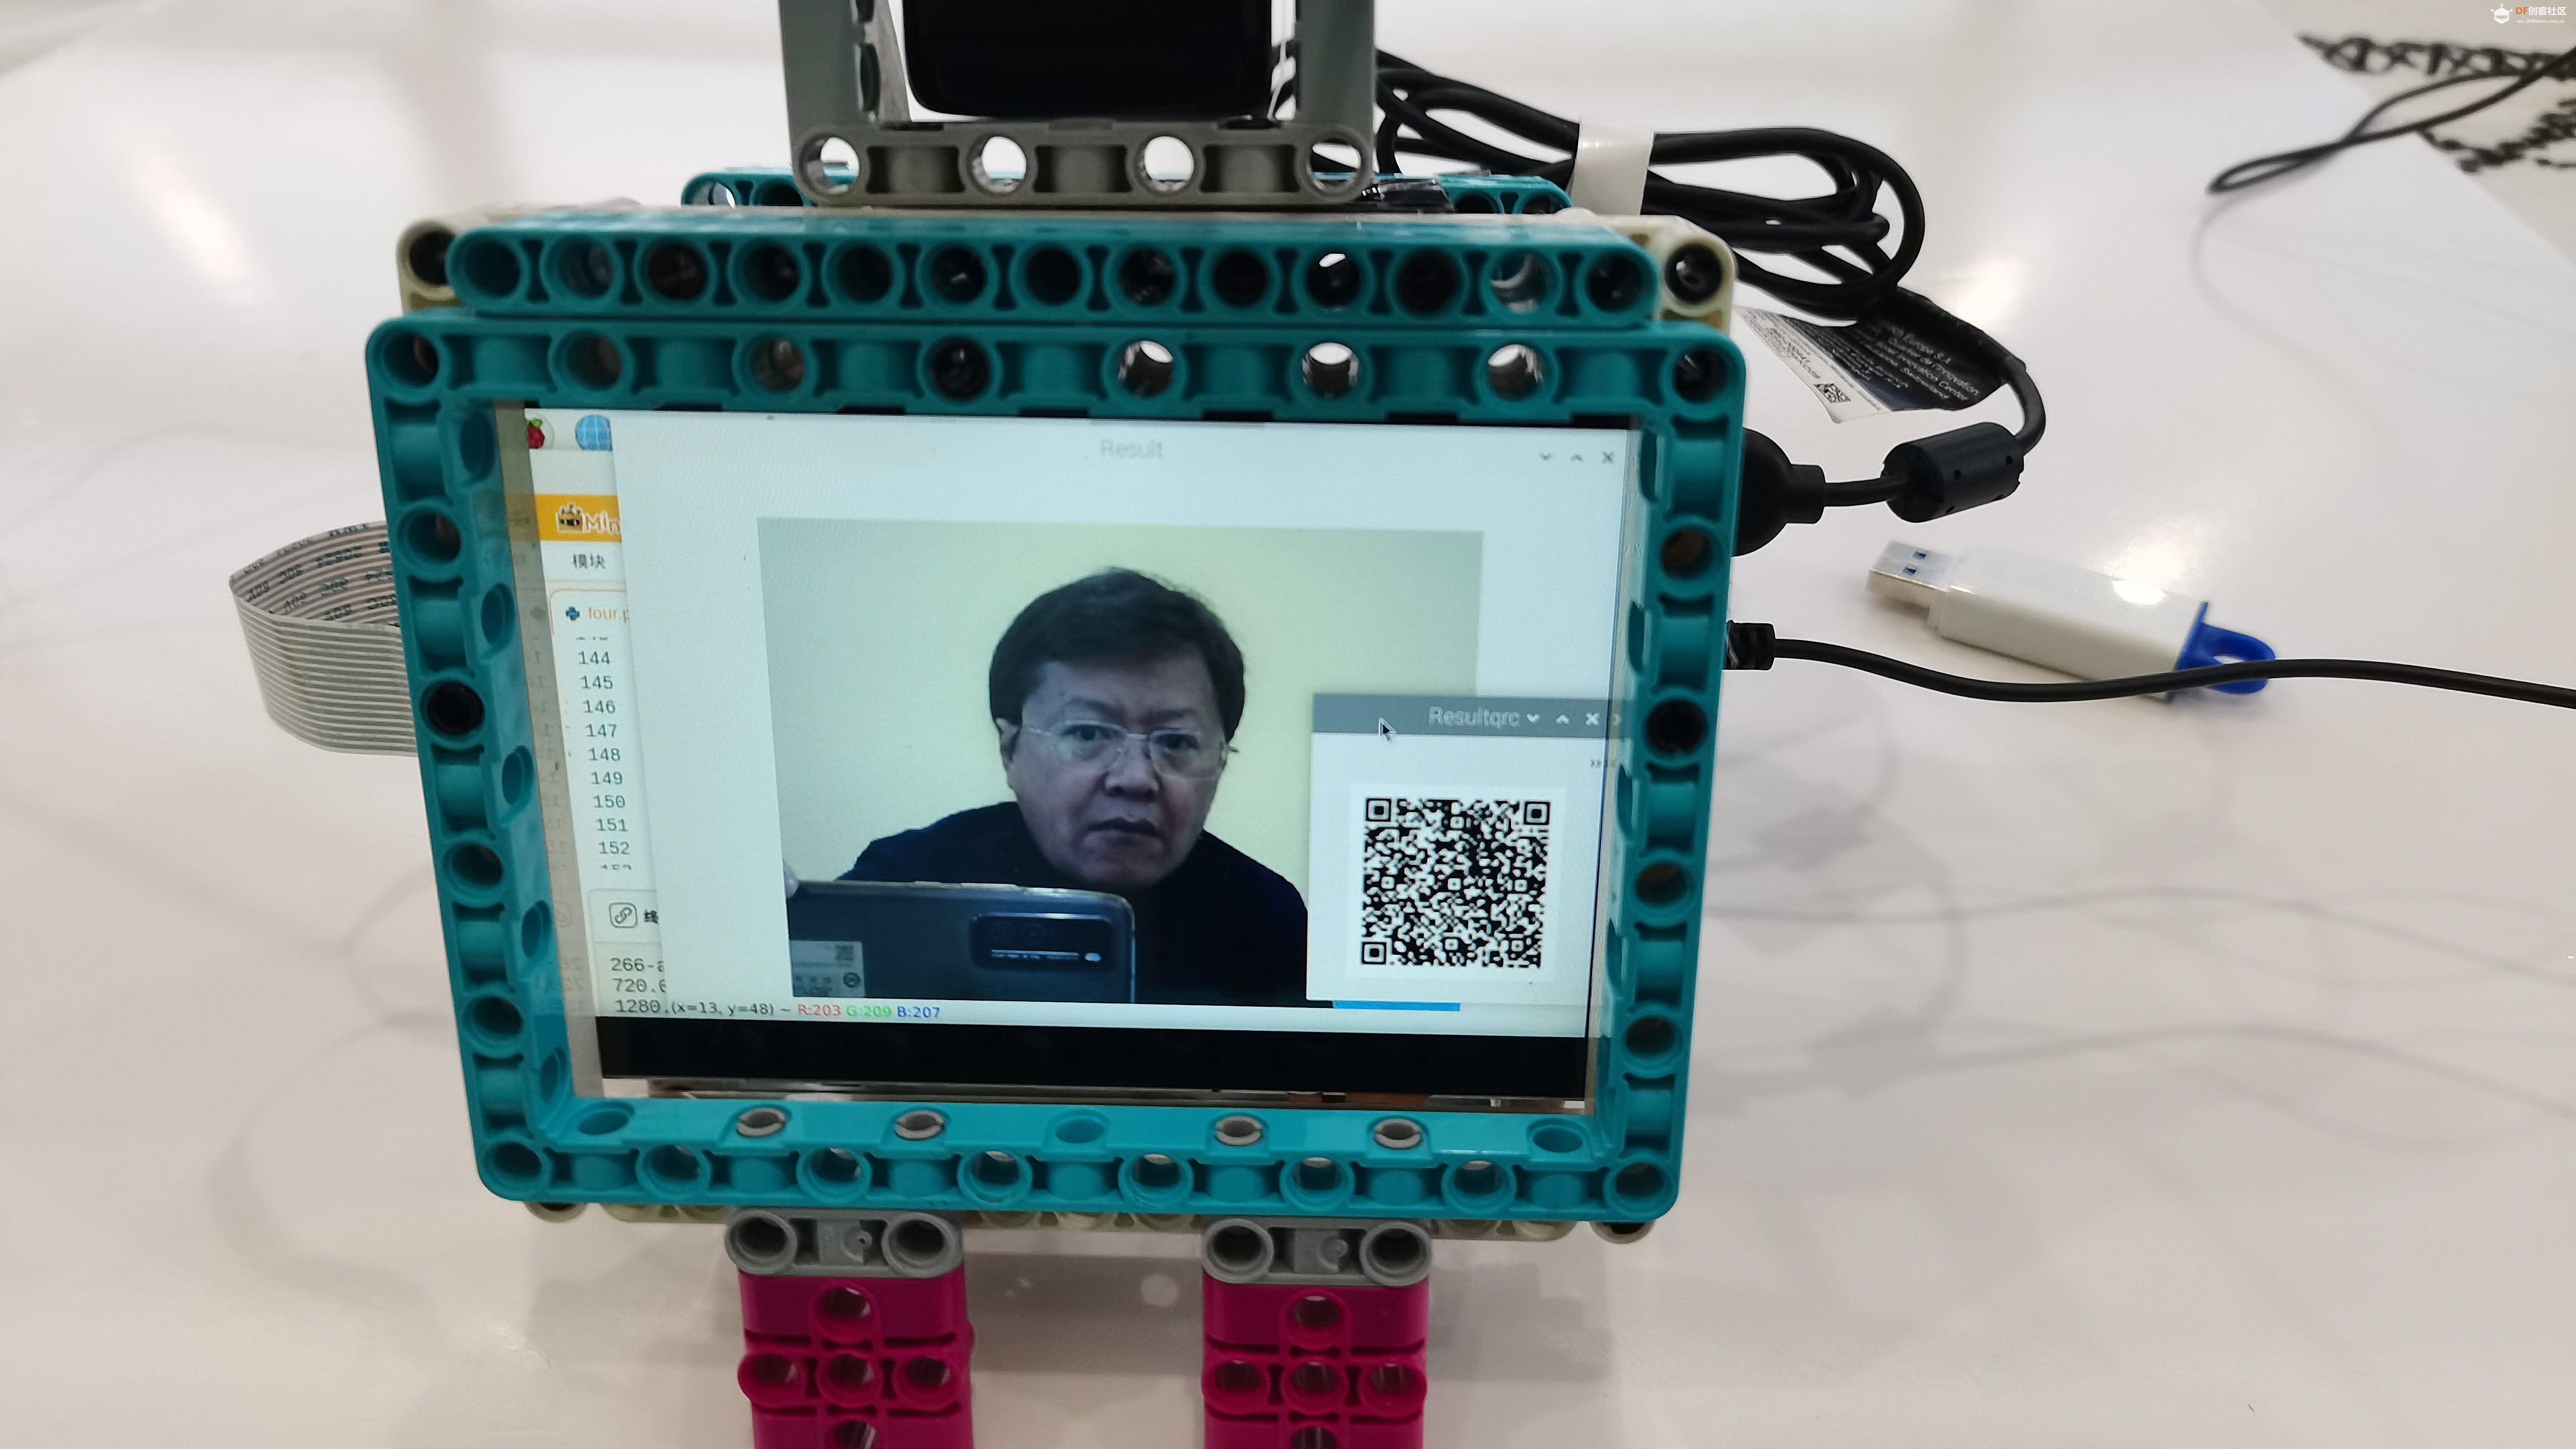
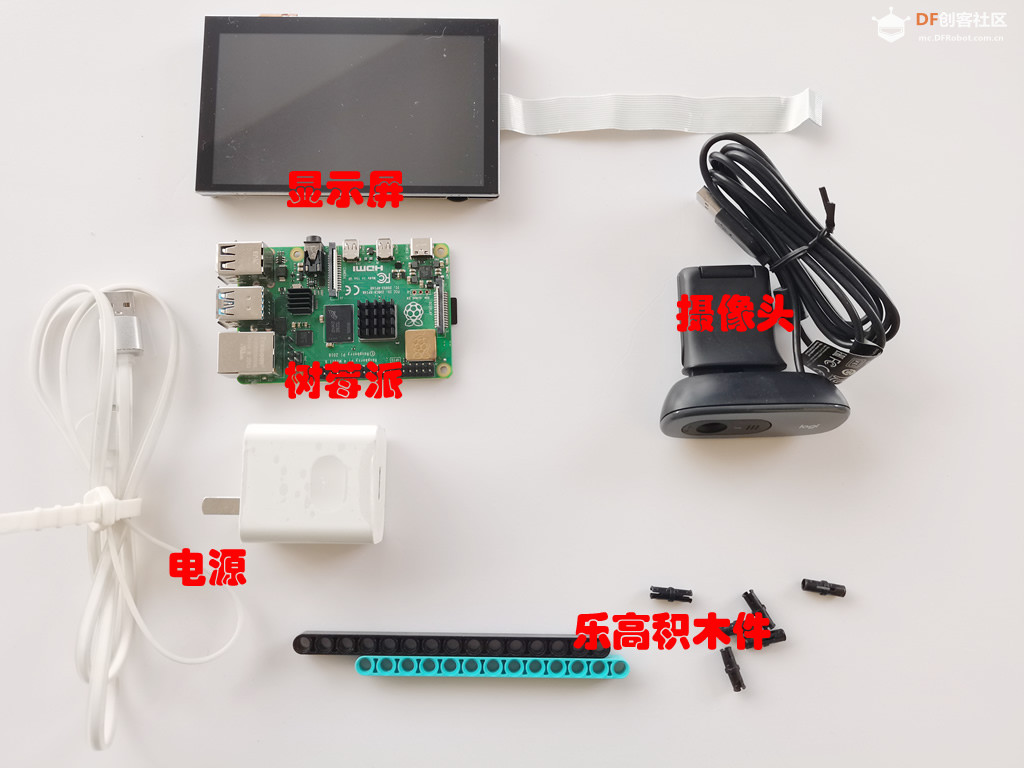
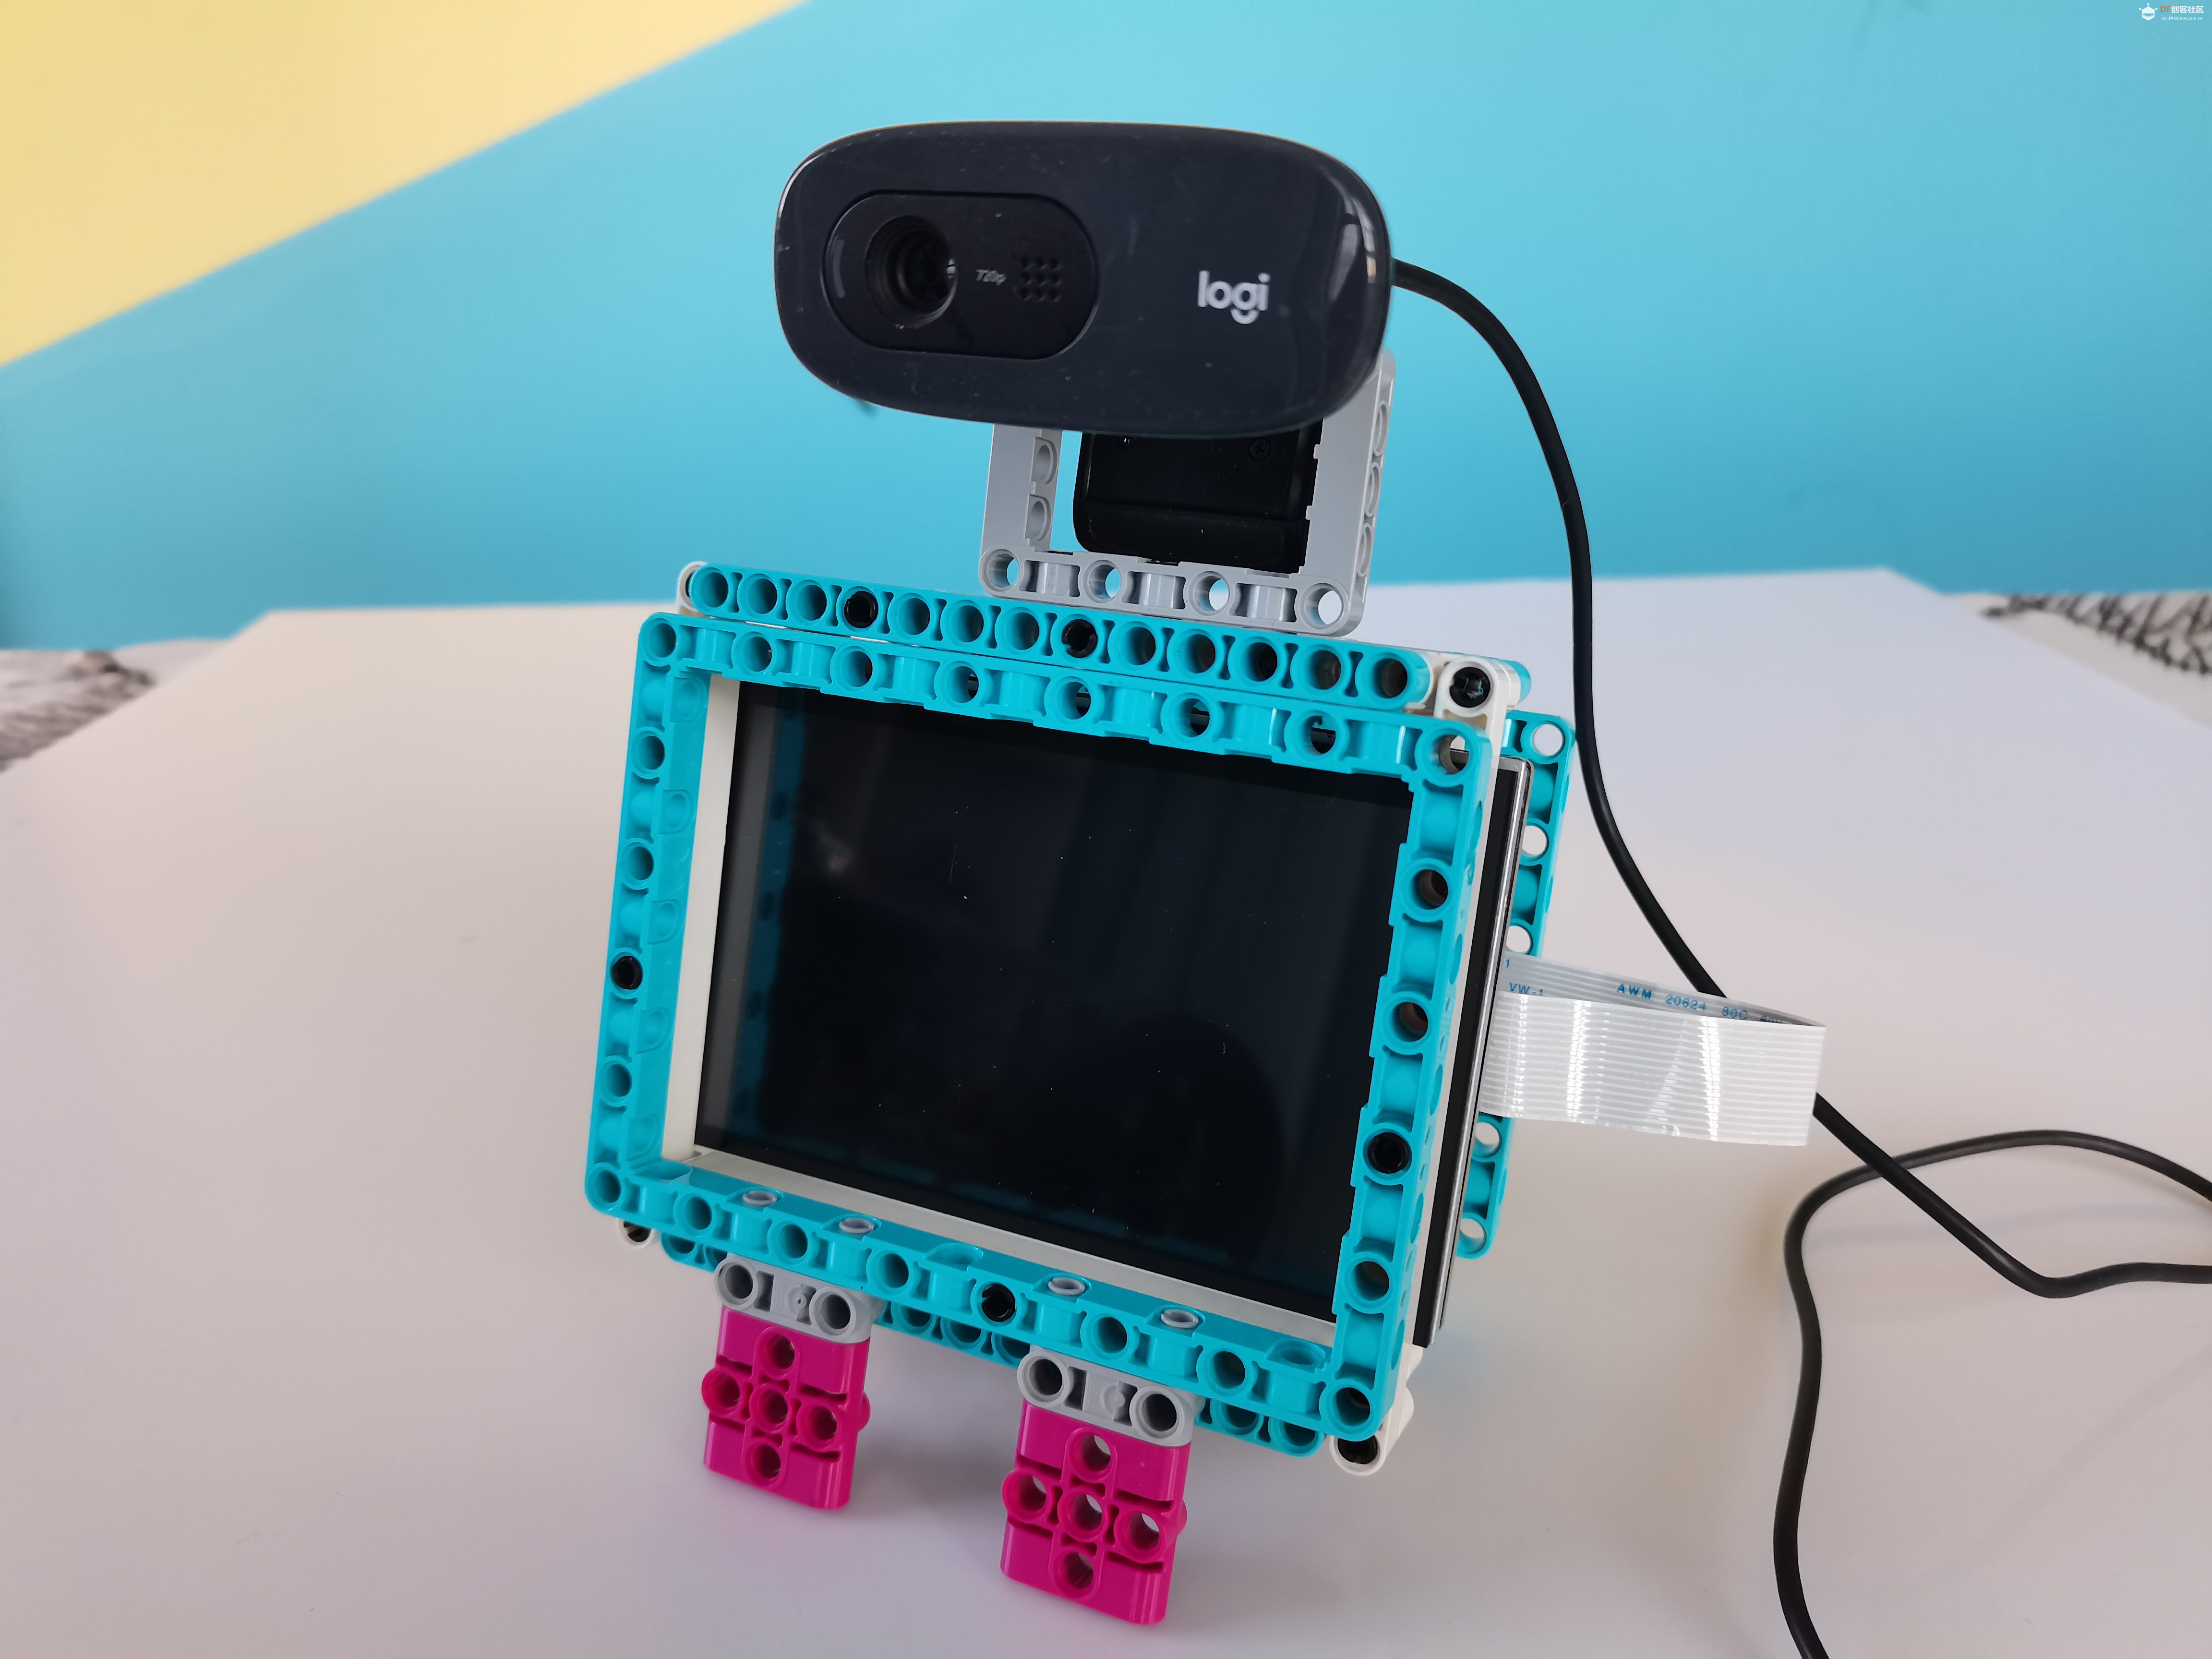
树莓派,显示屏,usb摄像头,电源(手机充电器),乐高积木件。
【硬件搭建】
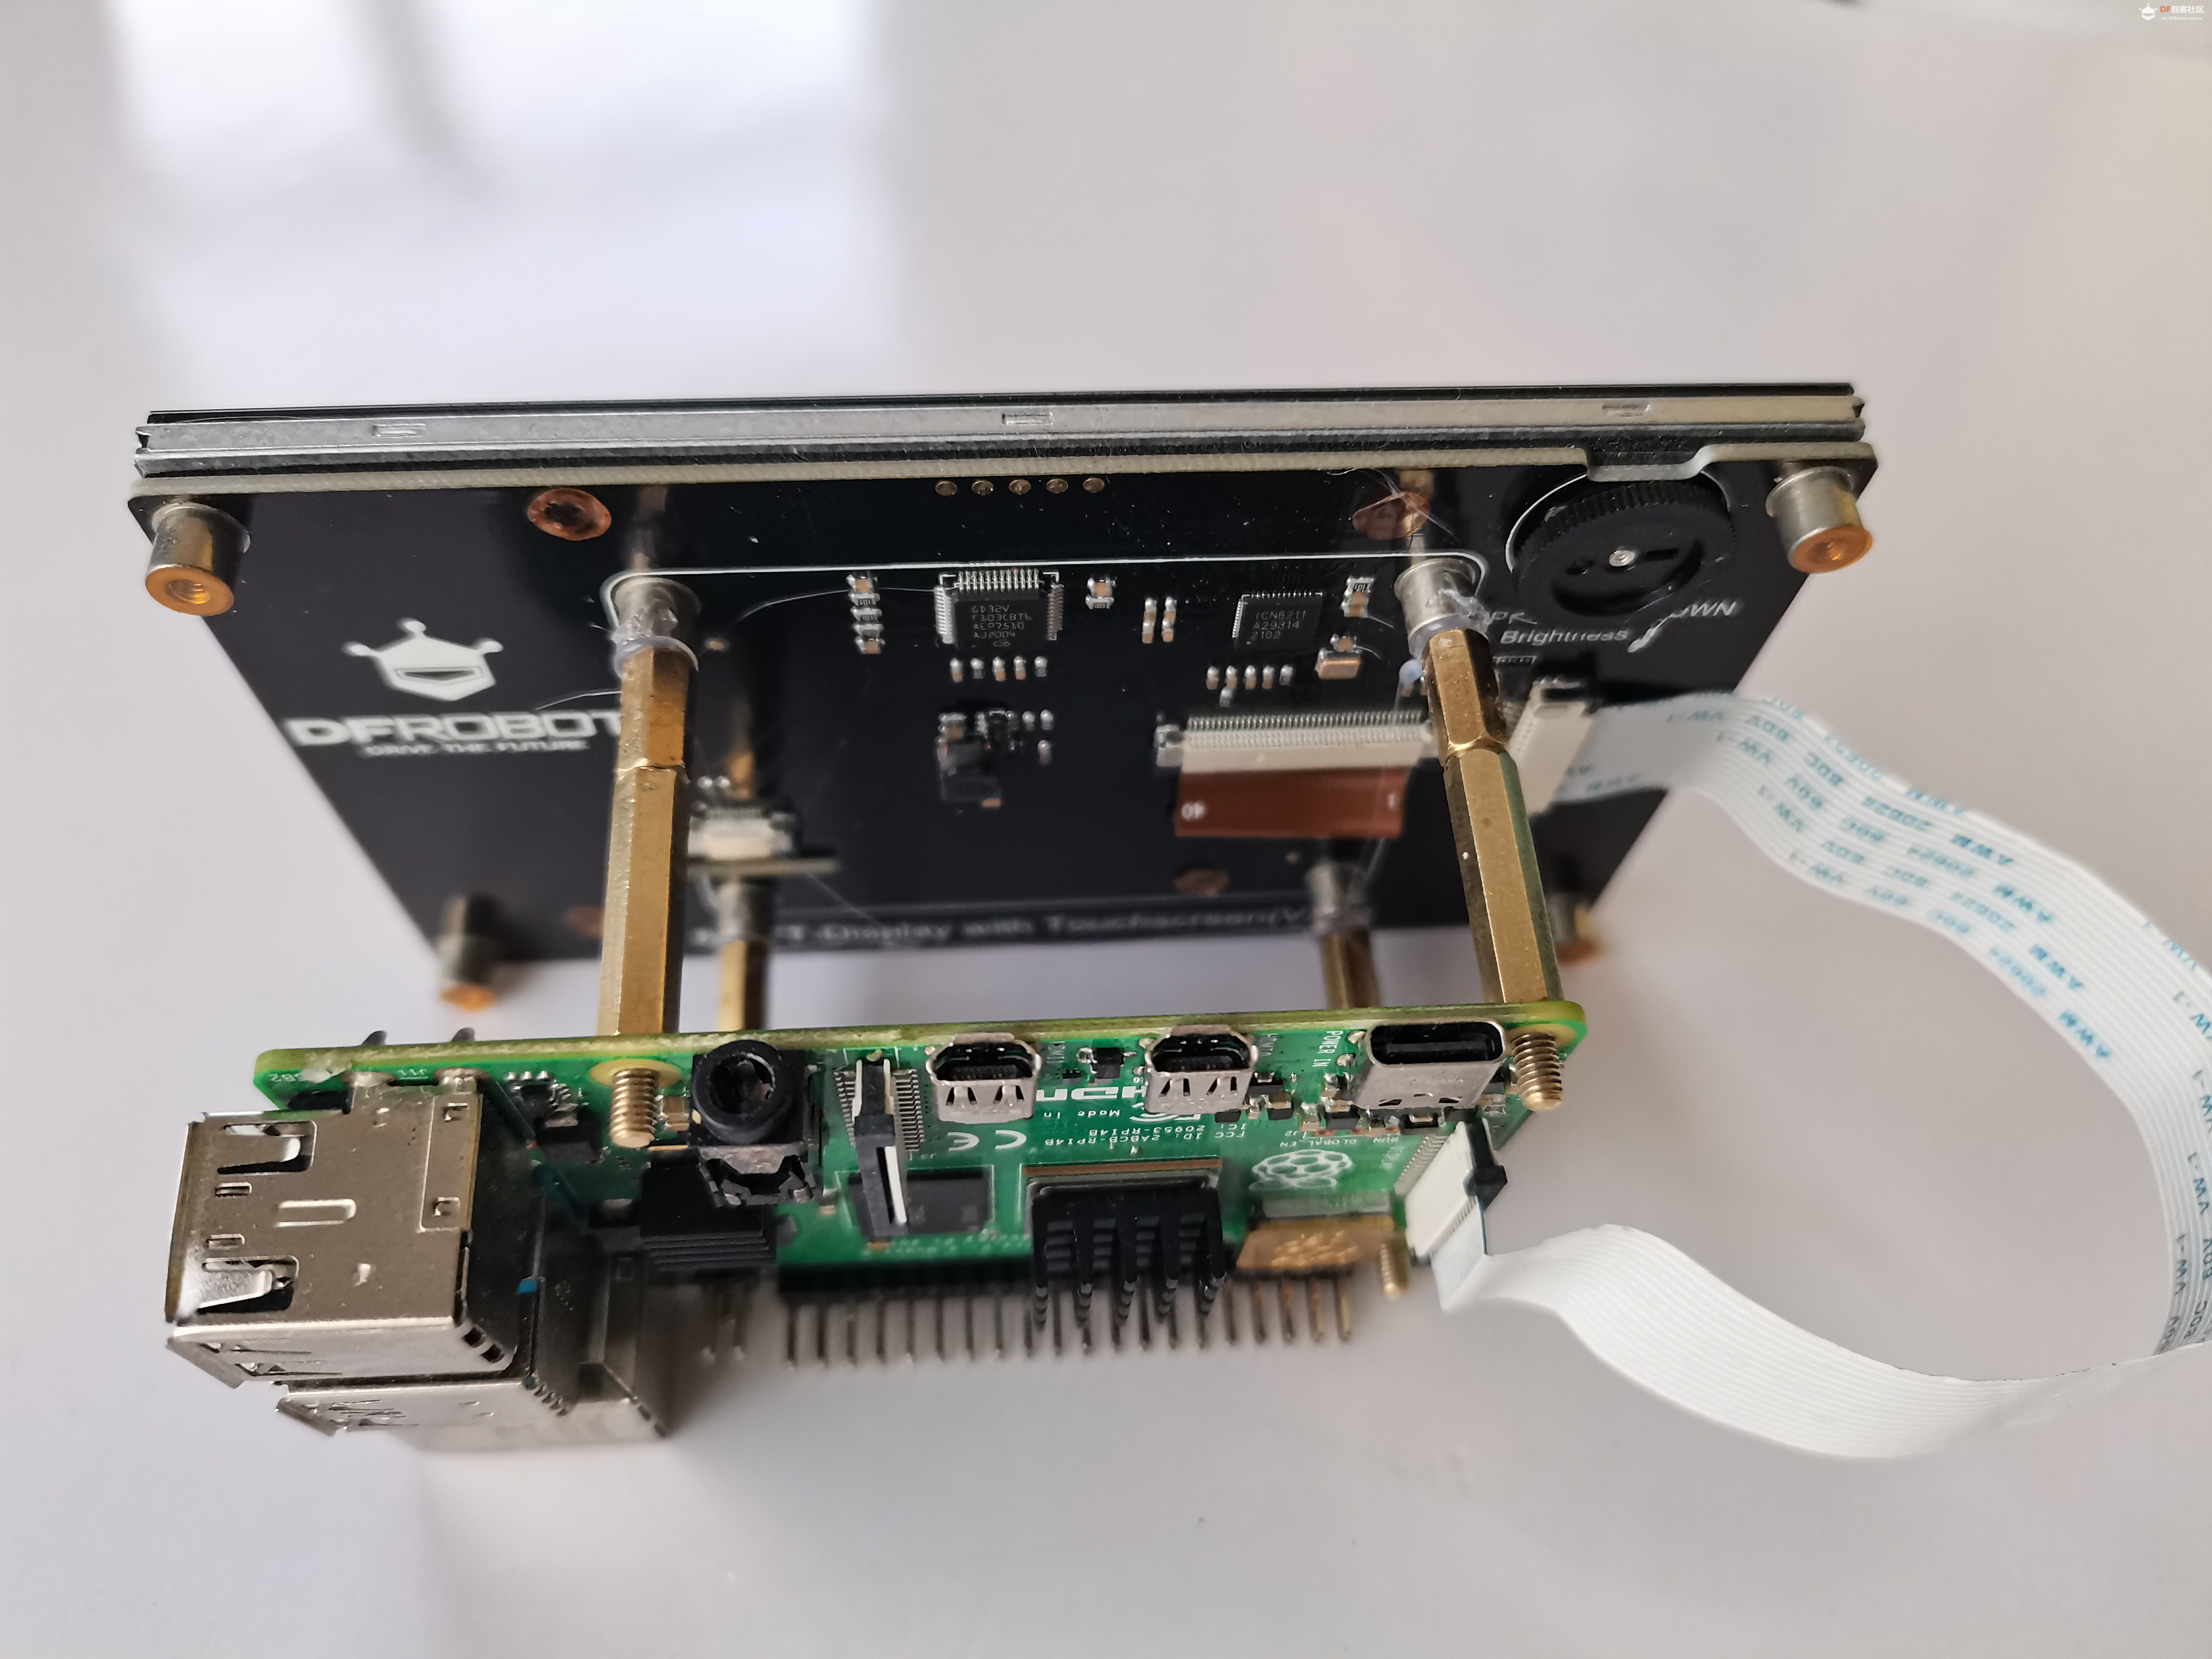
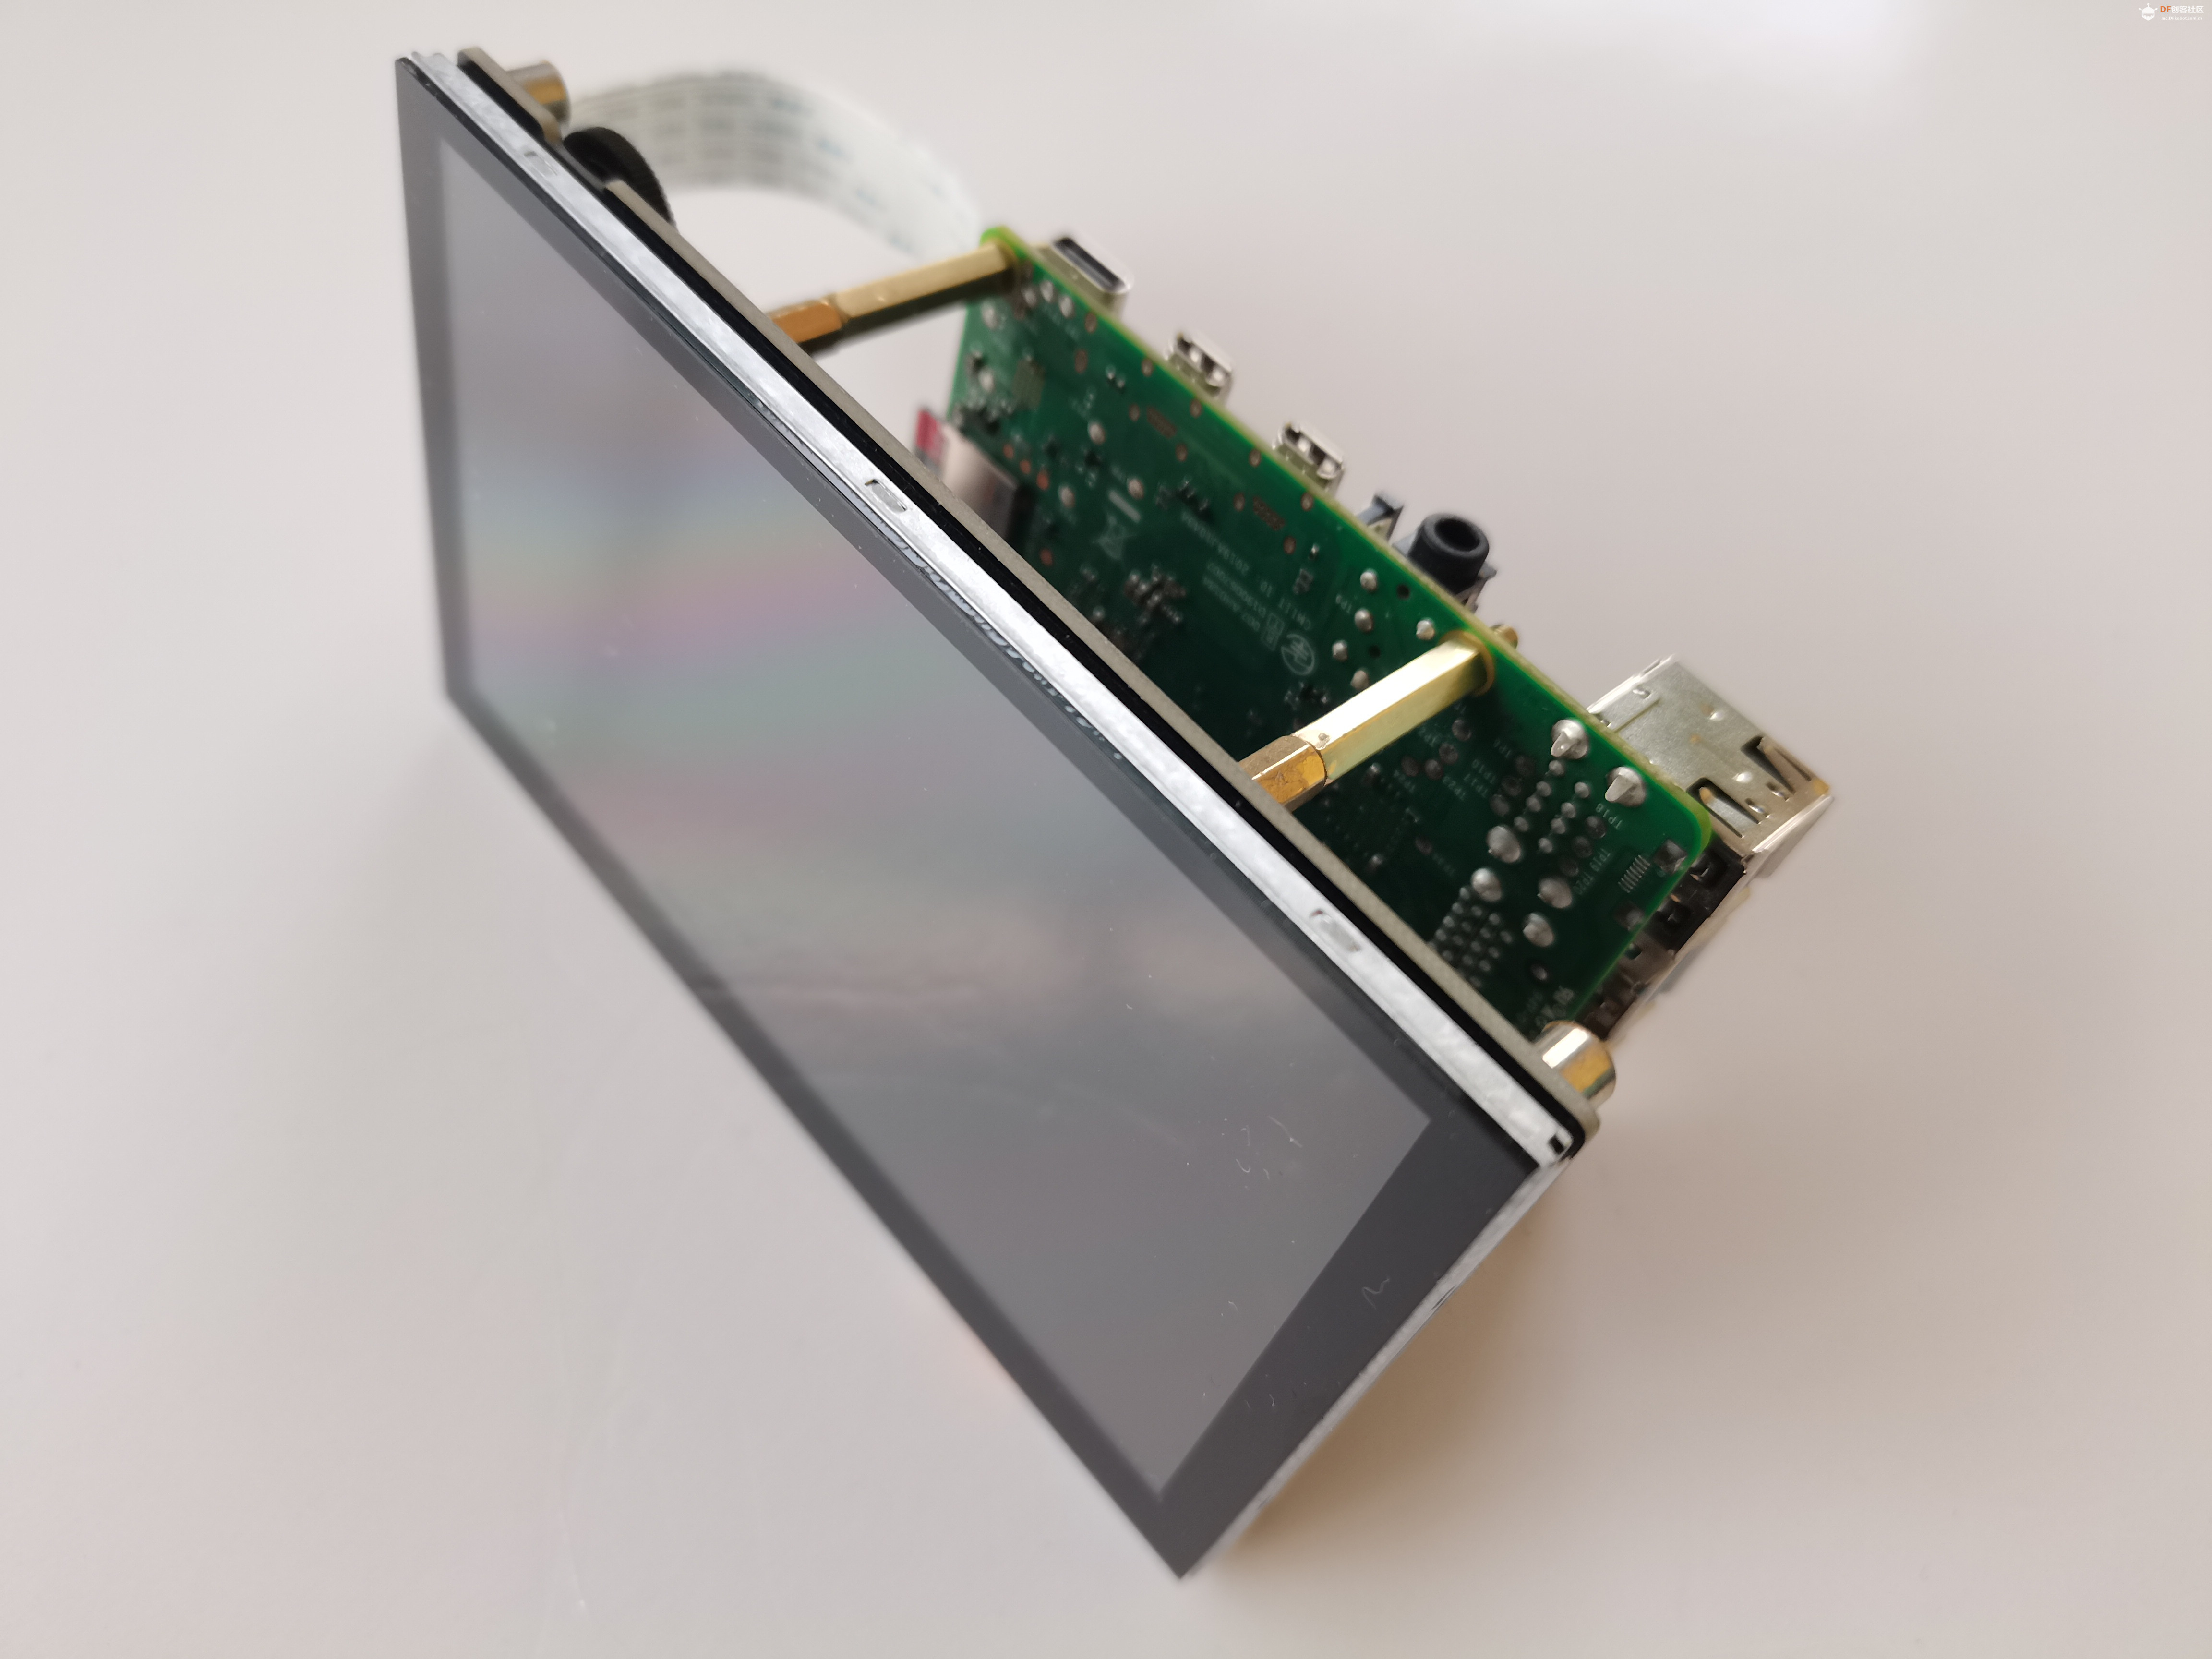
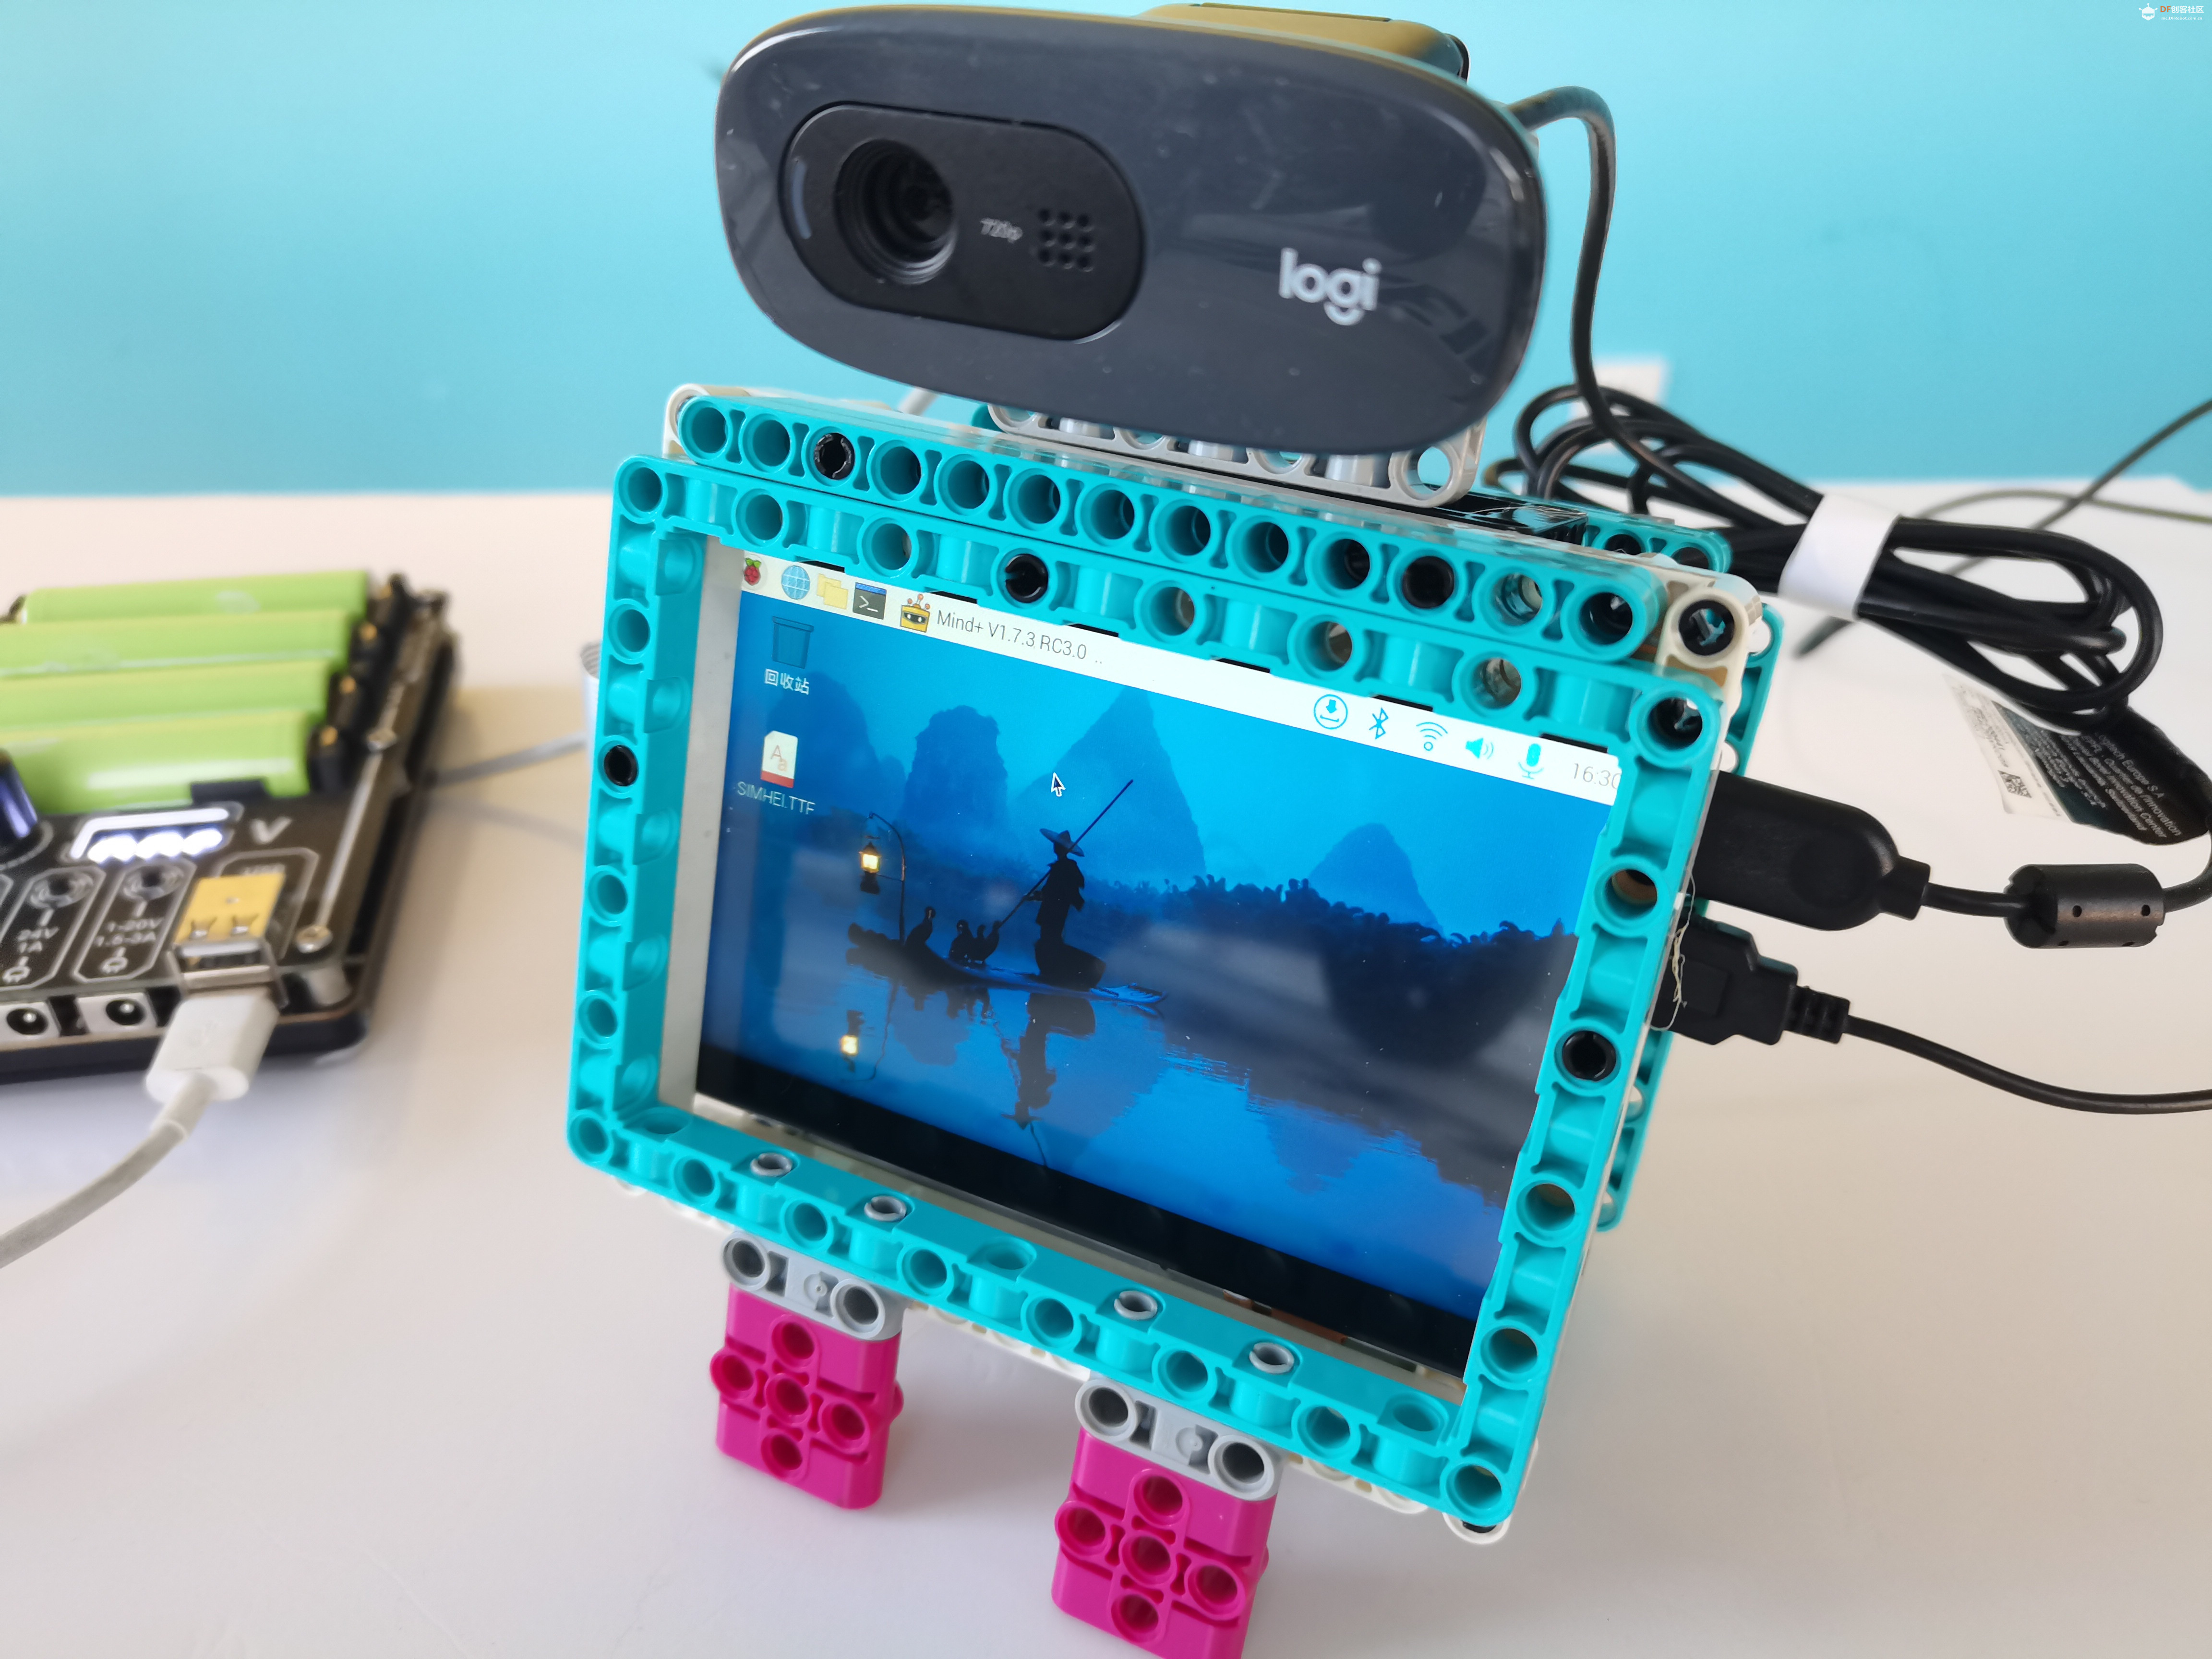
1.组合树莓派和显示屏
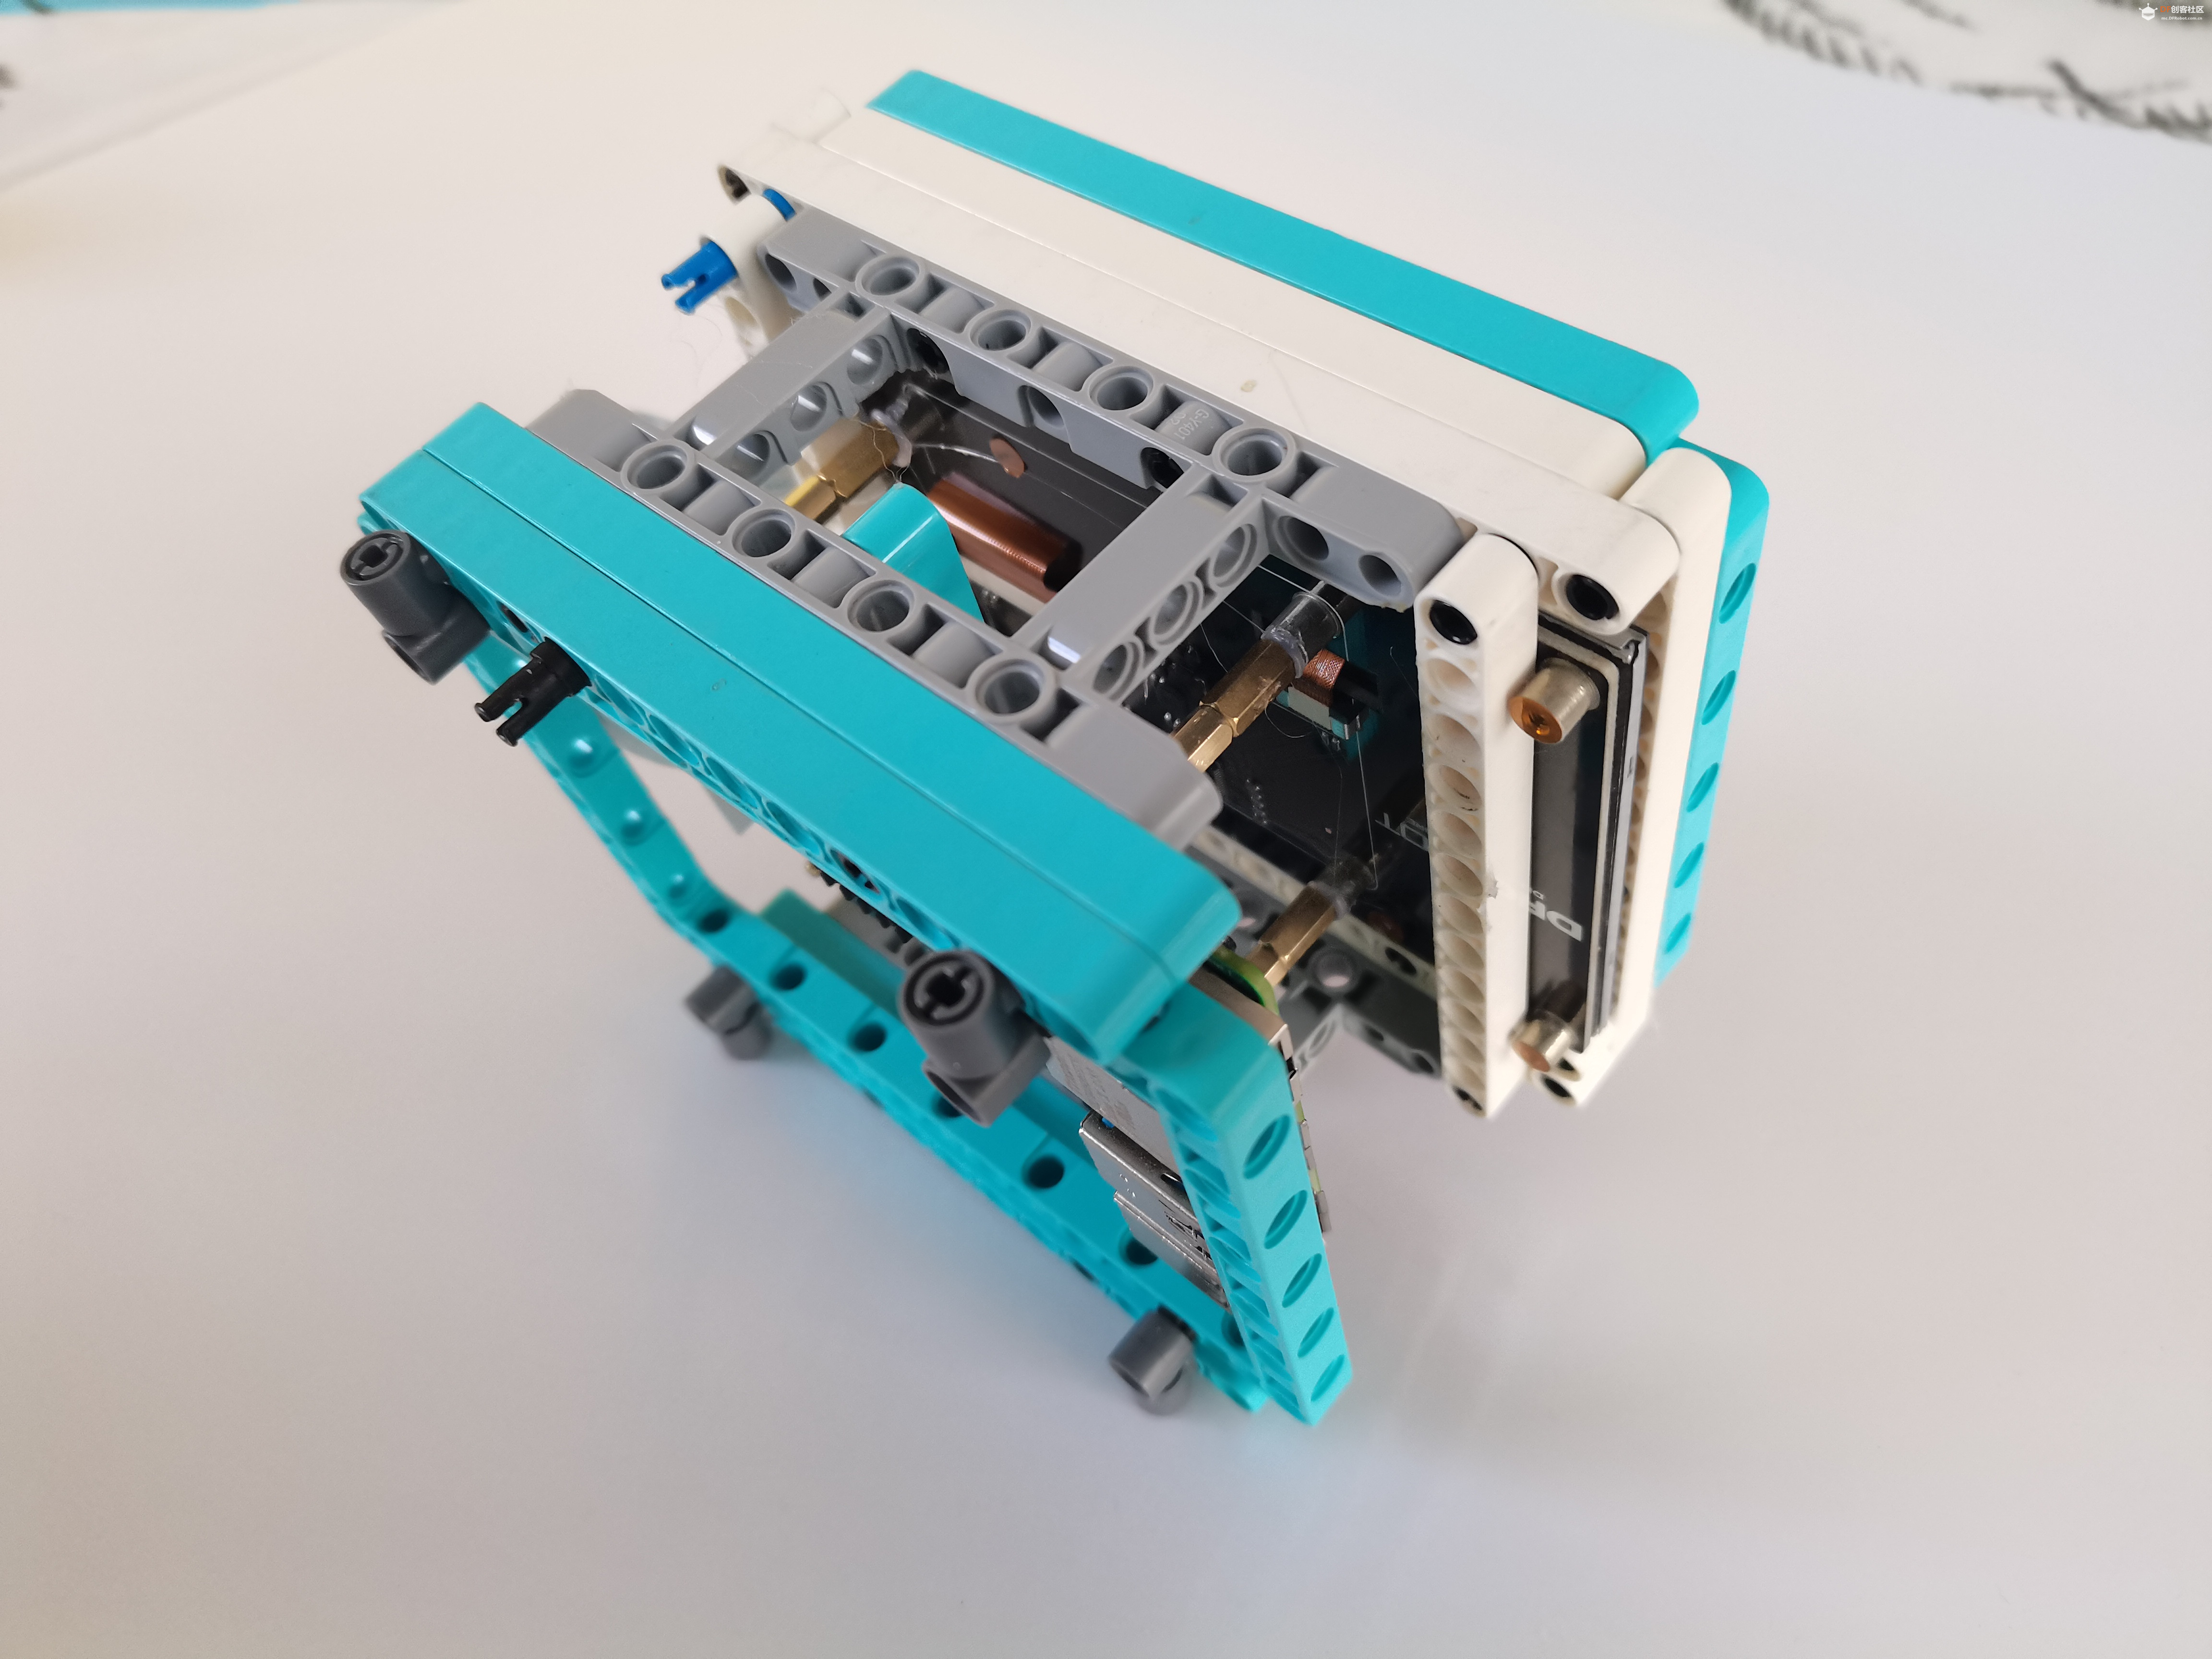
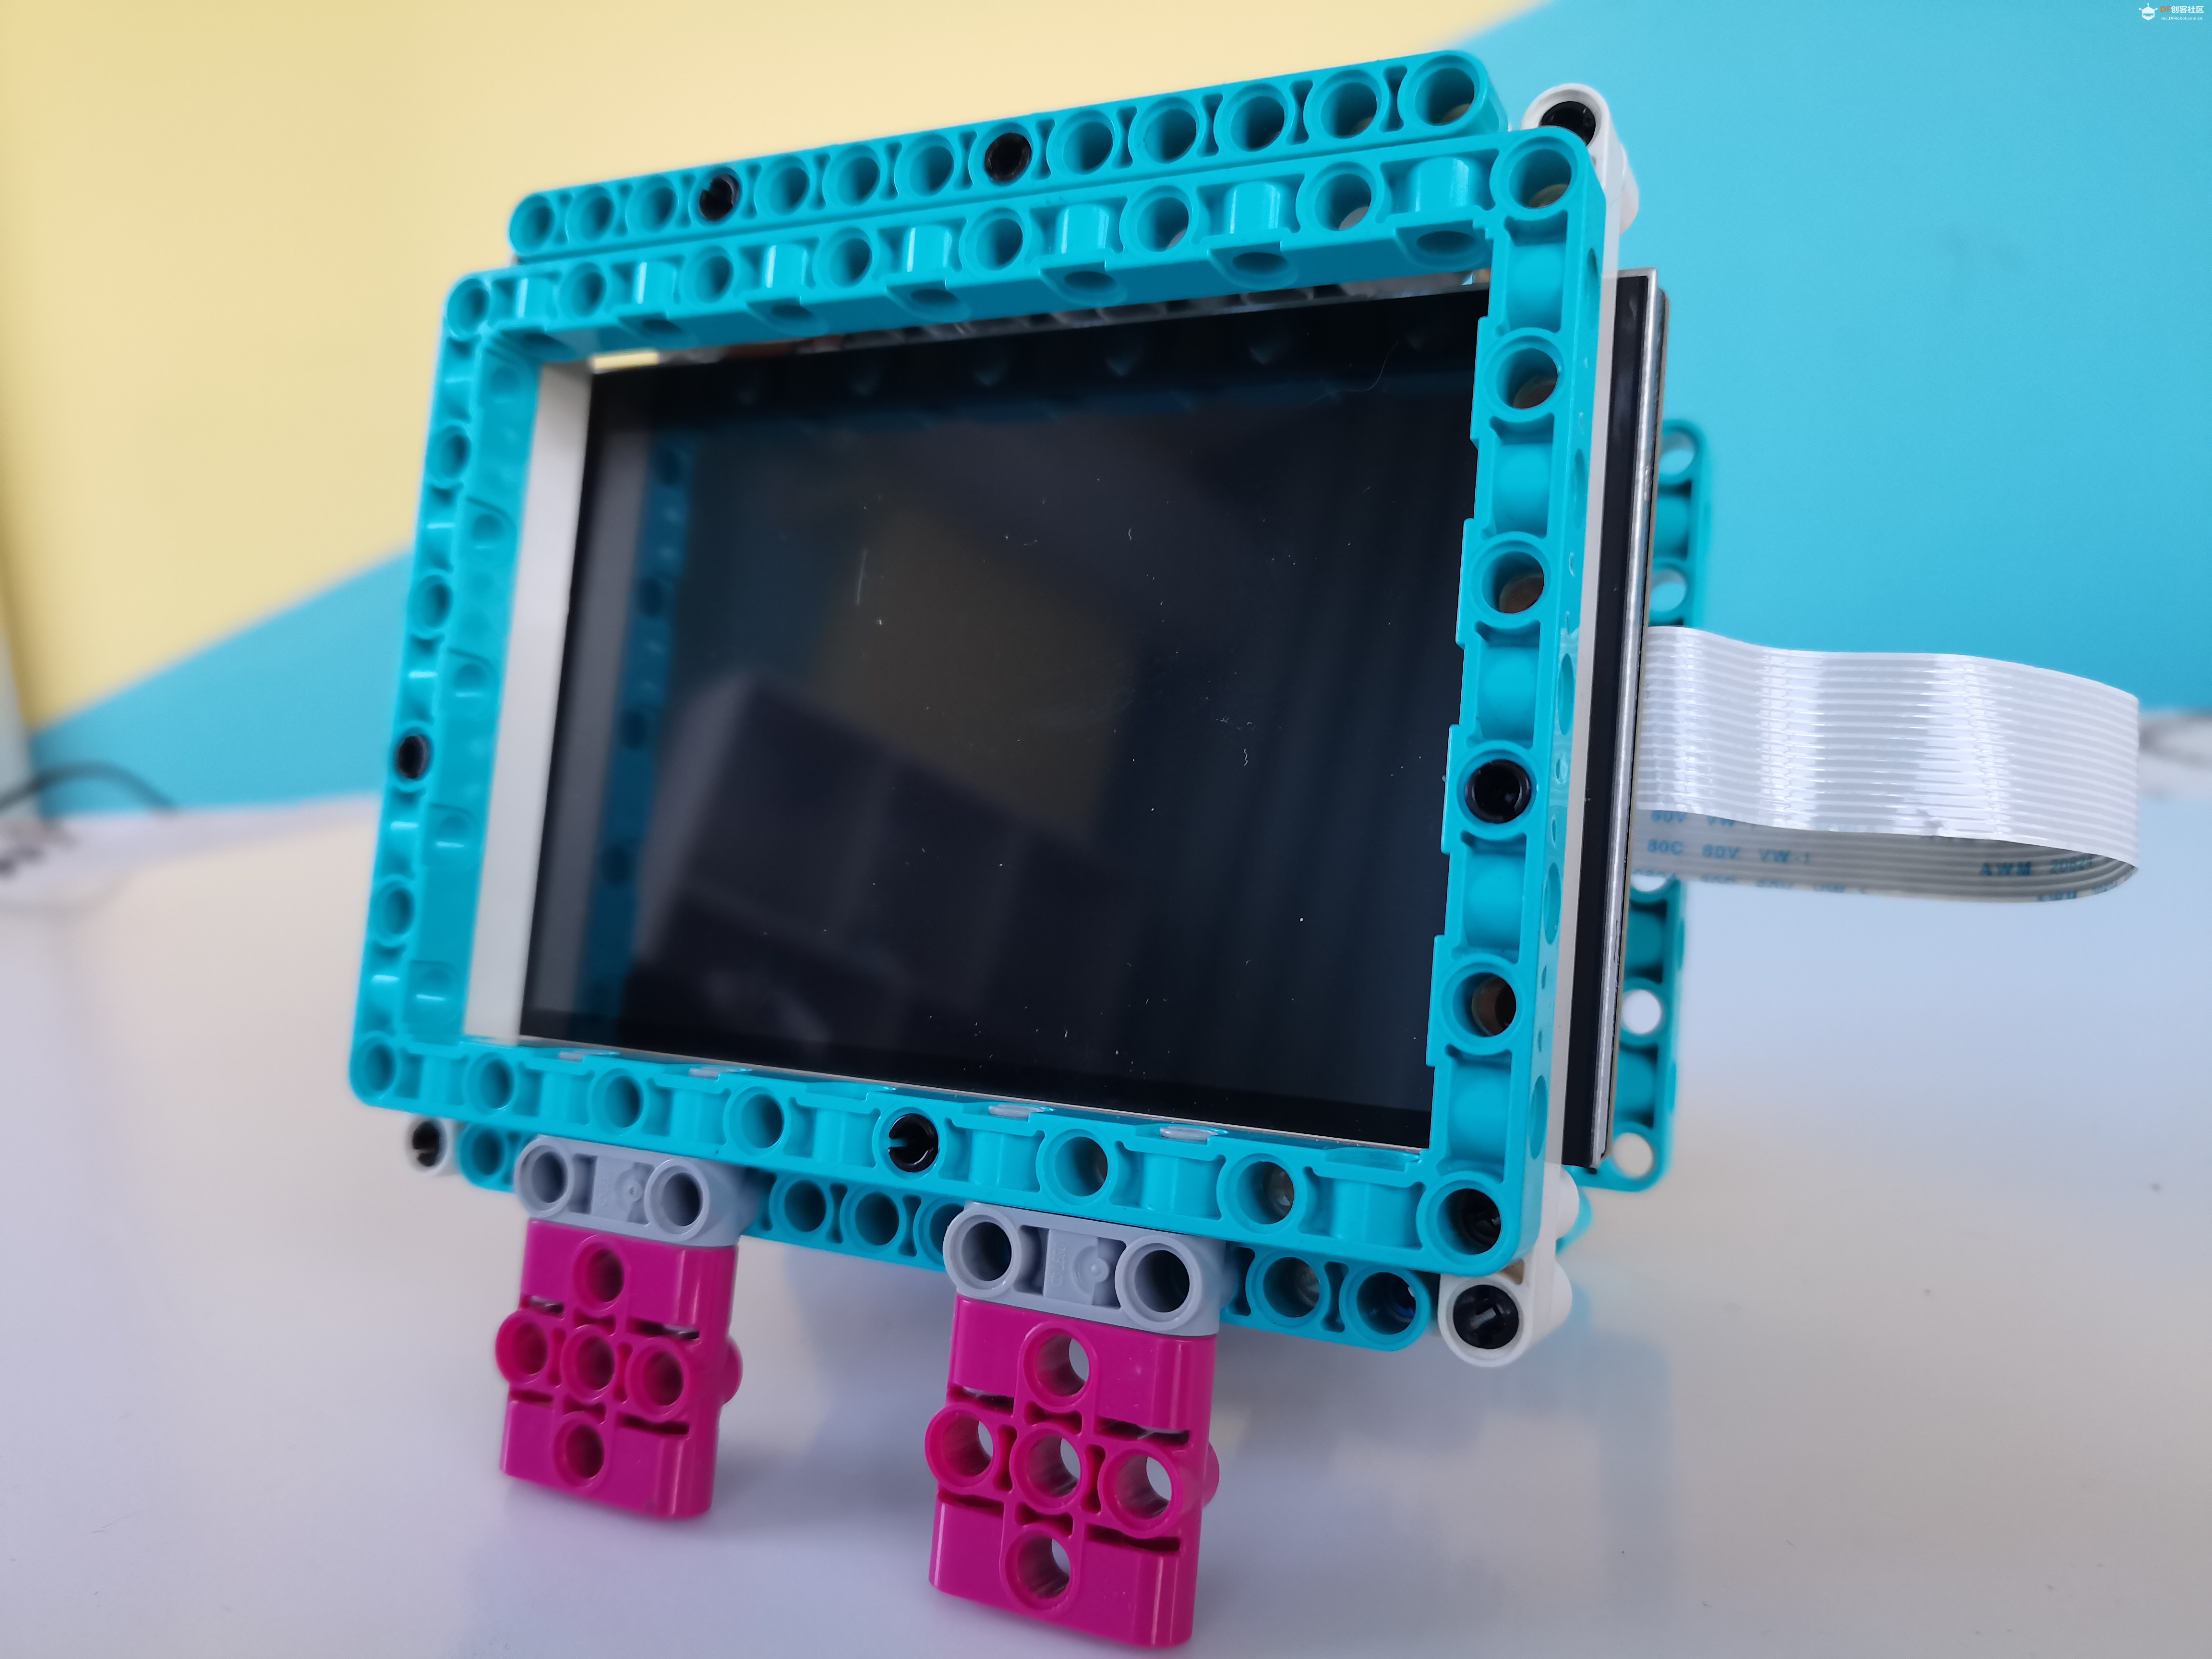
2.乐高积木搭建框架
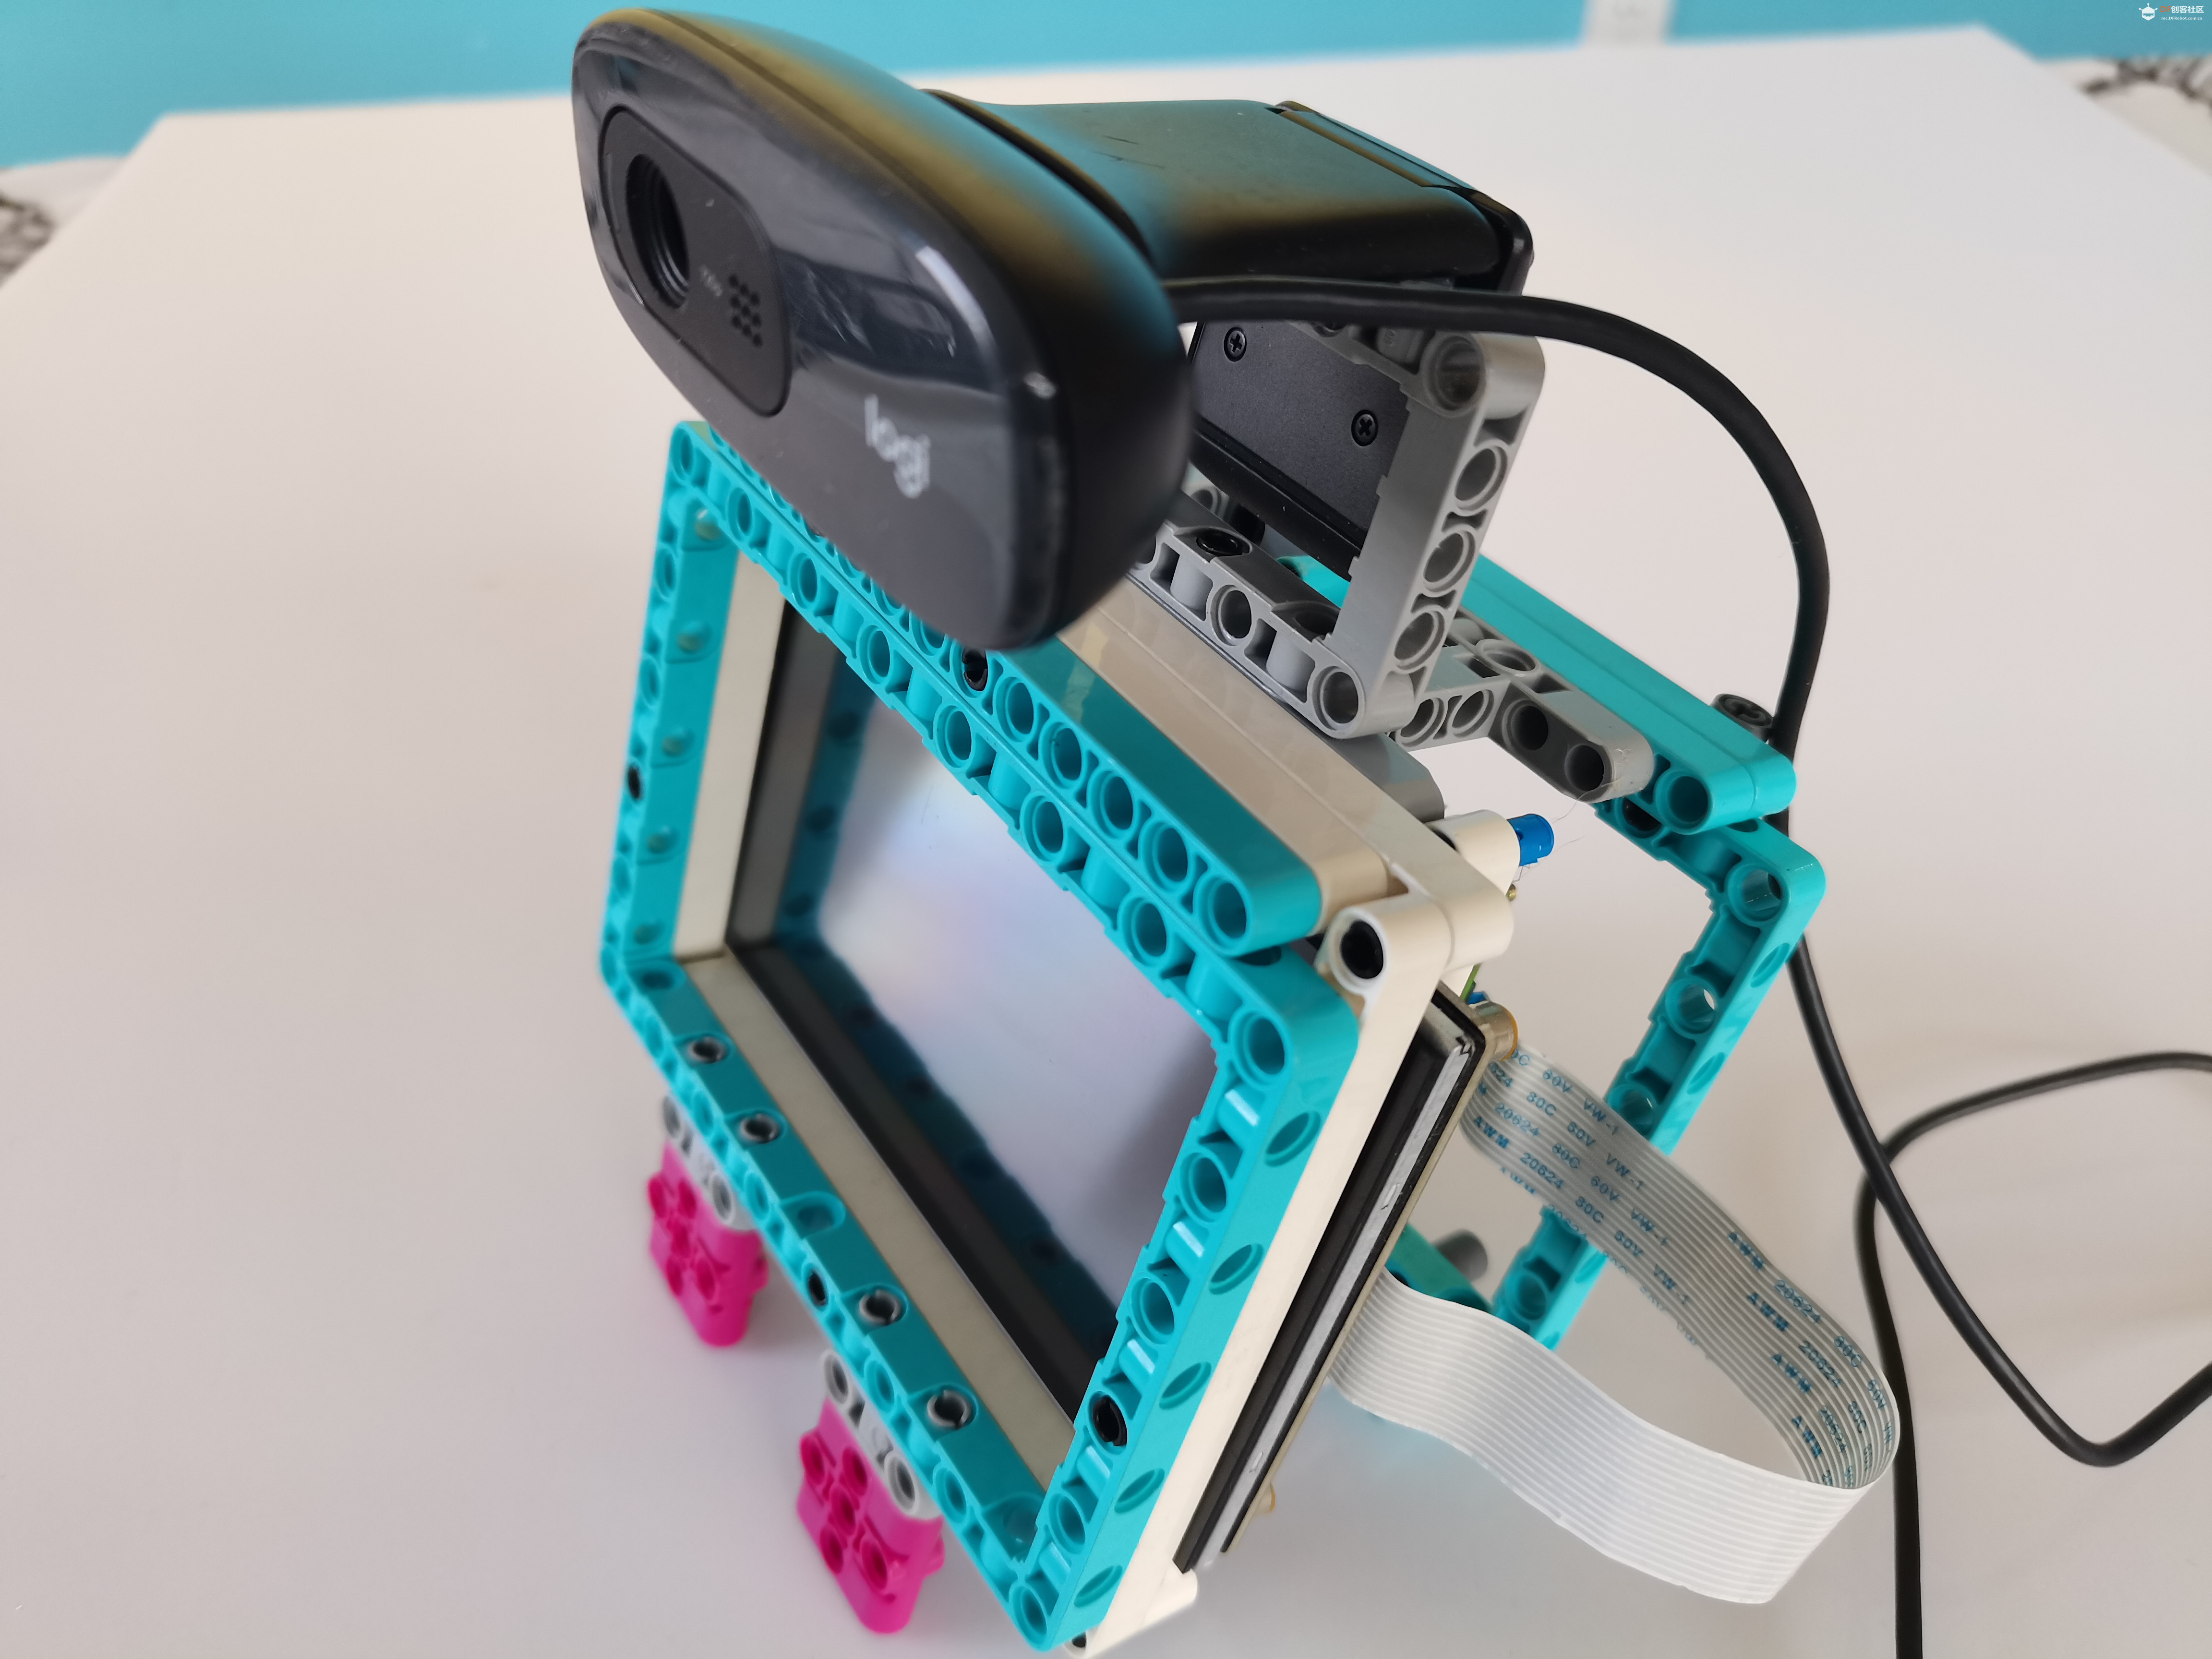
3.安装摄像头
【供电开机】
下载最新的Raspberry Pi OS,安装在SD卡上,插入树莓派,通电开机。
【安装Mind+】
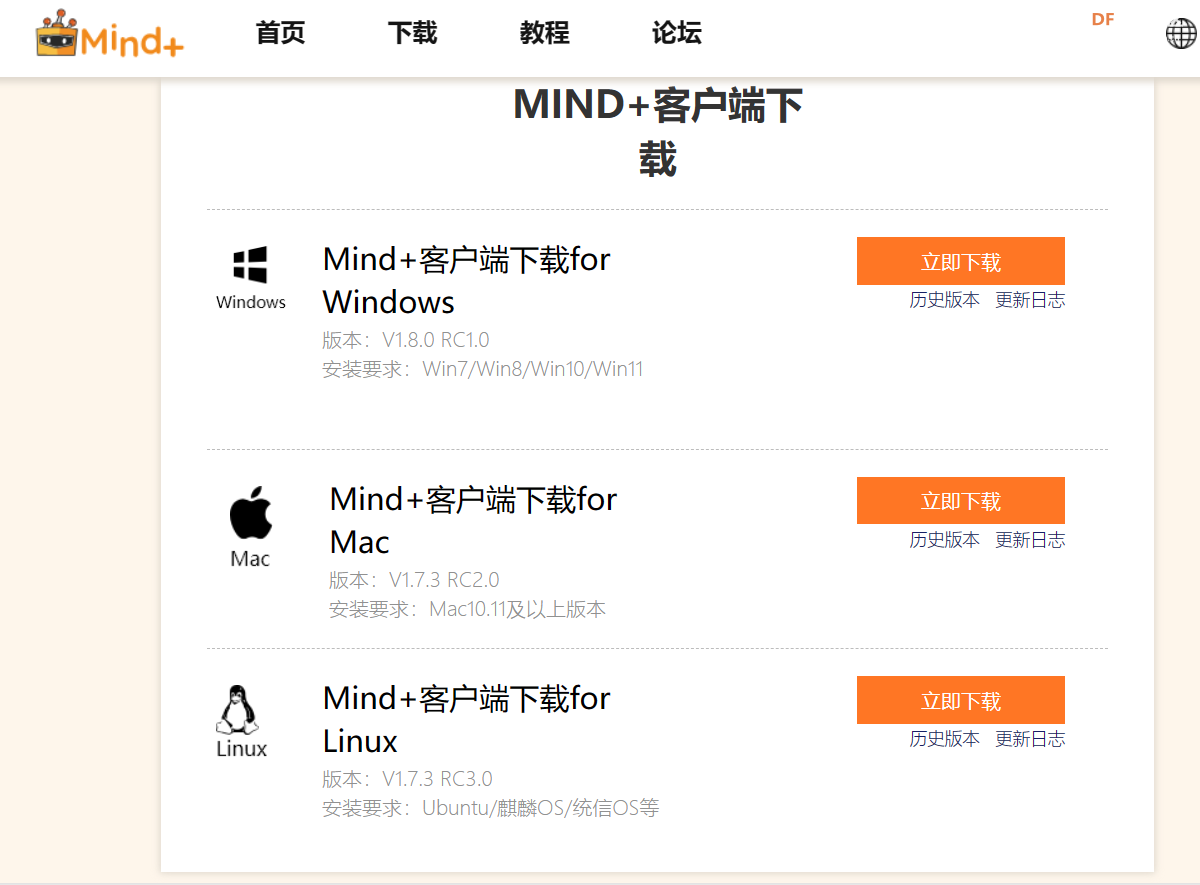
在树莓派上安装“Mind+客户端下载for Linux”,Mind+官方下载- Mind+图形化编程软件 (mindplus.cc)。
Mind+的V1.7.3版本支持arm64架构的CPU如树莓派,且安装了Linux相关系统,例如ubuntu、debian。
【安装库】
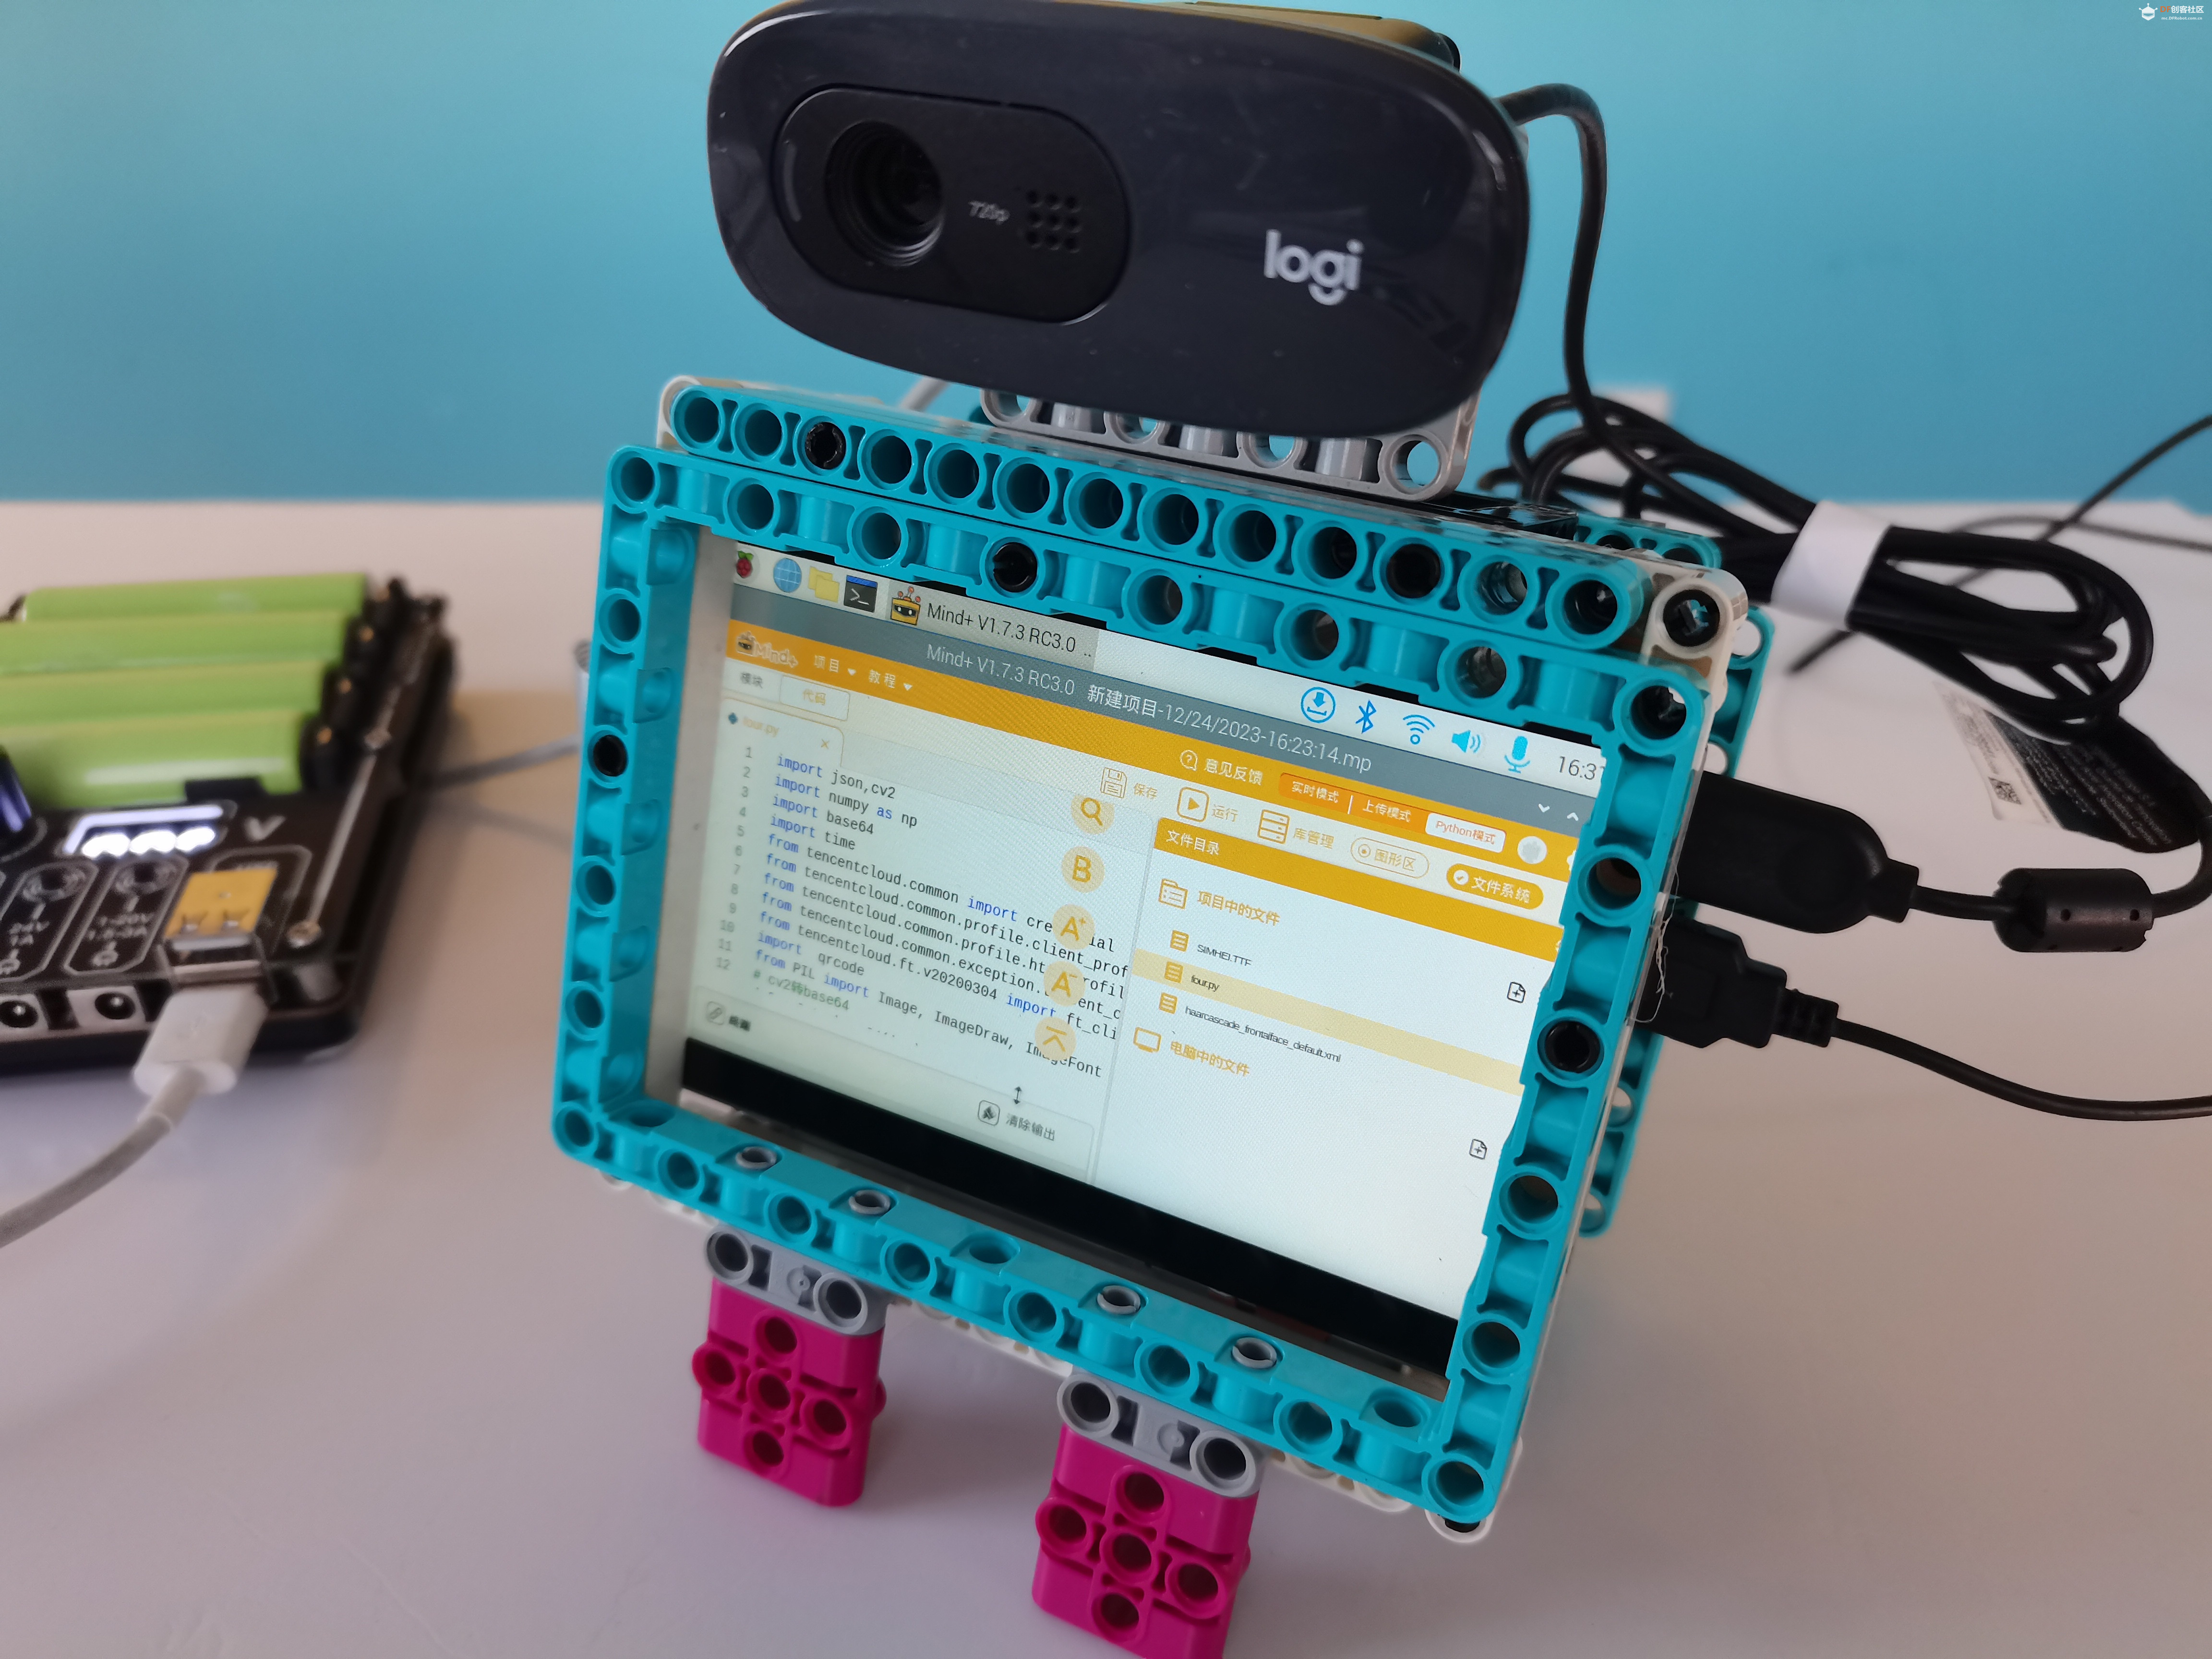
Mind+的V1.7.3版本Linux版,Python模式,已安装好opencv-python库(自已在树莓派中安装这个库,很麻烦)。通过库管理,手动安装“tencentcloud-sdk-python”。
【编写程序】
1.利用opencv库获取摄像头图像
-
- #导入所需的模块:
- import cv2
- #创建视频对象并打开摄像头:
- cap = cv2.VideoCapture(0) # 参数为0表示默认摄像头设备
- #读取每一帧图像并显示:
- while True:
- ret, frame = cap.read() # 从摄像头读取当前帧图像
- if not ret:
- break # 若无法成功读取图像,则退出循环
- cv2.imshow('Camera', frame) # 显示当前帧图像
- if cv2.waitKey(1) == ord('q'): # 等待用户按下'q'键退出程序
- break
- #关闭视频对象和窗口:
- cap.release()
- cv2.destroyAllWindows()
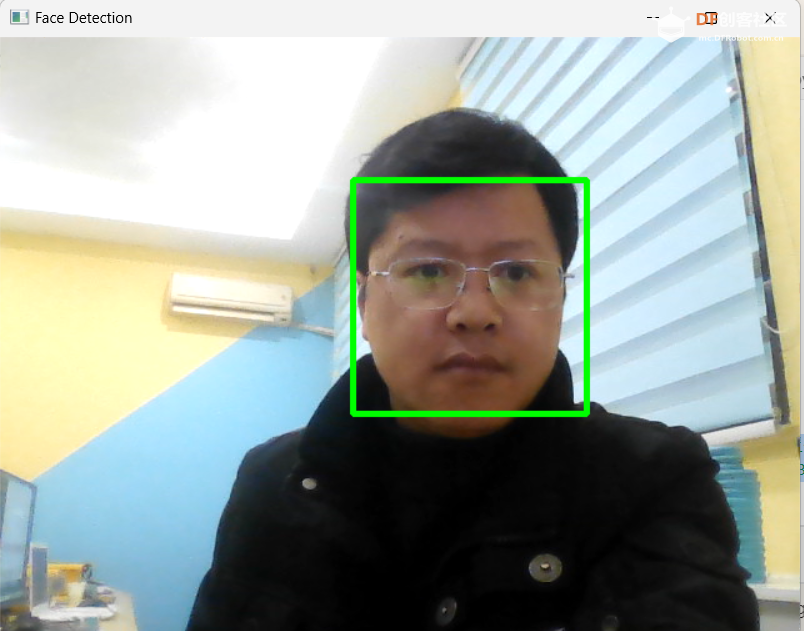
2.使用Haar级联分类器来检测人脸
-
- import cv2
- import numpy as np
-
- # 创建面部分类器对象。使用Haar级联分类器来检测人脸。
- cascade = cv2.CascadeClassifier('haarcascade_frontalface_default.xml')
- cap = cv2.VideoCapture(0)
- while True:
- ret, image = cap.read()
- # 转换为灰度图像
-
- gray = cv2.cvtColor(image, cv2.COLOR_BGR2GRAY)
-
-
-
- # 检测人脸。使用detectMultiScale()函数来找到图像中的人脸区域。这会返回包含每个人脸位置信息的列表:
- faces = cascade.detectMultiScale(gray, scaleFactor=1.1, minNeighbors=5, minSize=(30, 30))
-
- # 标记人脸。使用rectangle()函数在原始图像上绘制边界框来标记检测到的人脸
- for (x, y, w, h) in faces:
- cv2.rectangle(image, (x, y), (x+w, y+h), (0, 255, 0), 3)
-
- # 显示结果。最后,使用imshow()函数显示带有标记人脸的图像
- cv2.imshow("Face Detection", image)
- cv2.waitKey(1)
- cv2.destroyAllWindows()
3.实现中文提醒,及设置基准框 -
- import cv2
- import numpy as np
- from PIL import Image, ImageDraw, ImageFont
- # 加载Haar级联分类器模型(预训练好的)
- face_cascade = cv2.CascadeClassifier('haarcascade_frontalface_default.xml')
- # 从文件或者视频流中获取图像数据
- cap = cv2.VideoCapture(0)
- sum1=0
- sum2=0
- bs=0
- while True:
- ret, img = cap.read()
- height, width, _ = img.shape
- print("图像的高度为:", height)
- print("图像的宽度为:", width)
- if ret:
-
- gray = cv2.cvtColor(img, cv2.COLOR_BGR2GRAY)
- # 对图像进行人脸检测
- faces = face_cascade.detectMultiScale(gray, scaleFactor=1.3, minNeighbors=5, flags=cv2.CASCADE_SCALE_IMAGE)
- # 标记并显示检测到的人脸区域
- if len(faces)!=0:
- sum2=0
- if bs==0:
- sum1=sum1+1
- if sum1>100:
- bs=1
- else:
- sum1=0
- if bs==1:
- sum2=sum2+1
- if sum2>100:
- bs=0
- x1=260
- y1=170
- w1=200
- h1=200
- cv2.rectangle(img, (x1, y1), (x1+w1, y1+h1), (0, 255, 0), 3)
- for (x, y, w, h) in faces:
- cv2.rectangle(img, (x, y), (x+w, y+h), (0, 255, 0), 3)
- # 展示结果图片
- if abs(x-x1)<20 and abs(y-y1)<20 and abs(w-w1)<20 and abs(h-h1)<20:
- print("ok")
- cv2img = cv2.cvtColor(img, cv2.COLOR_BGR2RGB)
- pilimg = Image.fromarray(cv2img)
- # PIL图片上打印汉字
- draw = ImageDraw.Draw(pilimg) # 图片上打印
- #simsun 宋体
- font = ImageFont.truetype("SIMHEI.ttf", 40, encoding="utf-8")
- #位置,文字,颜色==红色,字体引入
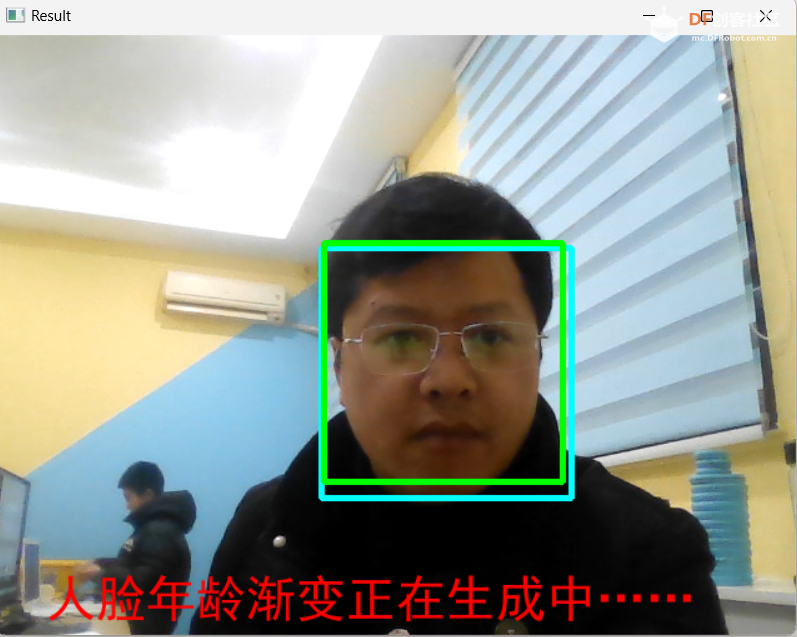
- draw.text((40, 430), "人脸年龄渐变正在生成中……", (255, 0, 0), font=font)
- # PIL图片转cv2 图片
- img = cv2.cvtColor(np.array(pilimg), cv2.COLOR_RGB2BGR)
- cv2.imshow("Result", img)
- cv2.waitKey(1)
- cv2.destroyAllWindows()
【开通人像变换服务】
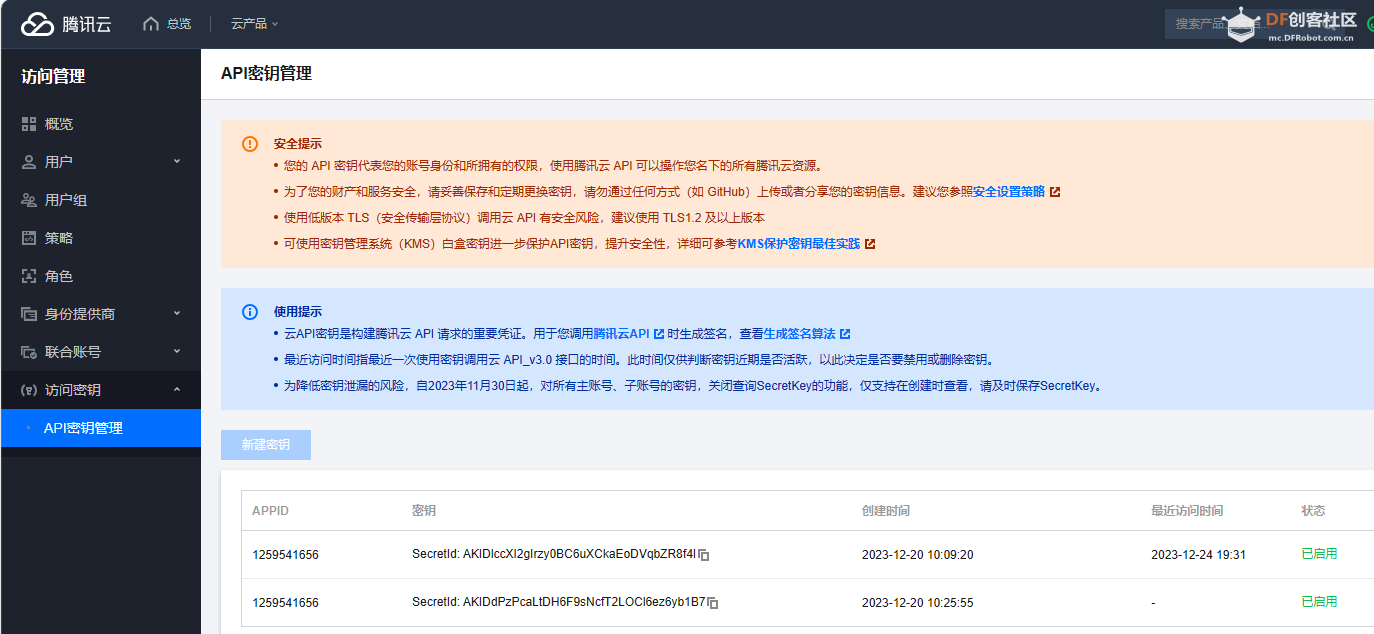
1.注册腾讯云, 获取API调用秘钥,在访问管理里可以获取到当前账号的SecretId和SecretKey,以便于后面调用云服务的前面验证。这个一定要保管好,泄露出去有被人盗刷的风险。已废弃或者有暴露风险的Secret也可以禁用,最大程度降低风险。
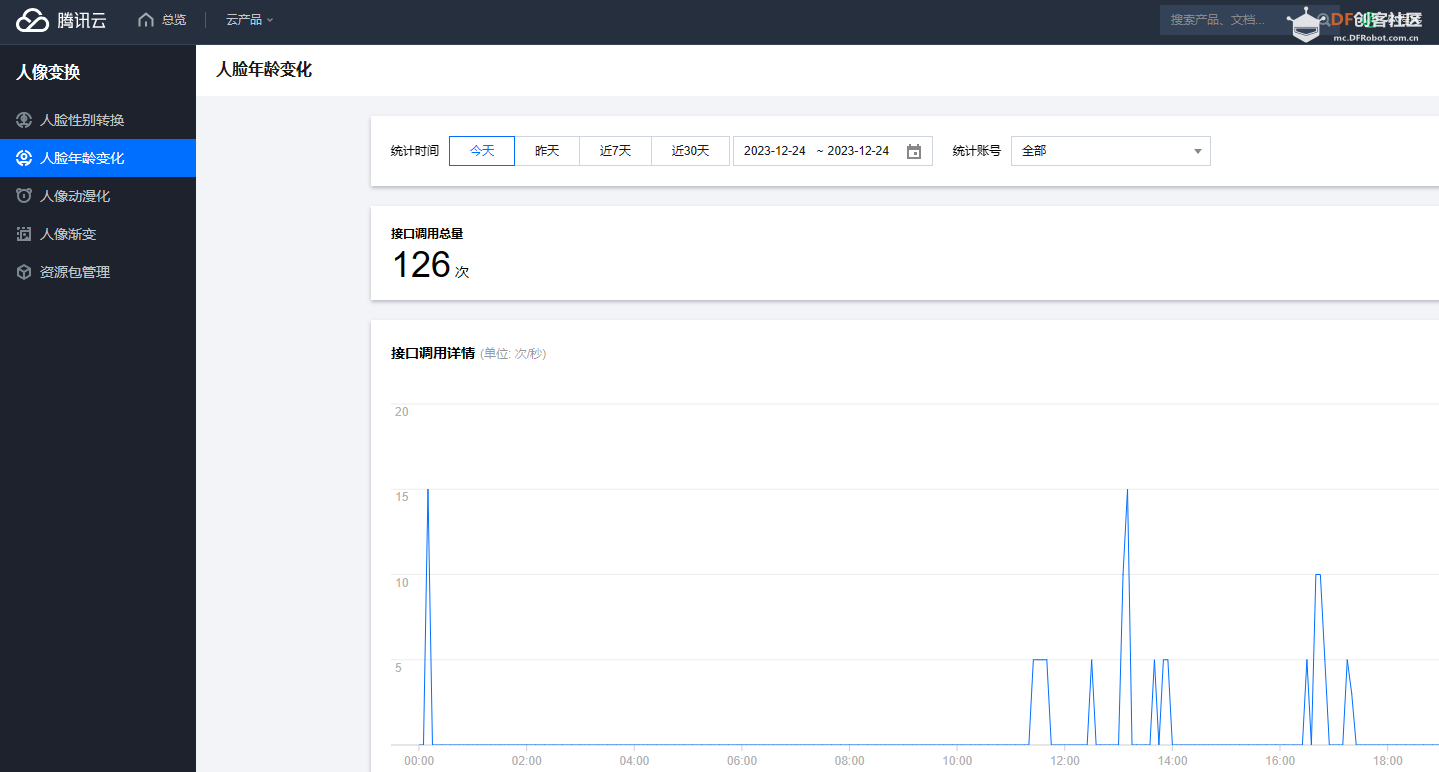
2.正式使用人像变换服务好像要开通下现有服务,和腾讯云其他产品比较像。点击下开通即可。
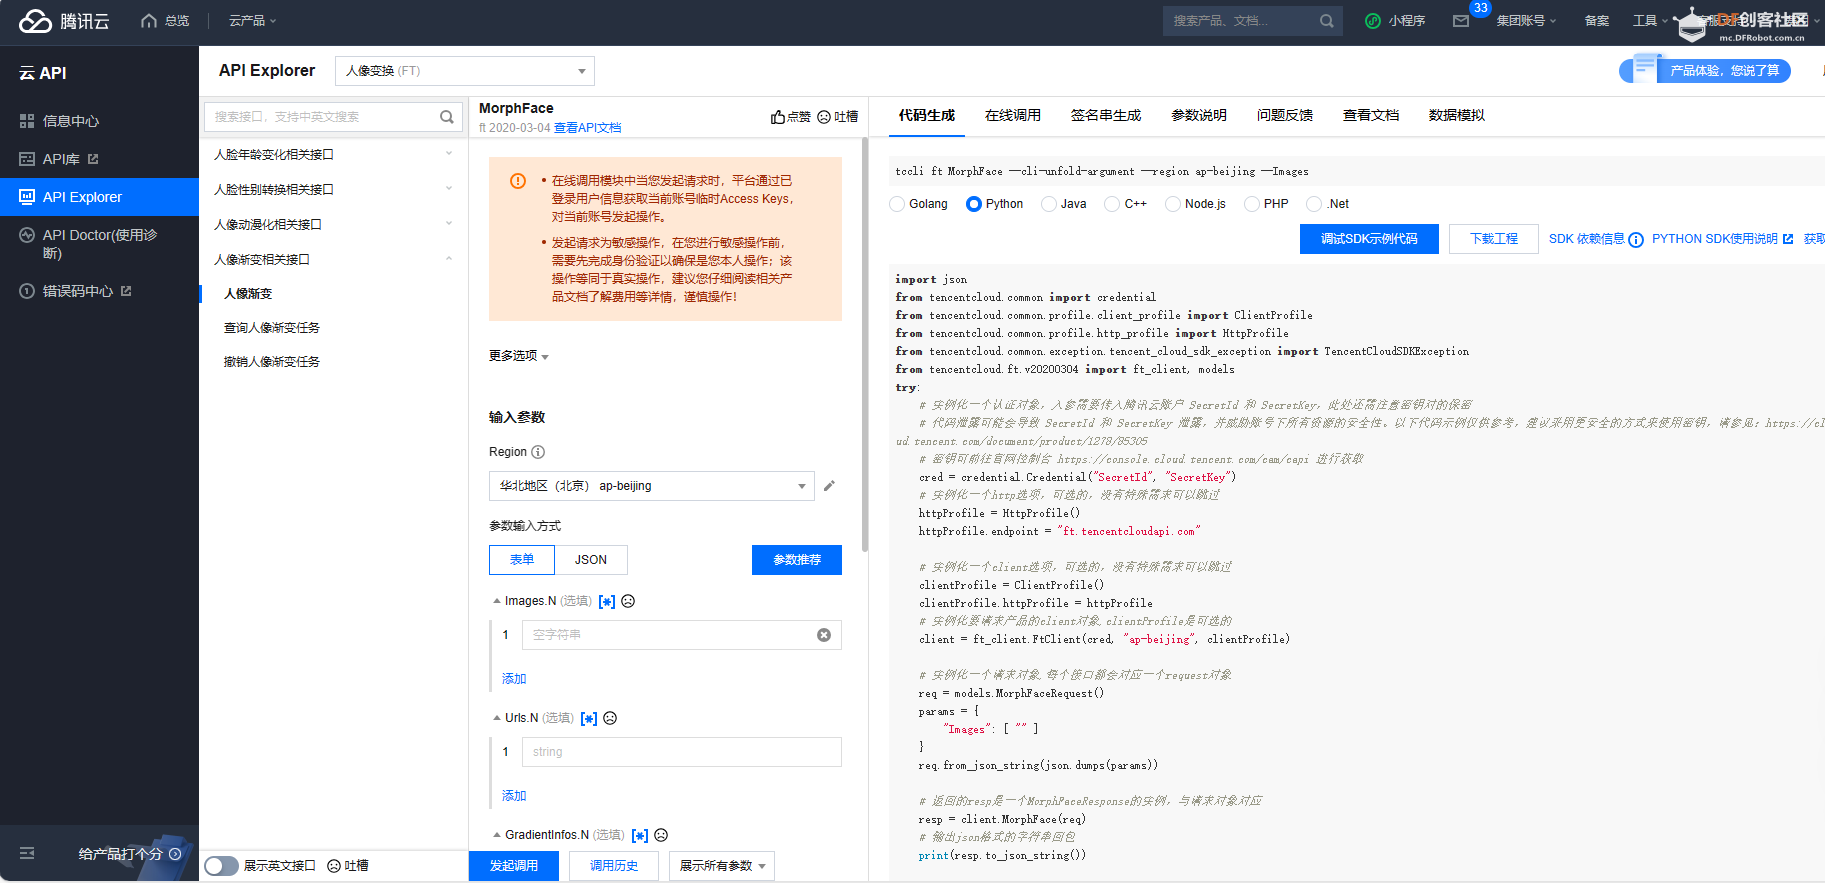
3.使用 API Explorer,可以在上面自动生成代码,同时也配备有签名调试工具。
-
- import json
- import base64
- from tencentcloud.common import credential
- from tencentcloud.common.profile.client_profile import ClientProfile
- from tencentcloud.common.profile.http_profile import HttpProfile
- from tencentcloud.common.exception.tencent_cloud_sdk_exception import TencentCloudSDKException
- from tencentcloud.ft.v20200304 import ft_client, models
-
- # 读一个本地测试文件转换为base64编码
- f = open('./test2.jpg', 'rb')
- base64_data = base64.b64encode(f.read())
- SecretId="*********************"
- SecretKey="*********************"
- try:
- # 实例化一个认证对象,入参需要传入腾讯云账户secretId,secretKey,此处还需注意密钥对的保密
- # 密钥可前往https://console.cloud.tencent.com/cam/capi网站进行获取
- cred = credential.Credential(SecretId, SecretKey) # 传入自己的秘钥
- # 实例化一个http选项,可选的,没有特殊需求可以跳过
- httpProfile = HttpProfile()
- httpProfile.endpoint = "ft.tencentcloudapi.com"
-
- # 实例化一个client选项,可选的,没有特殊需求可以跳过
- clientProfile = ClientProfile()
- clientProfile.httpProfile = httpProfile
- # 实例化要请求产品的client对象,clientProfile是可选的
- client = ft_client.FtClient(cred, "ap-guangzhou", clientProfile)
-
- # 实例化一个请求对象,每个接口都会对应一个request对象
- req = models.ChangeAgePicRequest()
- params = {
- "Image": base64_data.decode("utf-8"), # python里的bytes类型要转成string才可使用
- "AgeInfos": [
- {
- "Age":80 # 可以测试不同的年龄看效果
- }
- ],
- "RspImgType": "url"
- }
- req.from_json_string(json.dumps(params))
-
- # 返回的resp是一个ChangeAgePicResponse的实例,与请求对象对应
- resp = client.ChangeAgePic(req)
- # 输出json格式的字符串回包
- print(resp.to_json_string())
-
- except TencentCloudSDKException as err:
- print(err)
5.组合变年龄与渐变
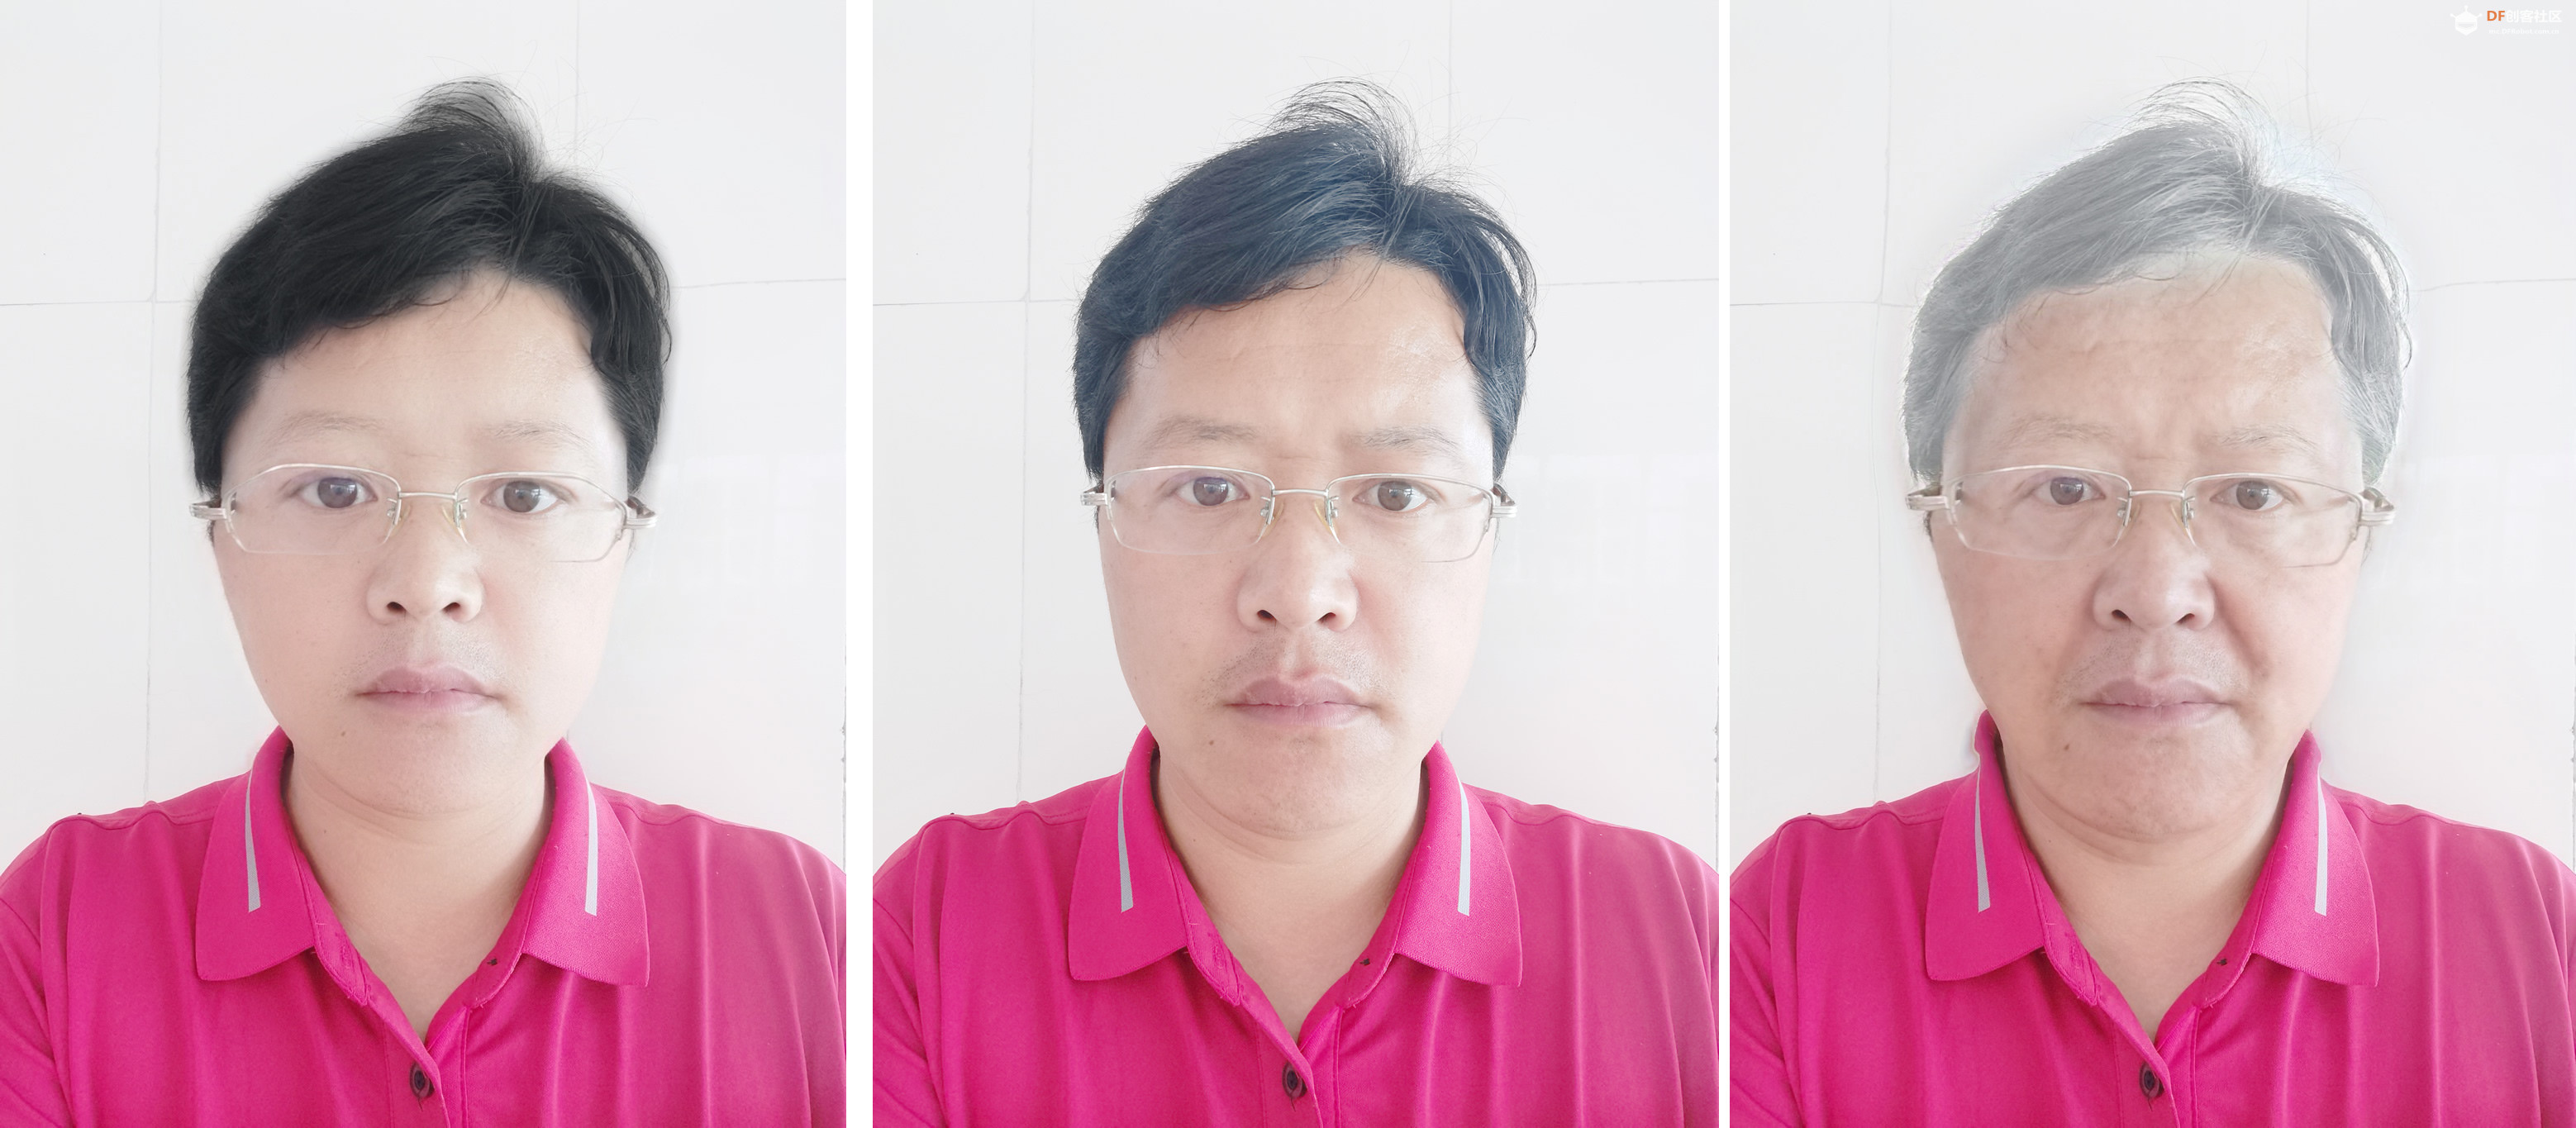
进一步了解了一下,人像变换产品下还有很多其他有意思的能力,我在想这些能力如果可以组合一下,应该会很有意思。比如人脸年龄变换+人像渐变,应该可以做成年龄渐变的效果。
-
- import json
- import sys
- import time
- import base64
- from tencentcloud.common import credential
- from tencentcloud.common.profile.client_profile import ClientProfile
- from tencentcloud.common.profile.http_profile import HttpProfile
- from tencentcloud.common.exception.tencent_cloud_sdk_exception import TencentCloudSDKException
- from tencentcloud.ft.v20200304 import ft_client, models
-
- # 读一个本地测试文件转换为base64编码
- def read_file(filename):
- f = open(filename, 'rb')
- base64_data = base64.b64encode(f.read())
- return base64_data
-
- # 变年龄
- def change_age(client, img, age):
- req = models.ChangeAgePicRequest()
- params = {
- "Image": img.decode("utf-8"), # python里的bytes类型要转成string才可使用
- "AgeInfos": [
- {
- "Age": int(age)
- }
- ],
- "RspImgType": "base64"
- }
- req.from_json_string(json.dumps(params))
- resp = client.ChangeAgePic(req)
- return resp
-
- # 人像渐变
- def morph_face(client, imgs):
- req = models.MorphFaceRequest()
- params = {
- "Images": imgs,
- # 更多细节可通过参数调节
- # "GradientInfos": [
- # {
- # "Tempo": 1,
- # "MorphTime": 1
- # }
- # ],
- "Fps": 25
- }
- req.from_json_string(json.dumps(params))
- resp = client.MorphFace(req)
- print(resp.to_json_string())
- return resp
-
- # 查询人像渐变结果
- def query_morph_face(client, job_id):
- req = models.QueryFaceMorphJobRequest()
- params = {
- "JobId": job_id
- }
- req.from_json_string(json.dumps(params))
- resp = client.QueryFaceMorphJob(req)
- print(resp.to_json_string())
- return resp
-
-
- try:
- # 实例化一个认证对象,入参需要传入腾讯云账户secretId,secretKey,此处还需注意密钥对的保密
- # 密钥可前往https://console.cloud.tencent.com/cam/capi网站进行获取
- cred = credential.Credential("YourSecretId", "YourSecretKey")
- # 实例化一个http选项,可选的,没有特殊需求可以跳过
- httpProfile = HttpProfile()
- httpProfile.endpoint = "ft.tencentcloudapi.com"
-
- # 实例化一个client选项,可选的,没有特殊需求可以跳过
- clientProfile = ClientProfile()
- clientProfile.httpProfile = httpProfile
- # 实例化要请求产品的client对象,clientProfile是可选的
- client = ft_client.FtClient(cred, "ap-guangzhou", clientProfile)
-
- # 读取图片
- data = read_file(sys.argv[1])
-
- ages = [20, 30, 40, 50, 60]
-
- # 批量变年龄
- imgs = []
- for age in ages:
- resp=change_age(client, data, age)
- imgs.append(resp.ResultImage)
-
- # 将图片集合起来调人像渐变
- resp = morph_face(client, imgs)
- job_id = resp.JobId
-
- # 轮询查结果
- resp=query_morph_face(client, job_id)
- while resp.JobStatusCode != 7:
- resp=query_morph_face(client, job_id)
- time.sleep(2)
-
-
- except TencentCloudSDKException as err:
- print(err)
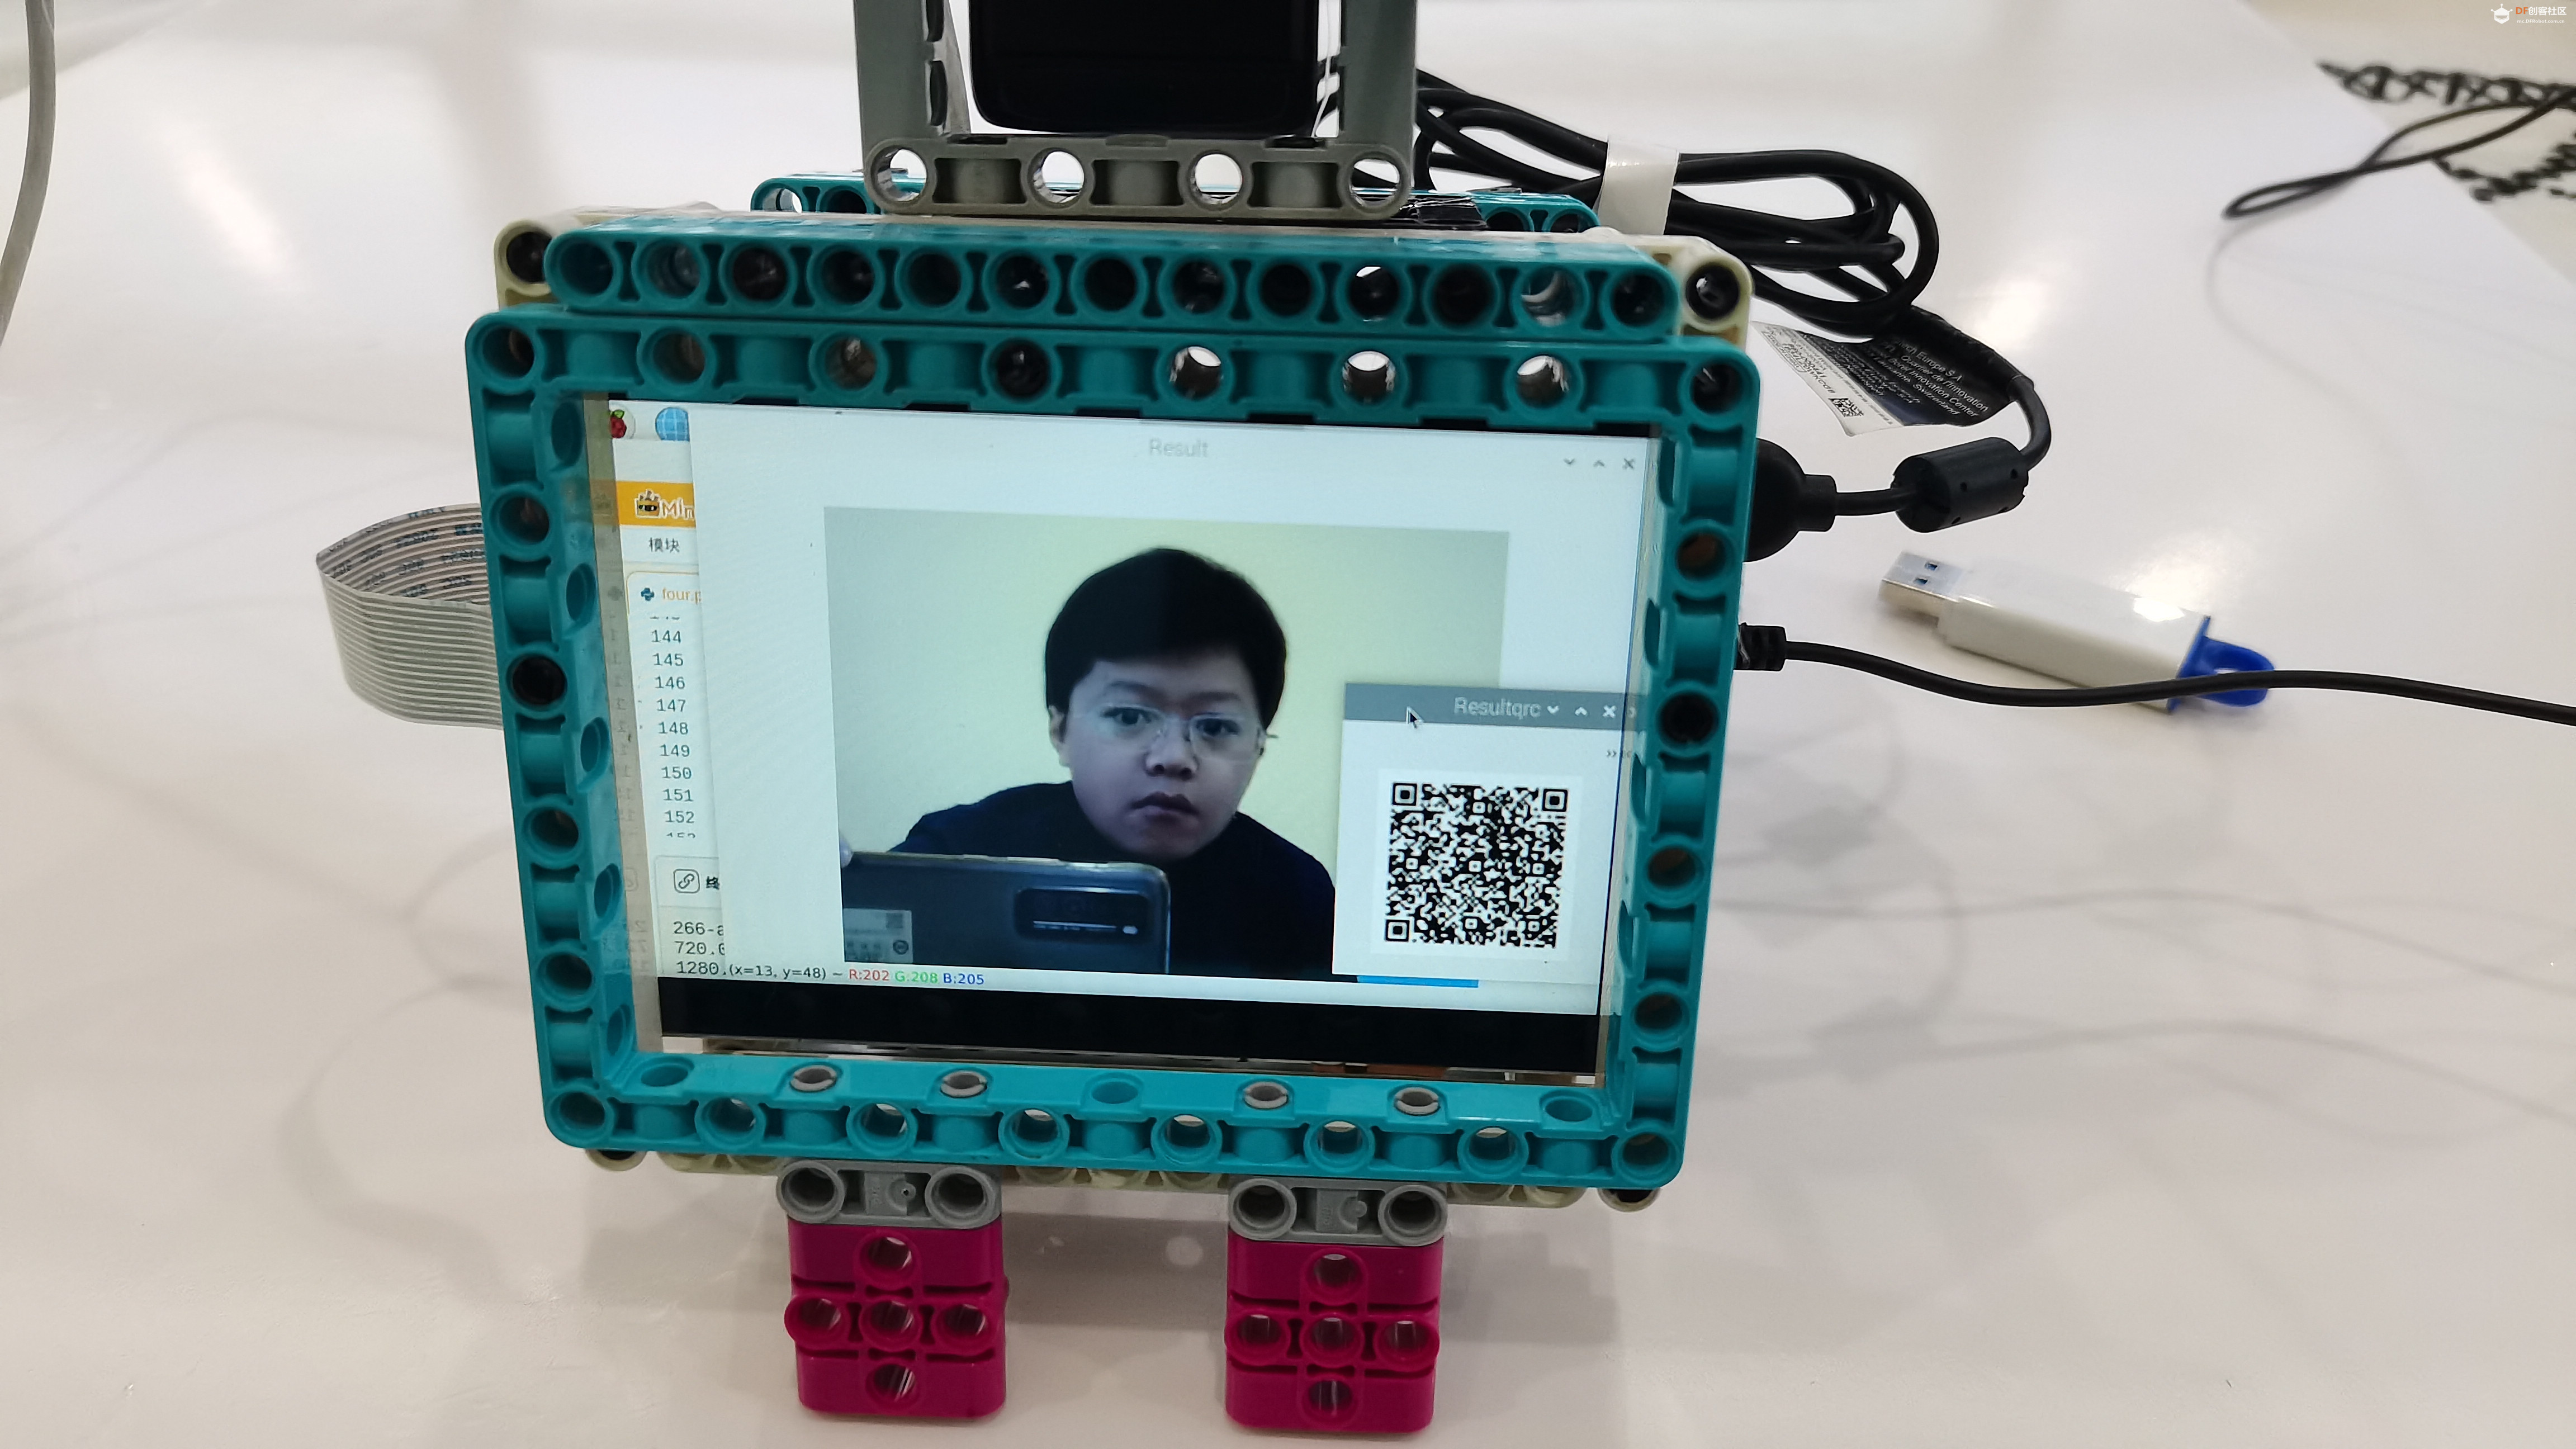
【生成渐变视频二维码】
-
- import cv2
- import qrcode
- from PIL import Image, ImageDraw, ImageFont
- # 打开视频文件
- url='http://bda-video-bodyseg-1254418846.cos.ap-guangzhou.myqcloud.com/video_morph_prod/1/1259541656/20231223235411_ff84a3ff-8046-4e75-9f26-ca751e9287e6_result.mp4'
- imgqrc = qrcode.make(url,version=1,border=4,box_size=1)
- imgqrc.save('output_image.jpg')
- imgqrc = cv2.imread("output_image.jpg")
- imgqrc = cv2.resize(imgqrc,(200,200))
- cv2.namedWindow("Resultqrc", cv2.WINDOW_NORMAL)
- cv2.resizeWindow("Resultqrc", 220, 220)
- cv2.moveWindow("Resultqrc", 800, 500)
- cv2.imshow("Resultqrc", imgqrc)
- cv2.waitKey(10000)
- cv2.destroyAllWindows()
【完整代码】
-
- import json,cv2
- import numpy as np
- import base64
- import time
- from tencentcloud.common import credential
- from tencentcloud.common.profile.client_profile import ClientProfile
- from tencentcloud.common.profile.http_profile import HttpProfile
- from tencentcloud.common.exception.tencent_cloud_sdk_exception import TencentCloudSDKException
- from tencentcloud.ft.v20200304 import ft_client, models
- import qrcode
- from PIL import Image, ImageDraw, ImageFont
- # cv2转base64
- def cv2_to_base64(img):
- img = cv2.imencode('.jpg', img)[1]
- image_code = str(base64.b64encode(img))[2:-1]
-
- return image_code
- # 变年龄
- def change_age(client, img, age):
- # 实例化一个请求对象,每个接口都会对应一个request对象
- req = models.ChangeAgePicRequest()
- params = {
- "Image": img, # python里的bytes类型要转成string才可使用
- "AgeInfos": [
- {
- "Age": int(age)
- }
- ],
- "RspImgType": "base64"
- }
- req.from_json_string(json.dumps(params))
-
- # 返回的resp是一个ChangeAgePicResponse的实例,与请求对象对应
- resp = client.ChangeAgePic(req)
- # 输出json格式的字符串回包
- image_base64 = resp.ResultImage
- image_data = base64.b64decode(image_base64)
- np_array=np.frombuffer(image_data,np.uint8)
- image=cv2.imdecode(np_array,cv2.IMREAD_COLOR)
- cv2.imshow("Result", image)
- cv2.waitKey(1)
- return resp
- # 人像渐变
- def morph_face(client, imgs):
- req = models.MorphFaceRequest()
- params = {
- "Images": imgs,
- # 更多细节可通过参数调节
- # "GradientInfos": [
- # {
- # "Tempo": 1,
- # "MorphTime": 1
- # }
- # ],
- "Fps": 25
- }
- req.from_json_string(json.dumps(params))
- resp = client.MorphFace(req)
-
- #print(resp.to_json_string())
- return resp
- # 查询人像渐变结果
- def query_morph_face(client, job_id):
- req = models.QueryFaceMorphJobRequest()
- params = {
- "JobId": job_id
- }
- req.from_json_string(json.dumps(params))
- resp = client.QueryFaceMorphJob(req)
- #print(resp.to_json_string())
- return resp
- # 加载Haar级联分类器模型(预训练好的)
- face_cascade = cv2.CascadeClassifier('haarcascade_frontalface_default.xml')
-
- # 从文件或者视频流中获取图像数据
- cap = cv2.VideoCapture(0)
- sum1=0
- sum2=0
- bs=0
- #ages = [5,10,15,20,25,30,35,40,45,50,55, 60,65,70,75,80,90,95,100]
- ages = [5,25,45,65,85]
- SecretId="#################"
- SecretKey="####################"
- # 实例化一个认证对象,入参需要传入腾讯云账户 SecretId 和 SecretKey,此处还需注意密钥对的保密
- # 代码泄露可能会导致 SecretId 和 SecretKey 泄露,并威胁账号下所有资源的安全性。以下代码示例仅供参考,建议采用更安全的方式来使用密钥,请参见:https://cloud.tencent.com/document/product/1278/85305
- # 密钥可前往官网控制台 https://console.cloud.tencent.com/cam/capi 进行获取
- cred = credential.Credential(SecretId, SecretKey)
- # 实例化一个http选项,可选的,没有特殊需求可以跳过
- httpProfile = HttpProfile()
- httpProfile.endpoint = "ft.tencentcloudapi.com"
-
- # 实例化一个client选项,可选的,没有特殊需求可以跳过
- clientProfile = ClientProfile()
- clientProfile.httpProfile = httpProfile
- # 实例化要请求产品的client对象,clientProfile是可选的
- client = ft_client.FtClient(cred, "ap-beijing", clientProfile)
- x3=220
- y3=140
- w3=200
- h3=200
-
- while True:
- ret, img = cap.read()
- if ret:
-
- gray = cv2.cvtColor(img, cv2.COLOR_BGR2GRAY)
- # 对图像进行人脸检测
- faces = face_cascade.detectMultiScale(gray, scaleFactor=1.3, minNeighbors=5, flags=cv2.CASCADE_SCALE_IMAGE)
- # 标记并显示检测到的人脸区域
- if len(faces)!=0:
-
- sum2=0
- if bs==0:
- for (x, y, w, h) in faces:
- if abs(x-x3)<20 and abs(y-y3)<20 and abs(w-w3)<20 and abs(h-h3)<20:#当识别到的人脸区域与基准区域接近时,启动人脸年龄变换
- sum1=sum1+1
- if sum1>10:
- bs=1
- data=cv2_to_base64(img)
- imgs = []
- for age in ages:
- resp=change_age(client, data, age)
- imgs.append(resp.ResultImage)
- time.sleep(30)
- print(age)
- # 将图片集合起来调人像渐变
- cv2img = cv2.cvtColor(img, cv2.COLOR_BGR2RGB)
- pilimg = Image.fromarray(cv2img)
- # PIL图片上打印汉字
- draw = ImageDraw.Draw(pilimg) # 图片上打印
- #simsun 宋体
- font = ImageFont.truetype("SIMHEI.TTF", 40, encoding="utf-8")
- #位置,文字,颜色==红色,字体引入
- draw.text((5, 430), "人脸年龄渐变视频正在生成中……", (255, 0, 0), font=font)
- # PIL图片转cv2 图片
- img = cv2.cvtColor(np.array(pilimg), cv2.COLOR_RGB2BGR)
- cv2.imshow("Result", img)
- cv2.waitKey(1)
- resp = morph_face(client, imgs)
- job_id = resp.JobId
-
- # 轮询查结果
- resp=query_morph_face(client, job_id)
- while resp.JobStatusCode != 7:
- resp=query_morph_face(client, job_id)
-
- time.sleep(2)
- #生成渐变视频二维码
- url=resp.FaceMorphOutput.MorphUrl
- imgqrc = qrcode.make(url,version=1,border=4,box_size=1)
- imgqrc.save('output_image.jpg')
- imgqrc = cv2.imread("output_image.jpg")
- imgqrc = cv2.resize(imgqrc,(200,200))
- cv2.namedWindow("Resultqrc", cv2.WINDOW_NORMAL)
- cv2.resizeWindow("Resultqrc", 220, 220)
- cv2.moveWindow("Resultqrc", 800, 500)
- cv2.imshow("Resultqrc", imgqrc)
- cv2.waitKey(1)
- cap1 = cv2.VideoCapture(url)
- print(resp.FaceMorphOutput.MorphUrl)
- print(cap1.get(cv2.CAP_PROP_FRAME_WIDTH))
- print(cap1.get(cv2.CAP_PROP_FRAME_HEIGHT))
- for i in range(8):
- cap1.set(cv2.CAP_PROP_POS_FRAMES,0)
- ret, img1 = cap1.read()
- while ret:
- # 设置区域位置
- x1, y1 = 0, 380 # 左上角点的 x、y 坐标
- x2, y2 = 720, 910 # 右下角点的 x、y 坐标
- # 提取指定区域的子图像
- img1 = img1[y1:y2, x1:x2]
- cv2.imshow("Result", img1)
- cv2.waitKey(1)
- ret, img1 = cap1.read()
- cv2.destroyAllWindows("Resultqrc")
- for (x, y, w, h) in faces:
- cv2.rectangle(img, (x, y), (x+w, y+h), (0, 255, 0), 3)
-
- else:
- sum1=0
- if bs==1:
- sum2=sum2+1
- if sum2>100:
- bs=0
- print(sum1,sum2)
-
- # 展示结果图片
- cv2.rectangle(img, (x3, y3), (x3+w3, y3+h3), (255, 0, 255), 4)
- cv2.imshow("Result", img)
- cv2.waitKey(1)
- cv2.destroyAllWindows()

|





 沪公网安备31011502402448