本帖最后由 云天 于 2025-12-11 22:07 编辑
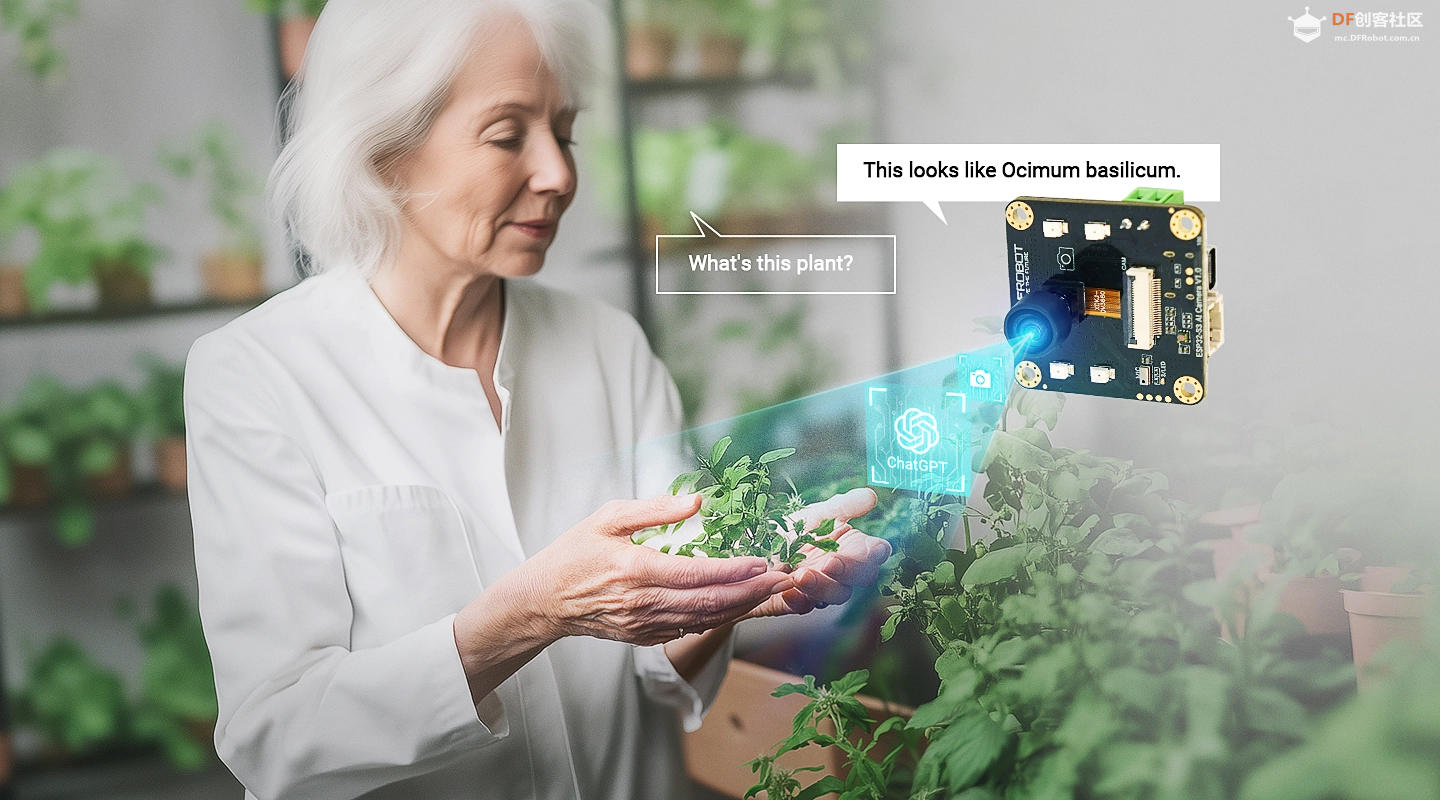
本项目创造性地将小智AI(ESP32-S3 AI摄像头)与掌控板相结合,通过UDP协议实现了语音和图像识别双重控制方式。这一创新方案突破了传统小智AI系统与其他主控设备通信的技术壁垒,为创客作品制作提供了一种简单、高效且灵活的解决方案。
【技术特点与创新点】
1. 创新性的UDP通信架构
本项目最大的技术突破在于使用UDP协议作为小智AI与外部主控设备之间的通信桥梁。传统的小智AI系统与其他设备通信需要复杂的MCP协议实现,而本项目通过简单的UDP消息传递,大大降低了开发门槛和系统复杂性。 2. 验证双重控制方式
演示两种控制方式: 语音控制:用户通过自然语言对话控制设备 图像识别控制:通过摄像头识别纸上文字进行控制
3. 开放式架构设计
通过UDP通信,小智AI可以与任何支持UDP协议的主控设备进行通信,包括但不限于掌控板、 Arduino、树莓派等,极大地扩展了小智AI的应用场景。
1.小智AI(ESP32-S3 AI摄像头)- ESP32-S3双核处理器
- 内置摄像头模块
- 麦克风阵列
- Wi-Fi连接功能
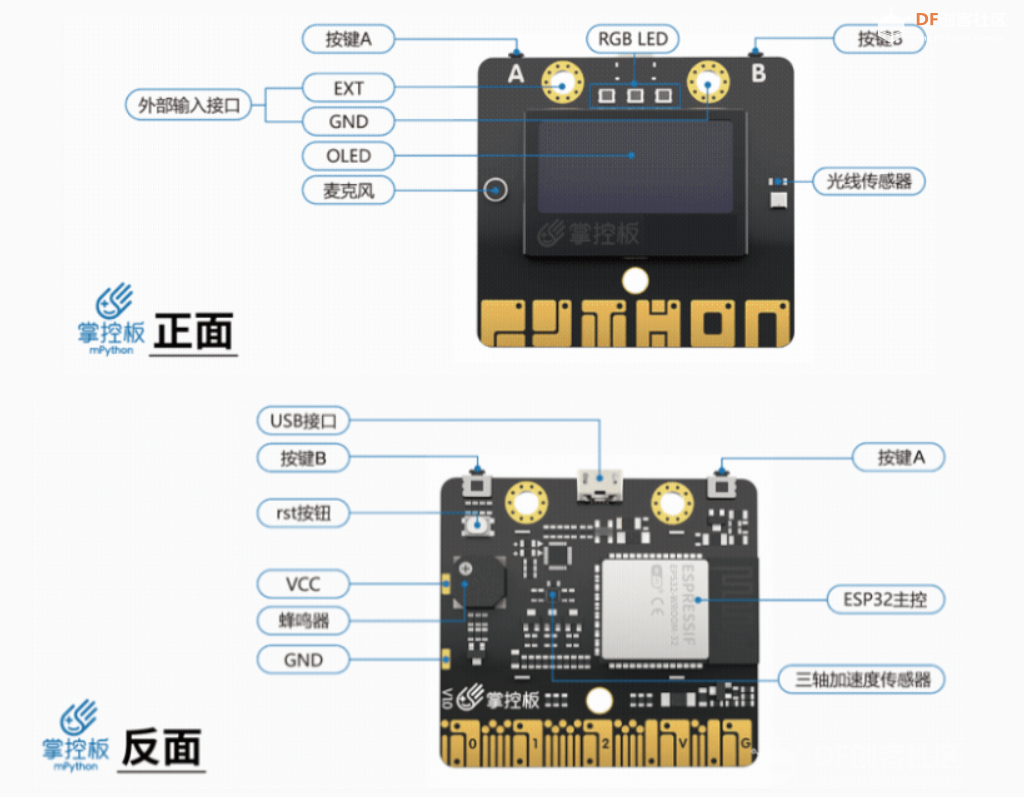
2.掌控板(主控设备)
- ESP32主控
- 集成RGB LED灯
- OLED显示屏
- 多种传感器接口
【软件实现】
小智AI固件修改 修改了小智AI的开源代码,在mcp_server.cc中实现了UDP通信功能: 1.增加头文件
- #include <lwip/sockets.h> // 添加socket头文件
- #include <string.h> // 添加字符串处理头文件
2.UDP初始化 - #define UDP_SERVER_IP "192.168.31.163" // 目标服务器IP
- #define UDP_SERVER_PORT 8888 // 目标服务器端口
- // 声明UDP发送函数
- static bool send_udp_letter(const char letter);
3.添加灯光控制工具 在McpServer::AddCommonTools(){}中添加。这个函数是所有MCP工具的集中注册点,将各种设备控制功能封装为MCP工具,使得AI助手可以通过标准协议调用这些功能。 - void McpServer::AddCommonTools() {
- // To speed up the response time, we add the common tools to the beginning of
- // the tools list to utilize the prompt cache.
- // Backup the original tools list and restore it after adding the common tools.
- auto original_tools = std::move(tools_);
- auto& board = Board::GetInstance();
- //修改
- // 添加语音控制灯光工具
-
- // 添加开灯工具 - 发送字母A
- AddTool("self.light.turn_on",
- "打开灯光。此工具通过UDP向小智AI服务器发送字母'A',表示打开灯光。\n"
- "当用户想要打开灯光或表达类似意图时使用此工具。\n"
- "无需参数。\n"
- "返回:\n"
- " 包含成功状态和消息的JSON对象",
- PropertyList(),
- [](const PropertyList& properties) -> ReturnValue { // 修改:添加参数
- ESP_LOGI(TAG, "打开灯光 - 发送字母'A'到 %s:%d",
- UDP_SERVER_IP, UDP_SERVER_PORT);
-
- // 发送UDP数据
- bool result = send_udp_letter('A');
-
- if (result) {
- std::string success_msg = "成功打开灯光,发送字母'A'到 " +
- std::string(UDP_SERVER_IP) + ":" + std::to_string(UDP_SERVER_PORT);
- ESP_LOGI(TAG, "%s", success_msg.c_str());
- return "{"success": true, "action": "turn_on", "message": "" + success_msg + ""}";
- } else {
- std::string error_msg = "打开灯光失败,发送字母'A'到 " +
- std::string(UDP_SERVER_IP) + ":" + std::to_string(UDP_SERVER_PORT) + " 失败";
- ESP_LOGE(TAG, "%s", error_msg.c_str());
- return "{"success": false, "action": "turn_on", "message": "" + error_msg + ""}";
- }
- });
-
- // 添加关灯工具 - 发送字母B
- AddTool("self.light.turn_off",
- "关闭灯光。此工具通过UDP向小智AI服务器发送字母'B',表示关闭灯光。\n"
- "当用户想要关闭灯光或表达类似意图时使用此工具。\n"
- "无需参数。\n"
- "返回:\n"
- " 包含成功状态和消息的JSON对象",
- PropertyList(),
- [](const PropertyList& properties) -> ReturnValue { // 修改:添加参数
- ESP_LOGI(TAG, "关闭灯光 - 发送字母'B'到 %s:%d",
- UDP_SERVER_IP, UDP_SERVER_PORT);
-
- // 发送UDP数据
- bool result = send_udp_letter('B');
-
- if (result) {
- std::string success_msg = "成功关闭灯光,发送字母'B'到 " +
- std::string(UDP_SERVER_IP) + ":" + std::to_string(UDP_SERVER_PORT);
- ESP_LOGI(TAG, "%s", success_msg.c_str());
- return "{"success": true, "action": "turn_off", "message": "" + success_msg + ""}";
- } else {
- std::string error_msg = "关闭灯光失败,发送字母'B'到 " +
- std::string(UDP_SERVER_IP) + ":" + std::to_string(UDP_SERVER_PORT) + " 失败";
- ESP_LOGE(TAG, "%s", error_msg.c_str());
- return "{"success": false, "action": "turn_off", "message": "" + error_msg + ""}";
- }
- });
4.UDP发送函数 - // UDP发送函数的实现
- static bool send_udp_letter(const char letter) {
- int sockfd = -1;
- struct sockaddr_in dest_addr;
-
- // 创建UDP socket
- sockfd = socket(AF_INET, SOCK_DGRAM, IPPROTO_IP);
- if (sockfd < 0) {
- ESP_LOGE(TAG, "Failed to create UDP socket: errno %d", errno);
- return false;
- }
-
- // 设置目标地址
- memset(&dest_addr, 0, sizeof(dest_addr));
- dest_addr.sin_family = AF_INET;
- dest_addr.sin_port = htons(UDP_SERVER_PORT);
-
- // 解析目标IP地址
- if (inet_pton(AF_INET, UDP_SERVER_IP, &dest_addr.sin_addr) != 1) {
- ESP_LOGE(TAG, "Invalid IP address: %s", UDP_SERVER_IP);
- close(sockfd);
- return false;
- }
-
- // 发送数据
- ssize_t sent_bytes = sendto(sockfd, &letter, 1, 0,
- (struct sockaddr *)&dest_addr, sizeof(dest_addr));
-
- bool success = false;
- if (sent_bytes < 0) {
- ESP_LOGE(TAG, "Failed to send UDP data: errno %d", errno);
- } else if (sent_bytes == 0) {
- ESP_LOGE(TAG, "No data sent");
- } else {
- ESP_LOGI(TAG, "Sent %d bytes to %s:%d", (int)sent_bytes, UDP_SERVER_IP, UDP_SERVER_PORT);
- success = true;
- }
-
- // 关闭socket
- close(sockfd);
- return success;
- }
【掌控板程序设计】 使用Mind+ 2.0图形化编程环境,编写了掌控板的UDP服务器程序: - /*!
- * MindPlus
- * DFRobot, 掌控板
- */
- #include <MPython.h>
- #include <DFRobot_Iot.h>
- #include <DFRobot_UDPServer.h>
- // 创建对象
- DFRobot_Iot myIot;
- DFRobot_UDPServer myserver;
-
- void onUdpServerRecvMsg(String message);
-
- // 主程序开始
- void setup() {
- mPython.begin();
- myserver.setCallback(onUdpServerRecvMsg);
- rgb.write(-1, 0xFF0000);
- myIot.wifiConnect("***", "*********");
- while (!myIot.wifiStatus()) {yield();}
- myserver.setPort(8888);
- rgb.write(-1, 0x00FF00);
- delay(1000);
- rgb.write(-1, 0x000000);
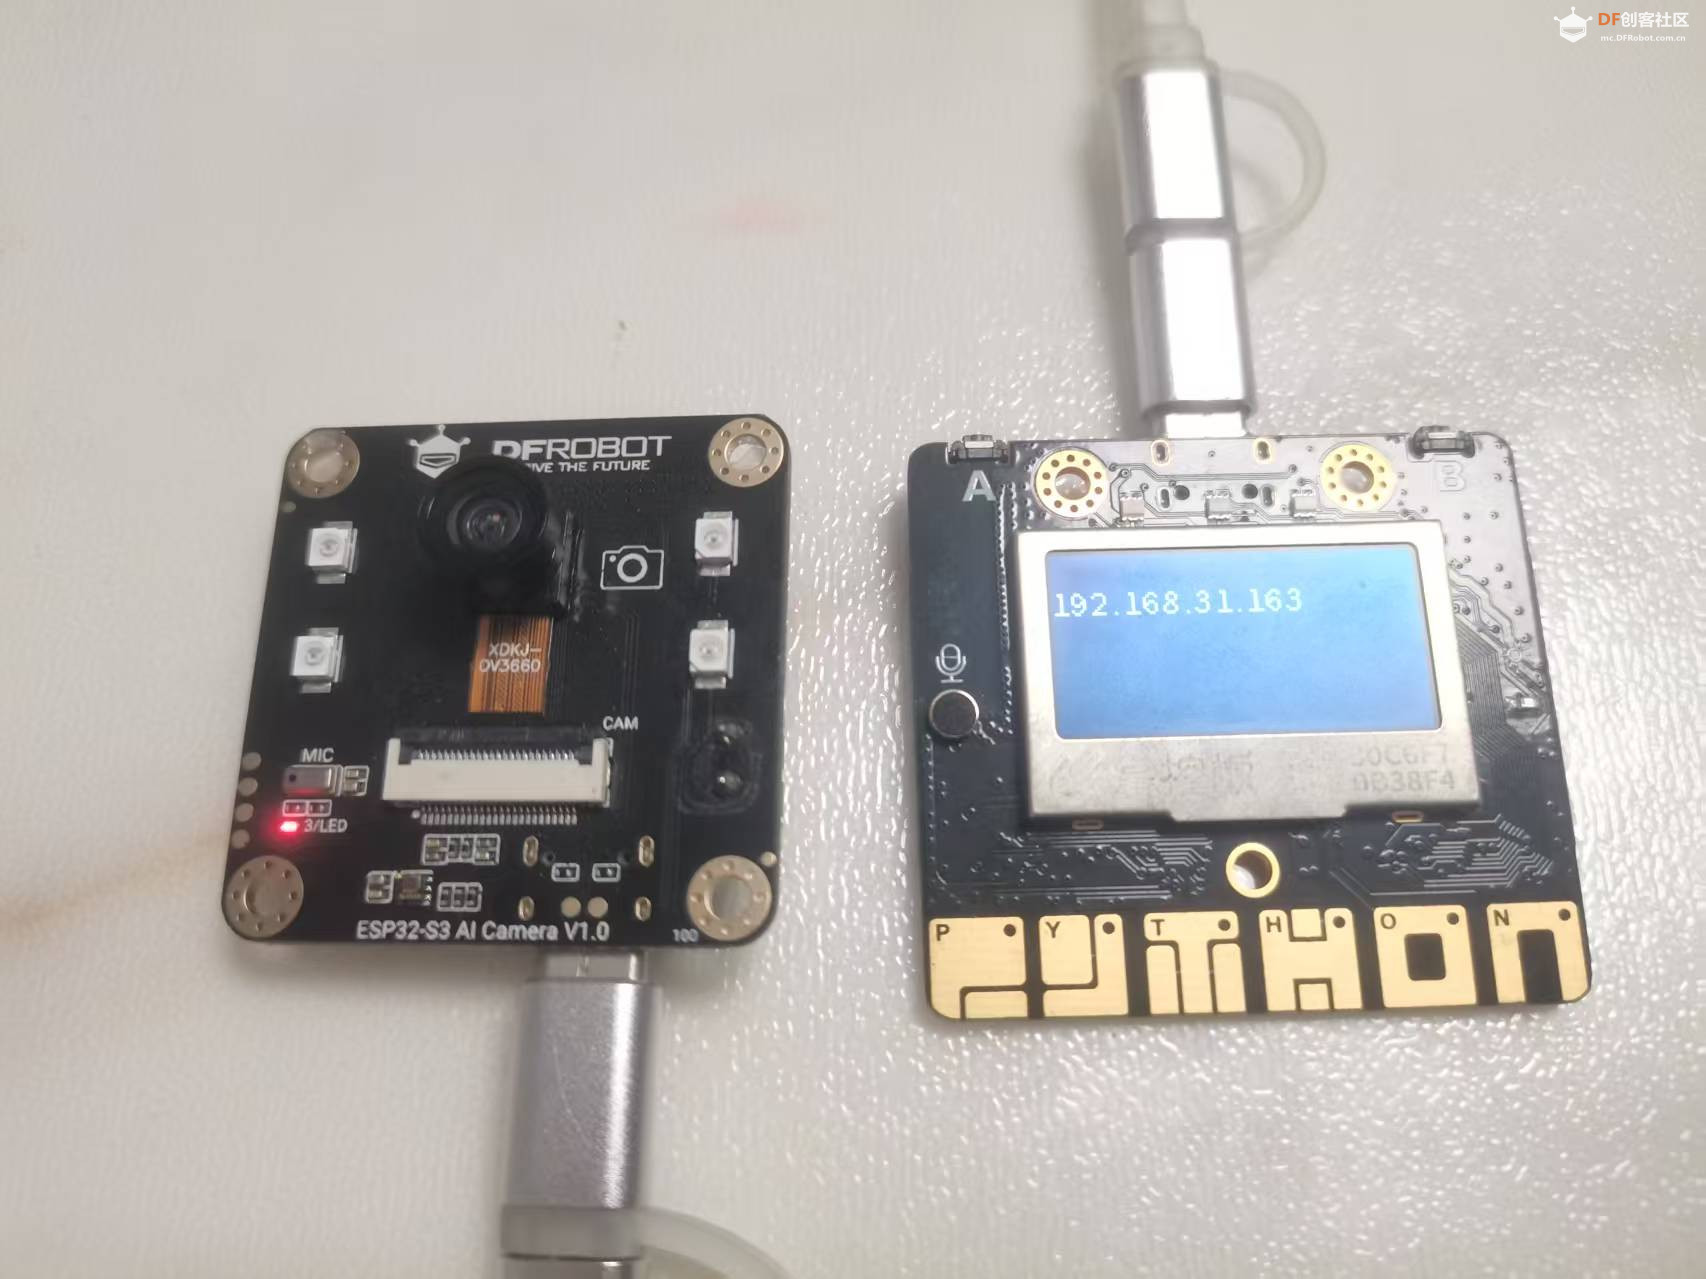
- display.setCursor(0, 22);
- display.print(myIot.getWiFiSoftIP());
- }
- void loop() {
-
- }
-
- // 事件回调函数
- void onUdpServerRecvMsg(String message) {
- display.fillInLine(3, 0);
- display.setCursorLine(3);
- display.printLine(message);
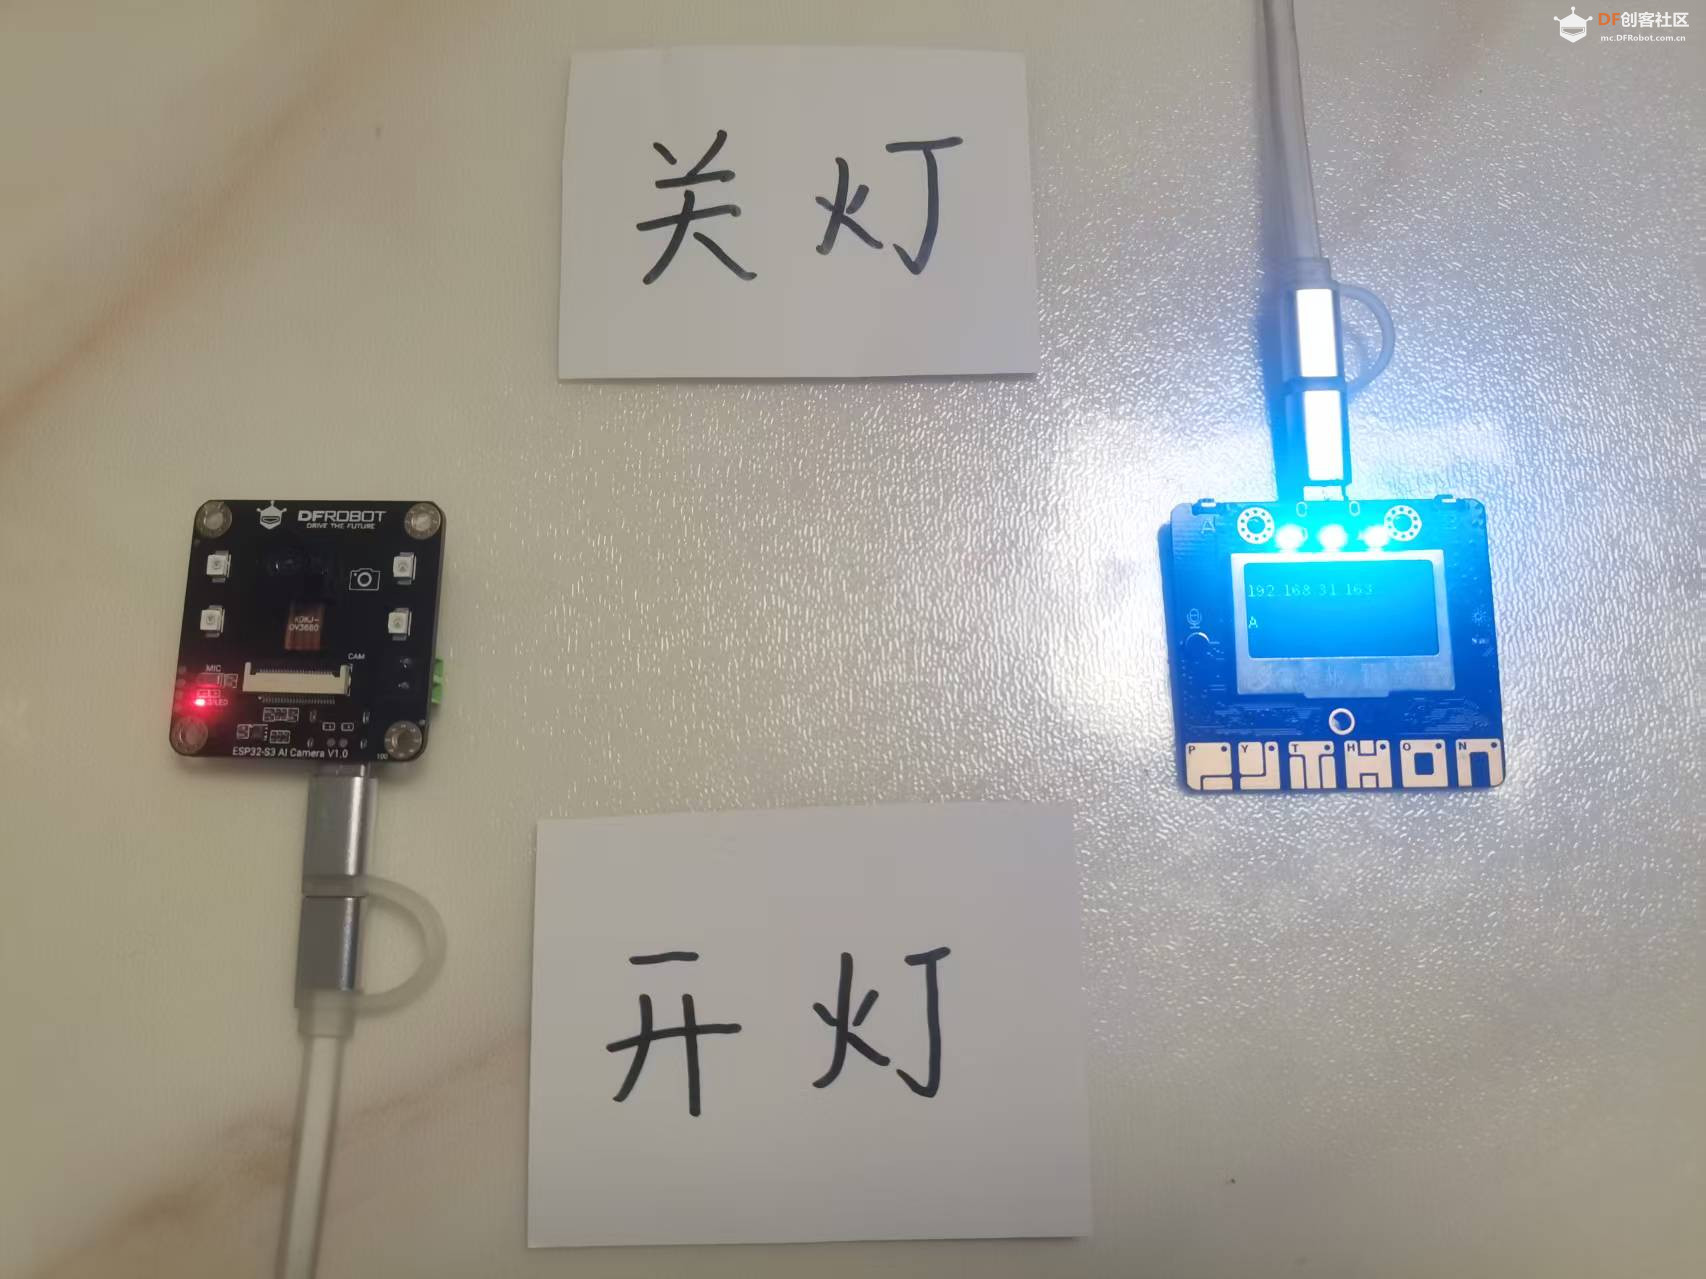
- if ((message==String("A"))) {
- rgb.write(-1, 0x0000FF);
- }
- if ((message==String("B"))) {
- rgb.write(-1, 0x000000);
- }
- }
【系统工作原理】
1. 语音控制流程用户说"开灯" → 小智AI语音识别 → MCP工具调用 → UDP发送'A' → 掌控板接收消息 → LED亮起
2. 图像识别控制流程用户展示"开灯"文字 → 小智AI图像识别 → MCP工具调用 → UDP发送'A' → 掌控板接收消息 → LED亮起
3. 通信流程小智AI (192.168.31.x) → UDP数据包 → WiFi网络 → 掌控板 (192.168.31.163:8888)
【技术优势】【教育应用】
【演示视频】
本项目通过创新的UDP通信方案,成功地将小智AI的AI能力与掌控板的硬件控制能力相结合,创造了一个简单、高效、灵活的智能控制系统。这一方案不仅解决了小智AI与外部设备通信的技术难题,也为物联网应用的开发提供了新的思路和范例。
| 


 沪公网安备31011502402448
 置顶卡
置顶卡 变色卡
变色卡 千斤顶
千斤顶
 活跃会员
活跃会员
 宣传大使
宣传大使
 牛X认证
牛X认证
 创客造
创客造
 编辑选择奖
编辑选择奖
 志“童”道合
 编辑选择奖
编辑选择奖
 编辑选择奖
编辑选择奖
 编辑选择奖
编辑选择奖
 编辑选择奖
编辑选择奖


