本帖最后由 麦壳maikemaker 于 2024-4-10 19:00 编辑
个人玩家自制客户端的实现方式选择有很多,但是大多数都受终端设备的类型限制,所以基于跨终端的应用为底座做客户端是比较方便的选择。一般情况下web是不受平台限制的无论是手机还是电脑,iOS还是安卓或者Linux都可以使用,还有就是今天要做的小程序。它基于微信,而微信也是跨平台可用的。先看下演示视频
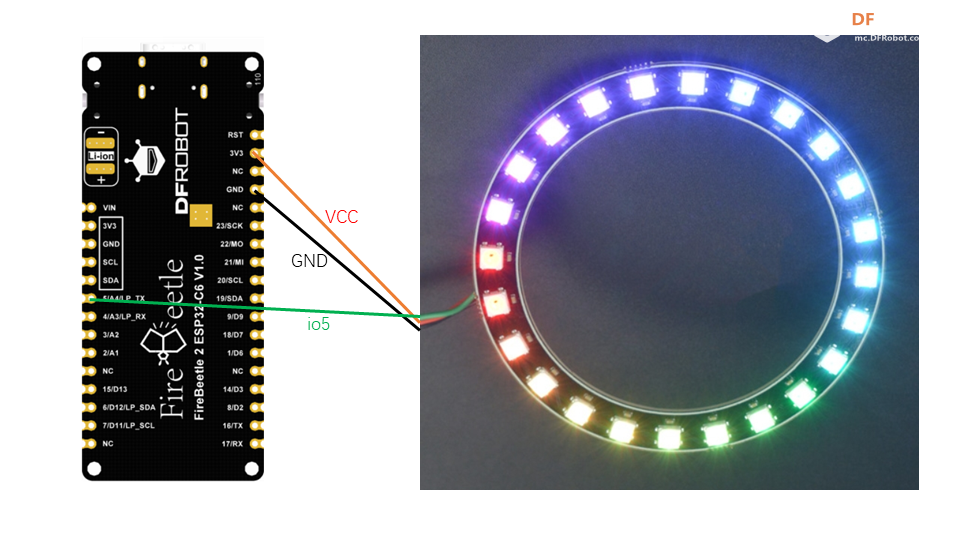
硬件端
硬件连接
程序
micropython语言
-
- #import mqtt
- import network
- import ssl
- import time
- import os
- from machine import Pin,Timer
- from umqtt.simple import MQTTClient
- import neopixel #导入ws2812彩灯库
- import urandom #导入随机数库
-
- CLIENT_ID = b'test_from_esp32c6'
- MQTT_SERVER = 'ea043a32.ala.cn-hangzhou.emqxsl.cn'
- PORT = 8883
- USERNAME = b'账号'
- PASSWORD = b'密码'
- TOPIC = b'esp32c6/test'
-
- xg=0
-
- RGBIO = Pin(5) # 彩灯控制引脚
- LED_NUM = 12 # 彩灯的数量
- LED = neopixel.NeoPixel(pin=RGBIO, n=LED_NUM, timing=1) # 创建控制对象
- LED.fill((0, 0, 0)) # GRB填充数据(RGB顺序, 0为不亮,255为全亮)
- LED.write() # 写入数据(生效)
-
- RR = [255, 252, 233, 191, 128, 64, 0, 0, 46, 139, 205, 255]
- GG = [0, 46, 139, 205, 255, 255, 205, 139, 46, 0, 0, 43]
- BB = [0, 0, 0, 46, 139, 205, 255, 255, 205, 139, 46, 0]
-
- #正反刷新随机颜色1
- def xg1():
- r = urandom.randint(0, 255)
- g = urandom.randint(0, 255)
- b = urandom.randint(0, 255)
- for i in range(12):
- LED[i] = (r, g, b) # 依次设置LED灯珠的颜色
- LED.write() # 写入数据
- time.sleep_ms(50)
-
- r = urandom.randint(0, 255)
- g = urandom.randint(0, 255)
- b = urandom.randint(0, 255)
- for i in range(11, -1, -1):
- LED[i] = (r, g, b) # 依次设置LED灯珠的颜色
- LED.write() # 写入数据
- time.sleep_ms(50)
-
- #单灯亮跑一圈,suiji变色
- def xg2():
- r = urandom.randint(0, 255)
- g = urandom.randint(0, 255)
- b = urandom.randint(0, 255)
- for i in range(12):
- LED.fill((0, 0, 0))
- LED[i] = (r, g, b) # 依次设置LED灯珠的颜色
- LED.write() # 写入数据
- time.sleep_ms(100)
-
- #单灯色不一致跑一圈变色
- def xg3():
- r = urandom.randint(0, 255)
- g = urandom.randint(0, 255)
- b = urandom.randint(0, 255)
- for i in range(12):
- LED.fill((b, r, g))
- LED[i] = (r, g, b) # 依次设置LED灯珠的颜色
- LED.write() # 写入数据
- time.sleep_ms(100)
-
- #单灯转圈随机色一步一变色
- def xg4():
-
- for i in range(12):
- r = urandom.randint(0, 255)
- g = urandom.randint(0, 255)
- b = urandom.randint(0, 255)
- LED[i] = (r, g, b) # 依次设置LED灯珠的颜色
- LED.write() # 写入数据
- time.sleep_ms(50)
- #单灯随机色转圈2只有一个灯亮
- def xg5():
-
- for i in range(12):
- r = urandom.randint(0, 255)
- g = urandom.randint(0, 255)
- b = urandom.randint(0, 255)
- LED.fill((0, 0, 0))
- LED[i] = (r, g, b) # 依次设置LED灯珠的颜色
- LED.write() # 写入数据
- time.sleep_ms(50)
- #旋转彩虹
- def xg6():
- global RR
- global GG
- global BB
- for i in range(12):
- LED[i] = (RR[i], GG[i], BB[i]) # 依次设置LED灯珠的颜色
- LED.write() # 写入数据
- time.sleep(0.3) # 暂停一段时间,控制旋转速度
- # 在这里添加代码来实现颜色的旋转效果,例如将RR、GG、BB列表中的元素向右移动一位
- RR = [RR[-1]] + RR[:-1]
- GG = [GG[-1]] + GG[:-1]
- BB = [BB[-1]] + BB[:-1]
- #三原色呼吸灯
- def xg7():
- for i in range(255):
- LED.fill((i, 0, 0))
- LED.write() # 写入数据
- time.sleep_ms(5)
- for i in range(255,0,-1):
- LED.fill((i, 0, 0))
- LED.write() # 写入数据
- time.sleep_ms(5)
- for i in range(255):
- LED.fill((0, i, 0))
- LED.write() # 写入数据
- time.sleep_ms(5)
- for i in range(255,0,-1):
- LED.fill((0, i, 0))
- LED.write() # 写入数据
- time.sleep_ms(5)
- for i in range(255):
- LED.fill((0, 0, i))
- LED.write() # 写入数据
- time.sleep_ms(5)
- for i in range(255,0,-1):
- LED.fill((0, 0, i))
- LED.write() # 写入数据
- time.sleep_ms(5)
- #sanse警示
- def xg8():
- LED.fill((255, 0, 0))
- LED.write() # 写入数据
- time.sleep_ms(100)
- LED.fill((0, 255, 0))
- LED.write() # 写入数据
- time.sleep_ms(100)
- LED.fill((0, 0, 255))
- LED.write() # 写入数据
- time.sleep_ms(100)
-
- def WIFI_Connect():
- WIFI_LED = Pin(15,Pin.OUT)
- wlan = network.WLAN(network.STA_IF)
- wlan.active(True)
- start_time=time.time() #记录时间做超时判断
- if not wlan.isconnected():
- print('connecting to network...')
- wlan.connect('waoo2111280', 'waoo2111280')#输入WIFI账号密码
- while not wlan.isconnected():
- #LED闪烁提示
- WIFI_LED.value(1)
- time.sleep_ms(300)
- WIFI_LED.value(0)
- time.sleep_ms(300)
- #超时判断,15秒没连接成功判定为超时
- if time.time()-start_time > 15 :
- print('WIFI Connected Timeout!')
- break
- if wlan.isconnected():
- #LED点亮
- WIFI_LED.value(1)
- #串口打印信息
- print('network information:', wlan.ifconfig())
- LED.fill((0, 255, 0))
- LED.write()
- return True
- else:
- LED.fill((255, 0, 0))
- LED.write()
- return False
- #设置MQTT回调函数,有信息时候执行
- def MQTT_callback(topic, msg):
- global xg
- print('topic: {}'.format(topic))
- print('msg:{}'.format(msg))
- #xg = int('{}'.format(msg)[2])
- if "b'1'"== '{}'.format(msg):
- print("1")
- xg=1
- if "b'2'"== '{}'.format(msg):
- print("2")
- xg=2
- if "b'3'"== '{}'.format(msg):
- print("3")
- xg=3
- if "b'4'"== '{}'.format(msg):
- print("4")
- xg=4
- if "b'5'"== '{}'.format(msg):
- print("5")
- xg=5
- if "b'6'"== '{}'.format(msg):
- print("6")
- xg=6
- if "b'7'"== '{}'.format(msg):
- print("7")
- xg=7
- if "b'8'"== '{}'.format(msg):
- print("8")
- xg=8
- if "b'9'"== '{}'.format(msg):
- print("9")
- xg=9
- client.publish('fh', "shoudao")
-
-
- #接收数据任务
- def MQTT_Rev(tim):
- try:
- client.check_msg() # 非租塞
- except Exception as e:
- print(str(e))
- time.sleep(2)
- print('reconnect!')
- client.connect()
- # 断线之后要重新订阅
- client.subscribe(TOPIC)
- print('dl')
-
-
- #执行WIFI连接函数并判断是否已经连接成功
- if WIFI_Connect():
- #SSL连接
- context = ssl.SSLContext(ssl.PROTOCOL_TLS_CLIENT)
- context.verify_mode = ssl.CERT_NONE
- try:
- client = MQTTClient(client_id=CLIENT_ID, # something unique to identify device, ie machine.unique_id()
- server= MQTT_SERVER,
- port=PORT, # if port ==0 AND ssl=True -> port=8883 the secure mqtt port
- user=USERNAME,
- password=PASSWORD,
- keepalive=7200,
- ssl=context
- )
-
- client.connect()
- print('Connected to %s MQTT Broker'%(MQTT_SERVER))
- client.set_callback(MQTT_callback)
- client.subscribe(TOPIC)
- print('subscribe TOPIC!')
- except OSError as e:
- print('Failed to connect to the MQTT Broker.')
- time.sleep(5)
- machine.reset()
-
- #开启RTOS定时器,编号为-1,周期300ms,执行socket通信接收任务
- #C6定时器编号0
- tim = Timer(0)
- tim.init(period=300, mode=Timer.PERIODIC,callback=MQTT_Rev)
- while True:
- #client.publish(TOPIC, 'Hello')
- if xg==1:
- xg1()
- elif xg==2:
- xg2()
- elif xg==3:
- xg3()
- elif xg==4:
- xg4()
- elif xg==5:
- xg5()
- elif xg==6:
- xg6()
- elif xg==7:
- xg7()
- elif xg>7:
- xg8()
-
注意事项:微信要求MQTT服务器必须备案,所以我们使用的服务器的选择就不多,本来是使用巴法云但是micropython下收不到消息不知如何解决遂放弃,有考虑DF的easyiot但是easyiot提供了一个官方的小程序不开放小程序可用的端口,其他公共服务器要么没备案要么不支持微信的协议。最后选择了emqx家的托管自建模式的服务器。申请参考:https://mc.dfrobot.com.cn/thread-318431-1-1.html。本文所使用的连接SSL安全连接的代码也是来自这个帖子,网上搜索GPT等折腾了十几个版本最后还是qiao大佬给了一个示例完成了需求。致谢!
小程序端
下载安装微信开发者工具:https://developers.weixin.qq.com ... tools/download.html
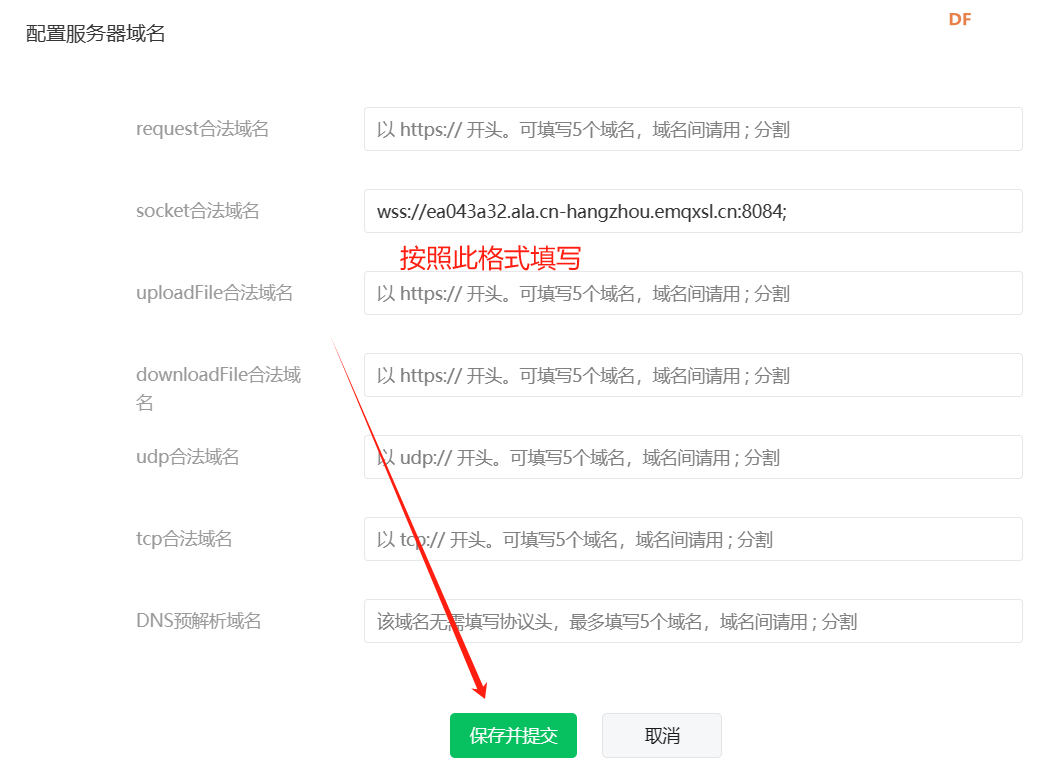
注册小程序测试号:https://mp.weixin.qq.com/wxamp/sandbox?doc=1 打开页面扫码即可登录后台添加服务器地址:https://mp.weixin.qq.com/cgi-bin ... 2338%26lang%3Dzh_CN
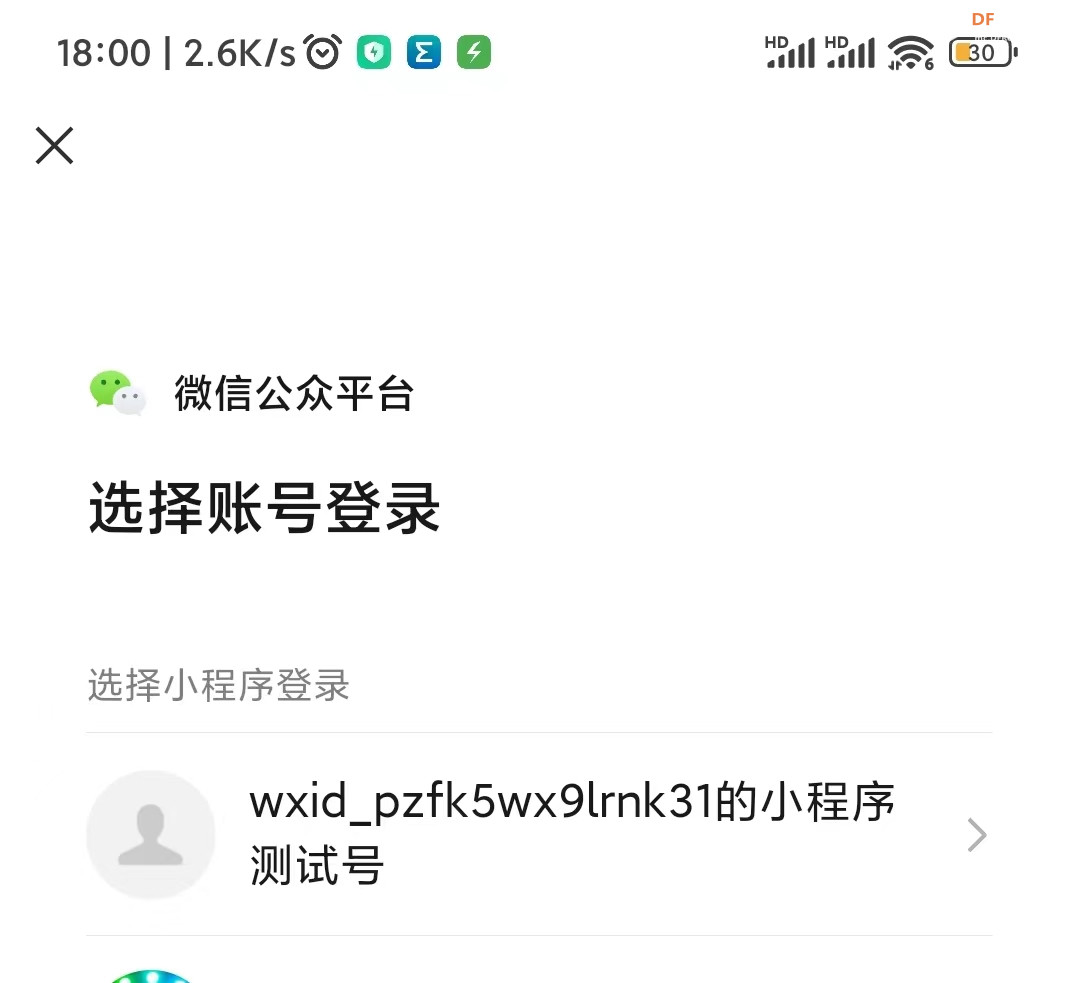
打开链接扫码登录

选择小程序测试号
点击修改
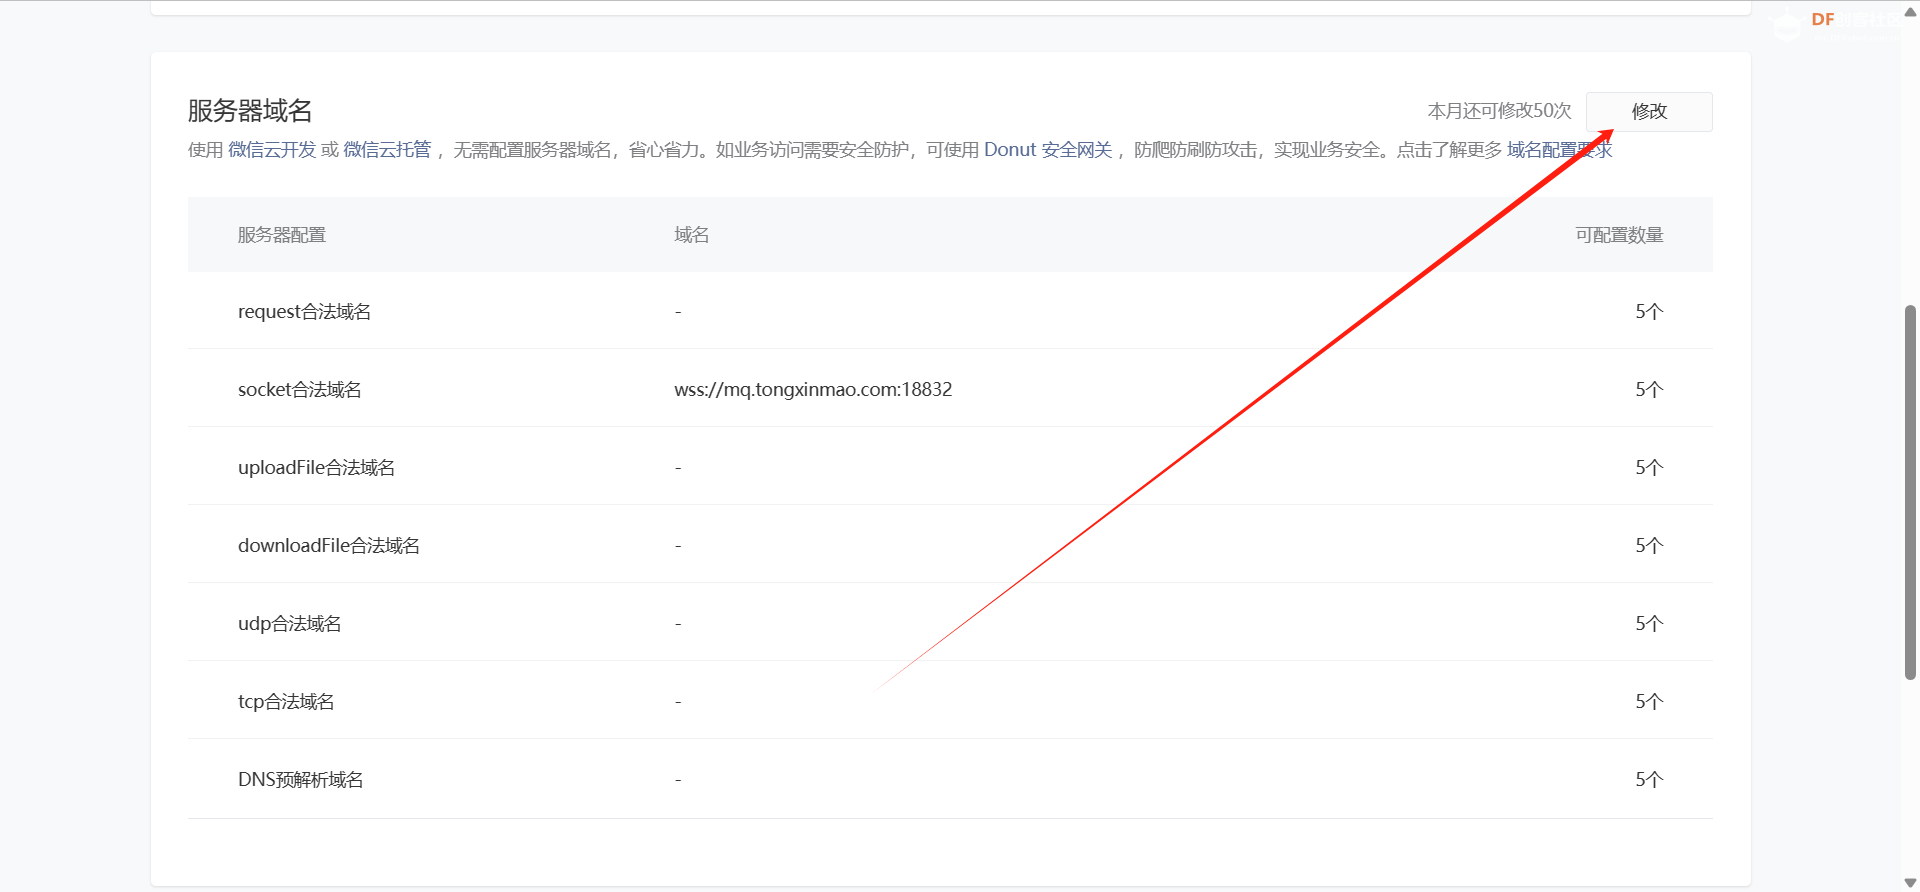
复制服务器地址和端口
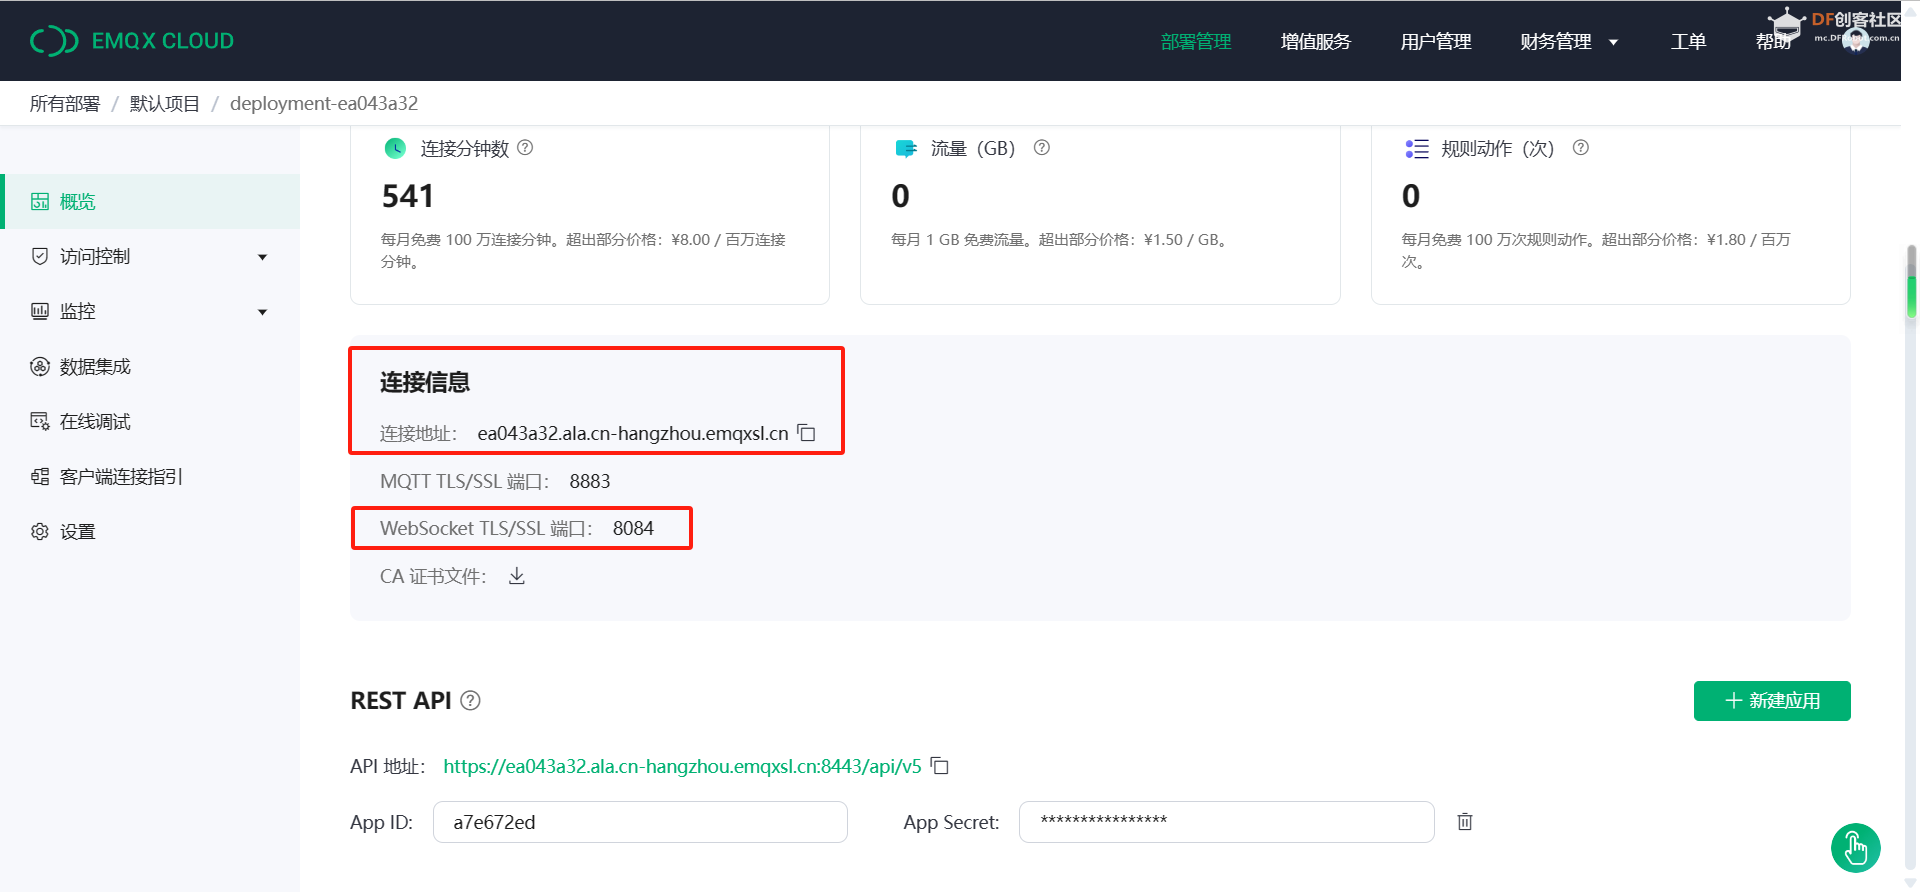
填写
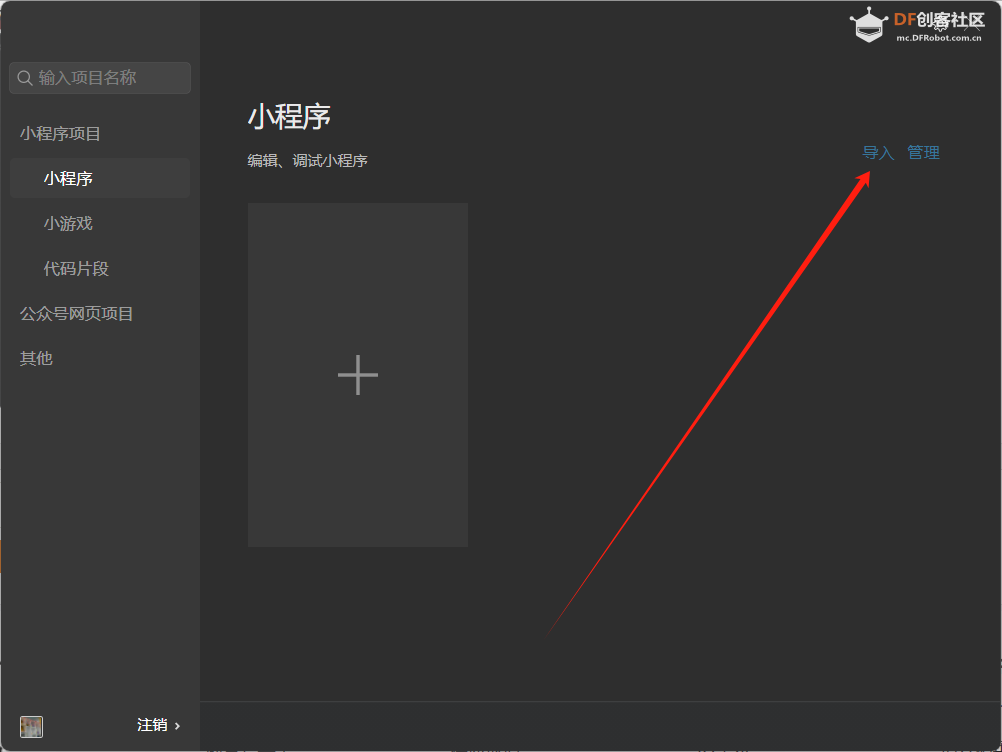
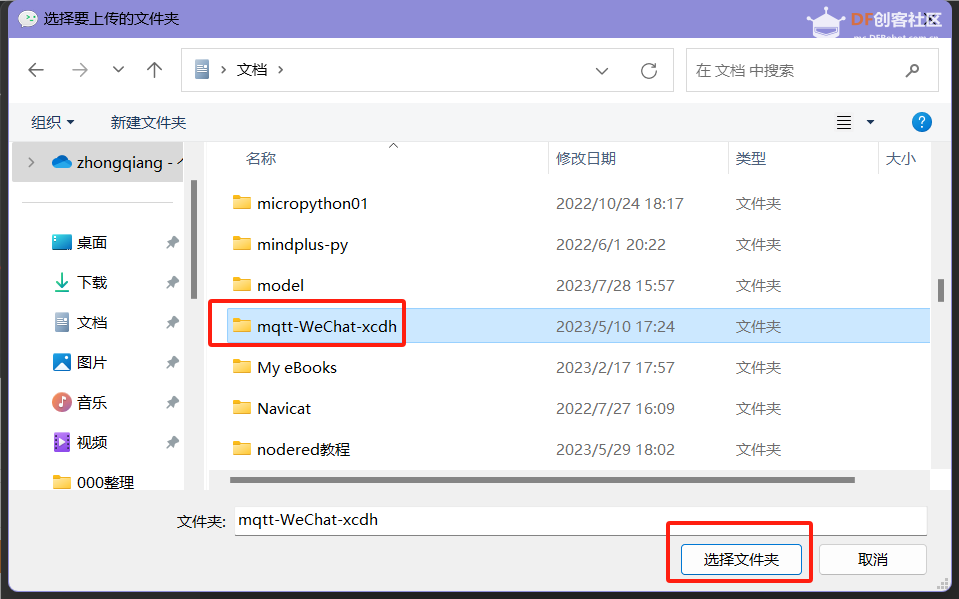
打开微信开发者工具,扫码登录,导入项目,修改,真机调试

导入
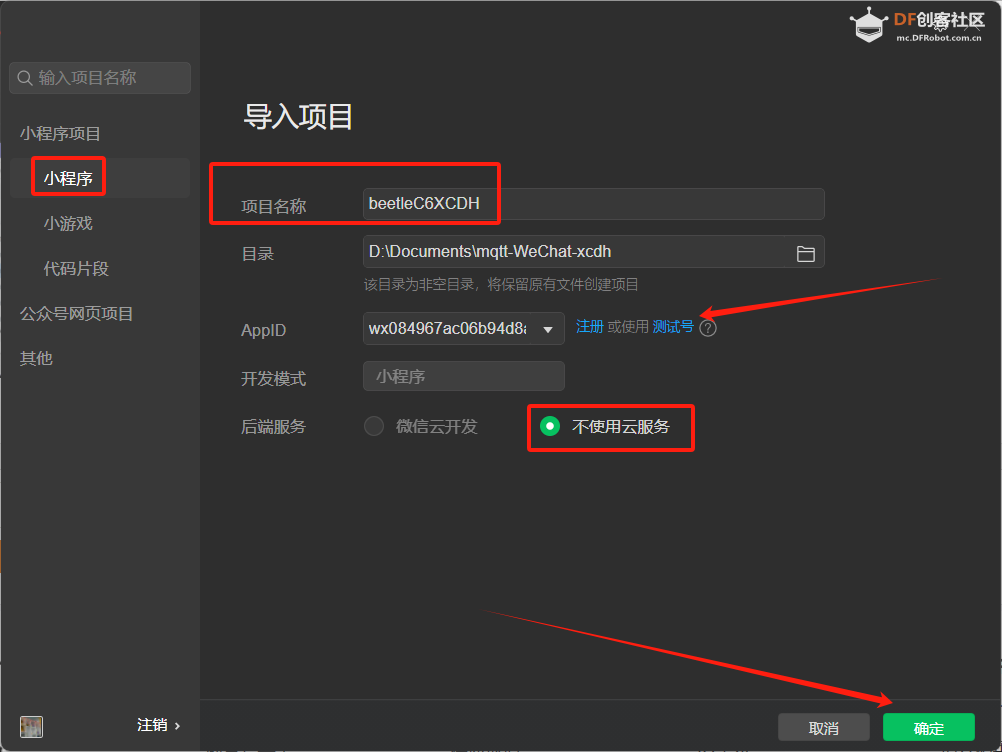
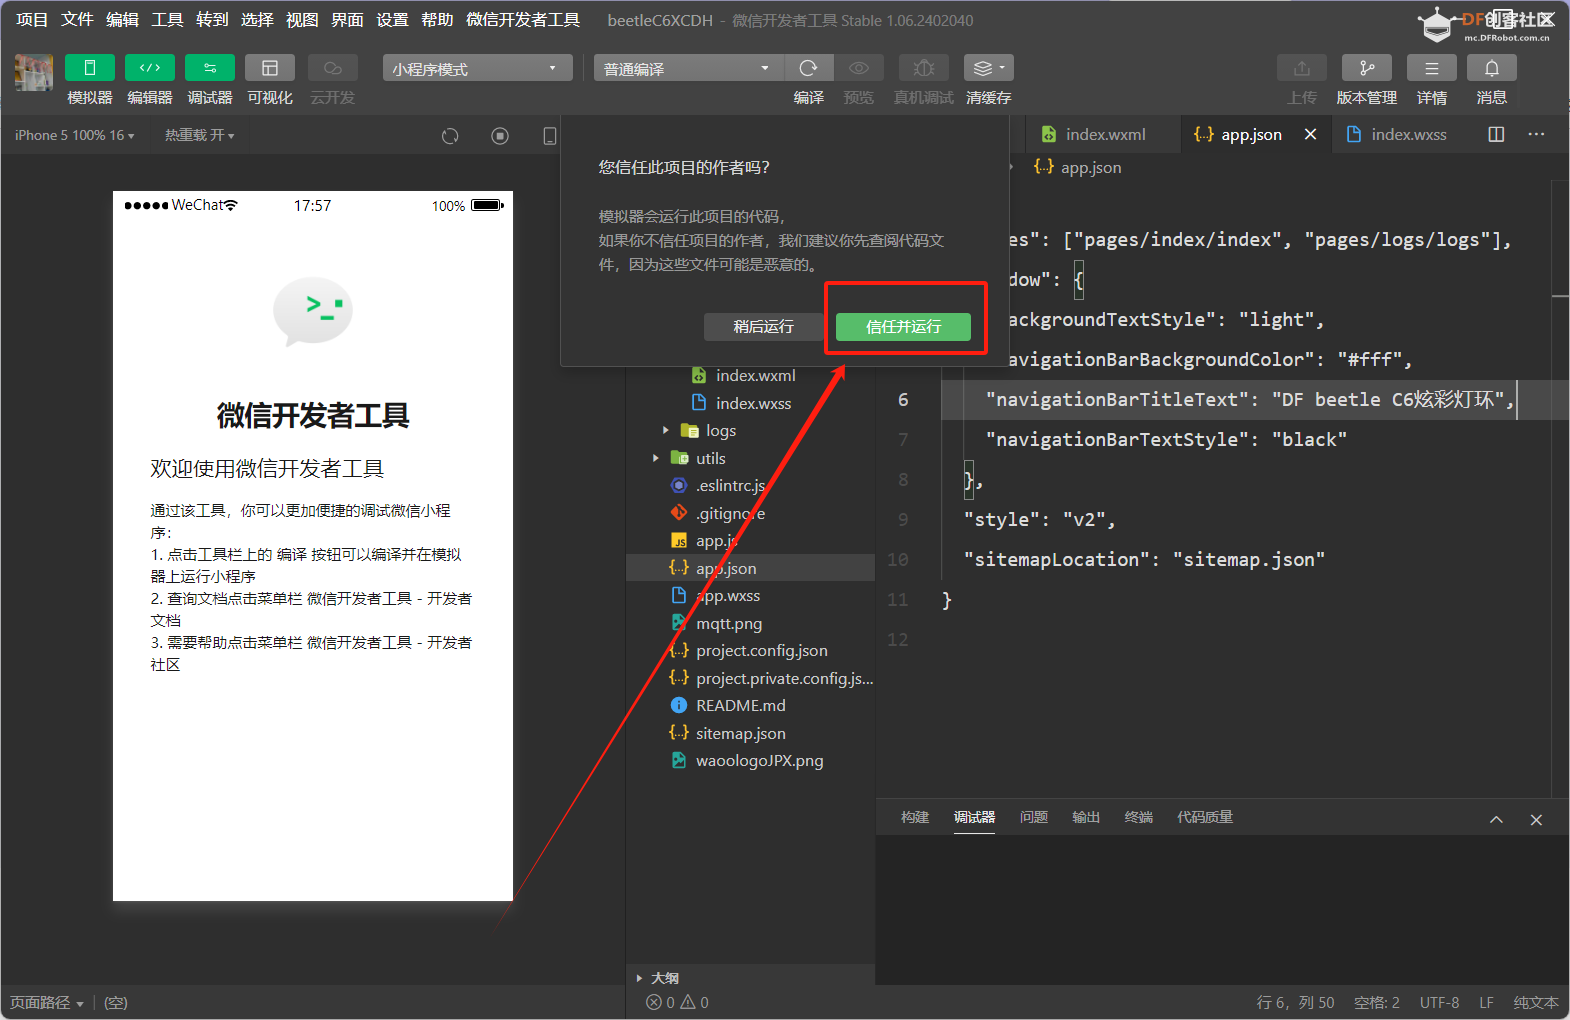
修改
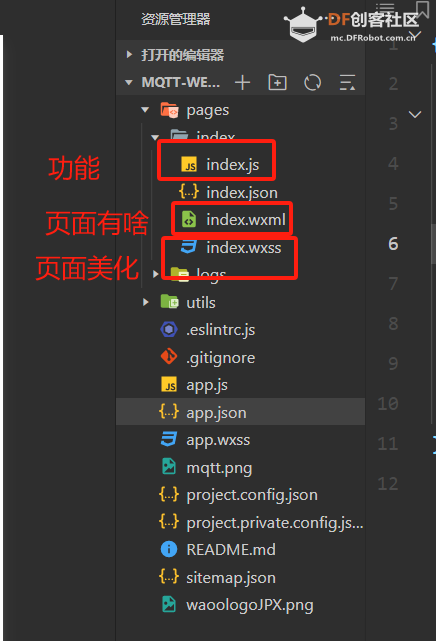
界面设计
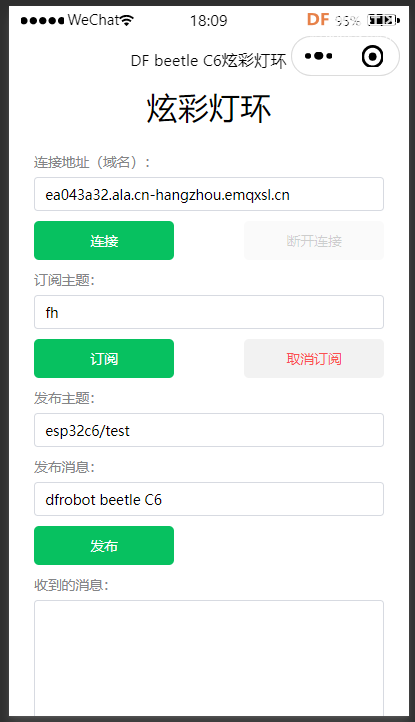 
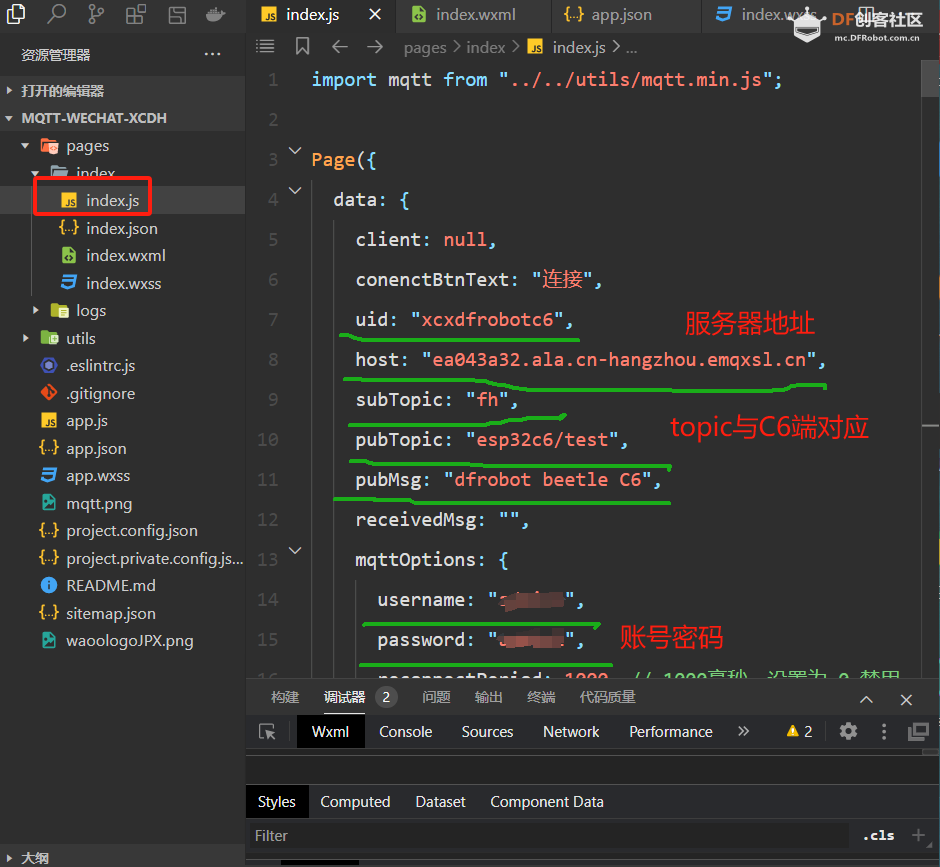
修改连接信息
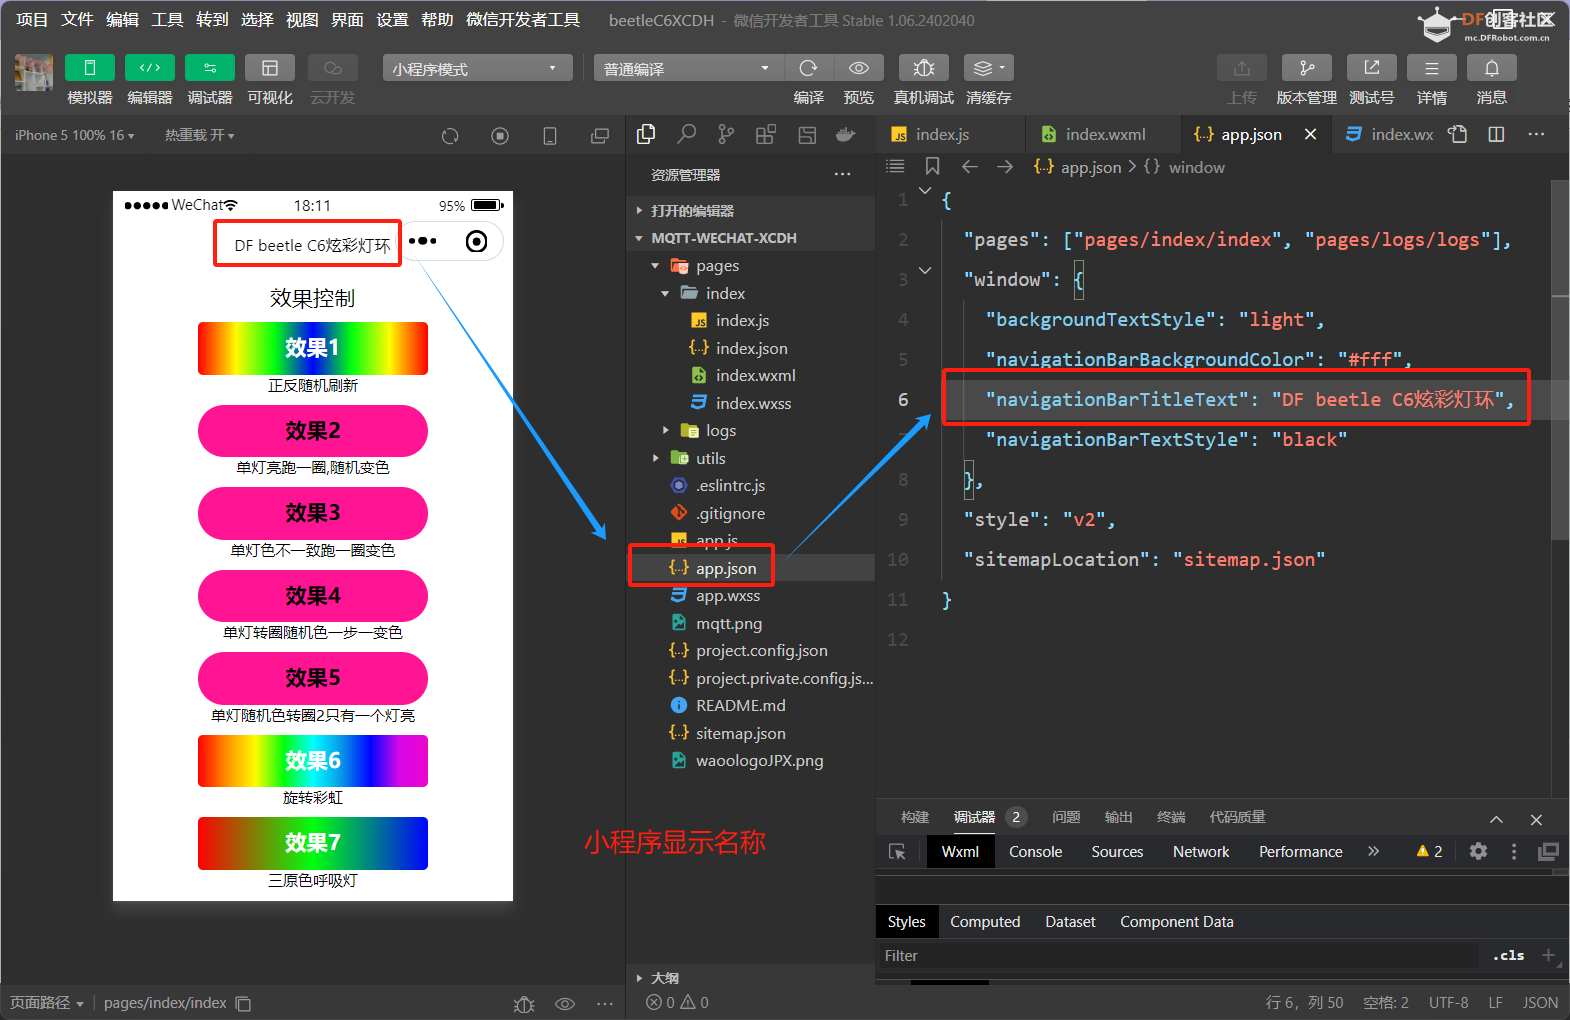
修改显示名称
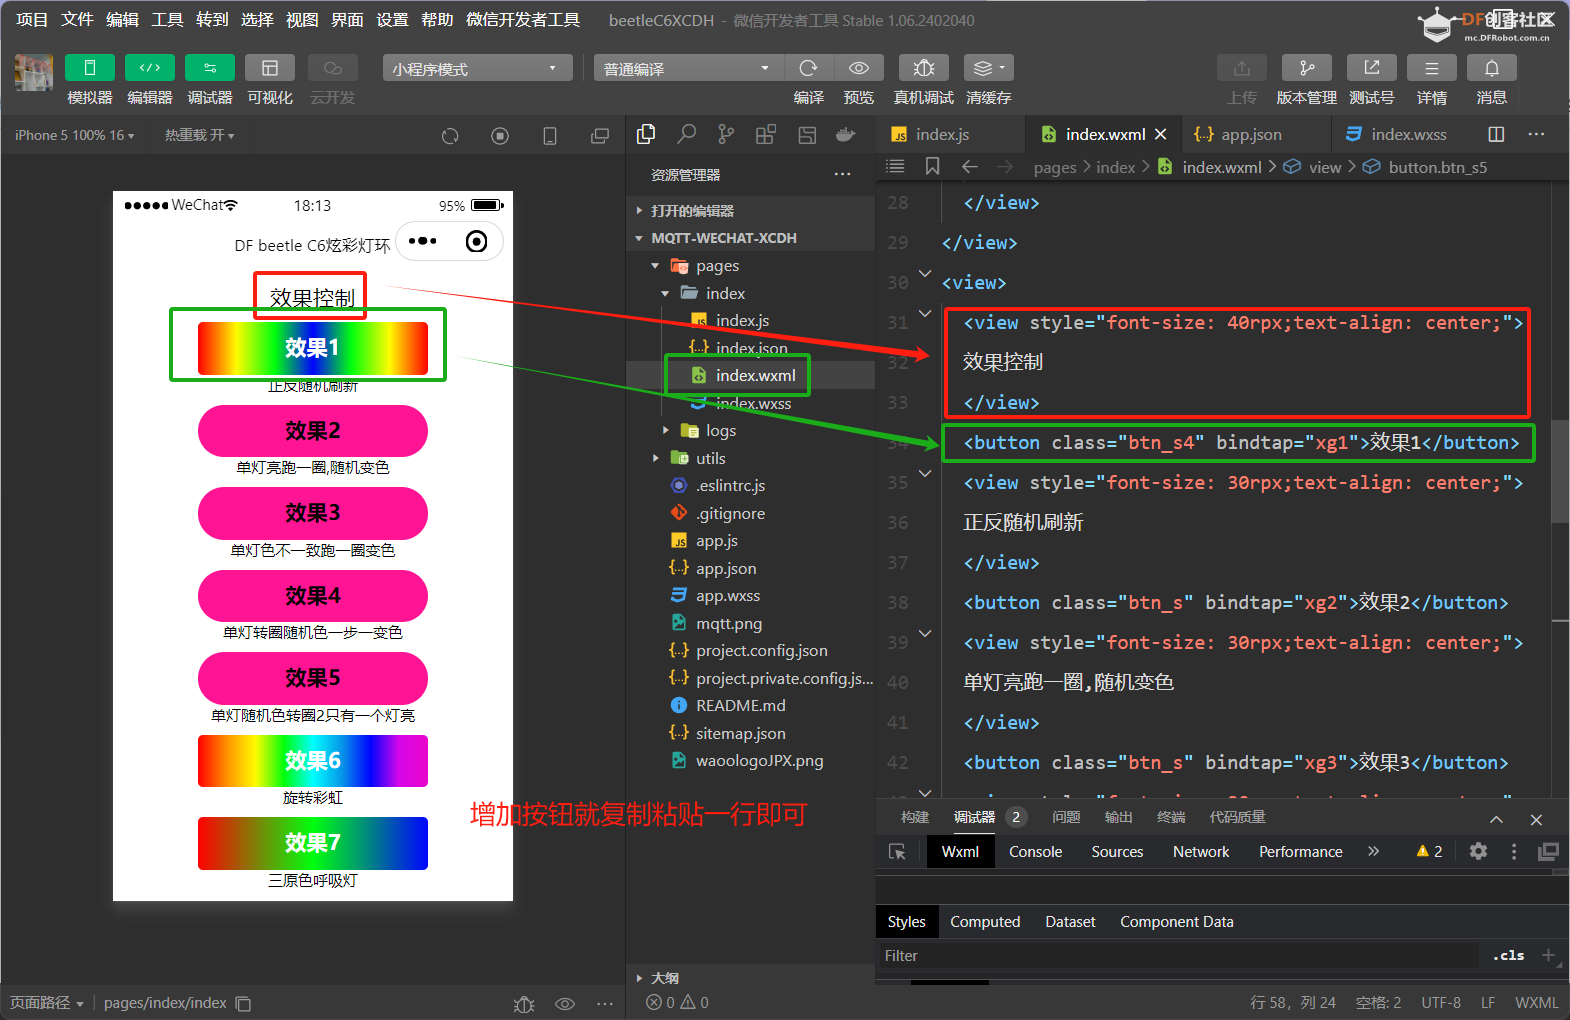
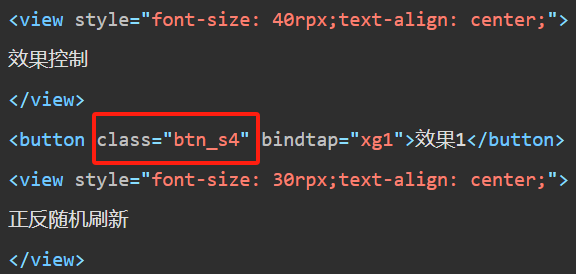
删减按钮
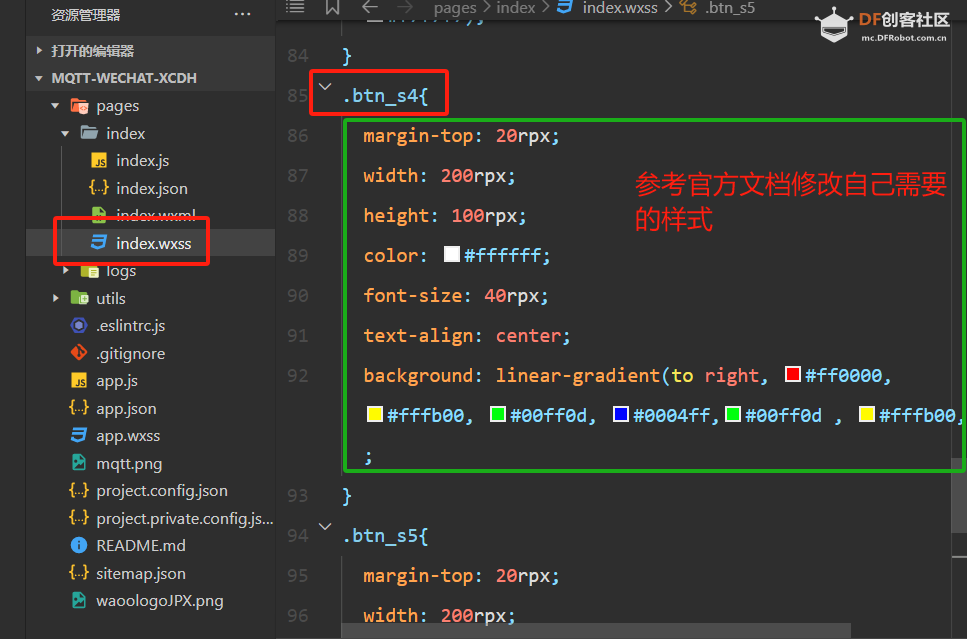
修改按钮样式
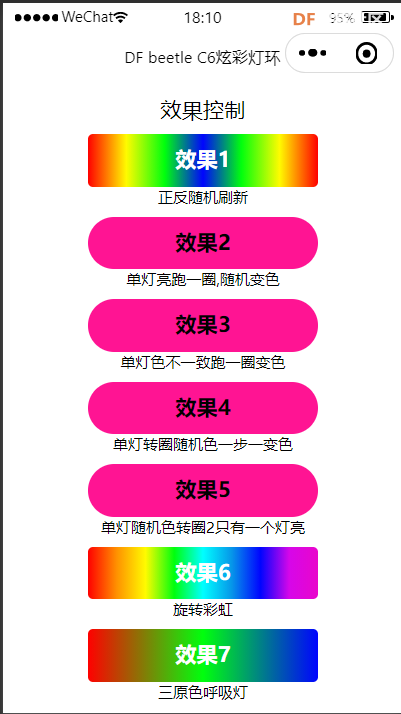
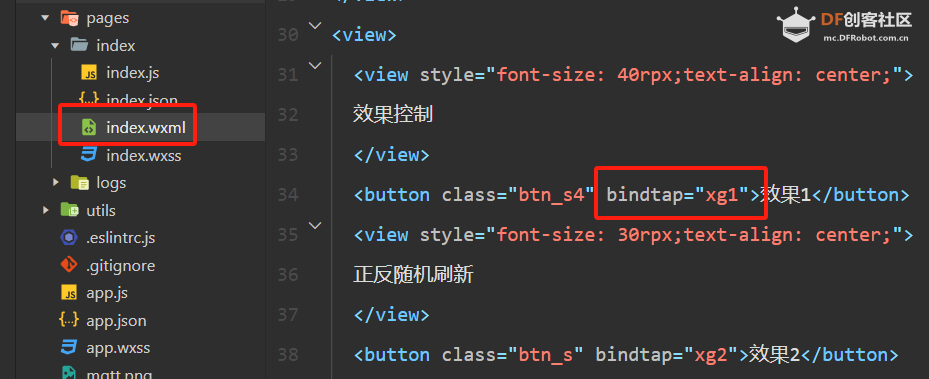
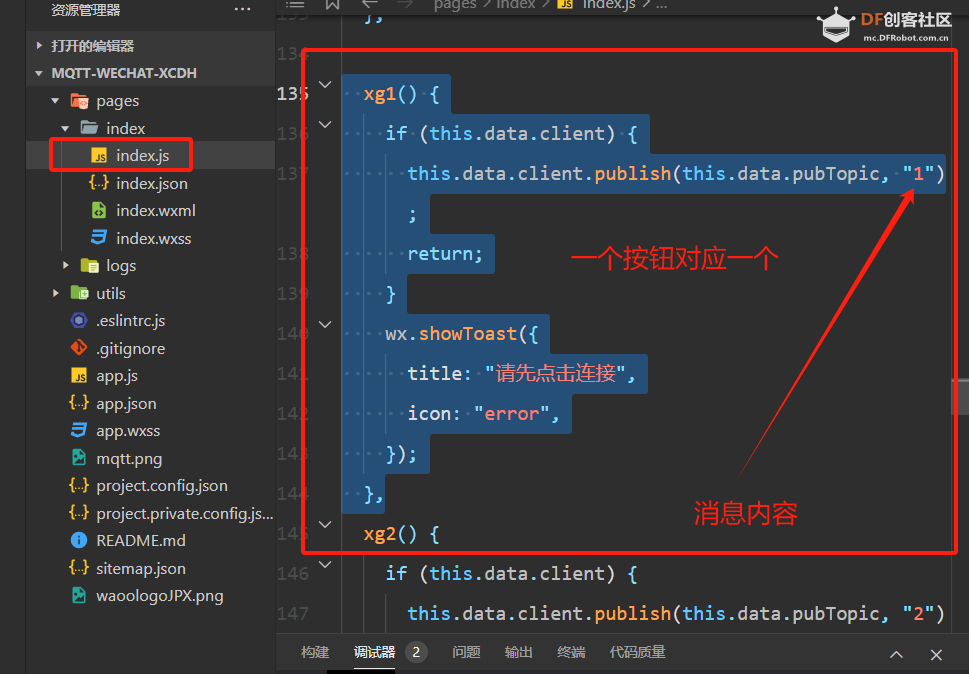
修改按钮功能
真机调试
 
上架这里就不演示了,小程序官方文档有详细步骤,网上也有视频教程。
有问题欢迎留言交流。
|


 沪公网安备31011502402448
 置顶卡
置顶卡 变色卡
变色卡 千斤顶
千斤顶


