本帖最后由 云天 于 2023-8-22 16:35 编辑
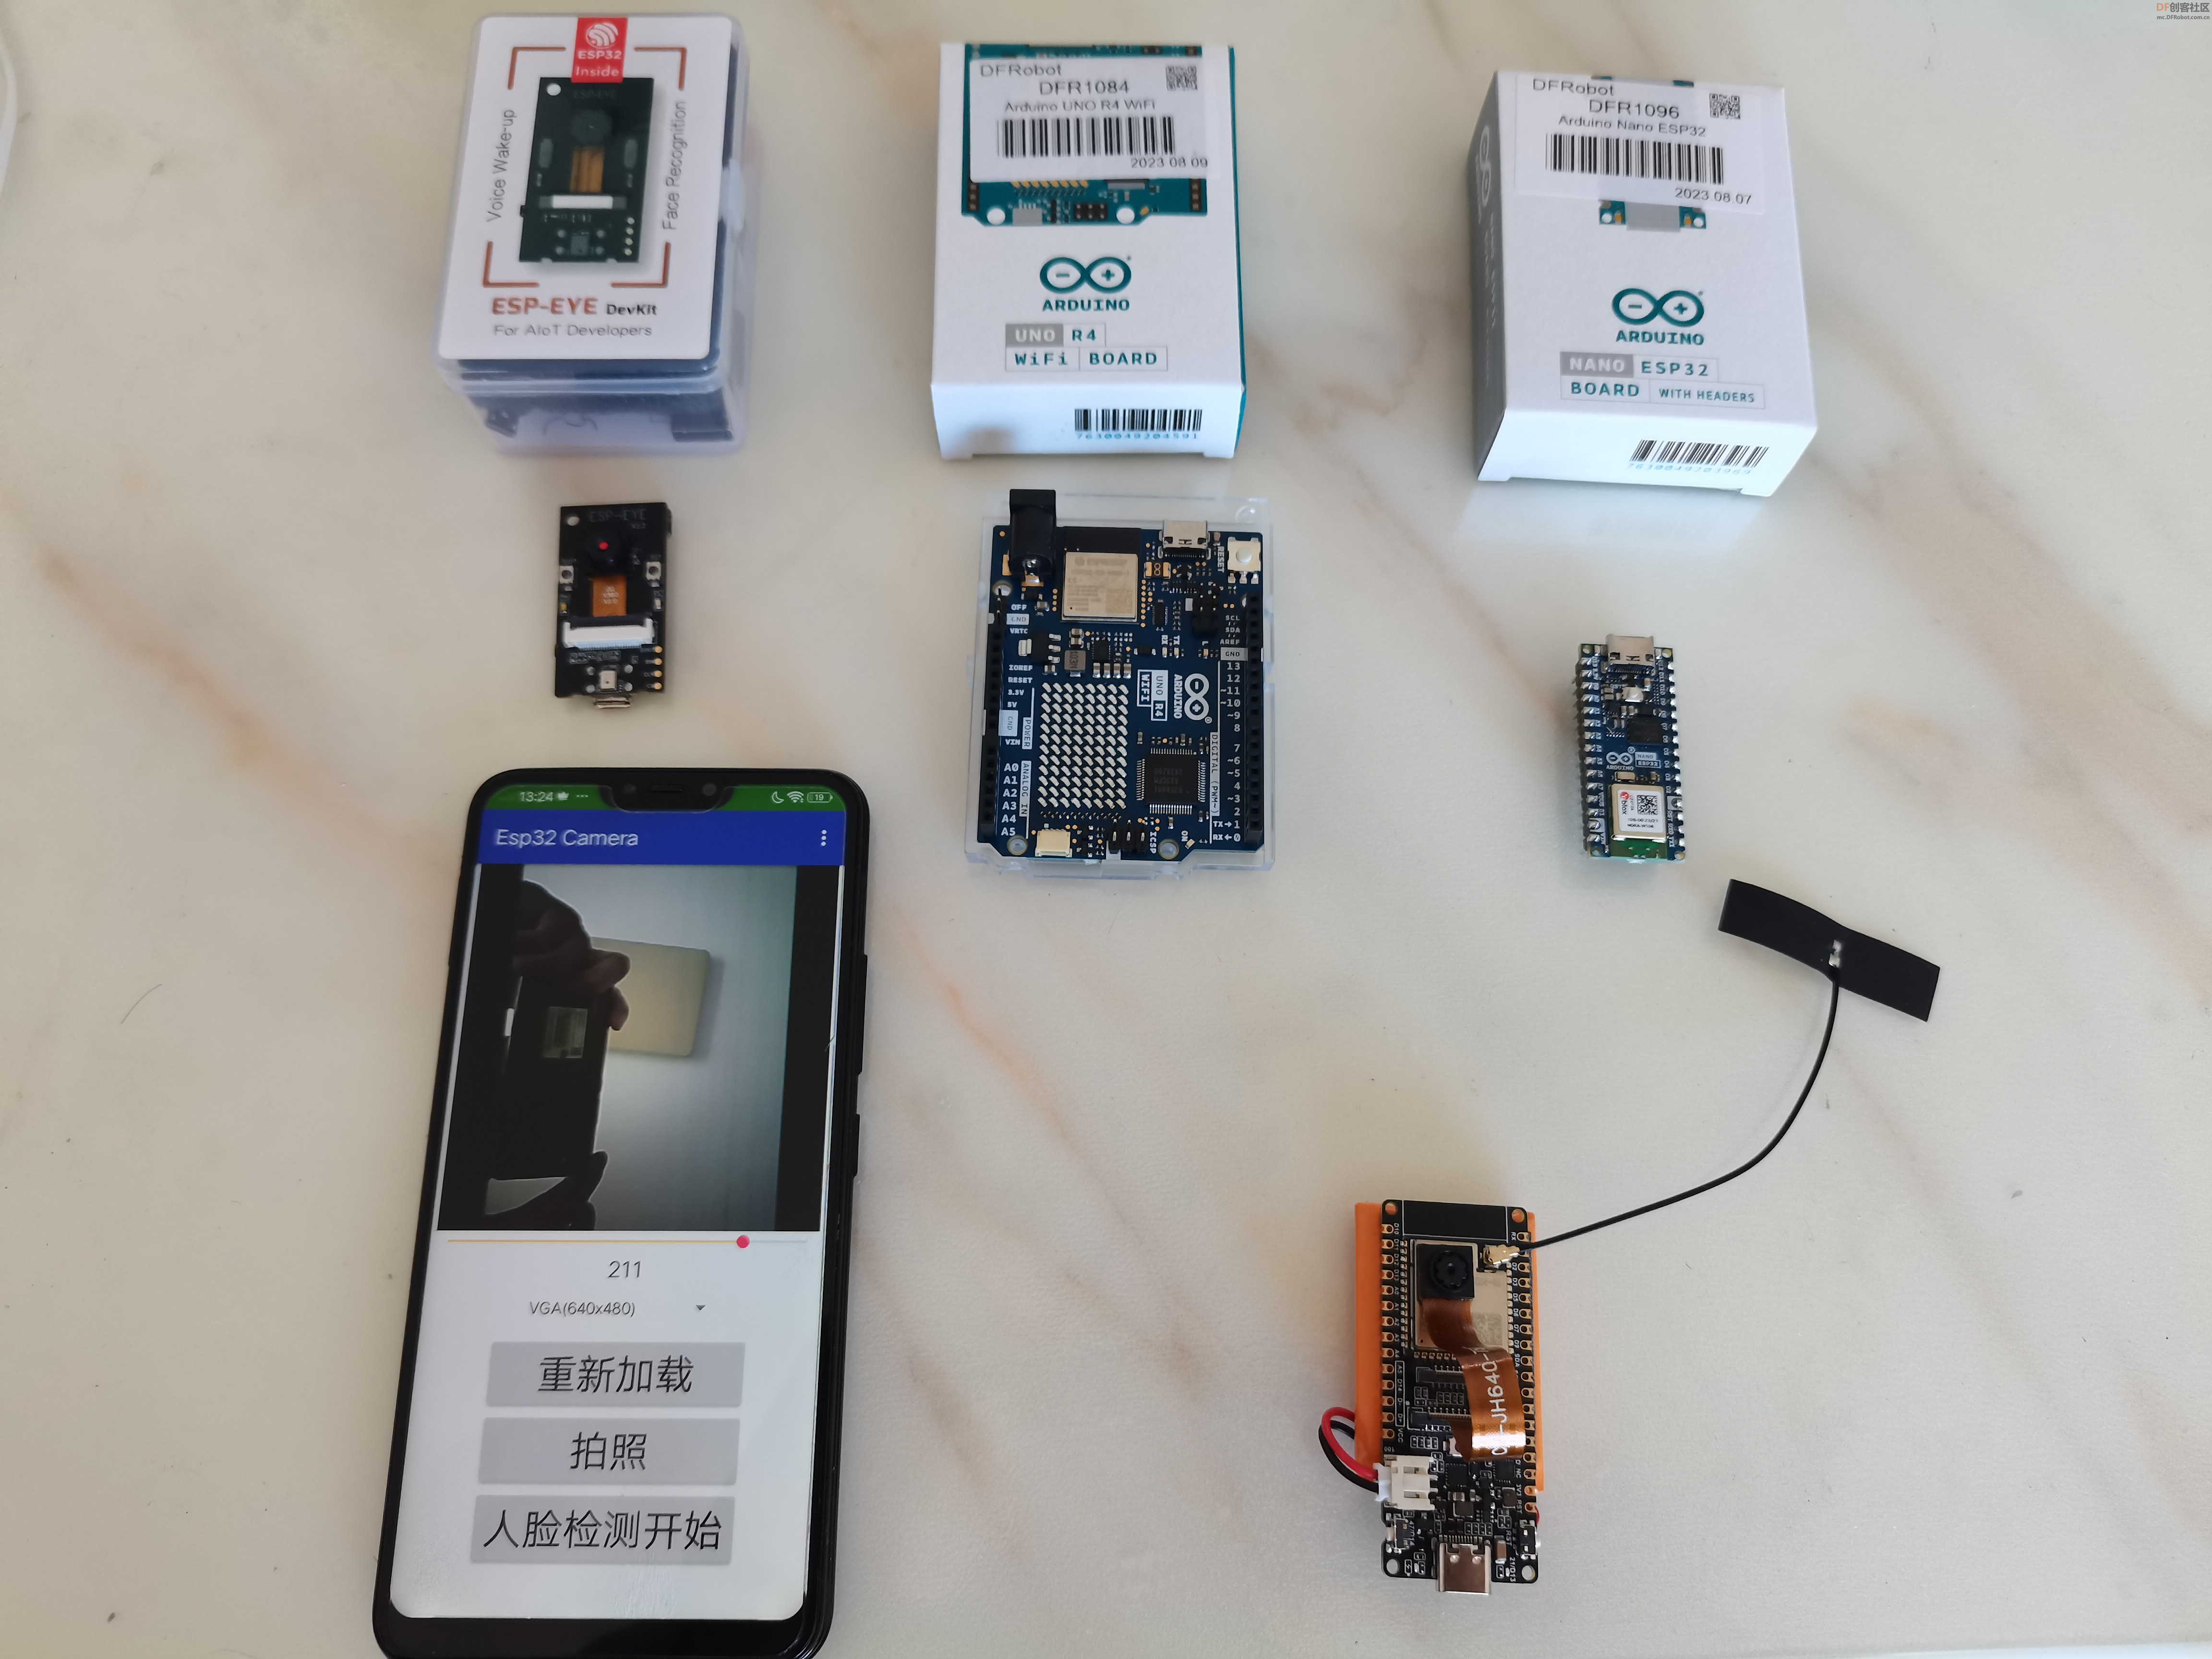
有机会试用FireBeetle 2 ESP32-S3,我在Arduino IDE安装DFRobot Firebeetle ESP32-S3主板后,示例中有“CameraWebServer”,功能比较强大。本试用项目将结合App inventor2制作手机APP监控画面。使用行空板接收FireBeetle 2 ESP32-S3的拍照画面。
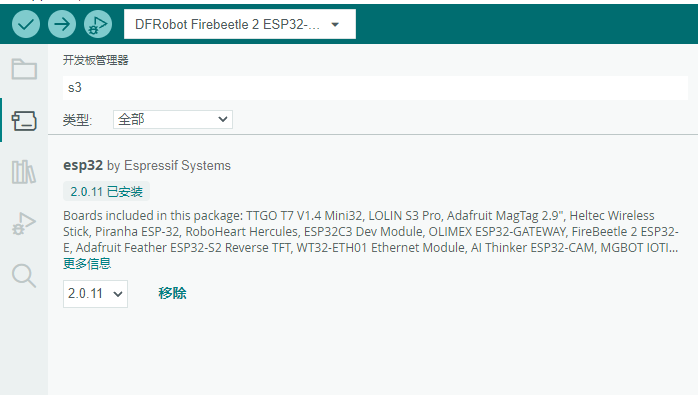
一、安装FireBeetle 2 ESP32-S3
我将使用Arduino IDE对ESP32开发板进行编程。因此,需要安装Arduino IDE以及ESP32附加组件:
二、修改“CameraWebServer”示例
增加电源管理:
#include "DFRobot_AXP313A.h"
DFRobot_AXP313A axp;
axp.enableCameraPower(axp.eOV2640); // 设置摄像头供电
备注:要在原示例中修改
- #include "esp_camera.h"
- #include <WiFi.h>
-
- //
- // WARNING!!! PSRAM IC required for UXGA resolution and high JPEG quality
- // Ensure ESP32 Wrover Module or other board with PSRAM is selected
- // Partial images will be transmitted if image exceeds buffer size
- //
- // You must select partition scheme from the board menu that has at least 3MB APP space.
- // Face Recognition is DISABLED for ESP32 and ESP32-S2, because it takes up from 15
- // seconds to process single frame. Face Detection is ENABLED if PSRAM is enabled as well
-
- // ===================
- // Select camera model
- // ===================
- //#define CAMERA_MODEL_WROVER_KIT // Has PSRAM
- //#define CAMERA_MODEL_ESP_EYE // Has PSRAM
- //#define CAMERA_MODEL_ESP32S3_EYE // Has PSRAM
- //#define CAMERA_MODEL_M5STACK_PSRAM // Has PSRAM
- //#define CAMERA_MODEL_M5STACK_V2_PSRAM // M5Camera version B Has PSRAM
- //#define CAMERA_MODEL_M5STACK_WIDE // Has PSRAM
- //#define CAMERA_MODEL_M5STACK_ESP32CAM // No PSRAM
- //#define CAMERA_MODEL_M5STACK_UNITCAM // No PSRAM
- //#define CAMERA_MODEL_AI_THINKER // Has PSRAM
- //#define CAMERA_MODEL_TTGO_T_JOURNAL // No PSRAM
- //#define CAMERA_MODEL_XIAO_ESP32S3 // Has PSRAM
- // ** Espressif Internal Boards **
- //#define CAMERA_MODEL_ESP32_CAM_BOARD
- //#define CAMERA_MODEL_ESP32S2_CAM_BOARD
- //#define CAMERA_MODEL_ESP32S3_CAM_LCD
- #define CAMERA_MODEL_DFRobot_FireBeetle2_ESP32S3 // Has PSRAM
- //#define CAMERA_MODEL_DFRobot_Romeo_ESP32S3 // Has PSRAM
- #include "camera_pins.h"
- #include "DFRobot_AXP313A.h"
-
- DFRobot_AXP313A axp;
- // ===========================
- // Enter your WiFi credentials
- // ===========================
- const char* ssid = "*******";
- const char* password = "********";
-
- void startCameraServer();
- void setupLedFlash(int pin);
-
- void setup() {
- Serial.begin(115200);
- Serial.setDebugOutput(true);
- Serial.println();
- while (axp.begin() != 0)
- {
- Serial.println("init error");
- delay(1000);
- }
- axp.enableCameraPower(axp.eOV2640); // 设置摄像头供电
- camera_config_t config;
- config.ledc_channel = LEDC_CHANNEL_0;
- config.ledc_timer = LEDC_TIMER_0;
- config.pin_d0 = Y2_GPIO_NUM;
- config.pin_d1 = Y3_GPIO_NUM;
- config.pin_d2 = Y4_GPIO_NUM;
- config.pin_d3 = Y5_GPIO_NUM;
- config.pin_d4 = Y6_GPIO_NUM;
- config.pin_d5 = Y7_GPIO_NUM;
- config.pin_d6 = Y8_GPIO_NUM;
- config.pin_d7 = Y9_GPIO_NUM;
- config.pin_xclk = XCLK_GPIO_NUM;
- config.pin_pclk = PCLK_GPIO_NUM;
- config.pin_vsync = VSYNC_GPIO_NUM;
- config.pin_href = HREF_GPIO_NUM;
- config.pin_sccb_sda = SIOD_GPIO_NUM;
- config.pin_sccb_scl = SIOC_GPIO_NUM;
- config.pin_pwdn = PWDN_GPIO_NUM;
- config.pin_reset = RESET_GPIO_NUM;
- config.xclk_freq_hz = 20000000;
- config.frame_size = FRAMESIZE_UXGA;
- config.pixel_format = PIXFORMAT_JPEG; // for streaming
- //config.pixel_format = PIXFORMAT_RGB565; // for face detection/recognition
- config.grab_mode = CAMERA_GRAB_WHEN_EMPTY;
- config.fb_location = CAMERA_FB_IN_PSRAM;
- config.jpeg_quality = 12;
- config.fb_count = 1;
-
- // if PSRAM IC present, init with UXGA resolution and higher JPEG quality
- // for larger pre-allocated frame buffer.
- if(config.pixel_format == PIXFORMAT_JPEG){
- if(psramFound()){
- config.jpeg_quality = 10;
- config.fb_count = 2;
- config.grab_mode = CAMERA_GRAB_LATEST;
- } else {
- // Limit the frame size when PSRAM is not available
- config.frame_size = FRAMESIZE_SVGA;
- config.fb_location = CAMERA_FB_IN_DRAM;
- }
- } else {
- // Best option for face detection/recognition
- config.frame_size = FRAMESIZE_240X240;
- #if CONFIG_IDF_TARGET_ESP32S3
- config.fb_count = 2;
- #endif
- }
-
- #if defined(CAMERA_MODEL_ESP_EYE)
- pinMode(13, INPUT_PULLUP);
- pinMode(14, INPUT_PULLUP);
- #endif
-
- // camera init
- esp_err_t err = esp_camera_init(&config);
- if (err != ESP_OK) {
- Serial.printf("Camera init failed with error 0x%x", err);
- return;
- }
-
- sensor_t * s = esp_camera_sensor_get();
- // initial sensors are flipped vertically and colors are a bit saturated
- if (s->id.PID == OV3660_PID) {
- s->set_vflip(s, 1); // flip it back
- s->set_brightness(s, 1); // up the brightness just a bit
- s->set_saturation(s, -2); // lower the saturation
- }
- // drop down frame size for higher initial frame rate
- if(config.pixel_format == PIXFORMAT_JPEG){
- s->set_framesize(s, FRAMESIZE_QVGA);
- }
-
- #if defined(CAMERA_MODEL_M5STACK_WIDE) || defined(CAMERA_MODEL_M5STACK_ESP32CAM)
- s->set_vflip(s, 1);
- s->set_hmirror(s, 1);
- #endif
-
- #if defined(CAMERA_MODEL_ESP32S3_EYE)
- s->set_vflip(s, 1);
- #endif
-
- // Setup LED FLash if LED pin is defined in camera_pins.h
- #if defined(LED_GPIO_NUM)
- setupLedFlash(LED_GPIO_NUM);
- #endif
-
- WiFi.begin(ssid, password);
- WiFi.setSleep(false);
-
- while (WiFi.status() != WL_CONNECTED) {
- delay(500);
- Serial.print(".");
- }
- Serial.println("");
- Serial.println("WiFi connected");
-
- startCameraServer();
-
- Serial.print("Camera Ready! Use 'http://");
- Serial.print(WiFi.localIP());
- Serial.println("' to connect");
- }
-
- void loop() {
- // Do nothing. Everything is done in another task by the web server
- delay(10000);
- }
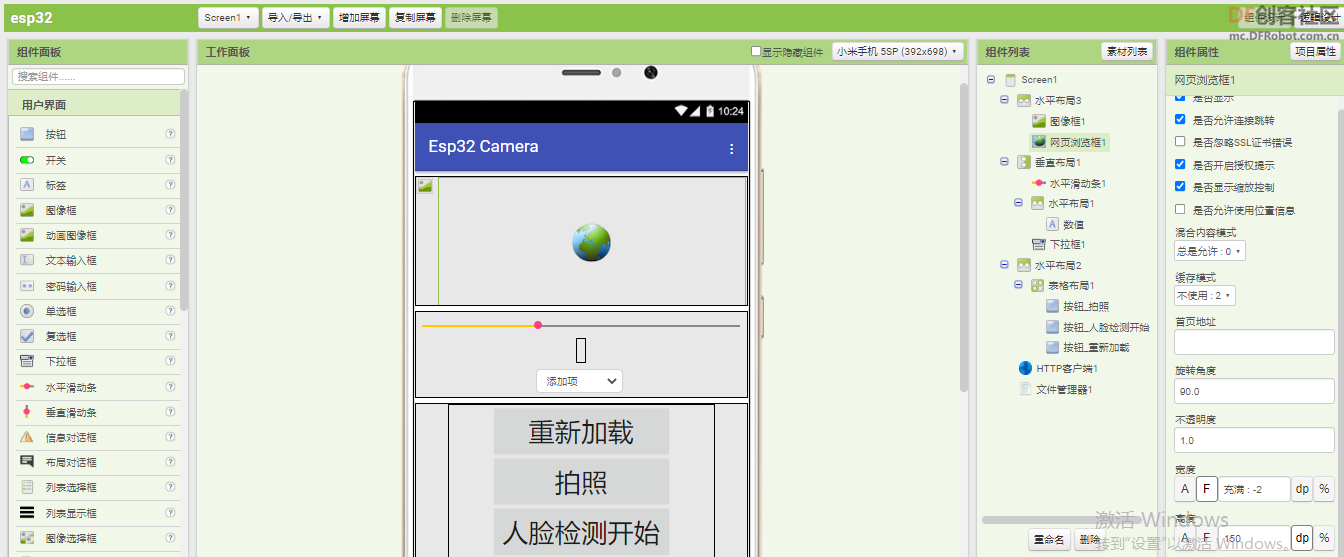
三、制作手机APP
1.组件设计
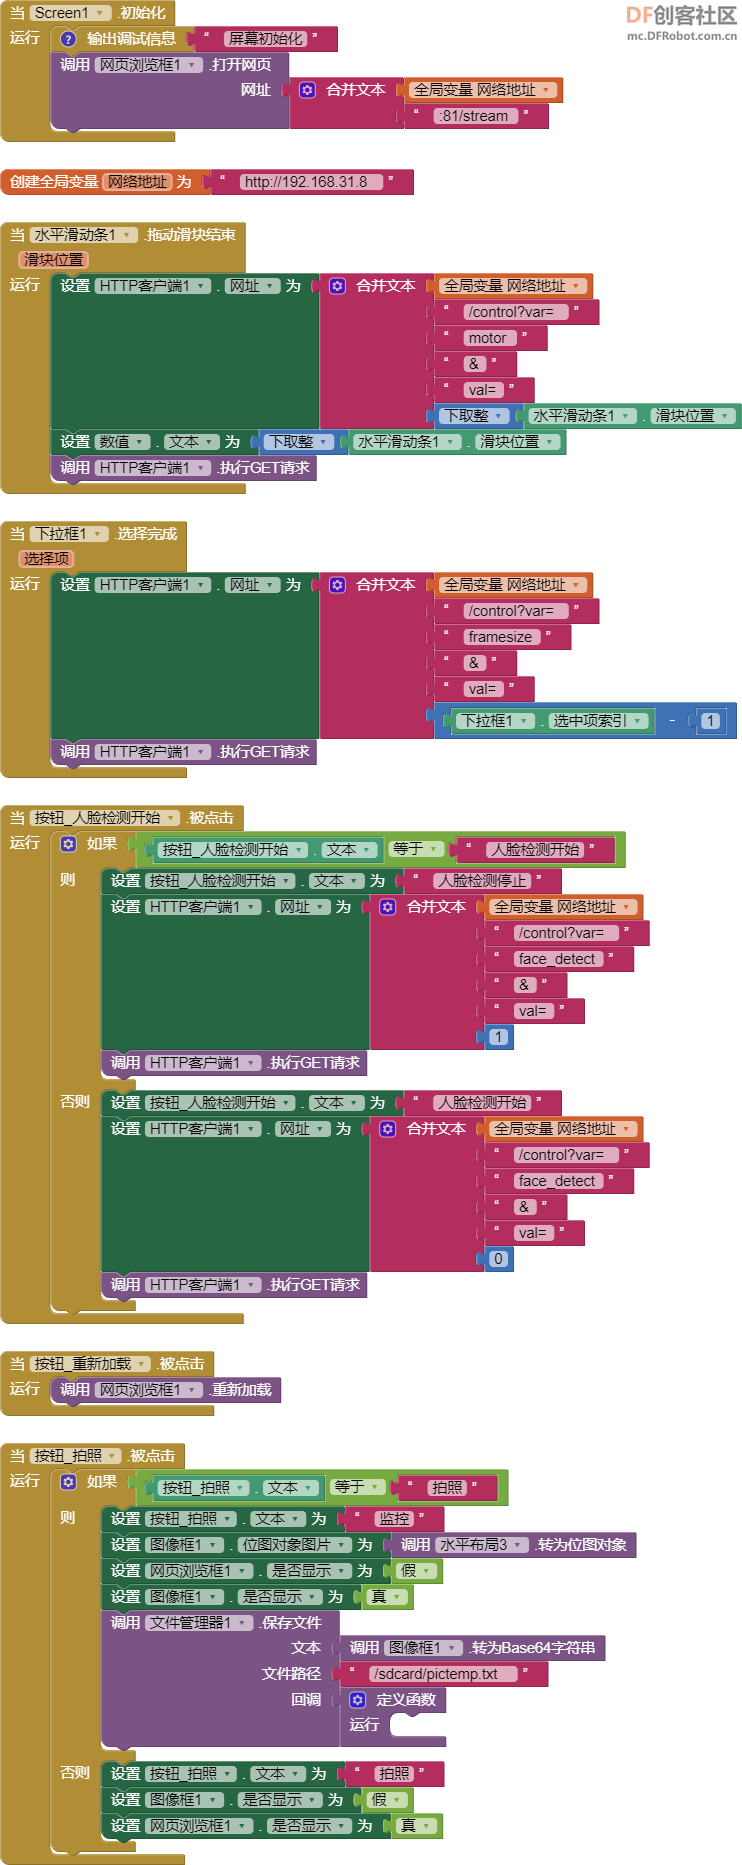
2.逻辑设计
3.测试
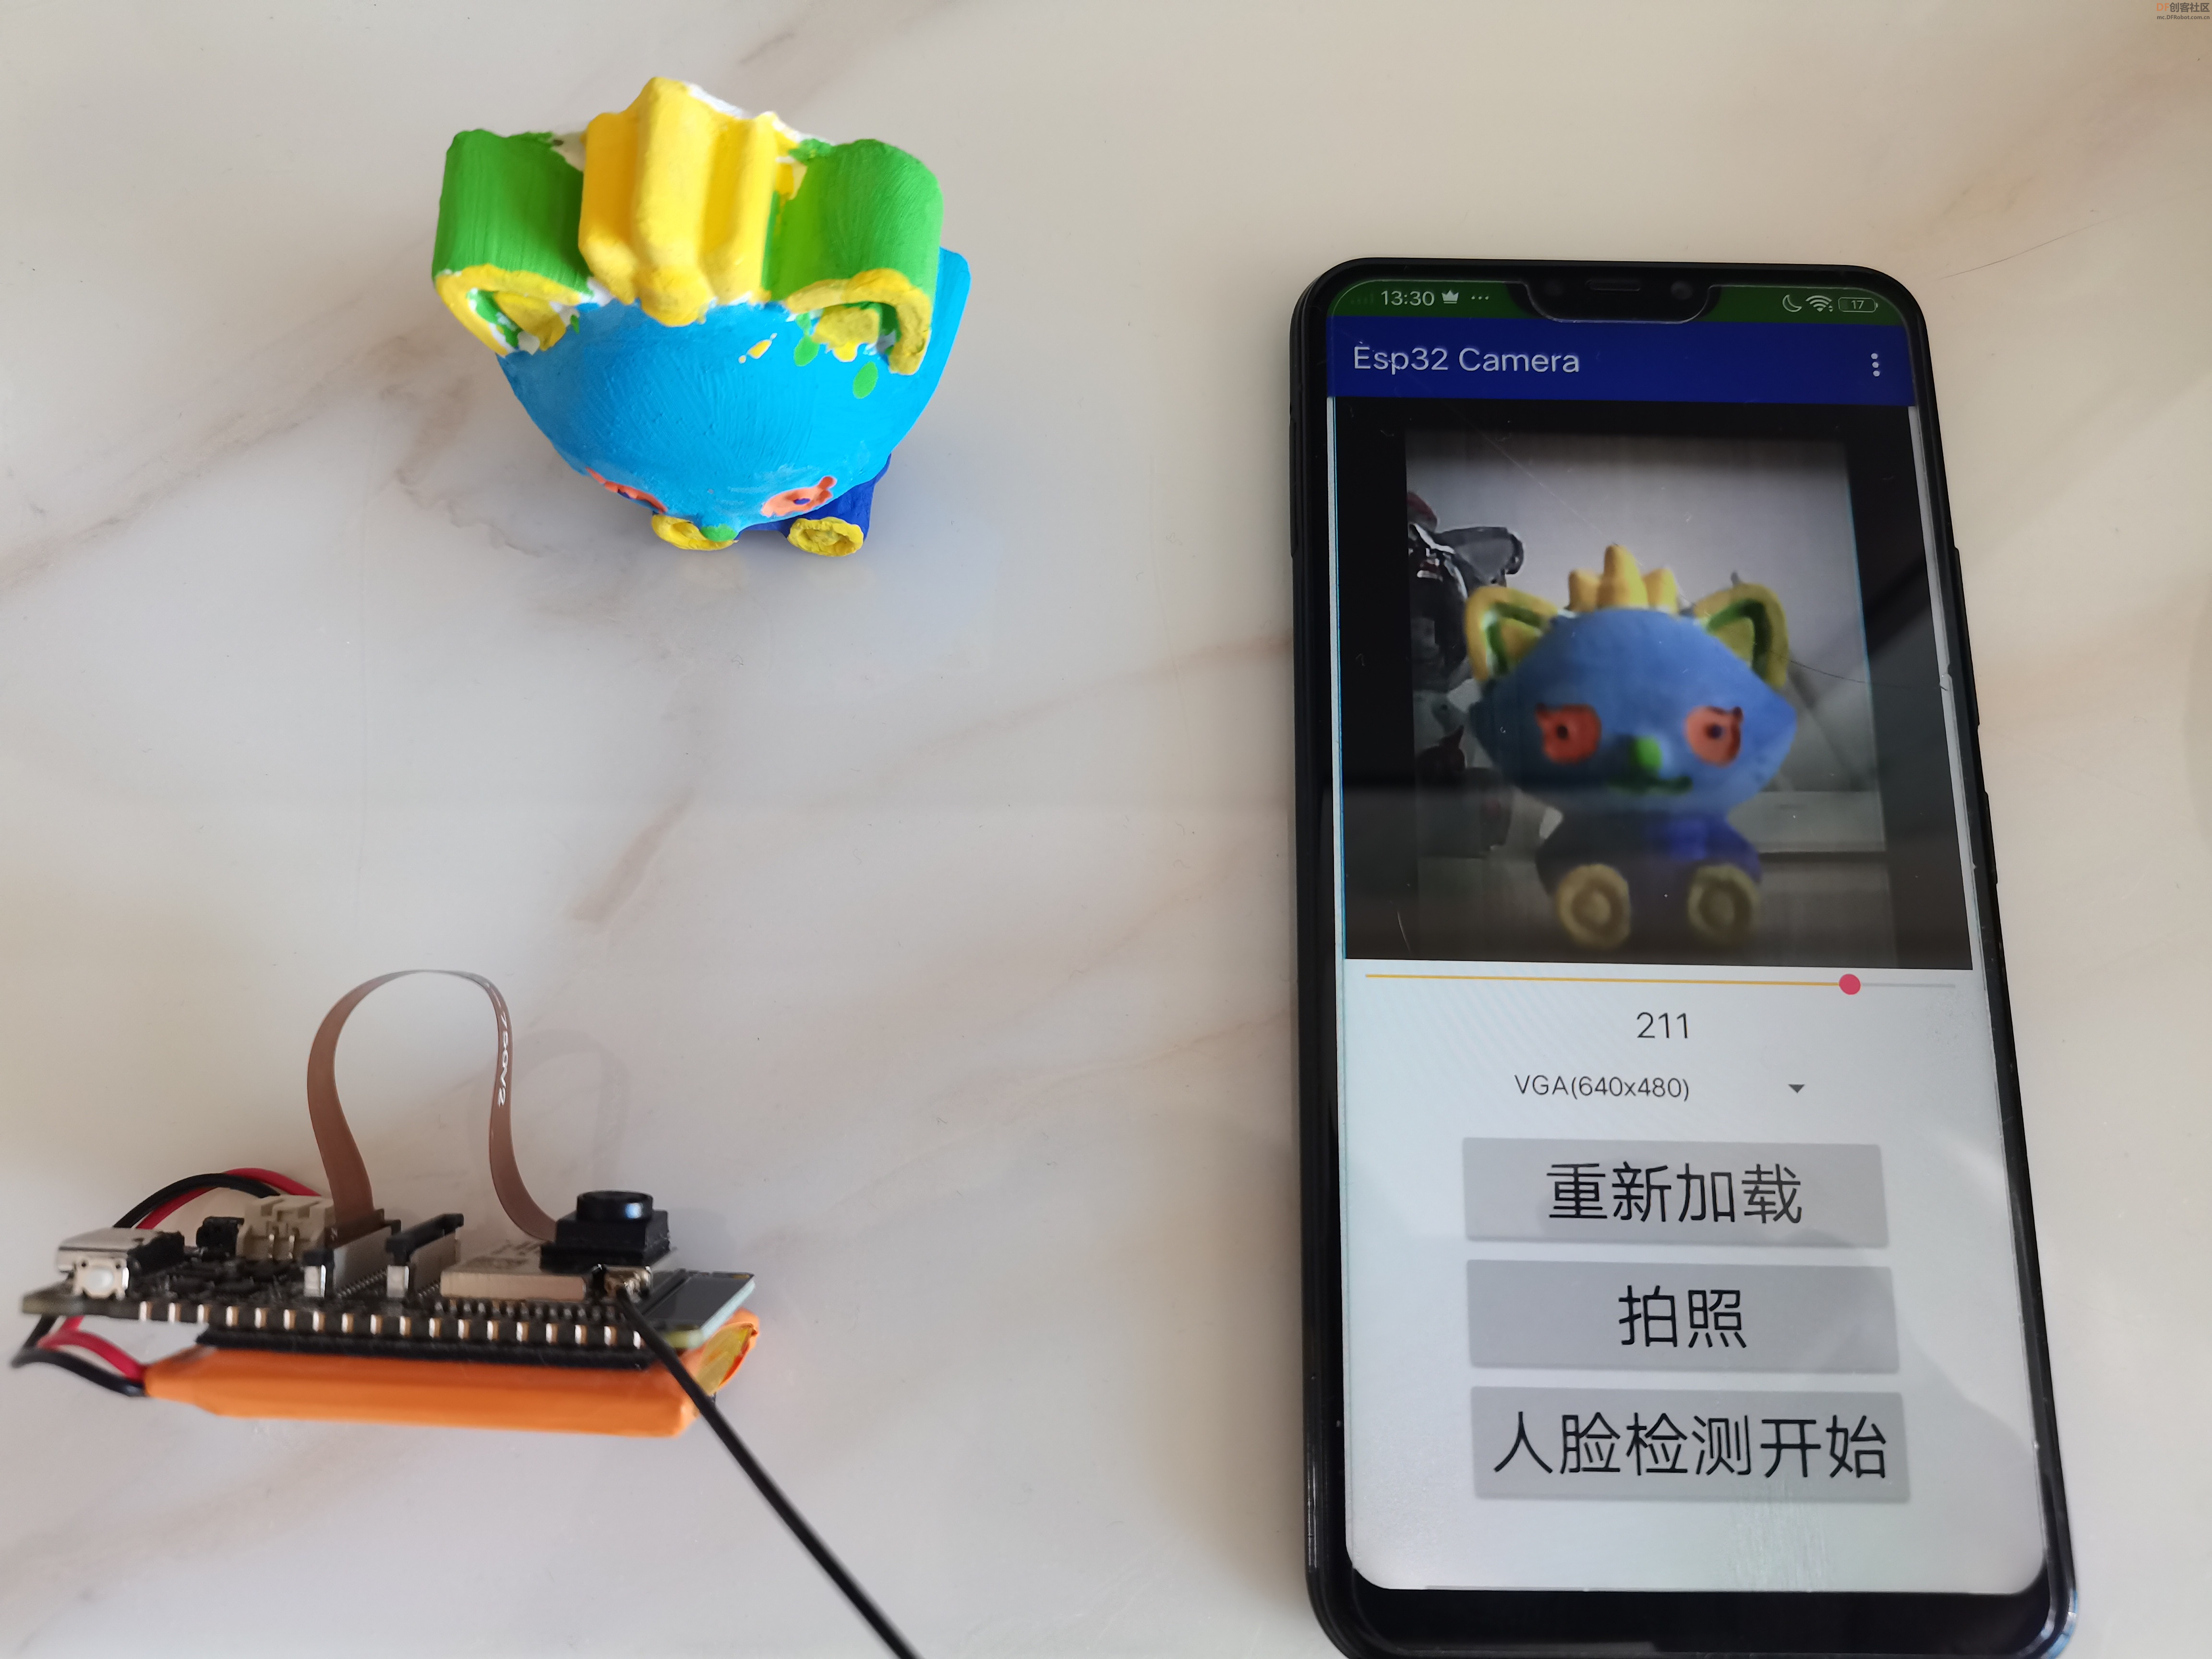
4.演示视频
四、行空板接收拍照画面
1.修改“CameraWebServer”示例
- #include "esp_camera.h"
- #include <WiFi.h>
- #include <HTTPClient.h>
-
- // 用于上传照片的服务器地址,行空板IP地址
- const char *serverName = "http://192.168.31.71:9000/upload";
-
- //
- // WARNING!!! PSRAM IC required for UXGA resolution and high JPEG quality
- // Ensure ESP32 Wrover Module or other board with PSRAM is selected
- // Partial images will be transmitted if image exceeds buffer size
- //
- // You must select partition scheme from the board menu that has at least 3MB APP space.
- // Face Recognition is DISABLED for ESP32 and ESP32-S2, because it takes up from 15
- // seconds to process single frame. Face Detection is ENABLED if PSRAM is enabled as well
-
- // ===================
- // Select camera model
- // ===================
- #define PWDN_GPIO_NUM -1
- #define RESET_GPIO_NUM -1
- #define XCLK_GPIO_NUM 45
- #define SIOD_GPIO_NUM 1
- #define SIOC_GPIO_NUM 2
-
- #define Y9_GPIO_NUM 48
- #define Y8_GPIO_NUM 46
- #define Y7_GPIO_NUM 8
- #define Y6_GPIO_NUM 7
- #define Y5_GPIO_NUM 4
- #define Y4_GPIO_NUM 41
- #define Y3_GPIO_NUM 40
- #define Y2_GPIO_NUM 39
- #define VSYNC_GPIO_NUM 6
- #define HREF_GPIO_NUM 42
- #define PCLK_GPIO_NUM 5
-
- #define ONBOARD_KEY 47 // 板载按钮
- #define ONBOARD_LED 21 // 板载 LED
-
- volatile bool buttonPressed = false; // 按钮下降沿中断标志位
- #define CAMERA_MODEL_DFRobot_FireBeetle2_ESP32S3 // Has PSRAM
- //#define CAMERA_MODEL_DFRobot_Romeo_ESP32S3 // Has PSRAM
- #include "camera_pins.h"
- #include "DFRobot_AXP313A.h"
-
- DFRobot_AXP313A axp;
-
- // ===========================
- // Enter your WiFi credentials
- // ===========================
- const char *ssid = "********";
- const char *password = "*************";
-
- void startCameraServer();
-
- void setup()
- {
- pinMode(ONBOARD_KEY, INPUT);
- pinMode(ONBOARD_LED, OUTPUT);
- attachInterrupt(digitalPinToInterrupt(ONBOARD_KEY), buttonInterrupt, FALLING);
- Serial.begin(115200);
- Serial.setDebugOutput(true);
- Serial.println();
- while (axp.begin() != 0)
- {
- Serial.println("init error");
- delay(1000);
- }
- axp.enableCameraPower(axp.eOV2640); // 设置摄像头供电
- camera_config_t config;
- config.ledc_channel = LEDC_CHANNEL_0;
- config.ledc_timer = LEDC_TIMER_0;
- config.pin_d0 = Y2_GPIO_NUM;
- config.pin_d1 = Y3_GPIO_NUM;
- config.pin_d2 = Y4_GPIO_NUM;
- config.pin_d3 = Y5_GPIO_NUM;
- config.pin_d4 = Y6_GPIO_NUM;
- config.pin_d5 = Y7_GPIO_NUM;
- config.pin_d6 = Y8_GPIO_NUM;
- config.pin_d7 = Y9_GPIO_NUM;
- config.pin_xclk = XCLK_GPIO_NUM;
- config.pin_pclk = PCLK_GPIO_NUM;
- config.pin_vsync = VSYNC_GPIO_NUM;
- config.pin_href = HREF_GPIO_NUM;
- config.pin_sscb_sda = SIOD_GPIO_NUM;
- config.pin_sscb_scl = SIOC_GPIO_NUM;
- config.pin_pwdn = PWDN_GPIO_NUM;
- config.pin_reset = RESET_GPIO_NUM;
- config.xclk_freq_hz = 20000000;
- config.frame_size = FRAMESIZE_QVGA; // 照片分辨率。这里默认为 FRAMESIZE_UXGA
- config.pixel_format = PIXFORMAT_JPEG; // for streaming
- // config.pixel_format = PIXFORMAT_RGB565; // for face detection/recognition
- config.grab_mode = CAMERA_GRAB_WHEN_EMPTY;
- config.fb_location = CAMERA_FB_IN_PSRAM;
- config.jpeg_quality = 12; // 63; // 照片质量。这里默认为 12
- config.fb_count = 1;
-
- /*
- FRAMESIZE_QVGA (320 x 240)
- FRAMESIZE_CIF (352 x 288)
- FRAMESIZE_VGA (640 x 480)
- FRAMESIZE_SVGA (800 x 600)
- FRAMESIZE_XGA (1024 x 768)
- FRAMESIZE_SXGA (1280 x 1024)
- FRAMESIZE_UXGA (1600 x 1200)
- */
-
- // if PSRAM IC present, init with UXGA resolution and higher JPEG quality
- // for larger pre-allocated frame buffer.
- if (config.pixel_format == PIXFORMAT_JPEG)
- {
- if (psramFound())
- {
- config.jpeg_quality = 12; // 63; // 照片质量。这里默认为 10
- config.fb_count = 2;
- config.grab_mode = CAMERA_GRAB_LATEST;
- }
- else
- {
- // Limit the frame size when PSRAM is not available
- config.frame_size = FRAMESIZE_UXGA; // 照片分辨率。这里默认为 FRAMESIZE_SVGA
- config.fb_location = CAMERA_FB_IN_DRAM;
- }
- }
- else
- {
- // Best option for face detection/recognition
- config.frame_size = FRAMESIZE_UXGA; // FRAMESIZE_240X240;
- #if CONFIG_IDF_TARGET_ESP32S3
- config.fb_count = 2;
- #endif
- }
-
- #if defined(CAMERA_MODEL_ESP_EYE)
- pinMode(13, INPUT_PULLUP);
- pinMode(14, INPUT_PULLUP);
- #endif
-
- // camera init
- esp_err_t err = esp_camera_init(&config);
- if (err != ESP_OK)
- {
- Serial.printf("Camera init failed with error 0x%x", err);
- return;
- }
-
- sensor_t *s = esp_camera_sensor_get();
- // initial sensors are flipped vertically and colors are a bit saturated
- if (s->id.PID == OV3660_PID)
- {
- s->set_vflip(s, 1); // flip it back
- s->set_brightness(s, 1); // up the brightness just a bit
- s->set_saturation(s, -2); // lower the saturation
- }
- // drop down frame size for higher initial frame rate
- if (config.pixel_format == PIXFORMAT_JPEG)
- {
- s->set_framesize(s, FRAMESIZE_QVGA);
- }
-
- #if defined(CAMERA_MODEL_M5STACK_WIDE) || defined(CAMERA_MODEL_M5STACK_ESP32CAM)
- s->set_vflip(s, 1);
- s->set_hmirror(s, 1);
- #endif
-
- #if defined(CAMERA_MODEL_ESP32S3_EYE)
- s->set_vflip(s, 1);
- #endif
-
- WiFi.begin(ssid, password);
- WiFi.setSleep(false);
-
- while (WiFi.status() != WL_CONNECTED)
- {
- delay(500);
- Serial.print(".");
- }
- Serial.println("");
- Serial.println("WiFi connected");
-
- startCameraServer();
-
- Serial.print("Camera Ready! Use 'http://");
- Serial.print(WiFi.localIP());
- Serial.println("' to connect");
- }
-
- void loop()
- {
- // Do nothing. Everything is done in another task by the web server
- // delay(10000);
-
- // 按钮按下后的逻辑
- if (buttonPressed)
- {
-
-
- // 拍摄照片
- camera_fb_t *fb = esp_camera_fb_get();
- if (!fb)
- {
- Serial.println("获取摄像头帧缓冲失败");
- return;
- }
-
- // 建立HTTP客户端
- HTTPClient http;
-
- // 将照片上传到服务器
- http.begin(serverName);
- http.addHeader("Content-Type", "image/jpeg");
- int httpResponseCode = http.POST(fb->buf, fb->len);
- if (httpResponseCode > 0)
- {
- Serial.printf("照片上传成功,服务器返回代码:%d\n", httpResponseCode);
-
- // 再闪一下提示上传成功
-
- }
- else
- {
- Serial.printf("照片上传失败,错误代码:%s\n", http.errorToString(httpResponseCode).c_str());
- }
- http.end();
-
- // 释放帧缓冲
- esp_camera_fb_return(fb);
-
- // delay(1000); // 等待 1 秒后才可再次拍摄和上传
-
- buttonPressed = false; // 重置中断标志位
- }
- }
-
- void buttonInterrupt()
- {
- buttonPressed = true; // 设置下降沿中断标志位
- }
2.行空板程序
- from flask import Flask, request
- from unihiker import GUI
- u_gui=GUI()
- 显图=u_gui.draw_image(image="base.png",h=320,x=0,y=0)
- app = Flask(__name__)
- @app.route('/upload', methods=['POST'])
- def upload():
- try:
- image = request.data
- # 保存照片到指定目录
-
- with open('base.png', 'wb') as f:
- f.write(image)
- f.close()
-
- 显图.config(image="base.png")
-
- return "照片上传成功", 200
- except Exception as e:
- print("照片上传失败:", str(e))
- return "照片上传失败", 500
-
- if __name__ == '__main__':
-
- app.run(host='192.168.31.71', port=9000)
-
-
3.测试
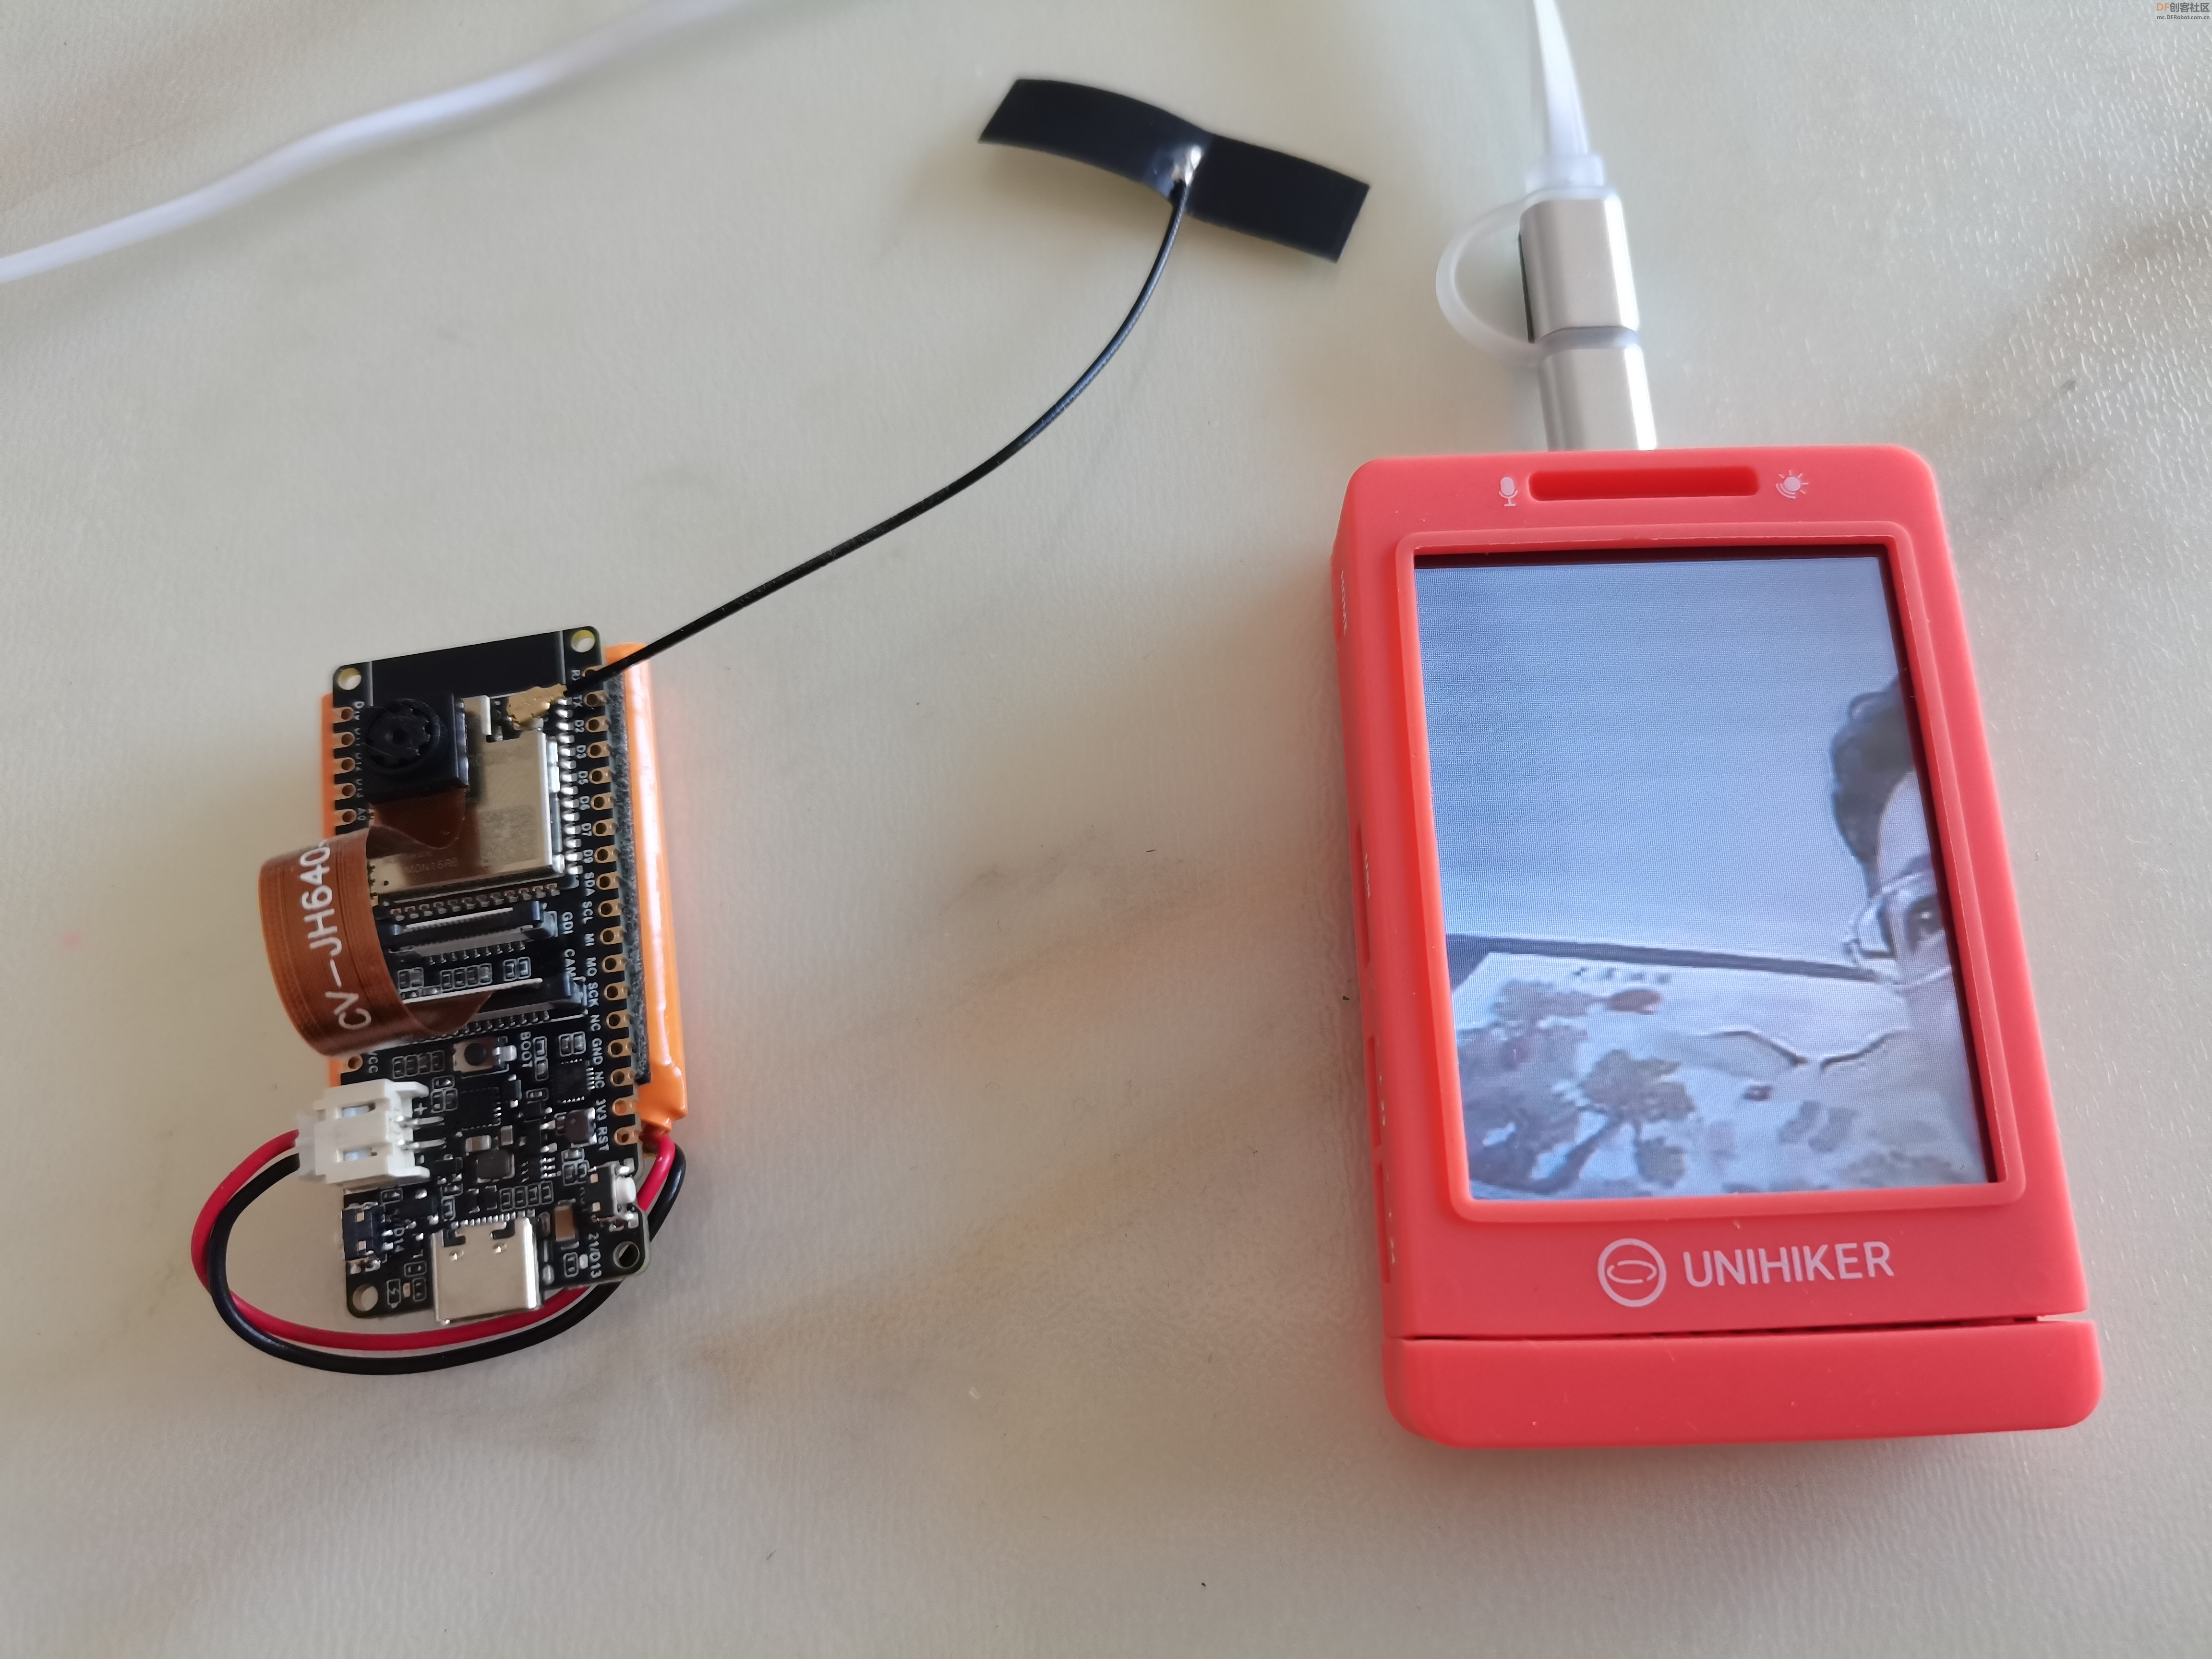
4.演示视频
五、GDI接口
这次的FireBeetle 2 ESP32-S3开发板不仅提供了CAM(Camera)接口,还提供了GDI接口:

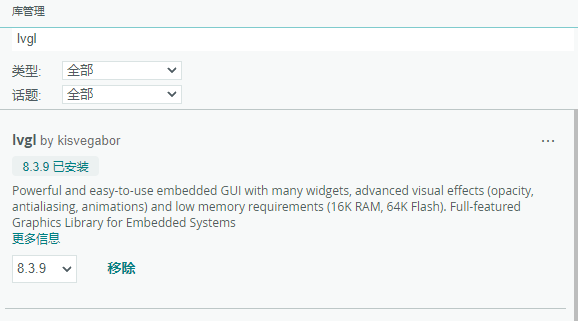
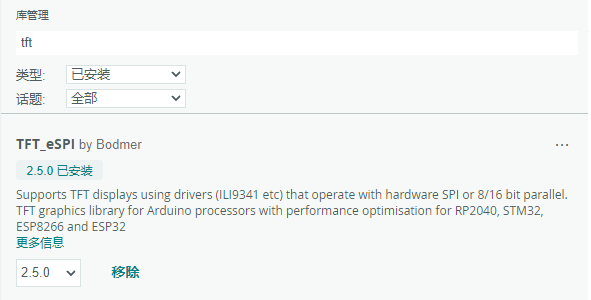
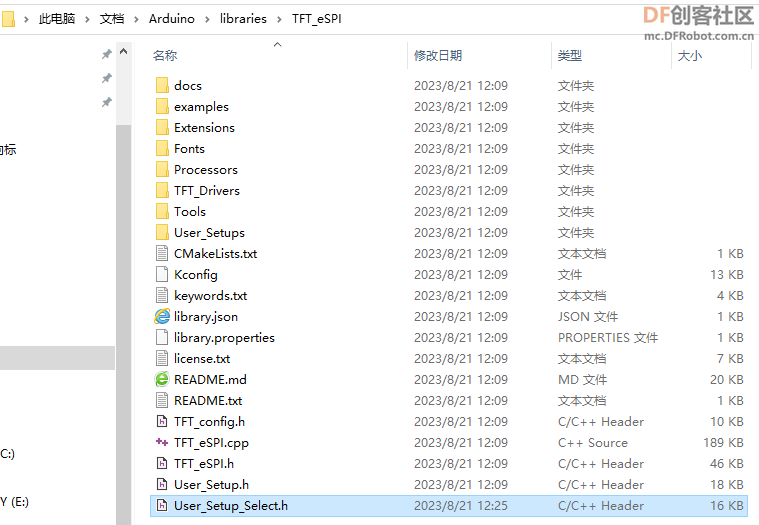
1.TFT_eSPI配置
TFT_eSPI、lvgl扩展库安装
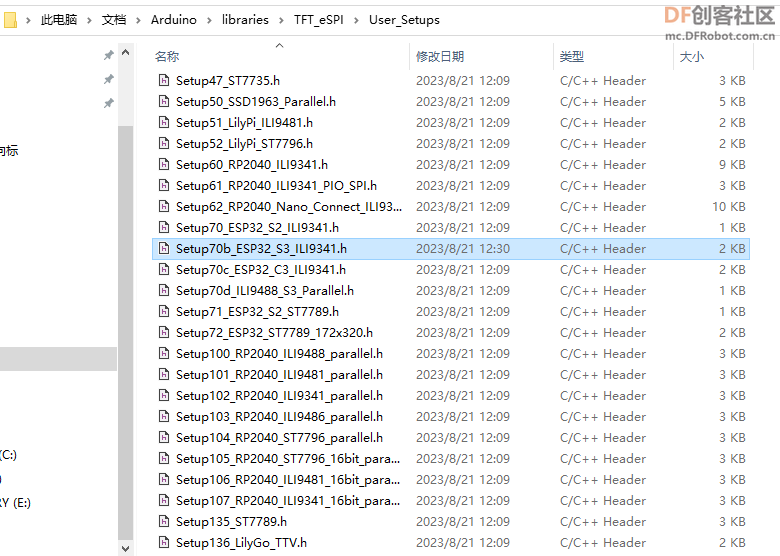
2.User_Setup_Select.h头文件控制调用哪个配置文件,User_Setups目录中则包含已经做好预配的多种配置文件。
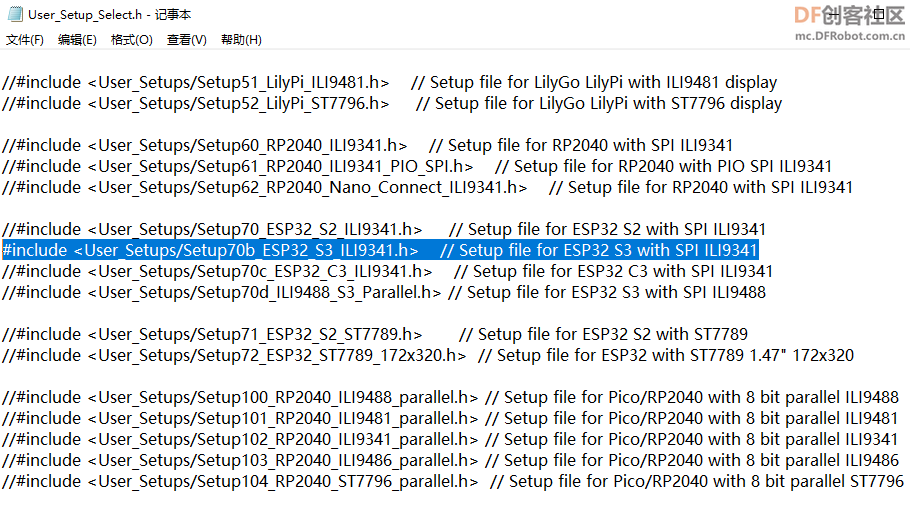
3.按下图FireBeetle 2 ESP32-S3开发板的GDI说明,修改“Setup70b_ESP32_S3_ILI9341.h”对应的GPIO配置:

- #define TFT_CS 18 // 10 or 34 (FSPI CS0)
- #define TFT_MOSI 15 // 11 or 35 (FSPI D)
- #define TFT_SCLK 17 // 12 or 36 (FSPI CLK)
- #define TFT_MISO 16 // 13 or 37 (FSPI Q)
-
- // Use pins in range 0-31
- #define TFT_DC 3
- #define TFT_RST 38
-
- //#define TOUCH_CS 12 // Optional for touch screen
运行示例,正在测试,将摄像头采集的内容显示在屏幕上……
| 


 沪公网安备31011502402448
 置顶卡
置顶卡 变色卡
变色卡 千斤顶
千斤顶

 活跃会员
活跃会员
 宣传大使
宣传大使
 牛X认证
牛X认证
 创客造
创客造
 编辑选择奖
编辑选择奖
 志“童”道合
 编辑选择奖
编辑选择奖
 编辑选择奖
编辑选择奖
 编辑选择奖
编辑选择奖
 编辑选择奖
编辑选择奖


