本帖最后由 云天 于 2021-3-29 15:12 编辑
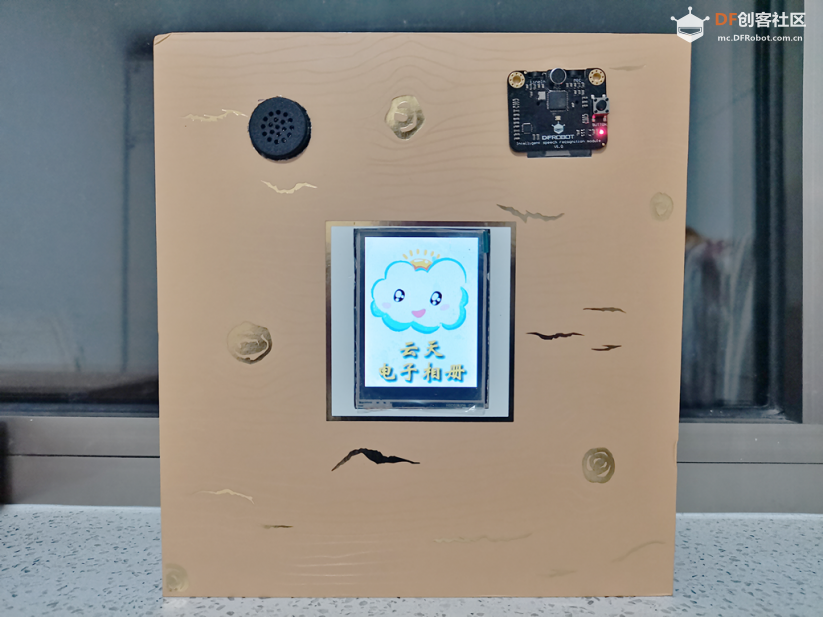
【云天AI电子相册】
语音控制播放相片及进行相片相关简介语音播报。
【视频演示】
【硬件设备】
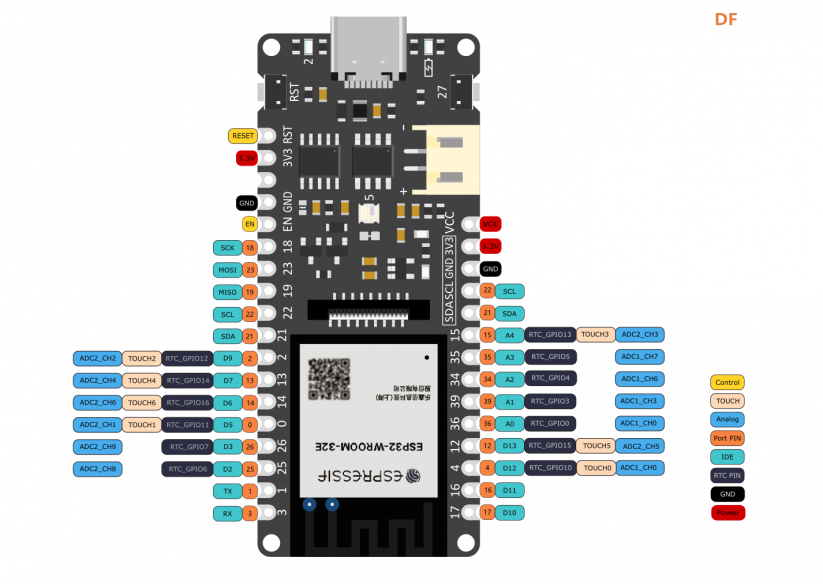
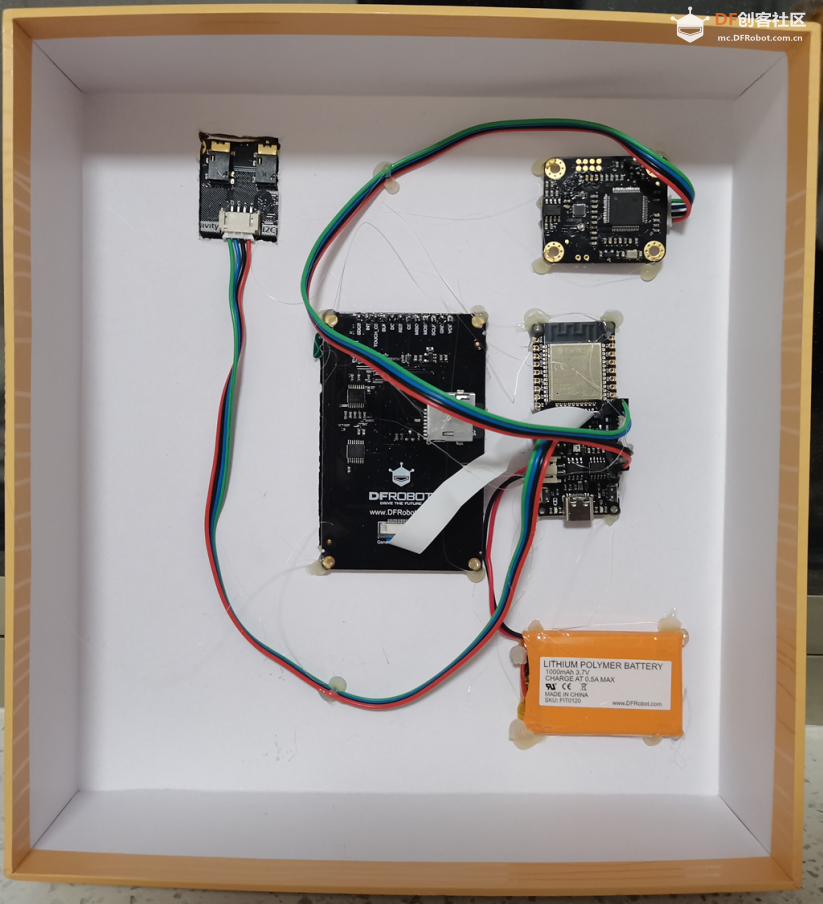
1、主控板:FireBeetle Board ESP32-E(Arduino开发板),拥有GDI显示接口,单线连接显示屏
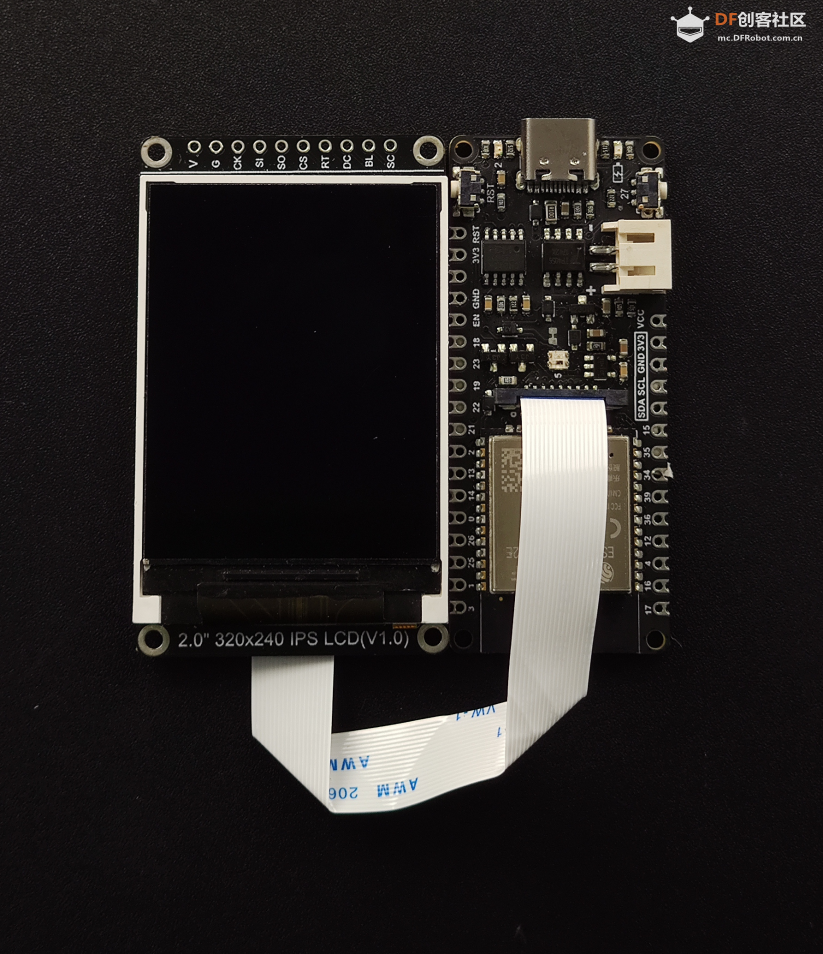
此接口为DFRbot专用GDI显示屏接口,使用18pin-FPC线连接,单线材连接屏幕,为您提供最简捷的屏幕使用方式。
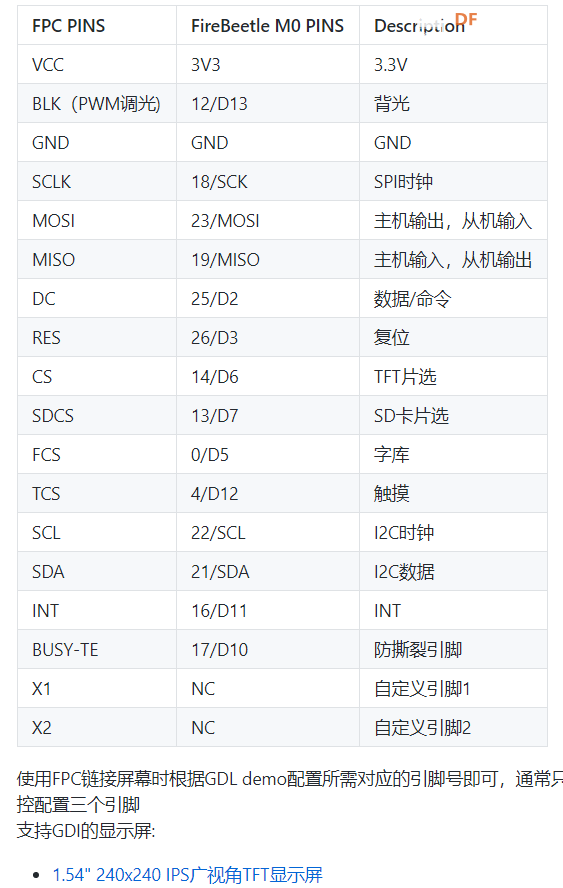
以下是GDI接口使用的引脚列表
- /*ESP32 and ESP8266*/
- #elif defined(ESP32) || defined(ESP8266)
- #define TFT_DC 25
- #define TFT_CS 14
- #define TFT_RST 26
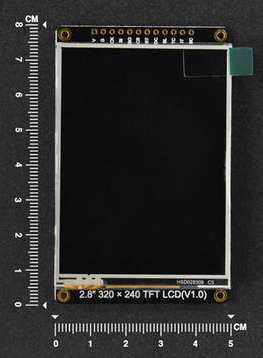
2、2.8" 320x240 IPS TFT电阻触摸显示屏
这是一款2.8英寸的IPS电阻式触摸显示屏。该模块分辨率为320x240,驱动IC为ILI9341,采用SPI(4线)通信方式。板载触摸芯片XPT2046,触控芯片将AD采集的触摸数据转换成SPI数据。模块集成SD卡槽,可以轻松的从SD卡中读取全彩色位图。模块为用户提供了两种接线方式,一种为普通排针接线方式;另一种为GDI(General Display interface)接口,需有GDI接口的主控相匹配(如FireBeetle Board ESP32-E),只需一根fpc线,就可即插即用,降低了接线的复杂程度。
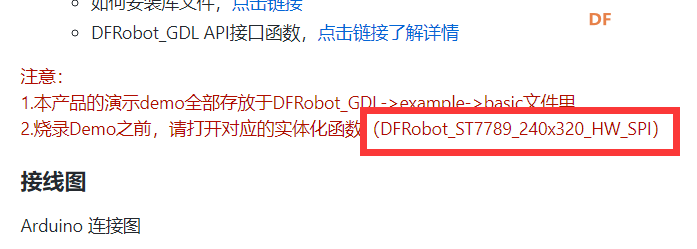
教程中提到的下面这句有误,应为“DFRobot_ILI9341_240x320_HW_SPI”
库文件实例“drawSDPicture.ino”中下列代码
- /*ESP32 and ESP8266*/
- #elif defined(ESP32) || defined(ESP8266)
- #define TFT_DC D3
- #define TFT_CS D4
- #define TFT_RST D5
- #define TFT_SD D6
应修改为:
- #elif defined(ESP32) || defined(ESP8266)
- #define TFT_DC 25
- #define TFT_CS 14
- #define TFT_RST 26
- #define TFT_SD 13
且在代码中读取SD卡文件时,在目录使用上出现问题,给我带来三天的困扰。
原代码中,目录“picture/219x220.jpg”
- decoder.drawPicture(/*filename=*/"picture/219x220.jpg",/*sx=*/0,/*sy=*/0,/*ex=*/screen.width(),/*ey=*/screen.height(),/*screenDrawPixel=*/screenDrawPixel);
- screen.fillScreen(COLOR_RGB565_WHITE);
- decoder.drawPicture(/*filename=*/"picture/RGB565.bmp",/*sx=*/0,/*sy=*/0,/*ex=*/screen.width(),/*ey=*/screen.height(),/*screenDrawPixel=*/screenDrawPixel);
应修改为:“/ picture/219x220.jpg”
- decoder.drawPicture(/*filename=*/"/picture/219x220.jpg",/*sx=*/0,/*sy=*/0,/*ex=*/screen.width(),/*ey=*/screen.height(),/*screenDrawPixel=*/screenDrawPixel);
- screen.fillScreen(COLOR_RGB565_WHITE);
- decoder.drawPicture(/*filename=*/"/picture/RGB565.bmp",/*sx=*/0,/*sy=*/0,/*ex=*/screen.width(),/*ey=*/screen.height(),/*screenDrawPixel=*/screenDrawPixel);
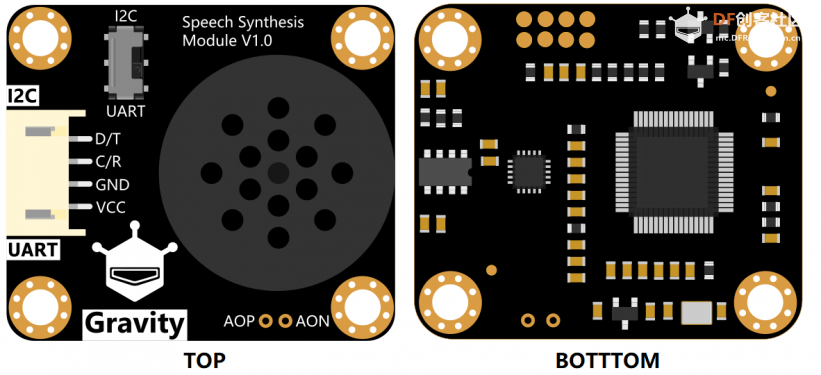
3、Gravity: 中英文语音合成模块
让声音为你的项目增添一抹特色!连接上语音合成模块,再添加几行简单的代码就可以让您的项目开口说话。无论是中文还是英文对于语音合成模块来说都是so easy,播报当前时间,播报环境数据统统不在话下,与语音识别模块结合还可实现语音对话!该模块采用I2C和UART两种通讯方式,Gravity接口,兼容绝大部分主控。模块上已经自带了一个喇叭,所以您无需再额外的添加喇叭。
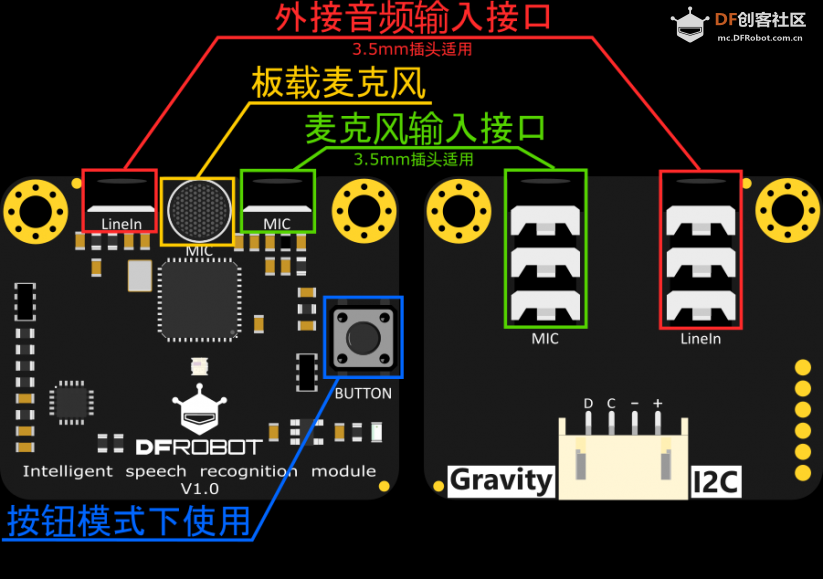
4、Gravity:I2C语音识别模块
让声音为您的项目增添一抹特色!连接上语音识别模块,再添加几行简单的代码,您的项目就可以听懂您说的话。无需机器学习,无需特定人语音,无需联网,随时随地都可以进行语音识别,结合语音合成模块还可以实现语音对话。使用Gravity I2C接口通信,兼容绝大部分主控,非常适合接入教育场景使用。三种语音识别模式和三种语音输入方式使模块可以集成入更多的场景。
【硬件连接】
【Arduino IDE 编译环境配置】
1、下载主控的核心:https://wiki.dfrobot.com.cn/_SKU ... rd_ESP32_E#target_6
2、安装1 x 2.8" 240x320 LCD显示模块DFRobot_GDL库文件
3、安装中英文语音合成模块语音合成库文件和示例程序
4、安装Gravity I2C 离线语音识别模块库文件 DFRobot_ASR
【完整程序代码】
- /*!
- * @file SD.ino
- * @brief Read pictures in bmp / jpg / jpeg format from the SD card and display them on the screen. bmp supports 16-bit / 24-bit / 32-bit.
- * [url=home.php?mod=space&uid=821650]@N[/url] jpg only supports JFIF format, you can open with windows drawing and save it as this format.
- * @n The pictures of this demo are stored under example-> SD-> picture; just copy the picture folder to the SD card
- * @n This demo supports mainboard ESP8266, FireBeetle-M0, MAGE2560, and UNO.
- * @copyright Copyright (c) 2010 DFRobot Co. Ltd ([url]http://www.dfrobot.com[/url])
- * @licence The MIT License (MIT)
- * @author [YeHangYu] ([email]hangyu.ye@dfrobot.com[/email])
- * @version V0.1
- * @date 2020-03-20
- * @url [url]https://github.com/DFRobot/DFRobot_GDL[/url]
- */
- #include <SD.h>
- #include <SPI.h>
- #include "DFRobot_GDL.h"
- #include "DFRobot_Picdecoder_SD.h"
- #include "DFRobot_SpeechSynthesis.h"
- #include "DFRobot_ASR.h"
- DFRobot_SpeechSynthesis_I2C ss;
- DFRobot_Picdecoder_SD decoder;
- DFRobot_ASR asr;
- //Custom communication pins
- /*FireBeetle-M0*/
- #if defined ARDUINO_SAM_ZERO
- #define TFT_DC 7
- #define TFT_CS 5
- #define TFT_RST 6
- #define TFT_SD 3
- /*ESP32 and ESP8266*/
- #elif defined(ESP32) || defined(ESP8266)
- #define TFT_DC 25
- #define TFT_CS 14
- #define TFT_RST 26
- #define TFT_SD 13
- /* AVR series mainboard */
- #else
- #define TFT_DC 2
- #define TFT_CS 3
- #define TFT_RST 4
- #define TFT_SD 6
- #endif
- /**
- * @brief Constructor Constructor of hardware SPI communication
- * @param dc Command/data line pin for SPI communication
- * @param cs Chip select pin for SPI communication
- * @param rst reset pin of the screen
- */
- //DFRobot_ST7789_240x240_HW_SPI screen(/*dc=*/TFT_DC,/*cs=*/TFT_CS,/*rst=*/TFT_RST);
- //DFRobot_ST7789_240x320_HW_SPI screen(/*dc=*/TFT_DC,/*cs=*/TFT_CS,/*rst=*/TFT_RST);
- DFRobot_ILI9341_240x320_HW_SPI screen(/*dc=*/TFT_DC,/*cs=*/TFT_CS,/*rst=*/TFT_RST);
- //DFRobot_ILI9488_320x480_HW_SPI screen(/*dc=*/TFT_DC,/*cs=*/TFT_CS,/*rst=*/TFT_RST);
- /* M0 mainboard DMA transfer */
- //DFRobot_ST7789_240x240_DMA_SPI screen(/*dc=*/TFT_DC,/*cs=*/TFT_CS,/*rst=*/TFT_RST);
- //DFRobot_ST7789_240x320_DMA_SPI screen(/*dc=*/TFT_DC,/*cs=*/TFT_CS,/*rst=*/TFT_RST);
- //DFRobot_ILI9341_240x320_DMA_SPI screen(/*dc=*/TFT_DC,/*cs=*/TFT_CS,/*rst=*/TFT_RST);
- //DFRobot_ILI9488_320x480_DMA_SPI screen(/*dc=*/TFT_DC,/*cs=*/TFT_CS,/*rst=*/TFT_RST);
-
- /*
- *User-selectable macro-defined color
- *COLOR_RGB565_BLACK COLOR_RGB565_NAVY COLOR_RGB565_DGREEN COLOR_RGB565_DCYAN
- *COLOR_RGB565_MAROON COLOR_RGB565_PURPLE COLOR_RGB565_OLIVE COLOR_RGB565_LGRAY
- *COLOR_RGB565_DGRAY COLOR_RGB565_BLUE COLOR_RGB565_GREEN COLOR_RGB565_CYAN
- *COLOR_RGB565_RED COLOR_RGB565_MAGENTA COLOR_RGB565_YELLOW COLOR_RGB565_ORANGE
- *COLOR_RGB565_WHITE
- */
- File root;
- int i;
- int j;
- void setup()
- {
- //Initialize the serial port
- Serial.begin(115200);
- //Initialize screen
- ss.begin();
- screen.begin();
- //Initialize the SD card, wait until the initialization is successful
- asr.begin(PASSWORD);
- asr.addCommand("xiao tian xiao tian",0);
- asr.addCommand("xia yi ge",1);
- asr.addCommand("shang yi ge",2);
-
- //开始识别
- asr.start();
- while(1)
- {
- if (SD.begin(/*sdcs=*/TFT_SD))
- {
- Serial.println("initialization done.");
- break;
- }
- Serial.println("initialization failed!");
- }
-
- decoder.drawPicture(/*filename=*/"/picture/0.jpg",/*sx=*/0,/*sy=*/0,/*ex=*/screen.width(),/*ey=*/screen.height(),/*screenDrawPixel=*/screenDrawPixel);
- ss.speak(F("云天电子相册"));
-
- }
-
-
-
- void loop()
- {
- j=asr.read();
- switch(j) //判断识别内容,在有识别结果的情况下asr.read()会返回识别到的词条编号,否则返回-1
- {
- case 0: //若是唤醒指令“小天 小天”
- switch(random(0,5))
- {
- case 0:
- ss.speak(F("嗯"));
- break;
- case 1:
- ss.speak(F("我在"));
- break;
- case 2:
- ss.speak(F("在听"));
- break;
- case 3:
- ss.speak(F("来了"));
- break;
- case 4:
- ss.speak(F("您说"));
- break;
- case 5:
- ss.speak(F("在了"));
- break;
- }
- break;
-
- case 1:
- if(i<4)
- {
- i++;
- }
- else
- {
- i=0;
- }
- break;
- case 2:
- if(i>0)
- {
- i--;
- }
- else
- {
- i=5;
- }
- break;
- }
- if(j !=-1 && j!=0)
- {
- switch(i)
- {
-
- case 0:
- decoder.drawPicture(/*filename=*/"/picture/1.jpg",/*sx=*/0,/*sy=*/0,/*ex=*/screen.width(),/*ey=*/screen.height(),/*screenDrawPixel=*/screenDrawPixel);
- ss.speak(F("每一天在成长"));
-
- break;
- case 1:
- decoder.drawPicture(/*filename=*/"/picture/2.jpg",/*sx=*/0,/*sy=*/0,/*ex=*/screen.width(),/*ey=*/screen.height(),/*screenDrawPixel=*/screenDrawPixel);
- ss.speak(F("北京火车站前"));
-
- break;
- case 2:
- decoder.drawPicture(/*filename=*/"/picture/3.jpg",/*sx=*/0,/*sy=*/0,/*ex=*/screen.width(),/*ey=*/screen.height(),/*screenDrawPixel=*/screenDrawPixel);
- ss.speak(F("运动小健将"));
-
- break;
- case 3:
- decoder.drawPicture(/*filename=*/"/picture/4.jpg",/*sx=*/0,/*sy=*/0,/*ex=*/screen.width(),/*ey=*/screen.height(),/*screenDrawPixel=*/screenDrawPixel);
- ss.speak(F("海中美人鱼"));
-
- break;
- case 4:
- decoder.drawPicture(/*filename=*/"/picture/5.jpg",/*sx=*/0,/*sy=*/0,/*ex=*/screen.width(),/*ey=*/screen.height(),/*screenDrawPixel=*/screenDrawPixel);
- ss.speak(F("方便面也吃的香"));
-
- break;
- }
-
- }
- }
- //For decoding function calling, the function of this function is to draw a pixel on the screen
- void screenDrawPixel(int16_t x, int16_t y, uint16_t color)
- {
- //Draw a point on the screen
- screen.writePixel(x,y,color);
- }
|
 沪公网安备31011502402448