本帖最后由 云天 于 2025-10-8 14:06 编辑
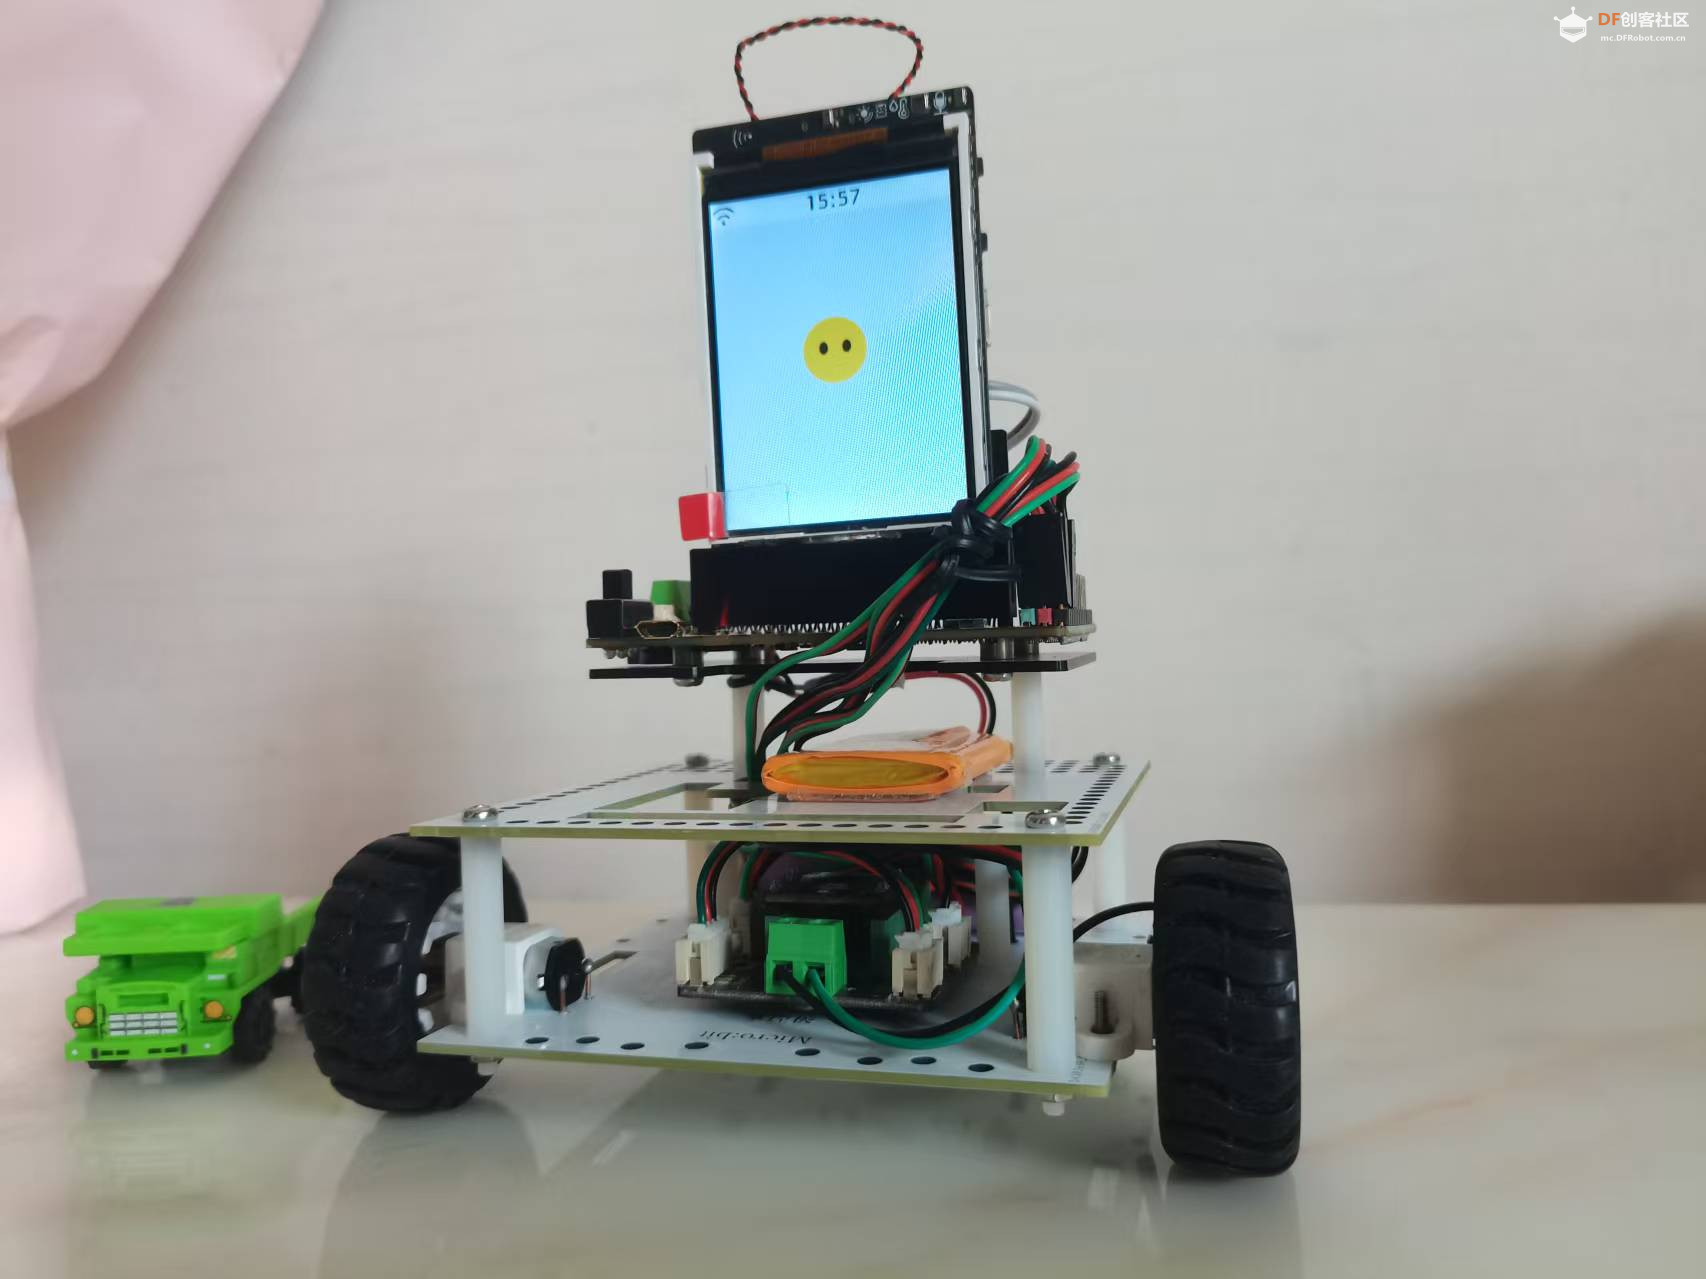
行空板 K10 + 小智 AI + IO 电机扩展板 —— 打造“能听懂话”的两轮 AI 小车
【项目缘起】
行空板 K10 是一块把 240×320 彩屏、摄像头、麦克风、Wi-Fi、ESP32-S3 全部塞进 51.6 mm×83 mm 的“魔方”。
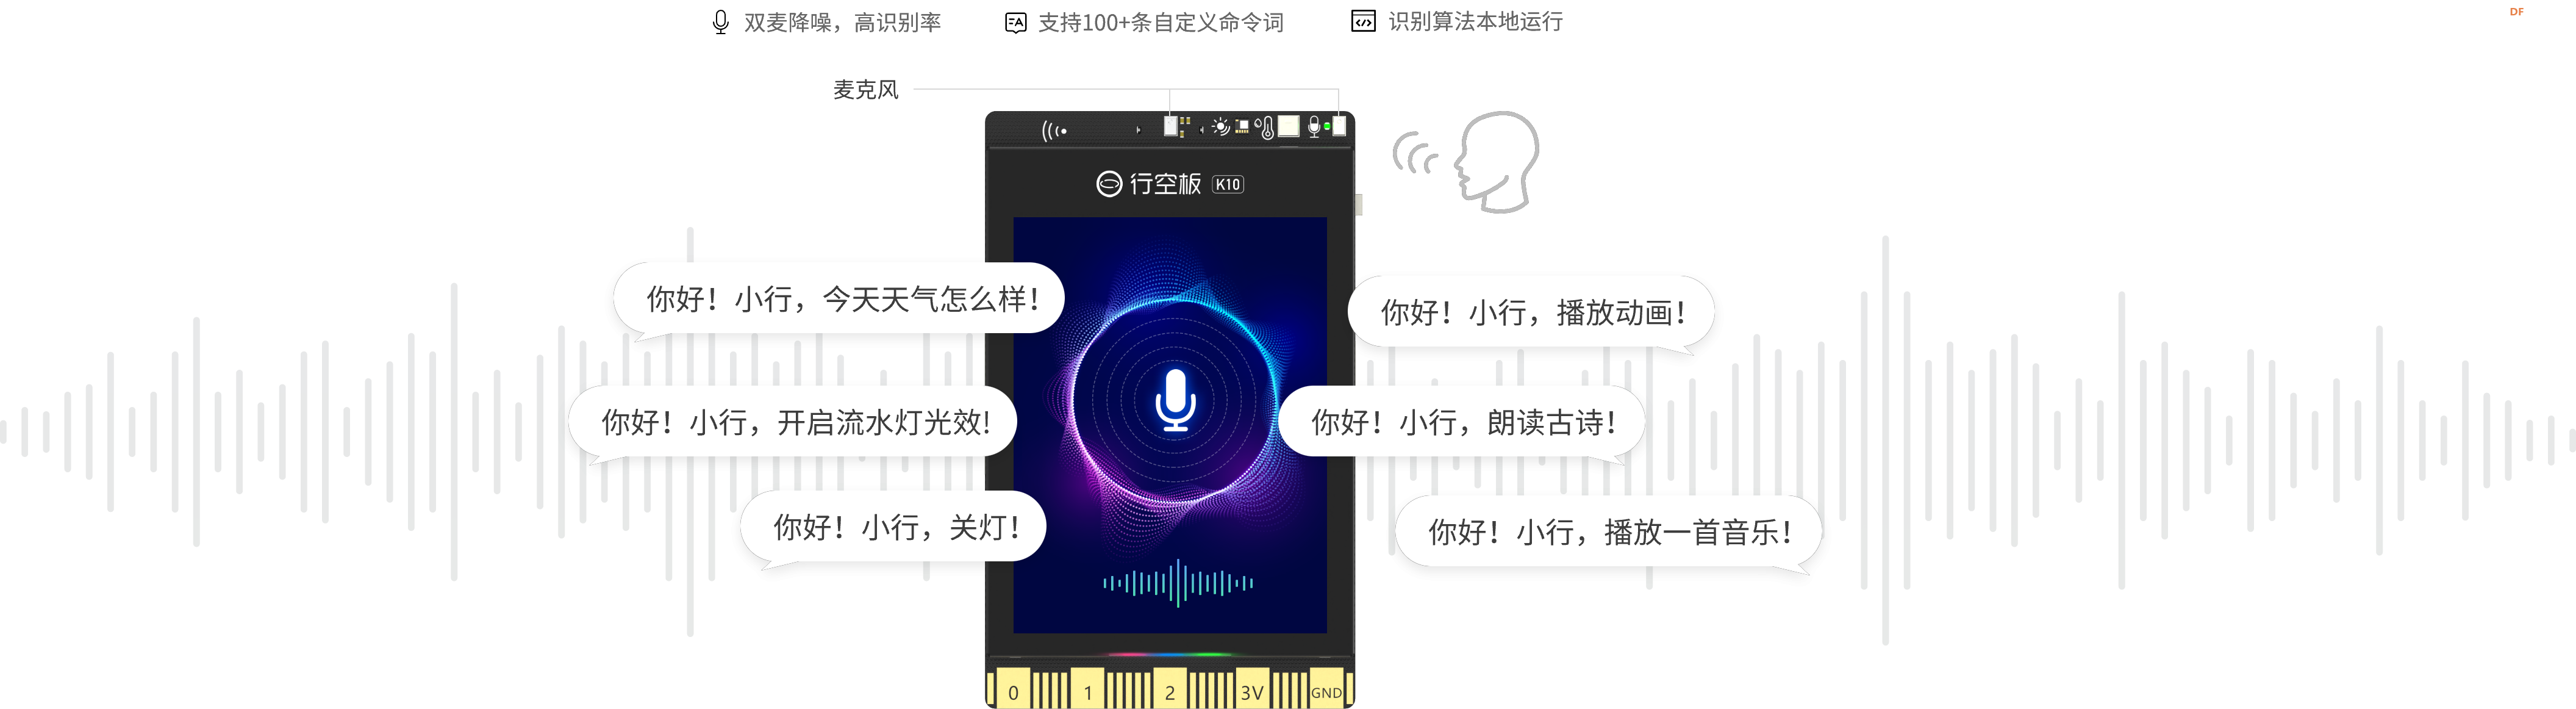
官方出厂集成麦克风、扬声器,可轻松实现离线语音识别、语音合成等人工智能项目。 行空板K10结合开源项目xiaozhi-esp32开启了新的可能。它充分利用行空板K10中ESP32-S3 的功能,并集成 DeepSeek 等模型的 API,实现了0.3秒级的 AI 语音聊天。DF官网提供了免编译的固件,只需要简单的烧录上传即可让行空板 K10 摇身一变,成为一款响应式智能终端,支持多轮对话、唤醒词检测和实时翻译。
行空板 K10 的官方「小智语音包」虽然上手零门槛,却只留下一个“会聊天的方盒子”——板载的P0/P1 两个“全功能”引脚、GPIO 金手指统统沉睡。
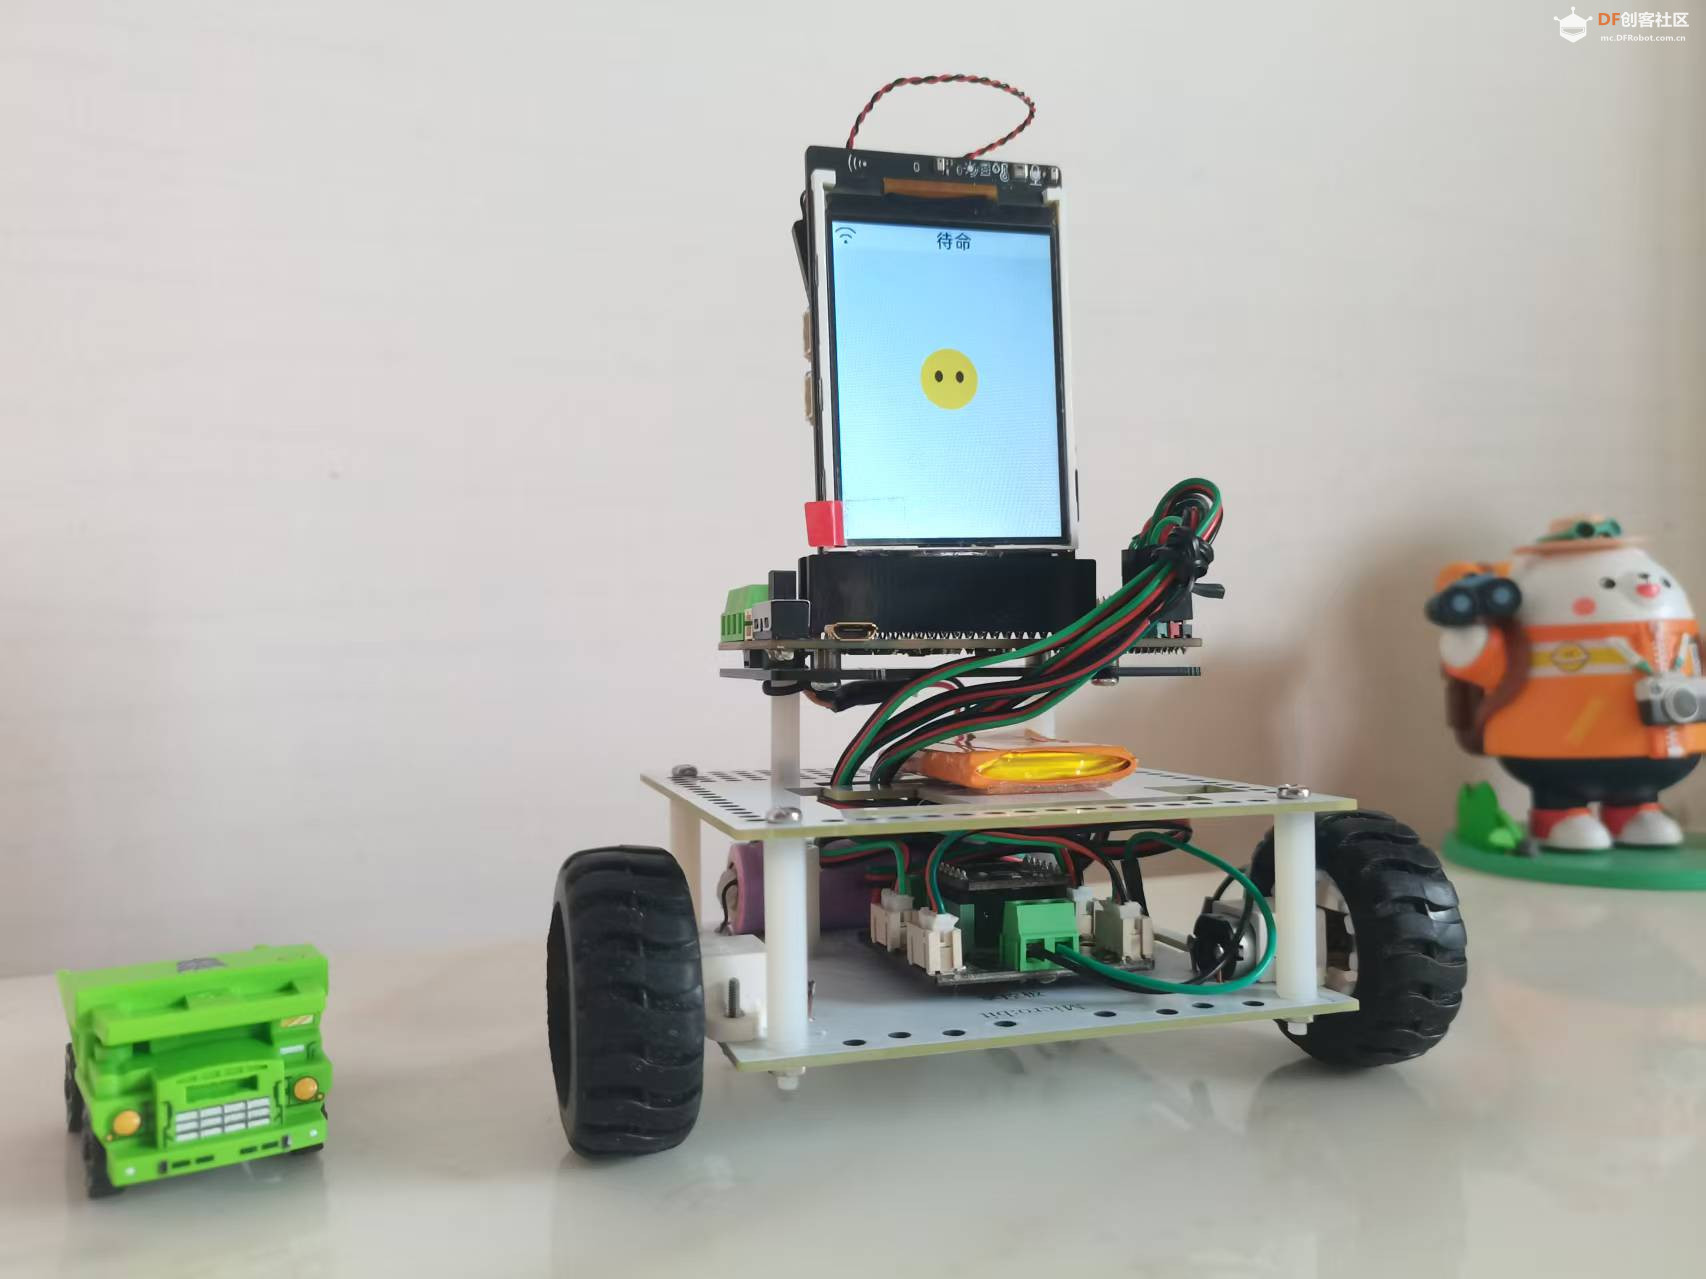
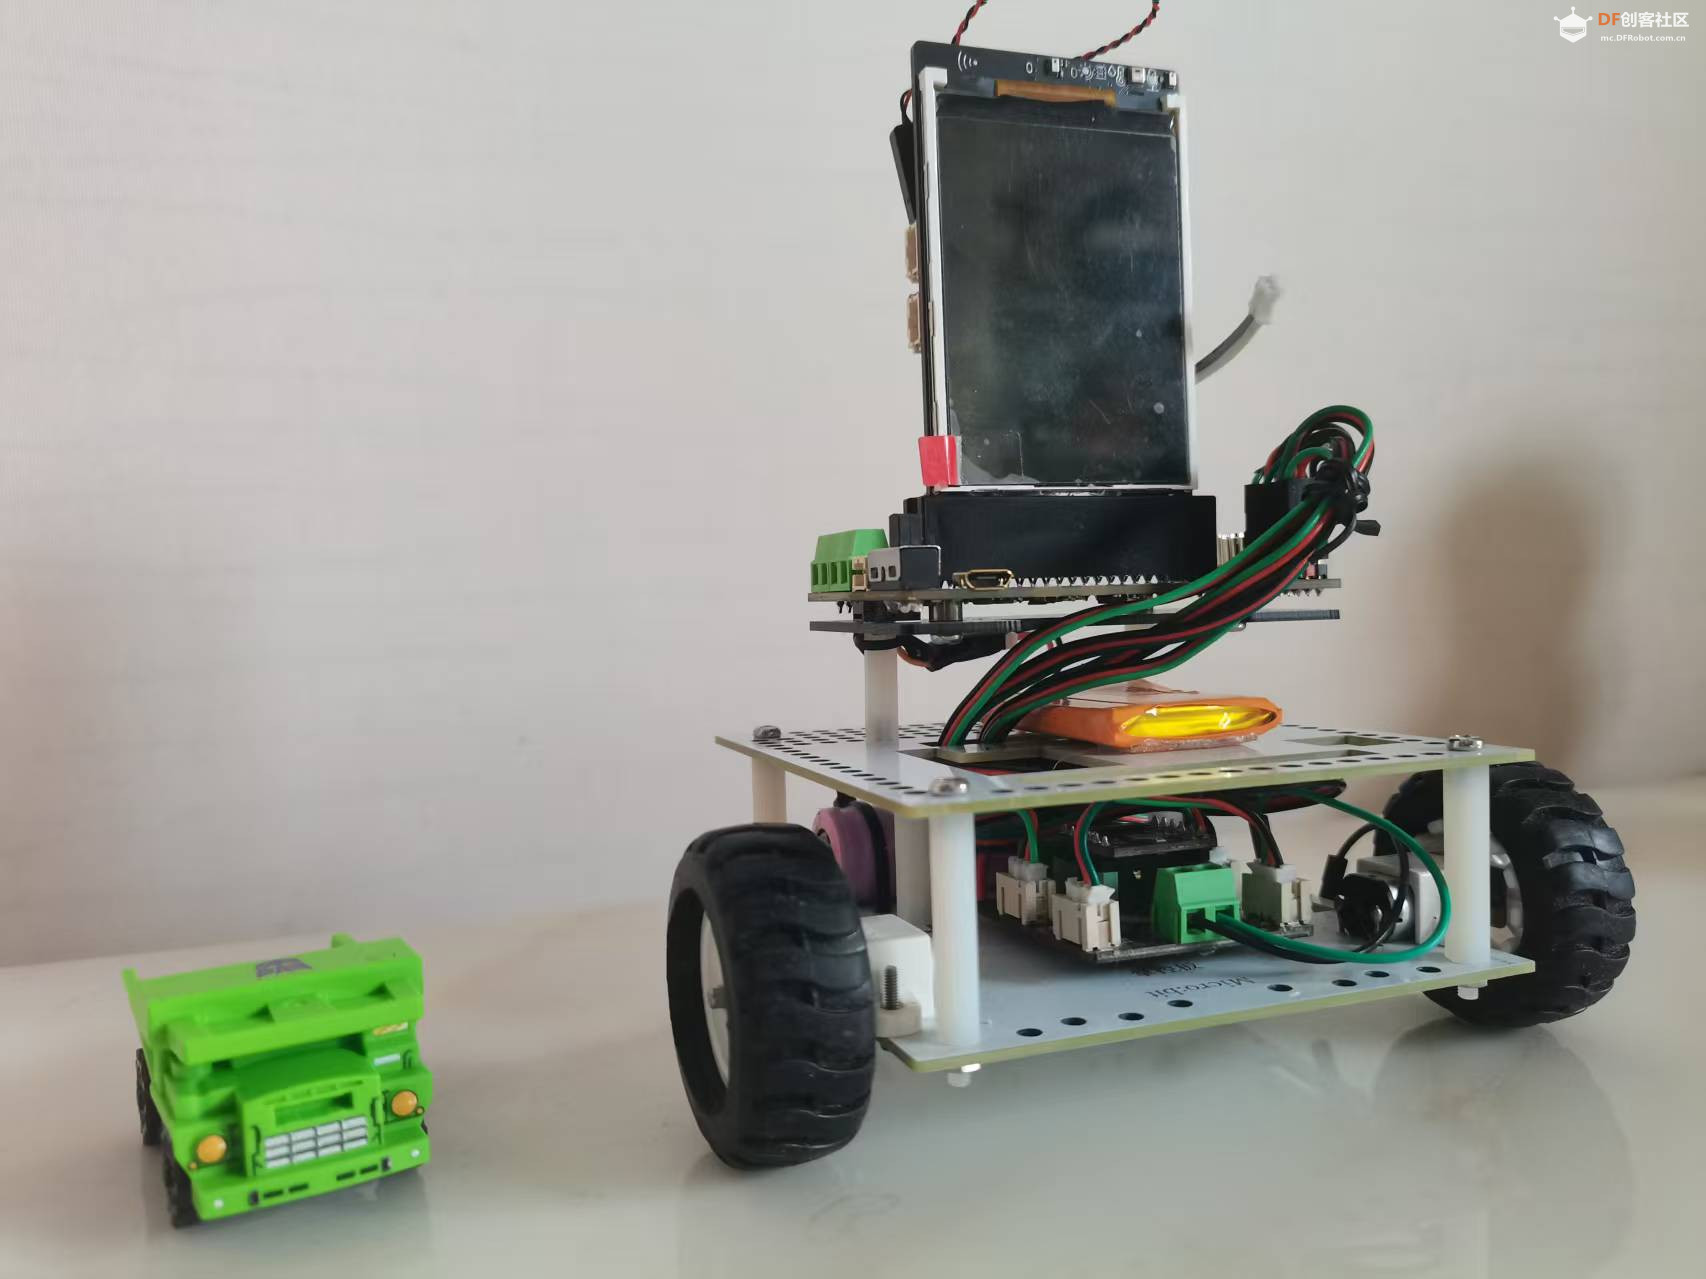
于是,我们干脆把这块“能听会说”的板子装进一辆巴掌大小的两轮小车:让语音成为方向盘,让闲置的 GPIO引脚真正去驱动马达。
接下来,同一套硬件,将不再只是聊天,而是“听得懂人话、看得见前方、跑得稳又停得准”的 AI两轮小车。
【硬件清单 】
1. 行空板 K10(ESP32-S3)
2. micro:bit 掌控 IO 扩展板
3.TB6612 双路电机驱动,电机驱动扩展板
4. N20电机 ×2
5.小车底盘 ×2(嘉立创)
6. 18650 锂电池(3.7V)
7. 3Pin 连接线×4
【原理透析】
为什么“只剩”P0/P1位置保留了两个全功能GPIO(支持数字输入/输出、模拟输入、PWM输出)。
------------------------------------------------
K10 的 ESP32-S3 原生 45 个 IO,但:
- 摄像头 8 data + XCLK + PCLK + VSYNC + HREF + SIOC + SIOD = 14 根
- 彩屏 SPI 4 data + DC + CS + RST + BACKLIGHT = 6 根
- 麦克风 I²S 3 根
- 扬声器 I²S 3 根
- 喇叭功放使能、LED 灯、SD 卡……
最后金手指引出的 20 根口线,全部由 **XL9535QF24**(16 bit I²C GPIO 扩展器)驱动,**只能做数字输入/输出**,不能 PWM/ADC。
因此“电机驱动”这种“方向+PWM”需求,P0、P1负责"PWM",扩展板上的P8、P9负责“方向”数字信号。
【XL9535QF24 快速上手】
1. 管脚定义
- SDA ←→ K10 金手指 P20
- SCL ←→ K10 金手指 P19
- 地址 0x20(A2/A1/A0 全部接地)
2. 寄存器模型
与 PCA9555 完全寄存器级兼容:
- 方向寄存器:0x06/0x07
- 输出寄存器:0x02/0x03
- 输入寄存器:0x00/0x01
3. ESP-IDF 驱动
官方已内置 `esp_io_expander_tca95xx_16bit.h`,实例化时把器件地址写成 `ESP_IO_EXPANDER_I2C_TCA9555_ADDRESS_000` 即可,一行代码不用改。
- esp_io_expander_new_i2c_tca95xx_16bit(i2c_bus_, ESP_IO_EXPANDER_I2C_TCA9555_ADDRESS_000, &io_expander);
【软件架构】
```
APP 层:小智 AI 语音 ⇄ 语义槽位 “self.car.action”
↓
MCP Server(JSON-RPC)
↓
Df_K10Board::IoExpanderSetLevel(P8/P9, DIR)
↓
XL9535QF24 → TB6612 AIN1/AIN2 → 电机正/反/停
```
定时器 `stop_timer_` 负责“运行 X 秒后自动停车”,防止语音没听到“停止”时小车冲出桌面。
【关键代码片段】
1. 初始化 XL9535- esp_io_expander_new_i2c_tca95xx_16bit(i2c_bus_, ESP_IO_EXPANDER_I2C_TCA9555_ADDRESS_000, &io_expander);
- uint16_t output_pins = (1 << 8) | (1 << 9) ; // 使用位掩码 (1 << 8) | (1 << 9) 表示引脚P8 和引脚P9。
- ret = esp_io_expander_set_dir(io_expander, output_pins,IO_EXPANDER_OUTPUT);
2. 语音控制回调
- void InitializeIot() {
-
- stop_timer_ = xTimerCreate("StopMotorTimer",pdMS_TO_TICKS(1000),pdFALSE,this,StopMotorCallbackStatic);
- auto& mcp_server = McpServer::GetInstance();
-
- motor_.init();
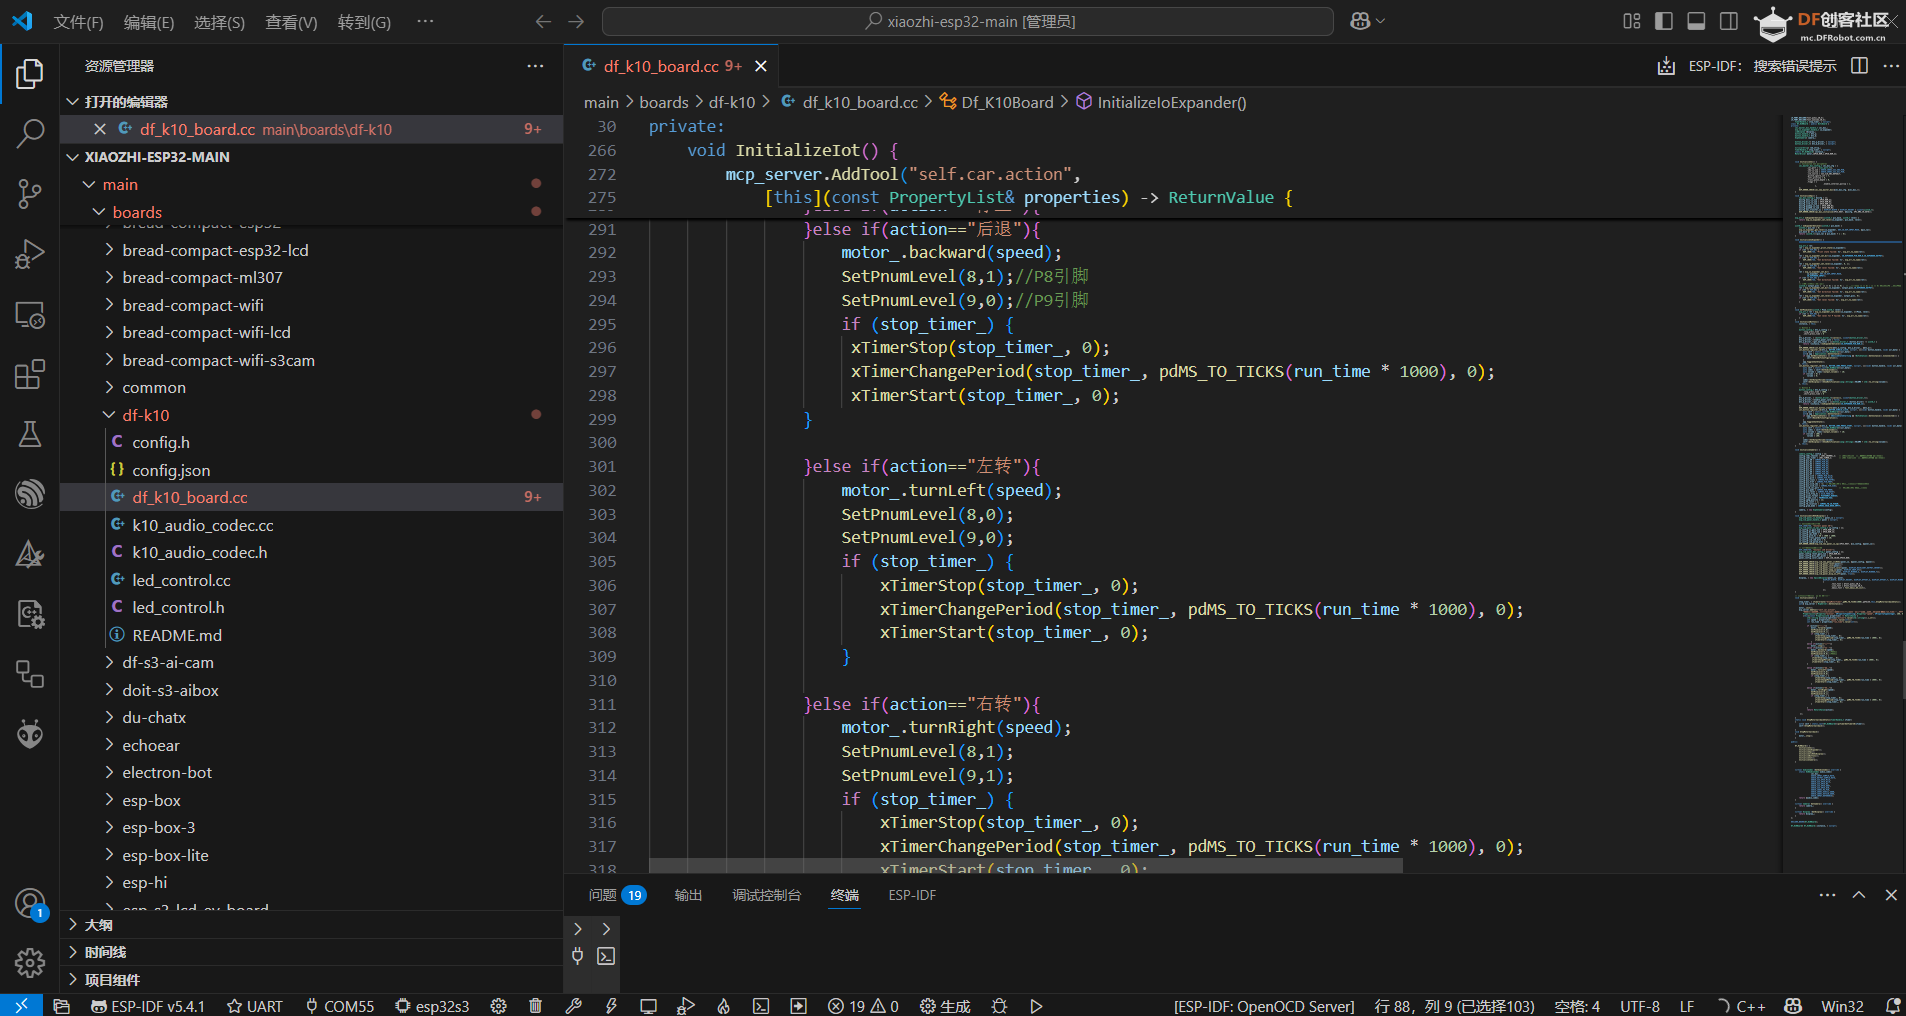
- mcp_server.AddTool("self.car.action",
- "可控制小车的运行动作,action(小车的动作):前进、后退、停止、左转、右转。speed:速度;run_time:执行时间(秒)",
- PropertyList({Property("action", kPropertyTypeString),Property("speed", kPropertyTypeInteger, 200, 0, 255),Property("run_time", kPropertyTypeInteger, 2, 0, 60)}),
- [this](const PropertyList& properties) -> ReturnValue {
- std::string action=properties["action"].value<std::string>().c_str();
- int speed = properties["speed"].value<int>();
- int run_time = properties["run_time"].value<int>();
-
- if (action=="前进"){
- motor_.forward(speed);
- SetPnumLevel(8,0);
- SetPnumLevel(9,1);
- if (stop_timer_) {
- xTimerStop(stop_timer_, 0);
- xTimerChangePeriod(stop_timer_, pdMS_TO_TICKS(run_time * 1000), 0);
- xTimerStart(stop_timer_, 0);
- }
- }else if(action=="停止"){
- motor_.stop();
- }else if(action=="后退"){
- motor_.backward(speed);
- SetPnumLevel(8,1);//P8引脚
- SetPnumLevel(9,0);//P9引脚
- if (stop_timer_) {
- xTimerStop(stop_timer_, 0);
- xTimerChangePeriod(stop_timer_, pdMS_TO_TICKS(run_time * 1000), 0);
- xTimerStart(stop_timer_, 0);
- }
-
- }else if(action=="左转"){
- motor_.turnLeft(speed);
- SetPnumLevel(8,0);
- SetPnumLevel(9,0);
- if (stop_timer_) {
- xTimerStop(stop_timer_, 0);
- xTimerChangePeriod(stop_timer_, pdMS_TO_TICKS(run_time * 1000), 0);
- xTimerStart(stop_timer_, 0);
- }
-
- }else if(action=="右转"){
- motor_.turnRight(speed);
- SetPnumLevel(8,1);
- SetPnumLevel(9,1);
- if (stop_timer_) {
- xTimerStop(stop_timer_, 0);
- xTimerChangePeriod(stop_timer_, pdMS_TO_TICKS(run_time * 1000), 0);
- xTimerStart(stop_timer_, 0);
- }
-
- }
- return ReturnValue(action);
-
- });
-
- }
3. 自动停车回调函数
- static void StopMotorCallbackStatic(TimerHandle_t xTimer)
- {
- auto* self = static_cast<Df_K10Board*>(pvTimerGetTimerID(xTimer));
- self->StopMotorCallback();
-
- }
- void StopMotorCallback()
- {
- motor_.stop();
- }
4.引脚P0、P1产生PWM——motor.cc文件
- #include "motor.h"
- #define PWM_FREQ_HZ 1000
- #define PWM_RESOLUTION LEDC_TIMER_8_BIT
- MotorDriver::MotorDriver(int ain1, int ain2)
- : _ain1(ain1), _ain2(ain2),
- _ch_ain1(LEDC_CHANNEL_1), _ch_ain2(LEDC_CHANNEL_2)
- {}
- void MotorDriver::init()
- {
- // 设置 PWM 定时器
- ledc_timer_config_t timer_conf = {};
- timer_conf.speed_mode = LEDC_MODE;
- timer_conf.timer_num = LEDC_TIMER_1;
- timer_conf.duty_resolution = PWM_RESOLUTION;
- timer_conf.freq_hz = PWM_FREQ_HZ;
- timer_conf.clk_cfg = LEDC_AUTO_CLK;
- timer_conf.deconfigure = false; // ESP-IDF 5.0+ 新字段,必须赋值
- ledc_timer_config(&timer_conf);
- // 配置每个通道
- auto config_channel = [this](int gpio, ledc_channel_t ch) {
- ledc_channel_config_t channel = {};
- channel.gpio_num = gpio;
- channel.speed_mode = LEDC_MODE;
- channel.channel = ch;
- channel.timer_sel = LEDC_TIMER_1;
- channel.duty = 0;
- channel.hpoint = 0;
- channel.intr_type = LEDC_INTR_DISABLE;
- ledc_channel_config(&channel);
- };
- config_channel(_ain1, _ch_ain1);
- config_channel(_ain2, _ch_ain2);
-
- }
- void MotorDriver::setMotor(ledc_channel_t ch1, uint8_t duty1,
- ledc_channel_t ch2, uint8_t duty2)
- {
- ledc_set_duty(LEDC_MODE, ch1, duty1);
- ledc_update_duty(LEDC_MODE, ch1);
- ledc_set_duty(LEDC_MODE, ch2, duty2);
- ledc_update_duty(LEDC_MODE, ch2);
- }
- void MotorDriver::stop()
- {
- setMotor(_ch_ain1, 0, _ch_ain2, 0);
- }
- void MotorDriver::forward(uint8_t speed)
- {
- setMotor(_ch_ain1, speed, _ch_ain2, speed);
- }
- void MotorDriver::backward(uint8_t speed)
- {
- setMotor(_ch_ain1, speed, _ch_ain2, speed);
- }
- void MotorDriver::turnLeft(uint8_t speed)
- {
- setMotor(_ch_ain1, speed, _ch_ain2, speed);
- }
- void MotorDriver::turnRight(uint8_t speed)
- {
- setMotor(_ch_ain1, speed, _ch_ain2, speed);
- }
【语音指令实测】
唤醒词:“小智小智”
用户:“前进 200 速度 3 秒”
小车:立即直行,3 s 后自动停止,屏幕提示“前进完成”。
用户:“左转 150 速度 2 秒”
小车:原地左转 2 s 后刹车,环形 LED 流水灯提示“转向中”。
【视频演示】
【踩坑记录 】
1. XL9535 上电默认输入,必须先把 P8/P9 设成输出,否则电机抖动。
2. K10 的 3.3 V 电源最大 500 mA,千万别把电机电源接到 3.3 V 排针!
【一句话总结】
“当 K10 遇到 小智AI,语音不再只停留在‘对话’,而是直接对话语言(非命令词)‘驱动’世界—— 原来,AI 的终点不是回答问题,而是帮你把车开出去,再安全地开回来。”
【代码开源】
https://gitee.com/yuntian365/xiaozhi-k10-car1(替换小智AI对应文件)
注:在 main/CMakeLists.txt里找到 SOURCES这一行,确认有没有把 "motor/motor.cpp"加进去。 |


 沪公网安备31011502402448
 置顶卡
置顶卡 变色卡
变色卡 千斤顶
千斤顶
 活跃会员
活跃会员
 宣传大使
宣传大使
 牛X认证
牛X认证
 创客造
创客造
 编辑选择奖
编辑选择奖
 志“童”道合
 编辑选择奖
编辑选择奖
 编辑选择奖
编辑选择奖
 编辑选择奖
编辑选择奖
 编辑选择奖
编辑选择奖


