本帖最后由 _深蓝_ 于 2023-9-6 12:12 编辑
一、项目背景  在各位老师教学过程当中经常会碰到一个问题,需要将学生的书写的答案投影到屏幕上面,而现在的大多数白板软件都有这样的功能,需要下载对应的app并连接与触摸一体机组成的局域网中,然后手机拍摄图片或视频上传到大屏电脑上,这样存着以下问题,上课必须要带手机;每次需要手动拍摄;经常由于手机的信息而打断上课的节奏; 有没有一个专门的工具让老师带着,他可以将图传到我们的屏幕上去呢?答案是肯定的。近期有幸获得FireBeetle 2 ESP32-S3的试用机会,特使用FireBeetle 2 ESP32-S3主控板制作教师投影辅助神器。 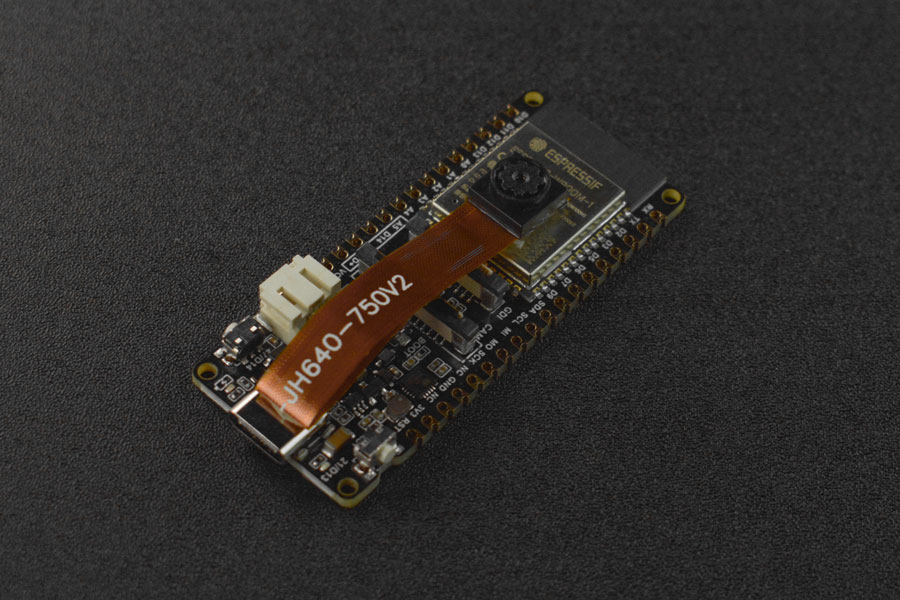
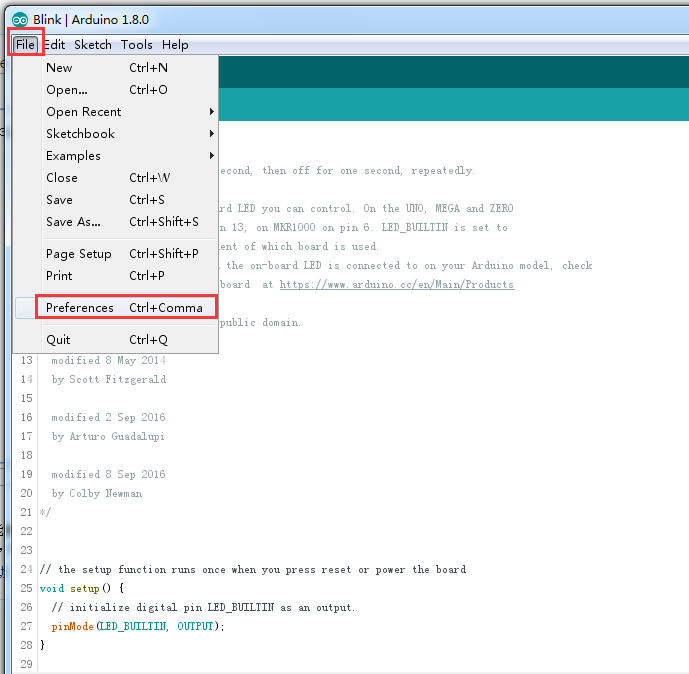
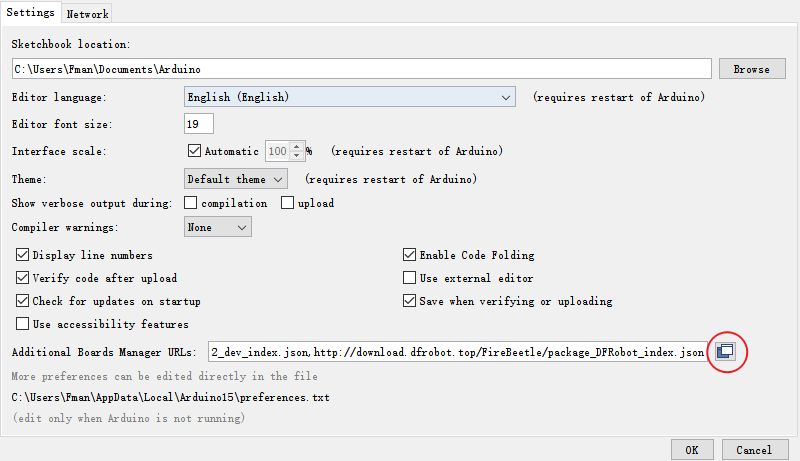
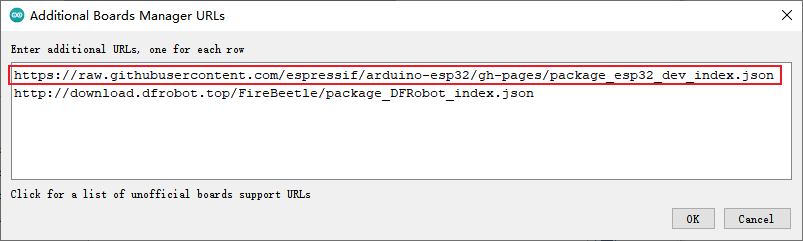
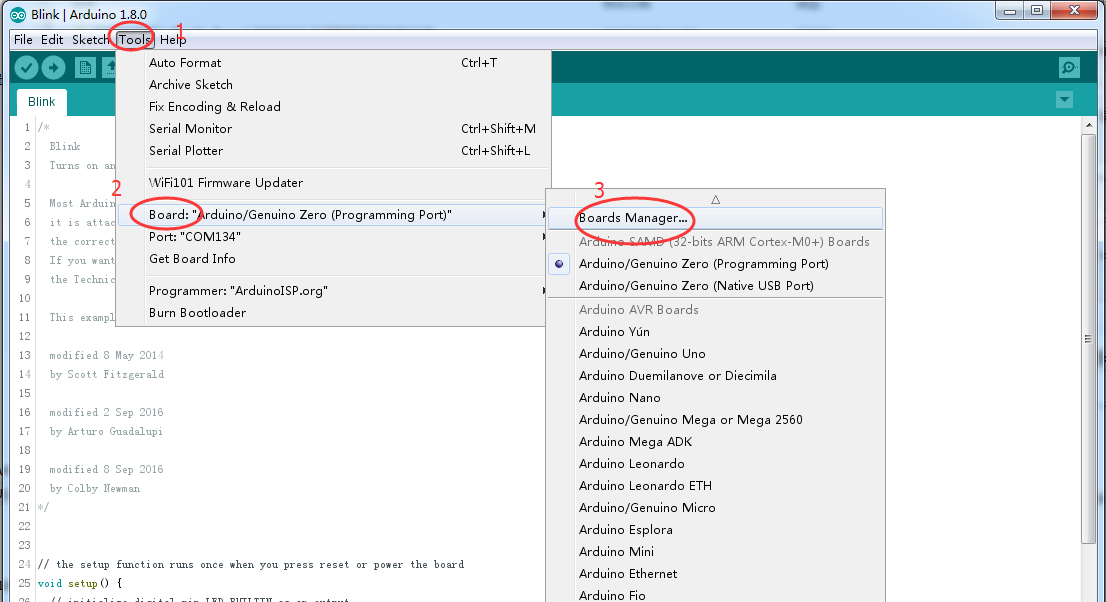
二、项目思路 2、Arduino环境配置。 3、编程以及图传的实现。 由于FireBeetle 2 ESP32-S3板载摄像头接口,附带了一个OV2640摄像头,可以直接使用该摄像头,如何把图像投屏呢,使用web服务器把拍摄的图像上传,可以看到实时图像。 4、制作一个便于携带的盒子,简单、易用。 以下是制作该项目的思维导图 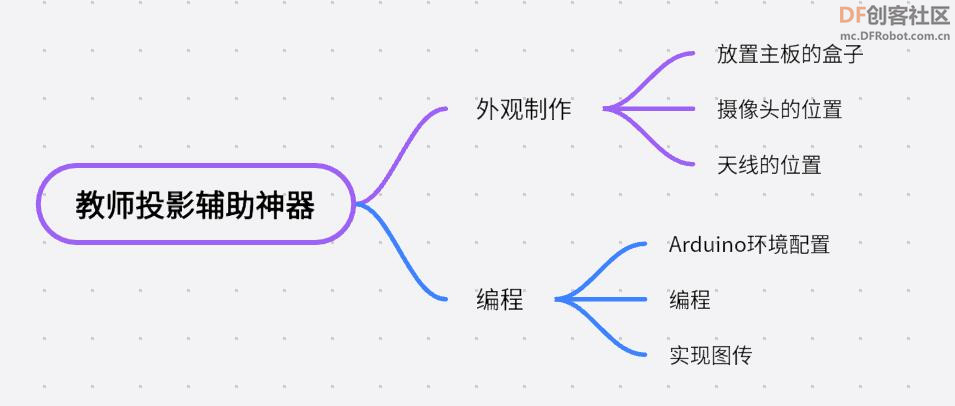 三、制作步骤 1、Arduino环境配置 配置URL网址到Arduino IDE,具体步骤: a) 打开Arduino IDE,点击File->Preferences,
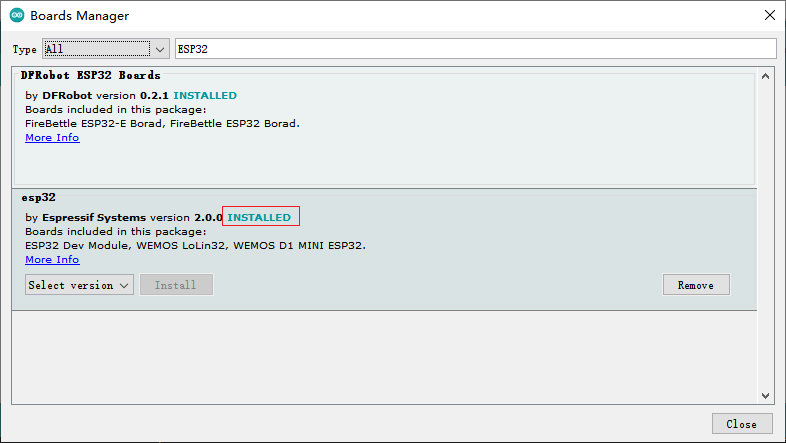
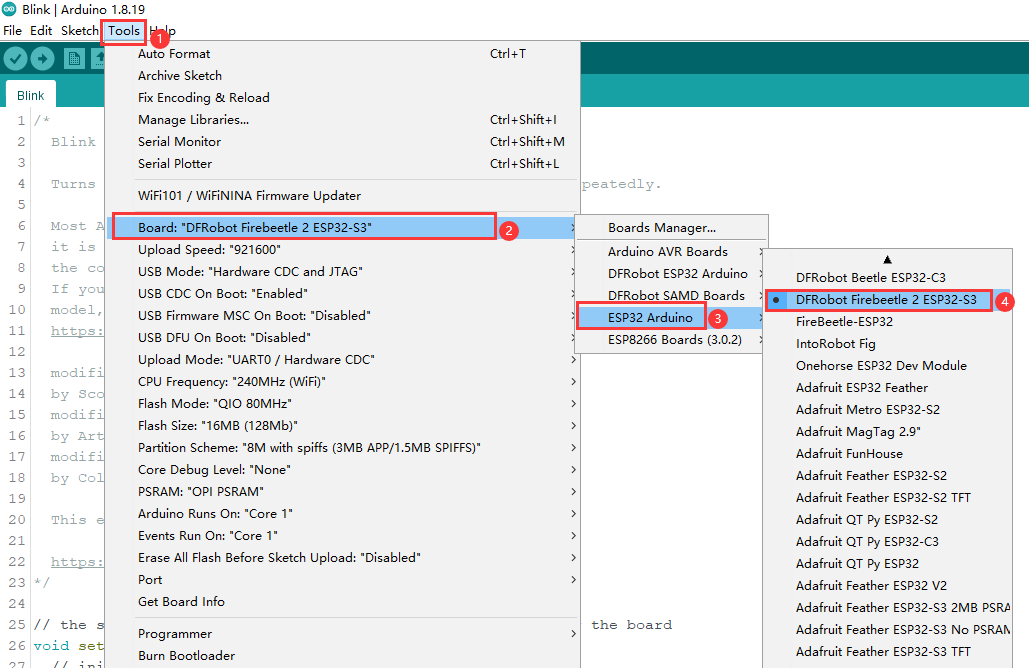
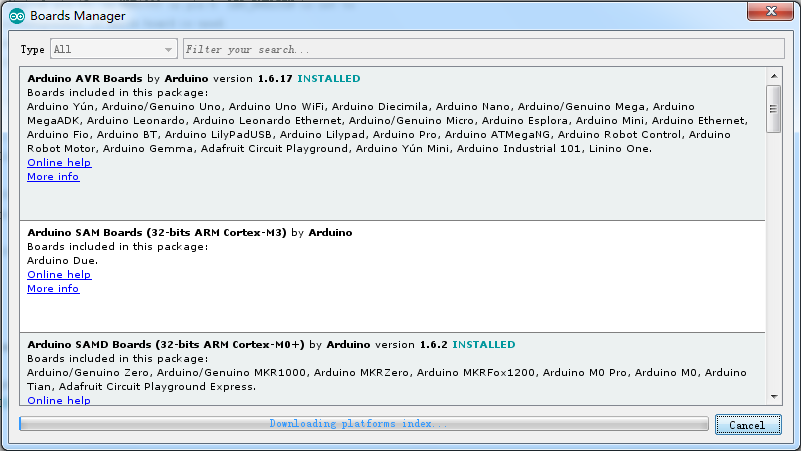
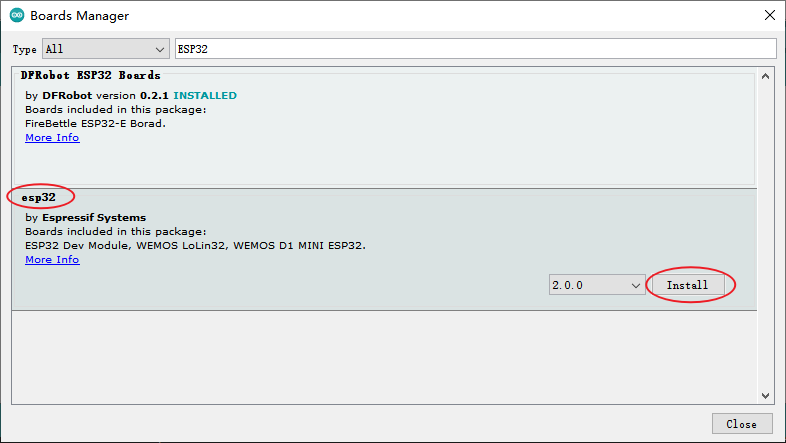
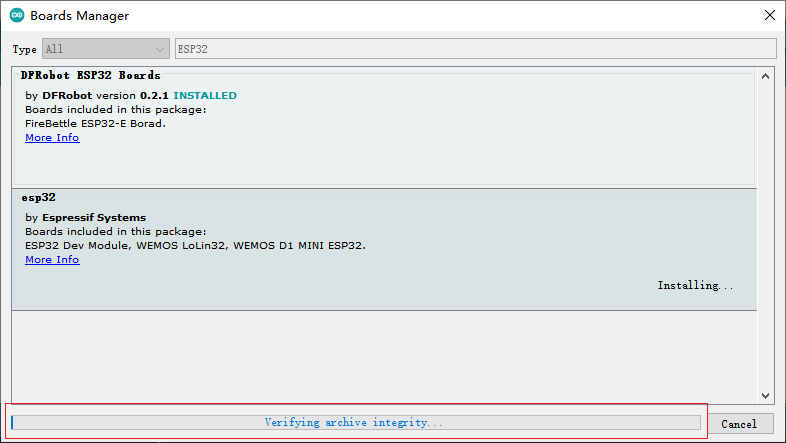
c) 打开Tools->Board:->Boards Manager...,BoardsManager会自动更新板卡, 更新完成后,您可以在上方输入esp32,出现如下情况时选择esp32点击安装即可(建议安装最新版本) d) 等待进度条结束,列表会显示已经安装esp32主板,点击Tools->Board:,选择DFRobot FireBeetle 2 ESP32-S3,点击Port选择对应的串口

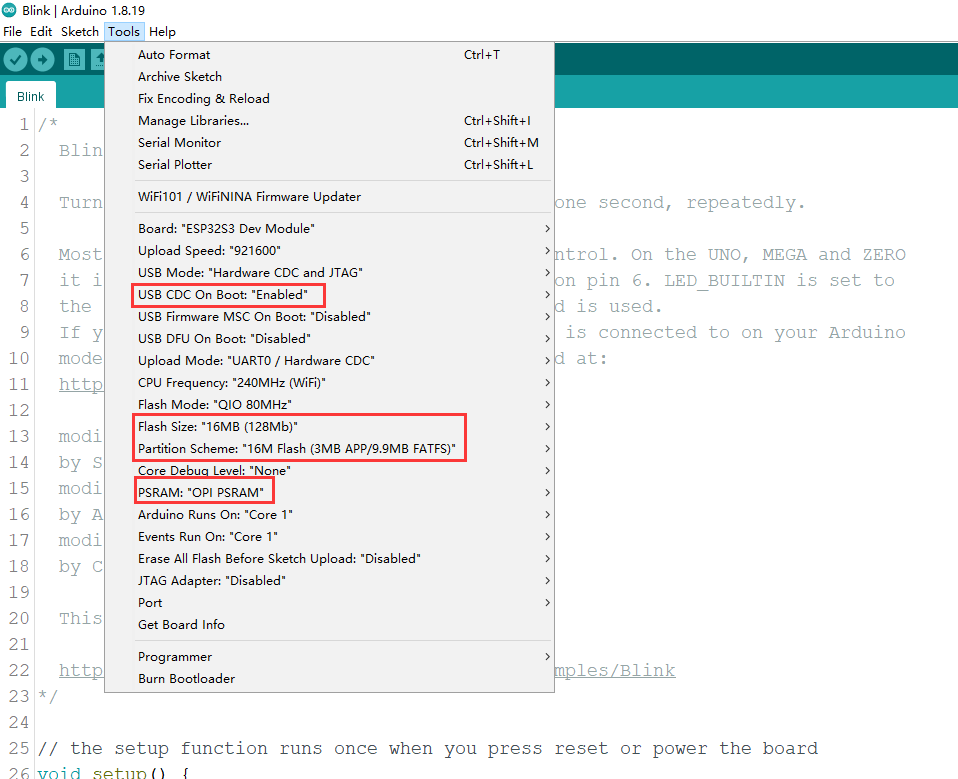
截止目前,Arduino环境配置已经完成,如果需要串口通信,需要进行以下操作:(当您选择 Disabled 时,串口为RX(44)、TX(43),如果您需要通过USB在Arduino监视器上打印,您需要选择Enable)
在这里踩了坑,由于没有打开串口通信,看不到web地址,傻傻的问群里的老师们,是不是串口没有数据还是程序出现了错误。
环境配置完后可以编写程序了,我呢,首先从例程开始学习,网址为https://wiki.dfrobot.com.cn/_SKU ... le_2_Board_ESP32_S3
这里有FireBeetle-ESP32-S3简介、硬件详情、基础教程等,初学小白可以看看这里。
2、编写代码
注意使用您家或者单位局域网中的无线连接,便于调试。
点击验证、上传,将程序烧录到主板上,并打开工具-》串口监视器(或按快捷键ctrl+shift+M)

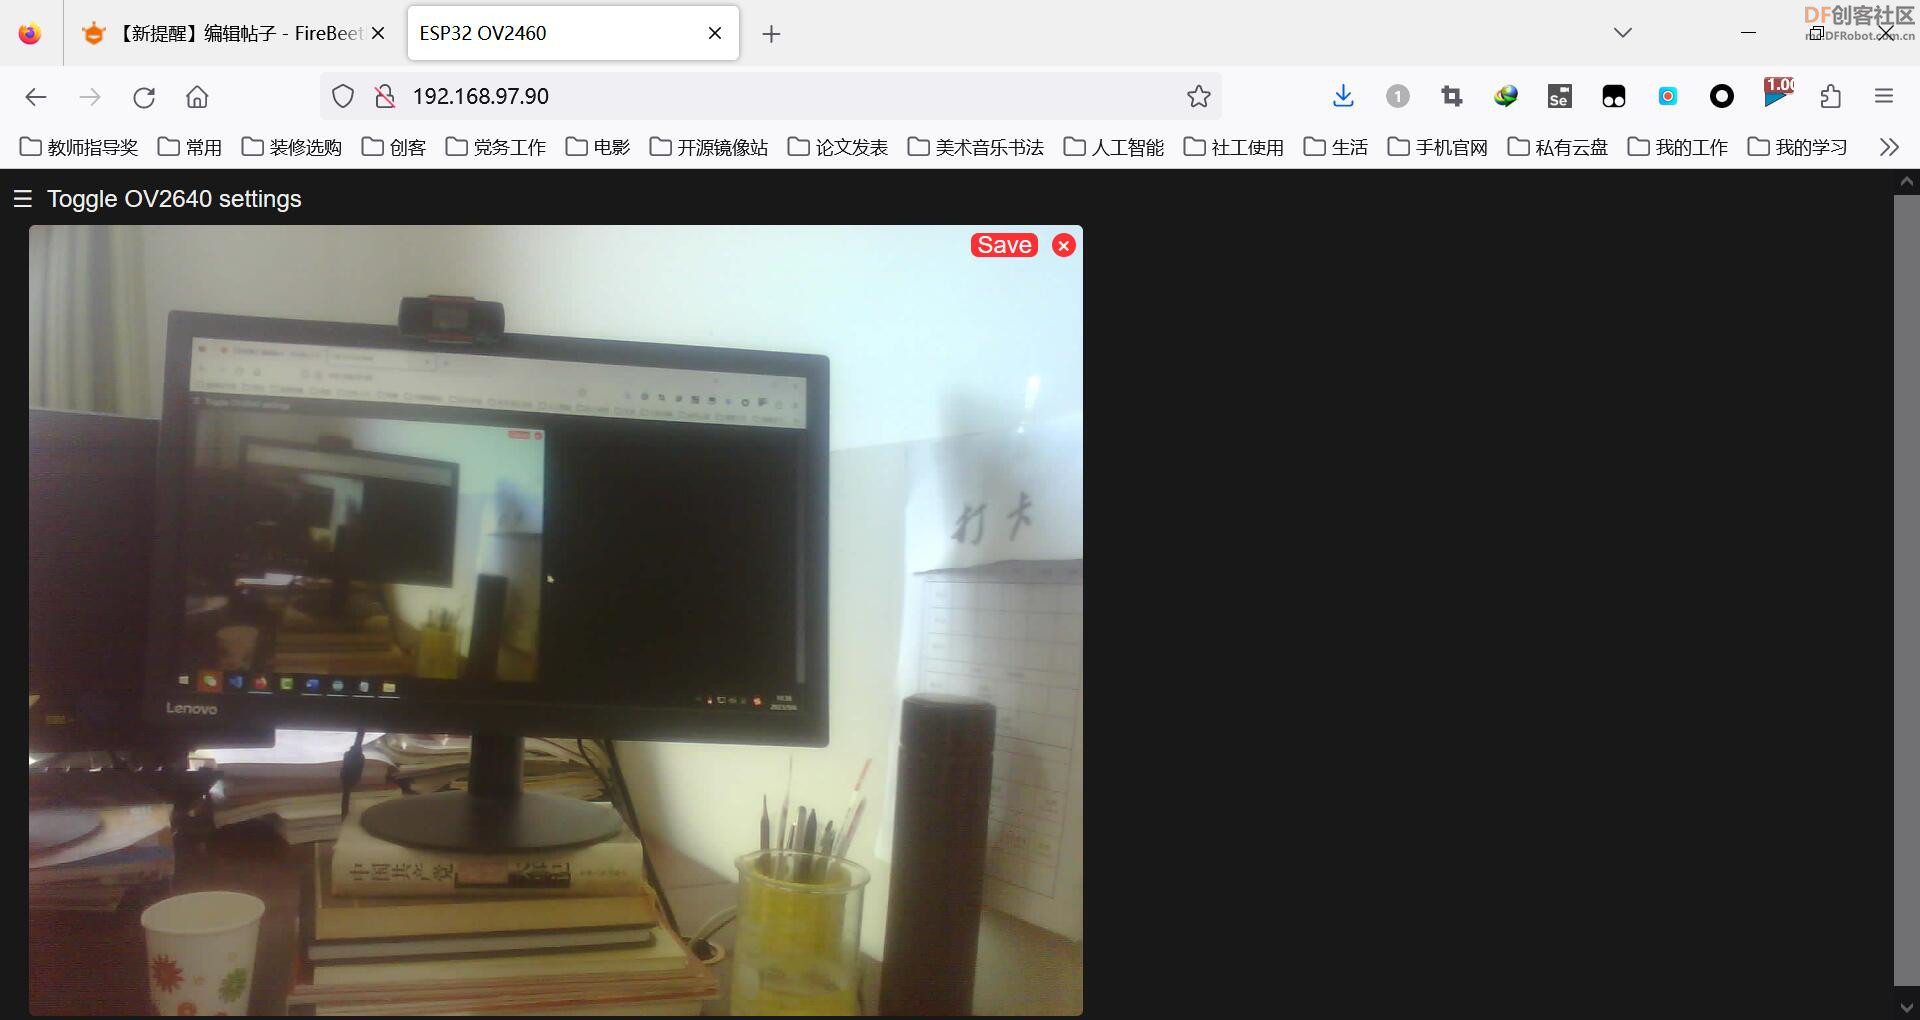
打开网页192.168.97.90即可打开视频的设置界面,确认设置后可以打开视频。

拔下与电脑的接线到学生教室后给该板供电,稍等一会即可在浏览器打开视频界面。
3、外观设计
很简单的外观,使用订书钉的盒子,将板子粘贴到盒子内部,天线固定盒外,摄像头固定在盒子上

四、效果展示
拍摄电脑画面清晰,有深邃的感脚。
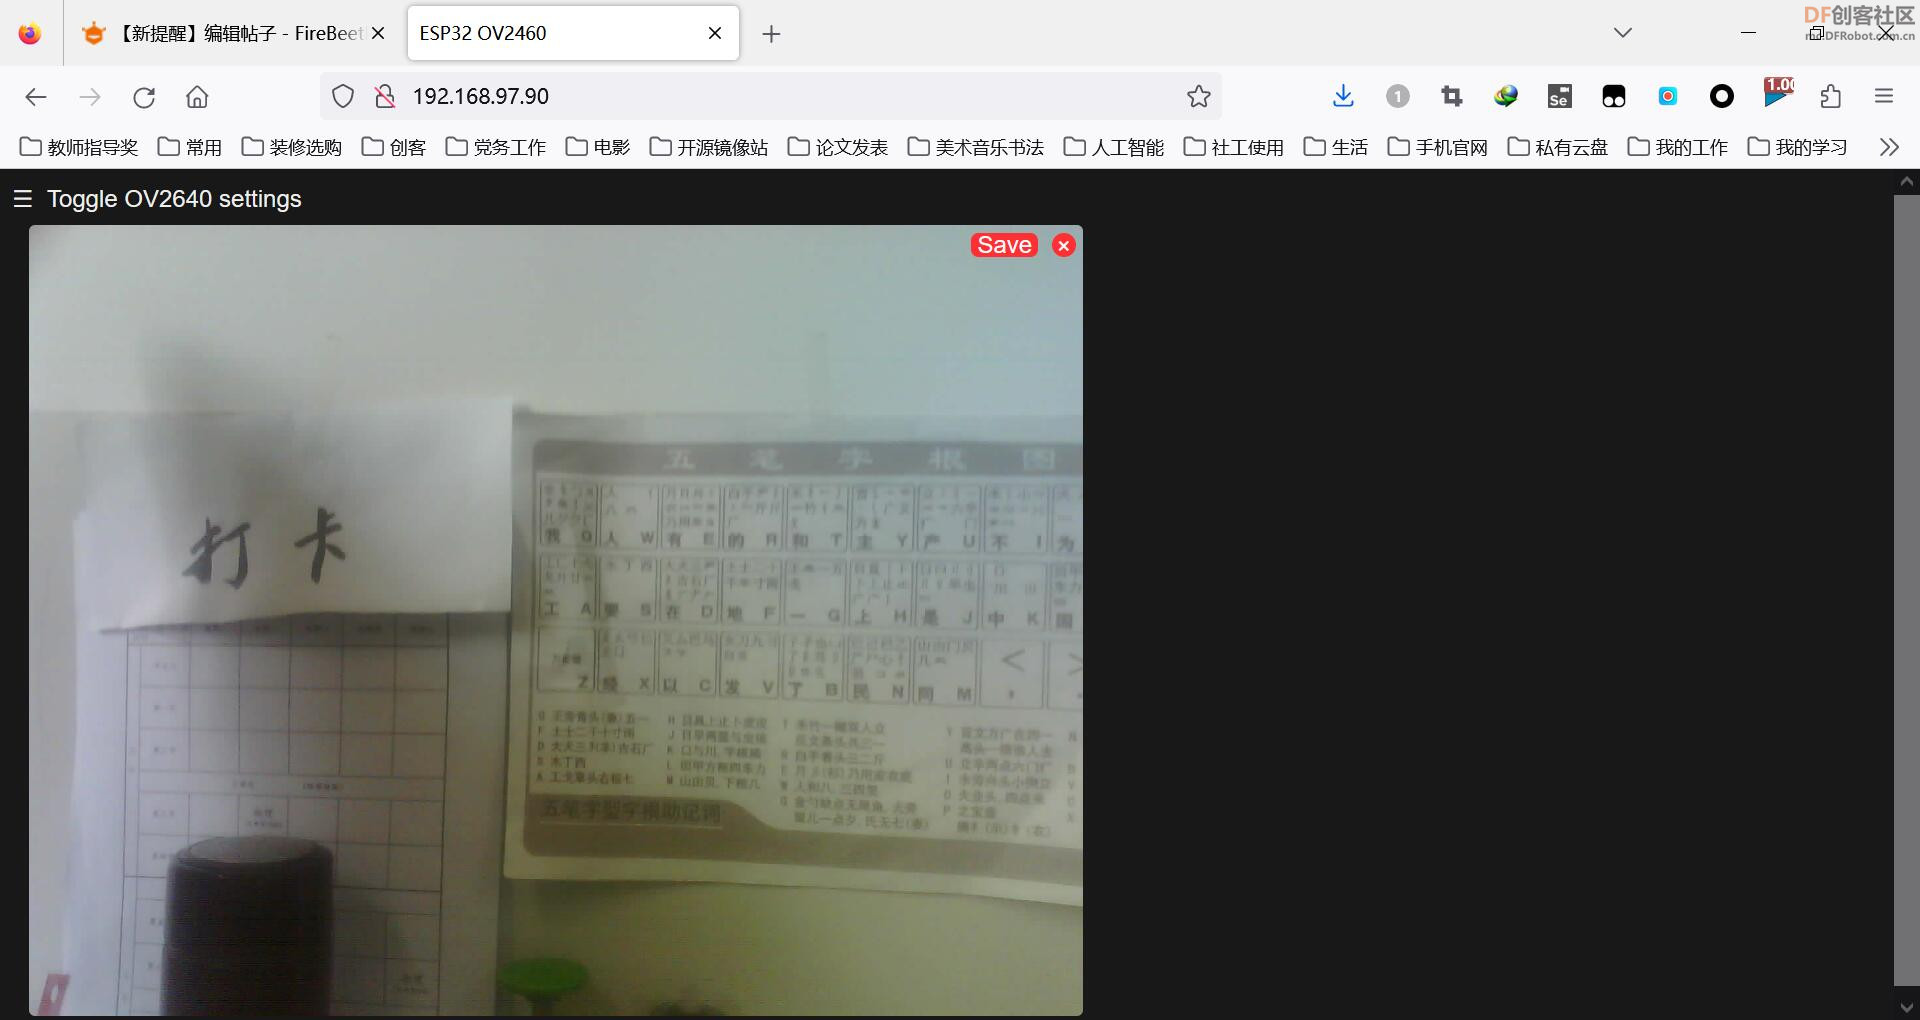
拍摄墙壁上五笔字根图与打卡
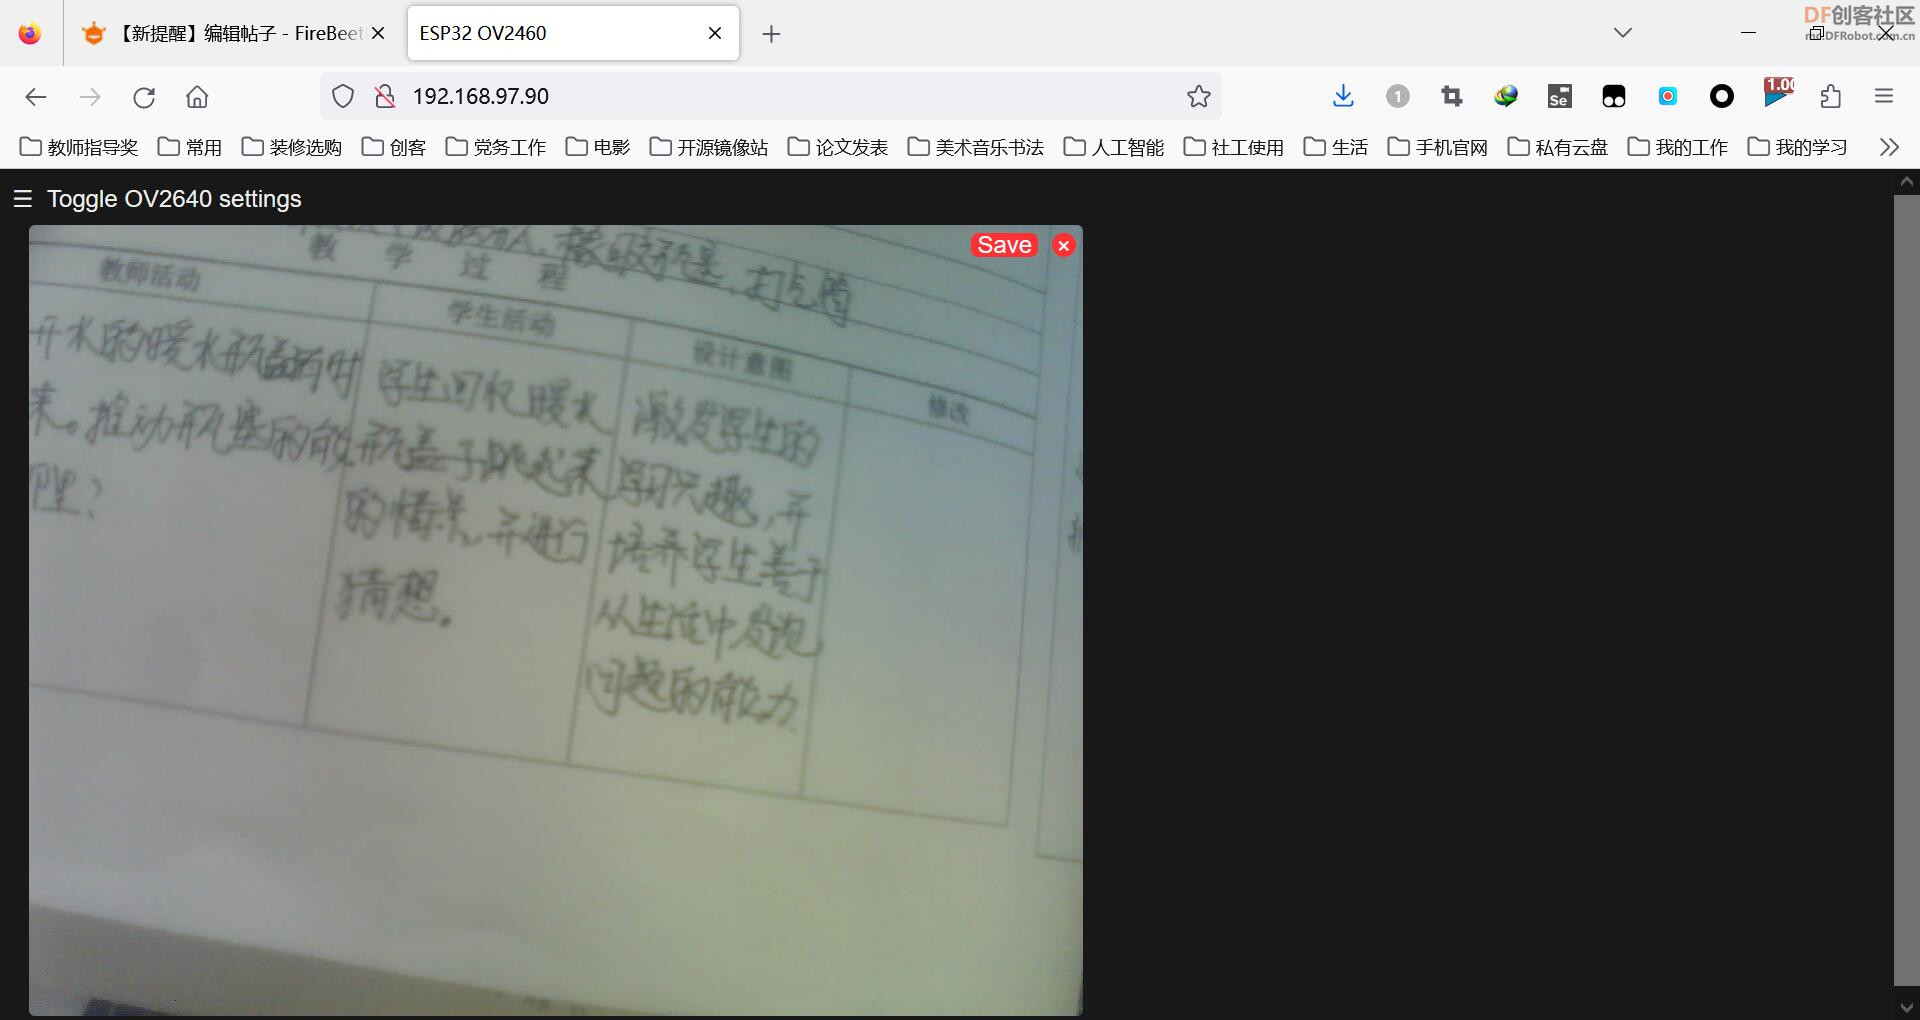
拍摄教案的情景,完全可以满足授课时使用。
五、附件
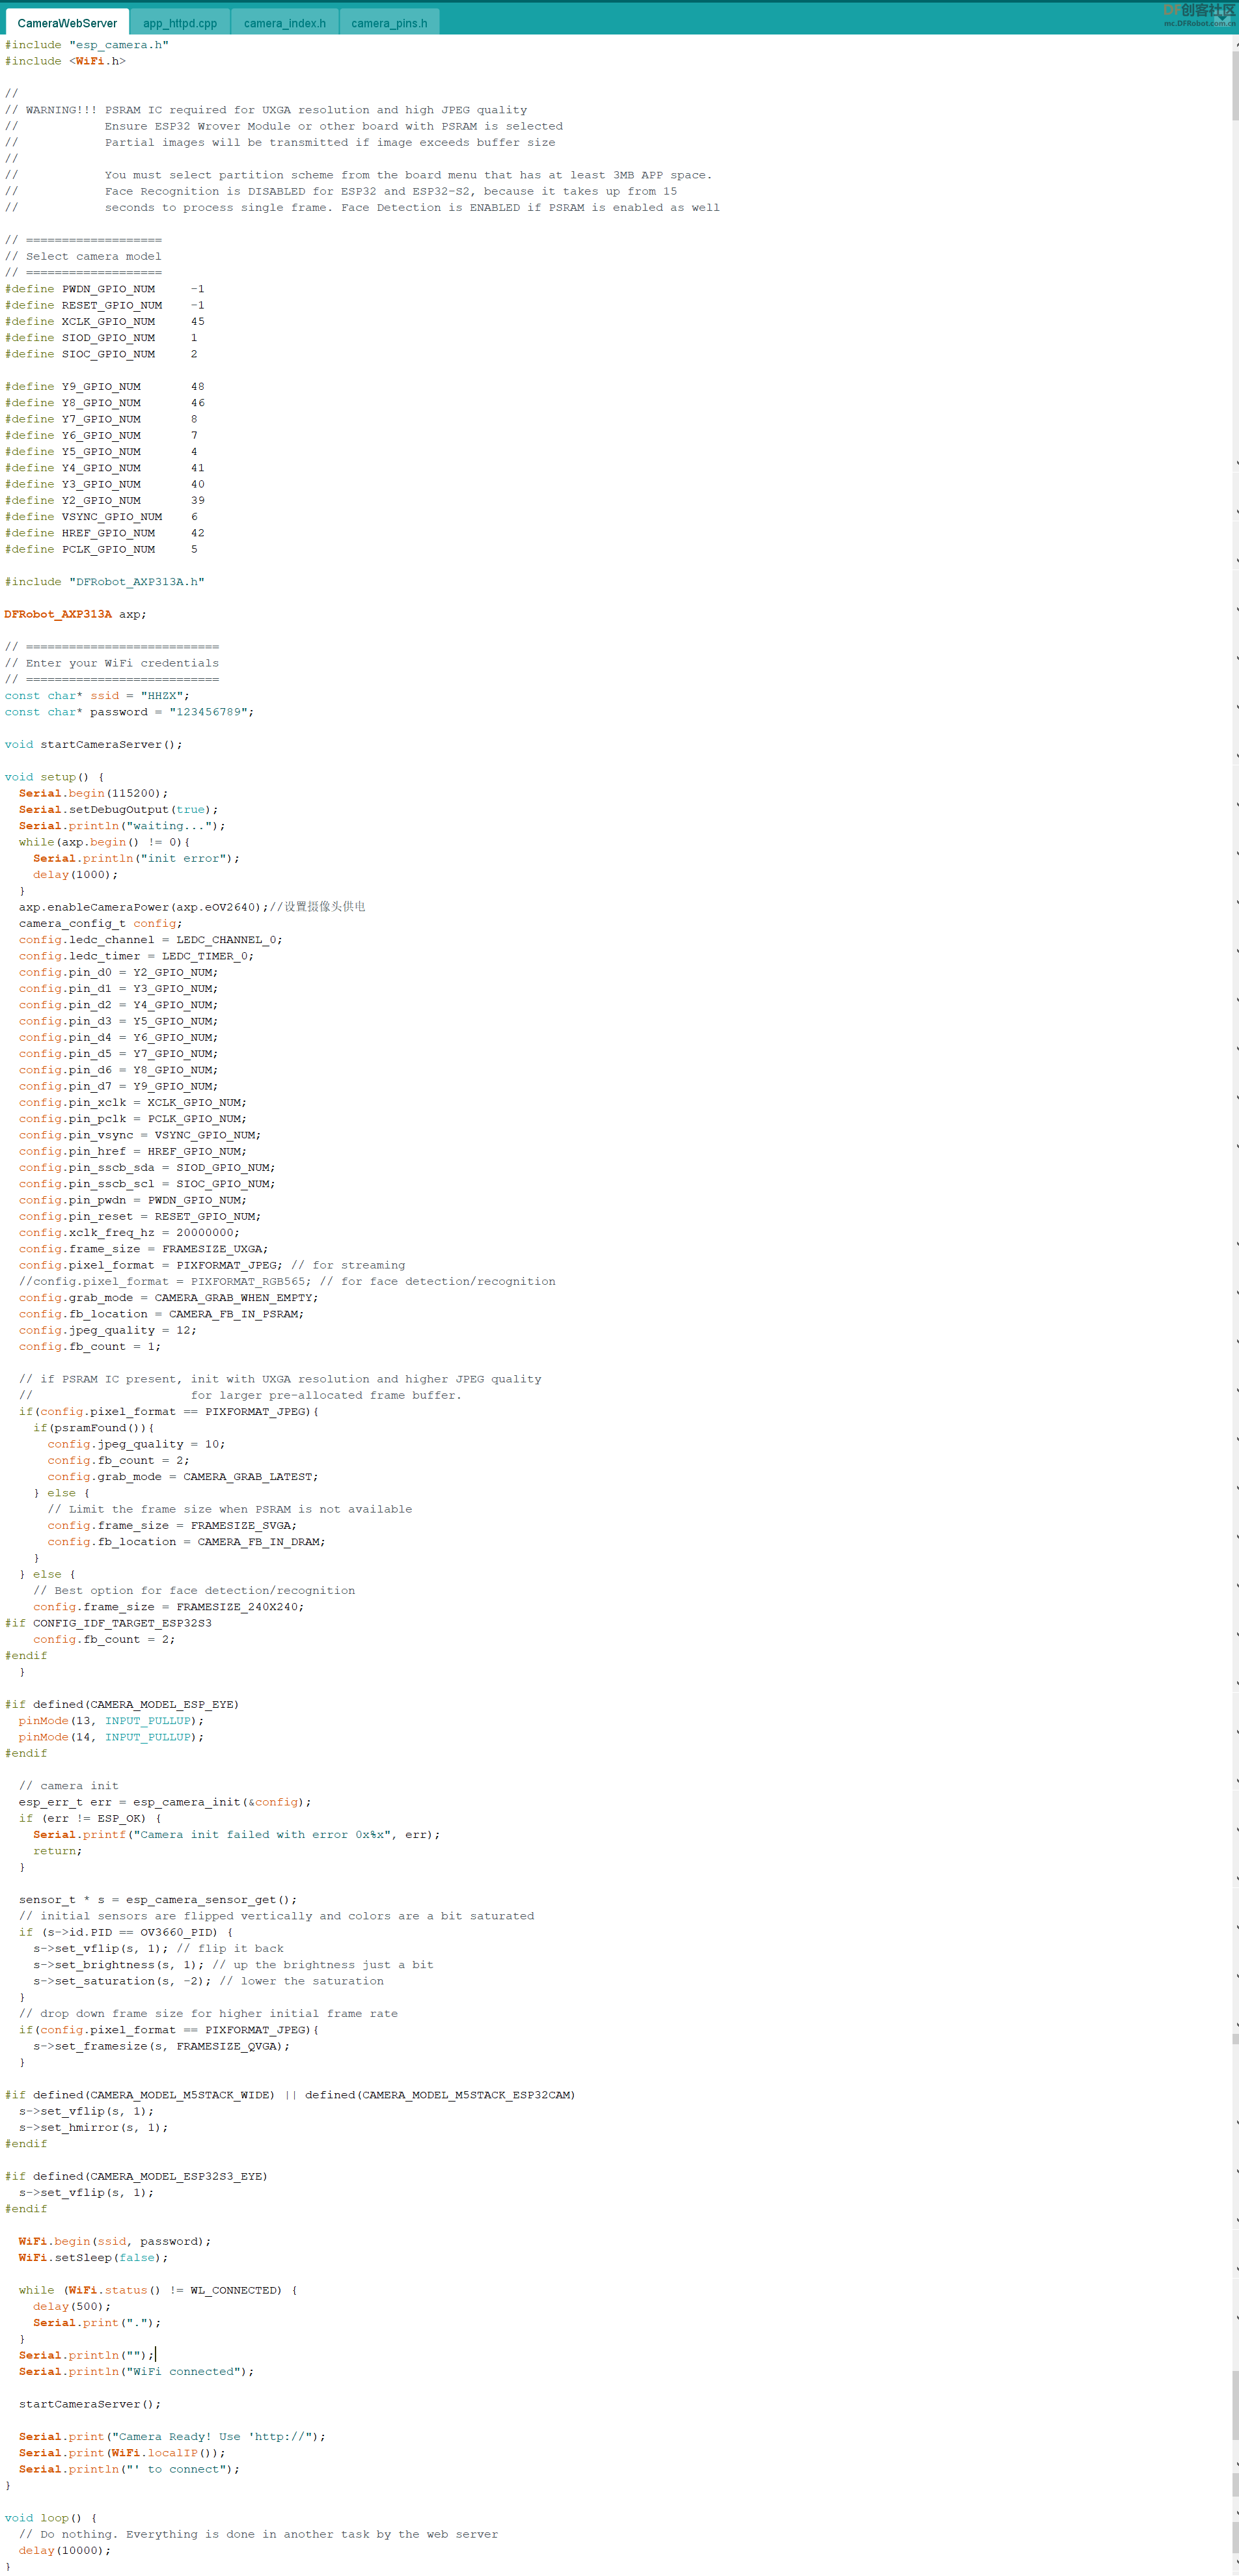
使用摄像头的C代码如下:
- #include "esp_camera.h"
- #include <WiFi.h>
-
- //
- // WARNING!!! PSRAM IC required for UXGA resolution and high JPEG quality
- // Ensure ESP32 Wrover Module or other board with PSRAM is selected
- // Partial images will be transmitted if image exceeds buffer size
- //
- // You must select partition scheme from the board menu that has at least 3MB APP space.
- // Face Recognition is DISABLED for ESP32 and ESP32-S2, because it takes up from 15
- // seconds to process single frame. Face Detection is ENABLED if PSRAM is enabled as well
-
- // ===================
- // Select camera model
- // ===================
- #define PWDN_GPIO_NUM -1
- #define RESET_GPIO_NUM -1
- #define XCLK_GPIO_NUM 45
- #define SIOD_GPIO_NUM 1
- #define SIOC_GPIO_NUM 2
-
- #define Y9_GPIO_NUM 48
- #define Y8_GPIO_NUM 46
- #define Y7_GPIO_NUM 8
- #define Y6_GPIO_NUM 7
- #define Y5_GPIO_NUM 4
- #define Y4_GPIO_NUM 41
- #define Y3_GPIO_NUM 40
- #define Y2_GPIO_NUM 39
- #define VSYNC_GPIO_NUM 6
- #define HREF_GPIO_NUM 42
- #define PCLK_GPIO_NUM 5
-
- #include "DFRobot_AXP313A.h"
-
- DFRobot_AXP313A axp;
-
- // ===========================
- // Enter your WiFi credentials
- // ===========================
- const char* ssid = "HHZX";
- const char* password = "123456789";
-
- void startCameraServer();
-
- void setup() {
- Serial.begin(115200);
- Serial.setDebugOutput(true);
- Serial.println("waiting...");
- while(axp.begin() != 0){
- Serial.println("init error");
- delay(1000);
- }
- axp.enableCameraPower(axp.eOV2640);//设置摄像头供电
- camera_config_t config;
- config.ledc_channel = LEDC_CHANNEL_0;
- config.ledc_timer = LEDC_TIMER_0;
- config.pin_d0 = Y2_GPIO_NUM;
- config.pin_d1 = Y3_GPIO_NUM;
- config.pin_d2 = Y4_GPIO_NUM;
- config.pin_d3 = Y5_GPIO_NUM;
- config.pin_d4 = Y6_GPIO_NUM;
- config.pin_d5 = Y7_GPIO_NUM;
- config.pin_d6 = Y8_GPIO_NUM;
- config.pin_d7 = Y9_GPIO_NUM;
- config.pin_xclk = XCLK_GPIO_NUM;
- config.pin_pclk = PCLK_GPIO_NUM;
- config.pin_vsync = VSYNC_GPIO_NUM;
- config.pin_href = HREF_GPIO_NUM;
- config.pin_sscb_sda = SIOD_GPIO_NUM;
- config.pin_sscb_scl = SIOC_GPIO_NUM;
- config.pin_pwdn = PWDN_GPIO_NUM;
- config.pin_reset = RESET_GPIO_NUM;
- config.xclk_freq_hz = 20000000;
- config.frame_size = FRAMESIZE_UXGA;
- config.pixel_format = PIXFORMAT_JPEG; // for streaming
- //config.pixel_format = PIXFORMAT_RGB565; // for face detection/recognition
- config.grab_mode = CAMERA_GRAB_WHEN_EMPTY;
- config.fb_location = CAMERA_FB_IN_PSRAM;
- config.jpeg_quality = 12;
- config.fb_count = 1;
-
- // if PSRAM IC present, init with UXGA resolution and higher JPEG quality
- // for larger pre-allocated frame buffer.
- if(config.pixel_format == PIXFORMAT_JPEG){
- if(psramFound()){
- config.jpeg_quality = 10;
- config.fb_count = 2;
- config.grab_mode = CAMERA_GRAB_LATEST;
- } else {
- // Limit the frame size when PSRAM is not available
- config.frame_size = FRAMESIZE_SVGA;
- config.fb_location = CAMERA_FB_IN_DRAM;
- }
- } else {
- // Best option for face detection/recognition
- config.frame_size = FRAMESIZE_240X240;
- #if CONFIG_IDF_TARGET_ESP32S3
- config.fb_count = 2;
- #endif
- }
-
- #if defined(CAMERA_MODEL_ESP_EYE)
- pinMode(13, INPUT_PULLUP);
- pinMode(14, INPUT_PULLUP);
- #endif
-
- // camera init
- esp_err_t err = esp_camera_init(&config);
- if (err != ESP_OK) {
- Serial.printf("Camera init failed with error 0x%x", err);
- return;
- }
-
- sensor_t * s = esp_camera_sensor_get();
- // initial sensors are flipped vertically and colors are a bit saturated
- if (s->id.PID == OV3660_PID) {
- s->set_vflip(s, 1); // flip it back
- s->set_brightness(s, 1); // up the brightness just a bit
- s->set_saturation(s, -2); // lower the saturation
- }
- // drop down frame size for higher initial frame rate
- if(config.pixel_format == PIXFORMAT_JPEG){
- s->set_framesize(s, FRAMESIZE_QVGA);
- }
-
- #if defined(CAMERA_MODEL_M5STACK_WIDE) || defined(CAMERA_MODEL_M5STACK_ESP32CAM)
- s->set_vflip(s, 1);
- s->set_hmirror(s, 1);
- #endif
-
- #if defined(CAMERA_MODEL_ESP32S3_EYE)
- s->set_vflip(s, 1);
- #endif
-
- WiFi.begin(ssid, password);
- WiFi.setSleep(false);
-
- while (WiFi.status() != WL_CONNECTED) {
- delay(500);
- Serial.print(".");
- }
- Serial.println("");
- Serial.println("WiFi connected");
-
- startCameraServer();
-
- Serial.print("Camera Ready! Use 'http://");
- Serial.print(WiFi.localIP());
- Serial.println("' to connect");
- }
-
- void loop() {
- // Do nothing. Everything is done in another task by the web server
- delay(10000);
- }
| 


 沪公网安备31011502402448

 置顶卡
置顶卡 变色卡
变色卡 千斤顶
千斤顶


