|
22193| 58
|
【花雕动手做】有趣好玩的音乐可视化(24)--无限LED镜子灯 |
|
【花雕动手做】有趣好玩的音乐可视化系列项目(24)--无限LED镜子灯 项目程序之三:NeoPixel 环形灯条测试程序 |
|
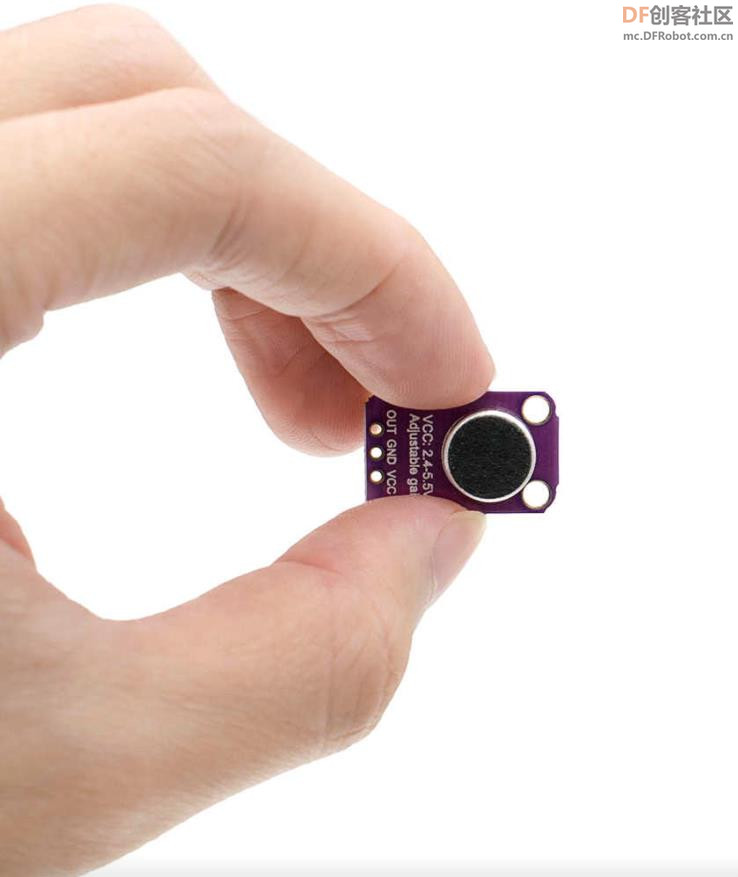
【花雕动手做】有趣好玩的音乐可视化系列项目(24)--无限LED镜子灯 项目之五:Arduino 和 FastLED多彩音乐节拍灯 模块接线:WS2812B接D6 MAX4466 UNO VCC 5V GND GND OUT A0 |
|
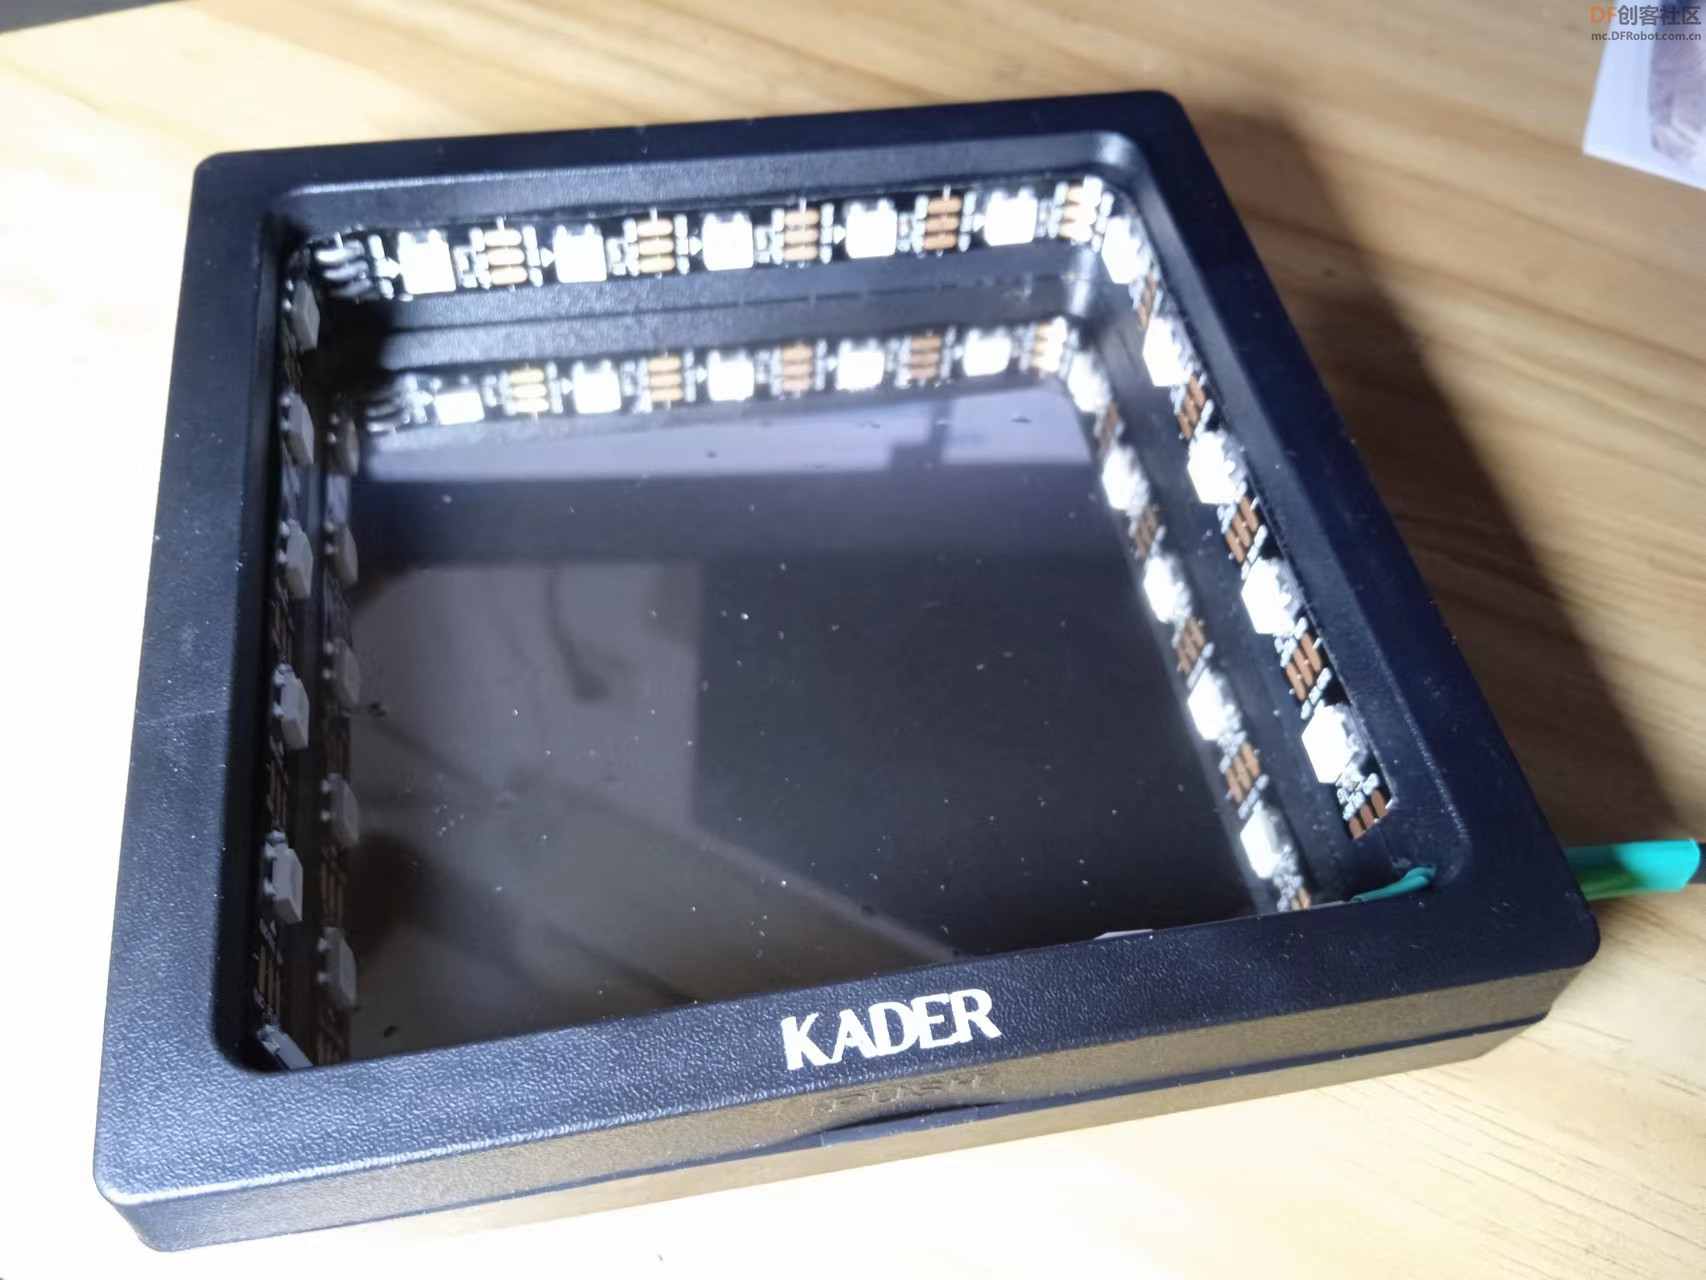
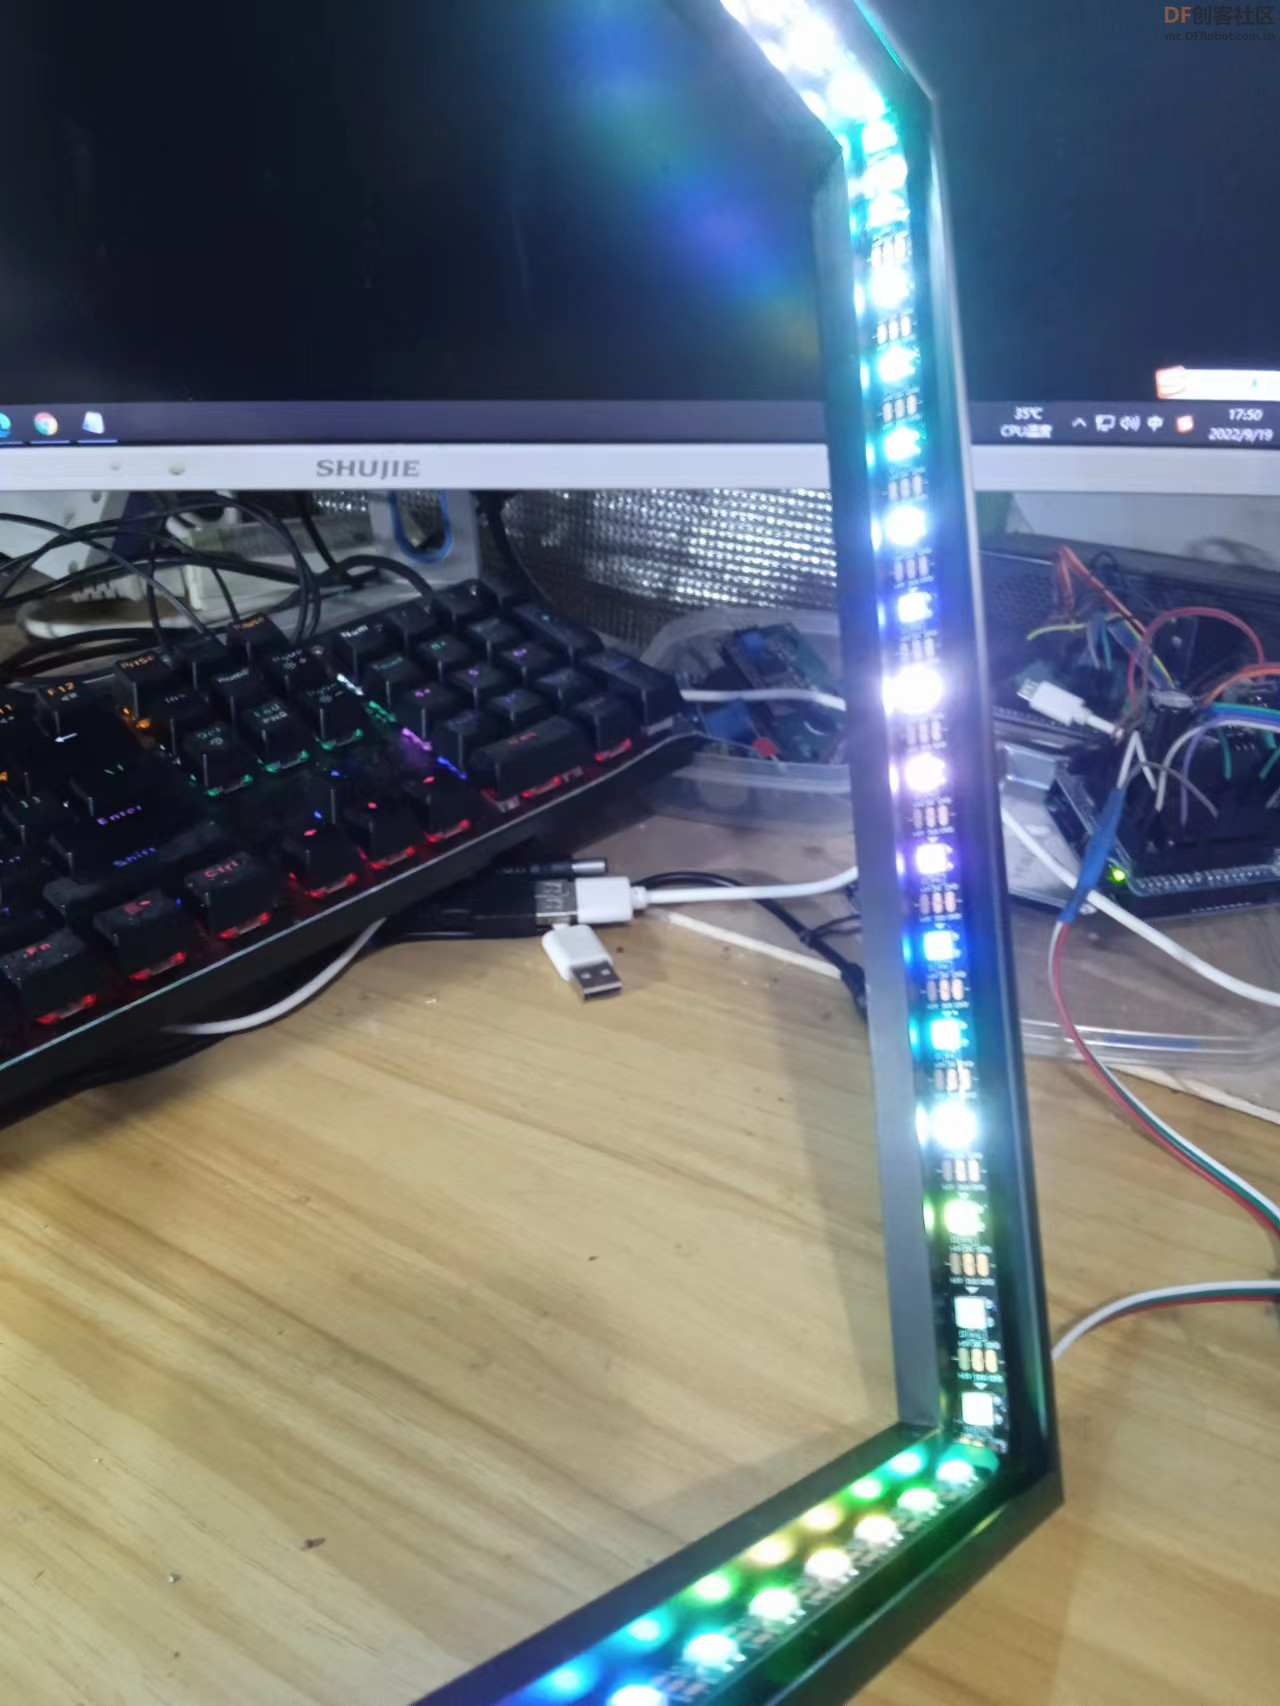
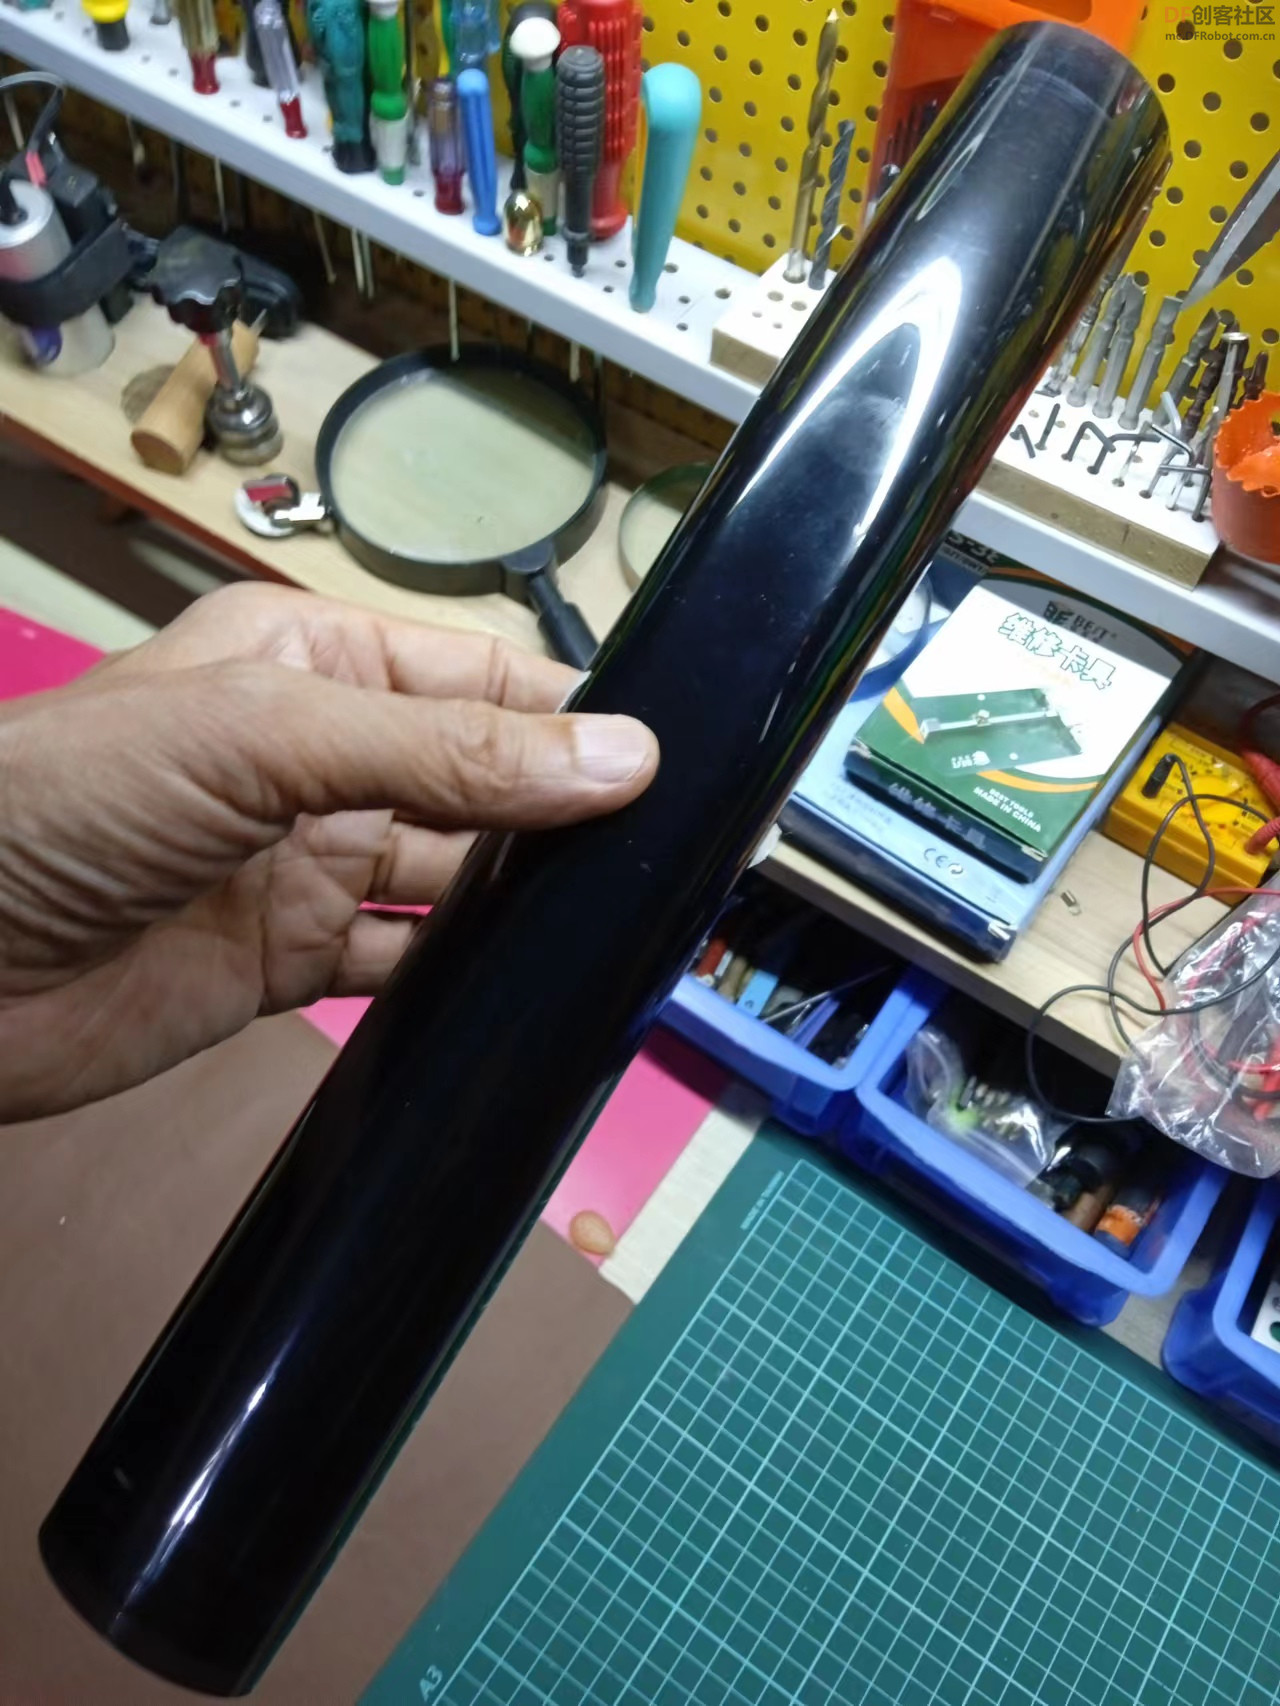
本帖最后由 驴友花雕 于 2022-9-19 07:07 编辑 维基百科上是这样定义的,无限反射镜是一种有两面或多面镜子组成的复合结构,这些镜子通常互相平行或接近平行。这种结构可以在镜子中产生无限多的虚像,以越来越小的姿态延伸至无限“远”。这种结构经常用单向玻璃做前面的镜子,但不用单向玻璃也可以达成效果。在艺术作品中,画面本身出现在画面中,再出现在画面中的画面中,称作德罗斯特效应。无限反射镜有时会用于室内装潢或艺术创作。(见https://zh.m.wikipedia.org/zh-hans/无限反射镜) 草间弥生(YayoiKusama)是世界上最有影响力的当代艺术家之一,于1929年出生于日本松本。 这位90岁的艺术家以其雕塑和装置而闻名,最著名的是她的《无限镜室》。30年后,草间弥生的无限镜作品终于火了,她于1965年创作了第一个无限镜作品: Phalli's Field。 草间弥生在大约25平方米充满镜子的房间中布置了数百种柔软的形式,作者兼策展人凯瑟琳·塔夫脱(Catherine Taft)在新近出版的草间弥生传中写道。“要与这些毛绒的凸起物产生互动,而这些通过无限反射数量倍增,这一切包围了观察者,创造了一种 与自己的身体和想象在心理上的相遇 。” 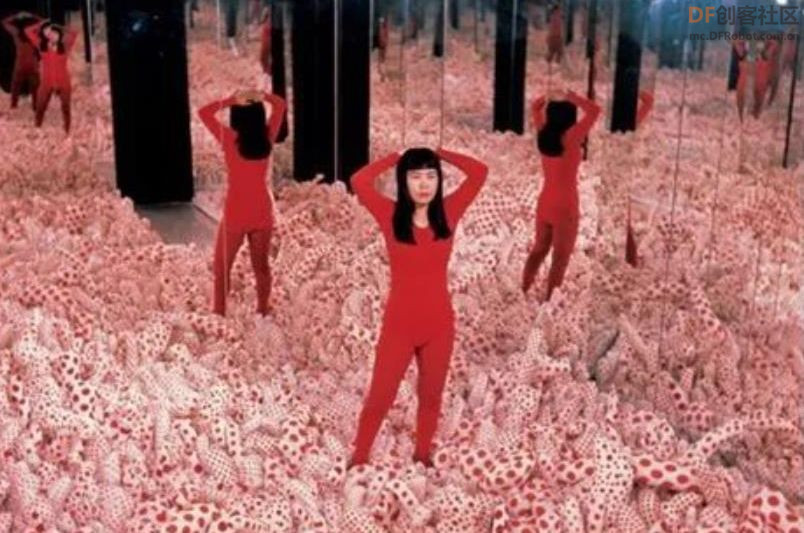 |
|
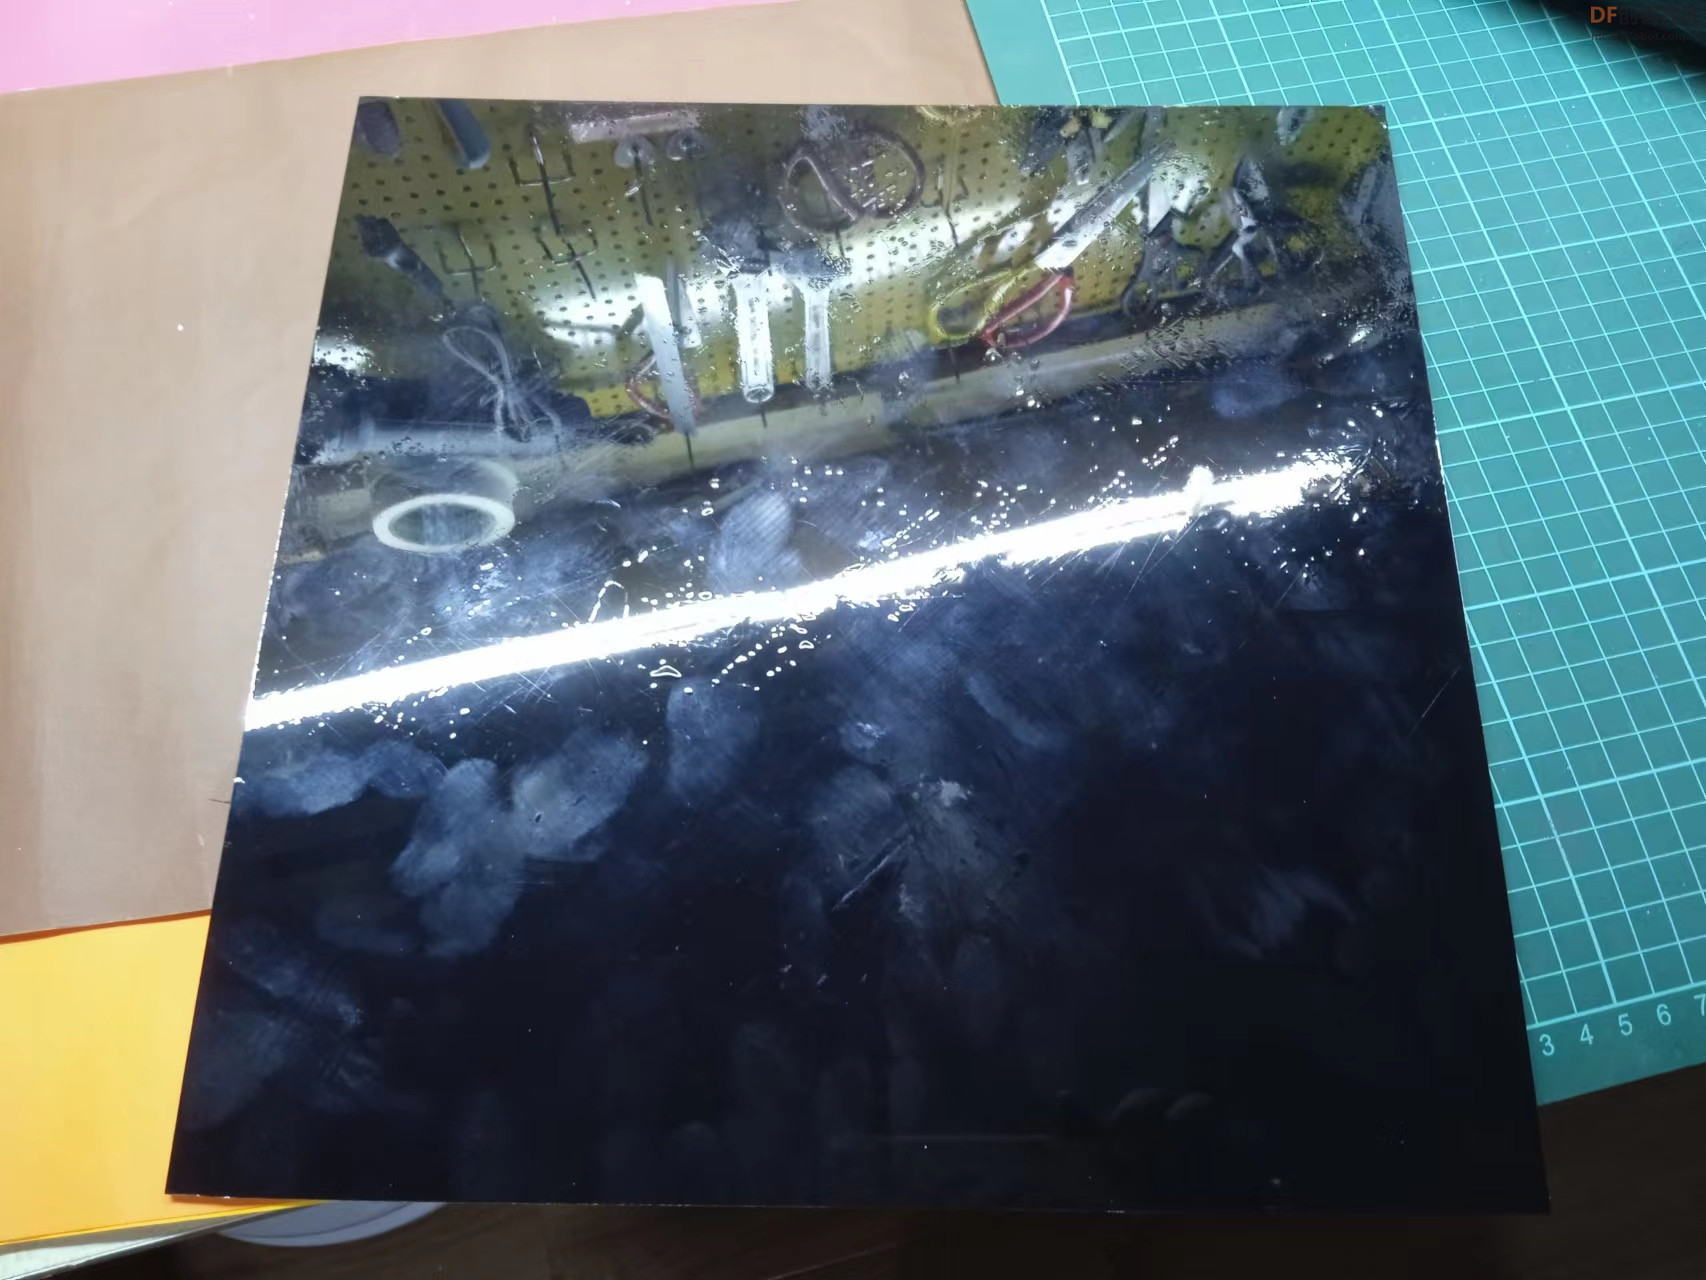
一套经典而完整的无限反射镜,一般都含有一组灯泡、LED灯或其他点光源,镶嵌在反射镜的整个边缘,同时一面部分反射的单向玻璃会以极近的距离被固定在反射镜前,彼此以互相平行的姿态对齐。当外部的观察者看向单向玻璃面时,光会在镜中延伸至无限,使镜看起来像是一条极深邃的隧道。如果两面镜子没有精确平行,而是存在微小的夹角,那么这条虚拟的隧道就会向镜的某一边弯曲并无限延伸。 无限反射镜的效果,也可以采取别的结构实现。观察者站在两面互相平行的全反射镜面中间时亦可以观察到此现象,某些试衣间、电梯和镜子迷宫会采取这种装潢。除了经过精心设计的装潢外,在站在两个互相平行且均带有反射效果的平面间时,也能看到弱化版的无限反射,比如饰有玻璃墙的走廊或小厅。部分反射的玻璃可以产生这种现象,而在通过玻璃渗入环境的视觉噪点作用下逐渐削弱。当站在两面镜子中间,场景见下图。 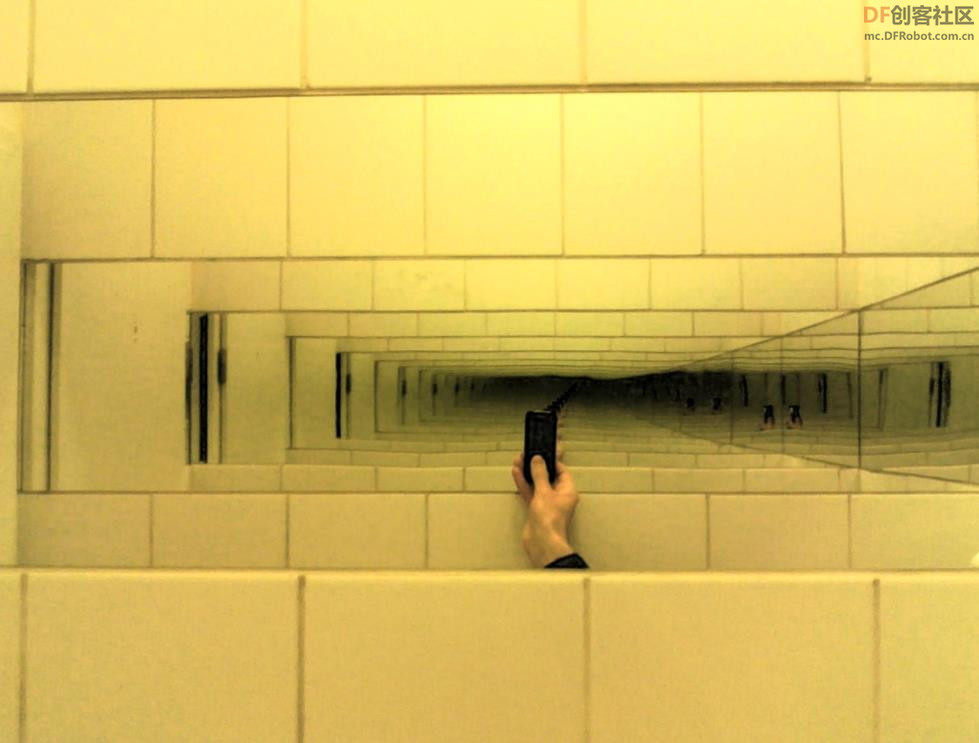 |
|
原理:当两面可以将光线反射若干次——理论上是无限次——的镜面互相平行放置时,镜面立体错觉便会出现。反射光在镜中看起来正向远处射去,因为在两个平面间光线真的走了它看起来在镜面中走的那么远。 举例来说,在一组间距两厘米的无限反射镜的正中间——也就是距两面镜的距离都是一厘米——有一个光线冲向且垂直于里侧镜面的光源。光线从光源射出,最初走过一厘米,抵达里侧镜面。随后第一次反射,光线经过两厘米从里侧镜面抵达外侧镜面,此时光线走过的总路程为三厘米,而它在镜子里成的像看起来也走了三厘米。第二次反射光线抵达里侧镜面时,光线又走过两厘米,总路程为五厘米,所以在镜中看起来光线也走了五厘米。以此类推。每次成功的反射都会增加光线走过的总路程,而两镜间的位置变化一直在两厘米间变换,但在镜像中却看起来越来越远。下图为计算机模拟的无限镜效果。  |
|
视觉艺术家,尤其是当代艺术家雕刻家 ,已使用无穷大反射镜。 草间弥生, 乔西亚·麦克埃里尼(Josiah McElheny), 伊万·纳瓦罗(Ivan Navarro), 泰勒·戴维斯(Taylor Davis) , 和 安东尼·詹姆斯所有作品都使用无限反射镜扩大了作品中无限空间的感觉。 一些游乐园黑暗的游乐设施 ,例如迪士尼的“太空山 云霄飞车,使用无限反射镜营造出在太空中飞行的印象。 当代古典作曲家 阿尔沃·派特(ArvoPärt) 写了他1978年的作品 Spiegel im Spiegel (“镜子中的镜子”)作为对无限镜子效果的音乐反射。 星球大战:最后的绝地武士 包括一个具有无限镜面效果的短洞穴场景片段。 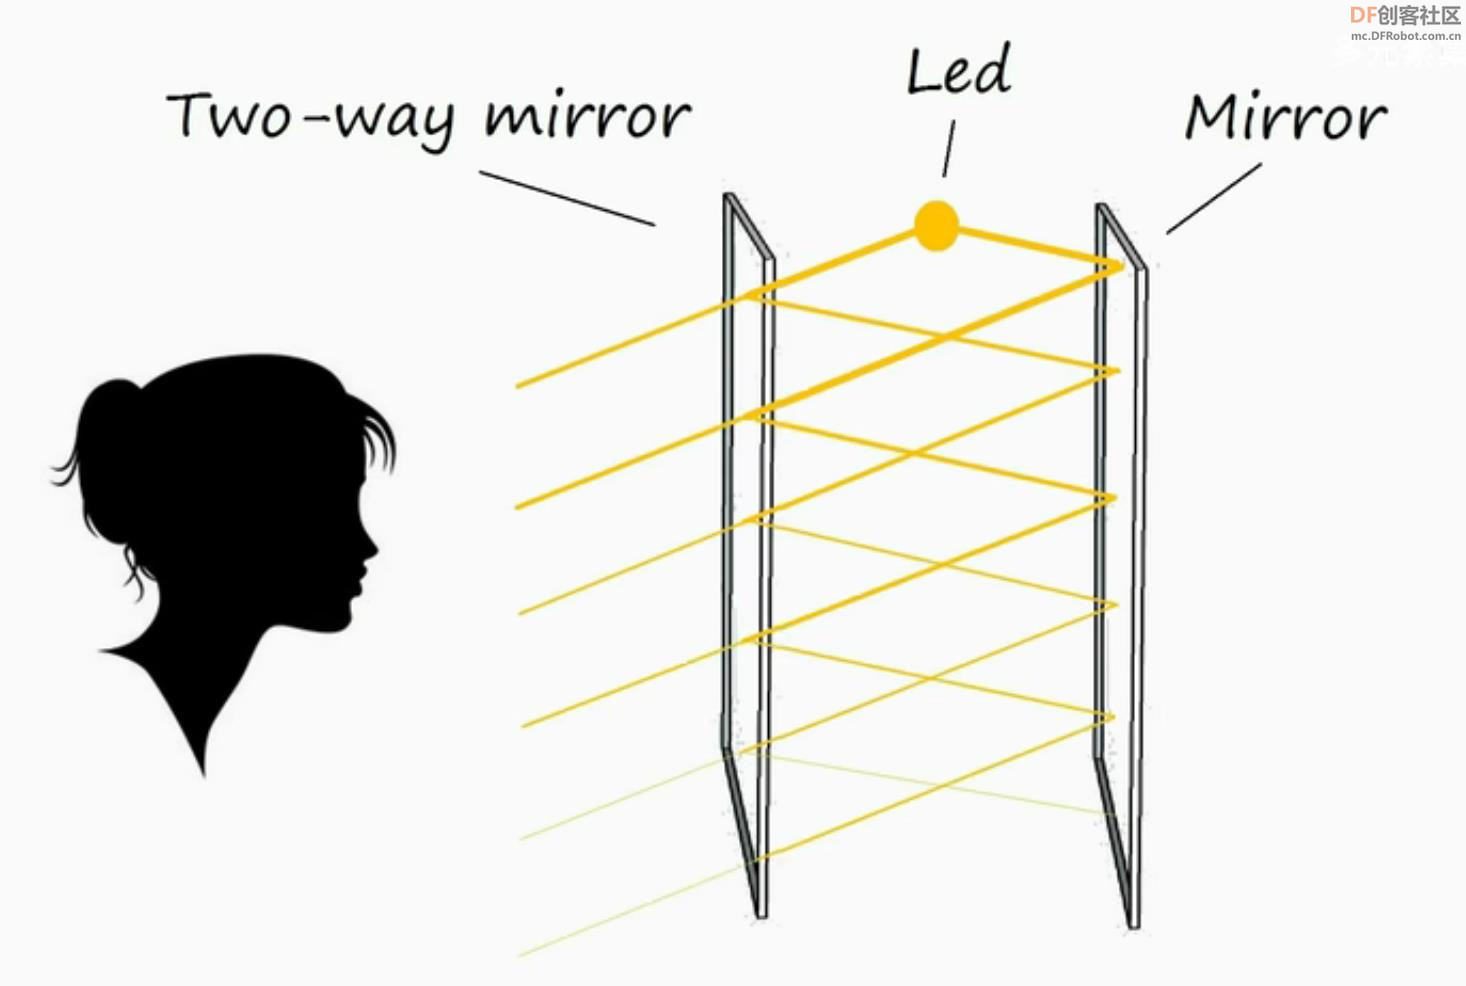 |
|
本帖最后由 驴友花雕 于 2022-9-19 16:05 编辑 MAX4466 是微功率运算放大器,经过优化,可用作麦克风前置放大器。它们提供了优化的增益带宽产品与电源电流的理想组合,以及超小型封装中实现低电压工件环境。 MAX4466具有增益稳定特性,仅需24μA的电源电流即可提供200kHz的增益带宽。经过解压缩,可实现+5V/V的最小稳定增益,并提供600KHZ增益带宽。此外这些放大器具有轨到轨输出,高 AVOL ,以及出色的电源抑制和共模抑制比,适合在嘈杂环境中工作。广泛应用于蜂窝电话、数字复读装置、耳机、助听器、麦克风前置放大器、便携计算机和语音识别系统中。  |
|
该模块在 Vcc 和接地引线上都包含铁氧体,以最大限度地减少电源噪声。如果与 MCU 一起使用,最好使用 2.4V – 5.5V 范围内可用的最安静的电源。在 Arduino 上,这通常是 3.3V 电源。 输出是直流耦合的。当输出信号处于静止状态时,它将位于 Vcc/2。如果 Vcc 为 5V,则输出将为 2.5V。如果输出需要交流耦合,可以在输出引脚和它驱动的电路的输入之间增加一个100uF的电容。 背面的小型单圈电位器可让您将增益从 25x 调整到 125x。逆时针旋转电位器会增加增益,而逆时针旋转会降低增益。 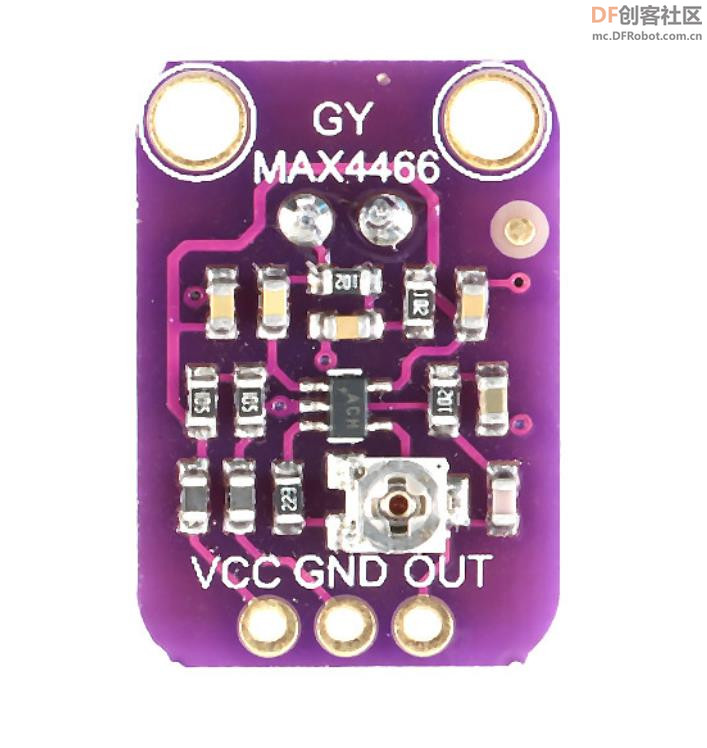 |
|
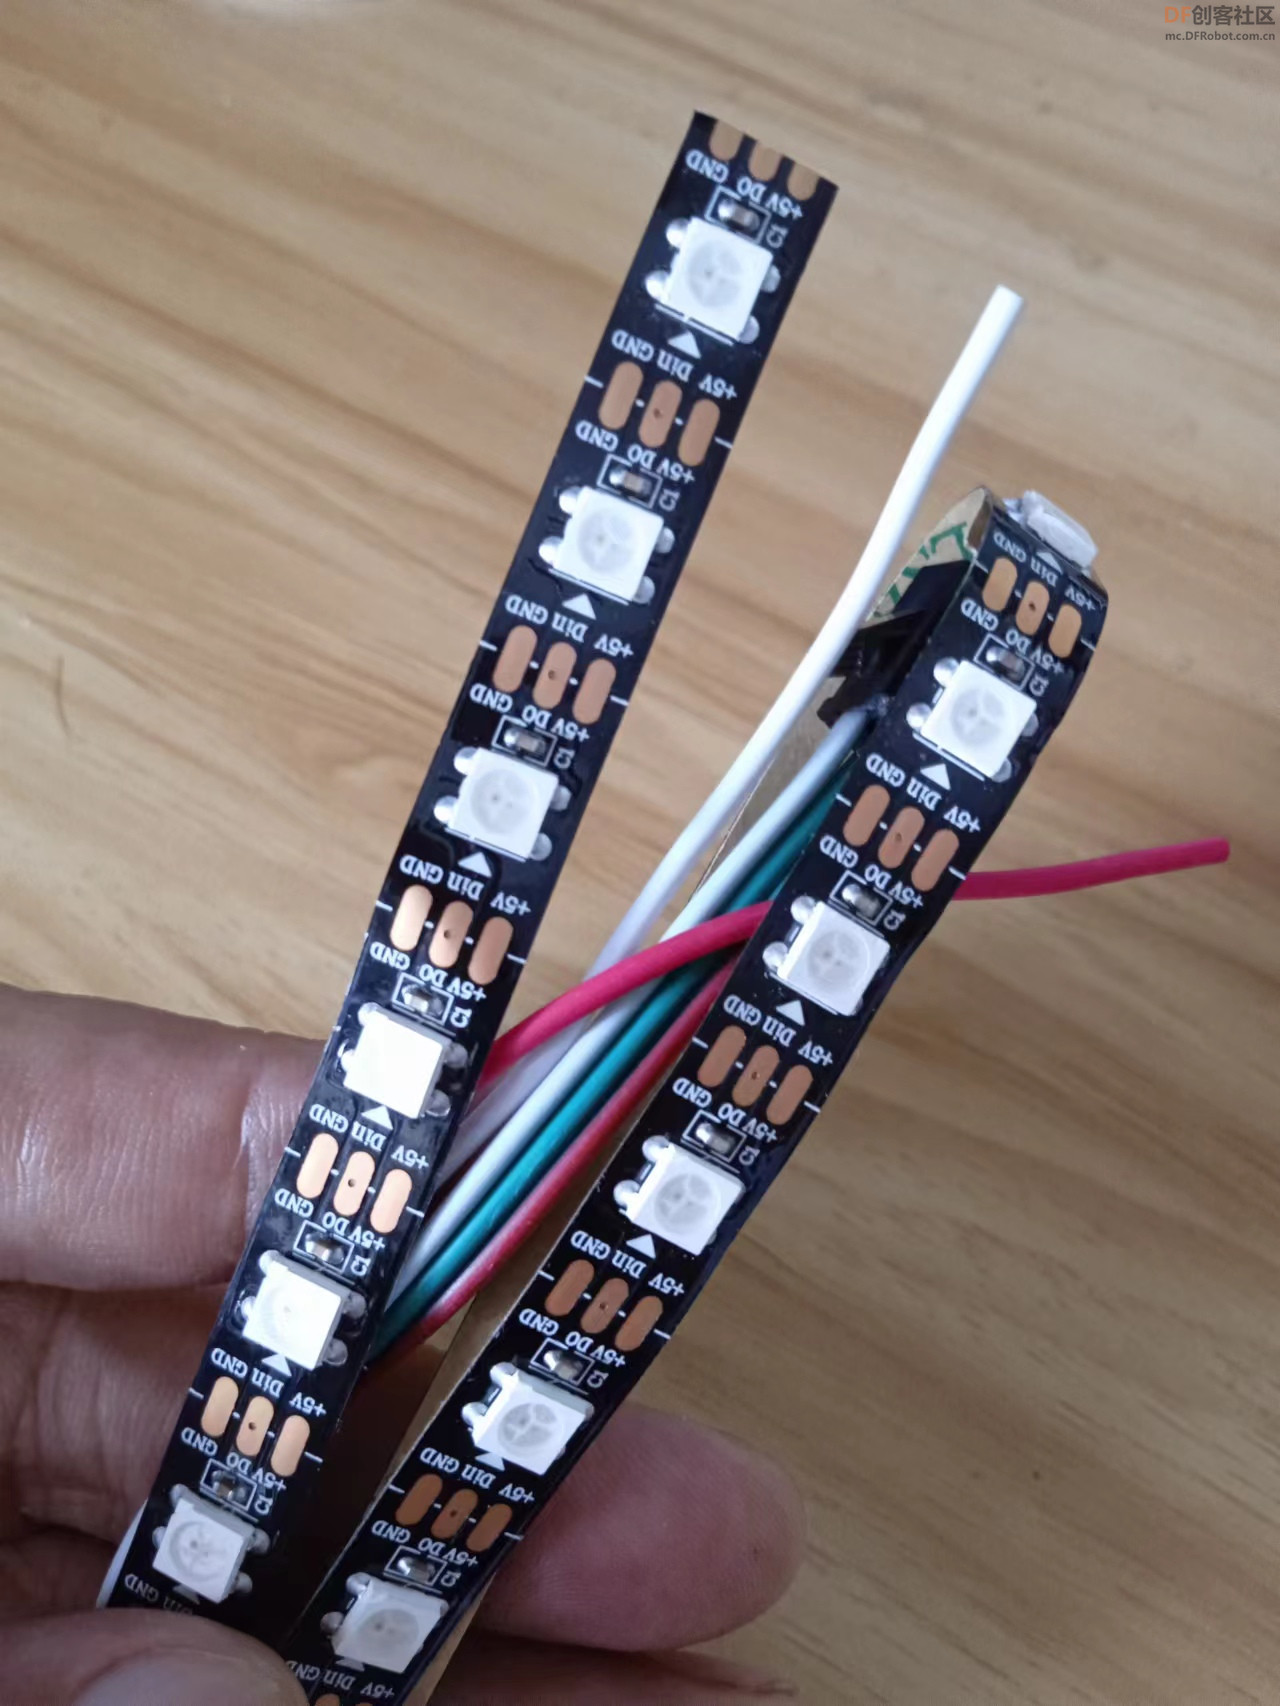
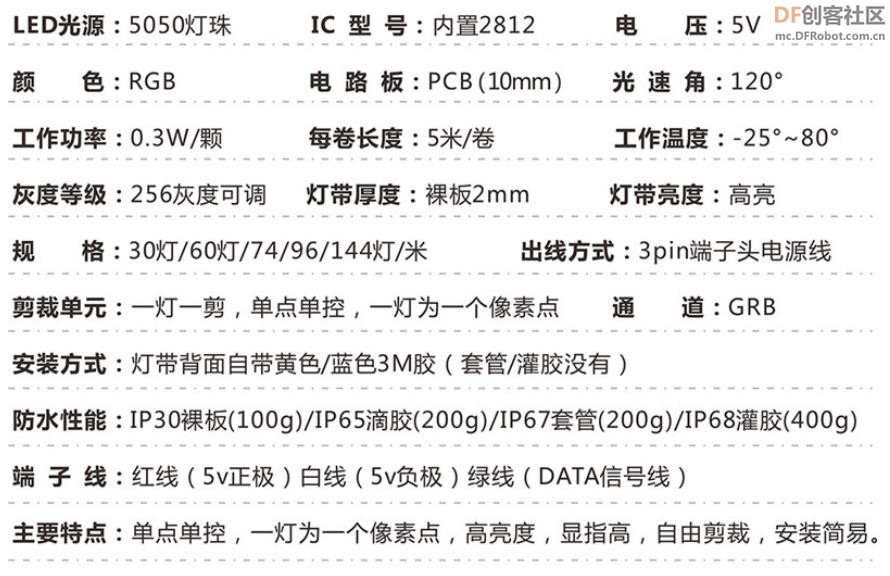
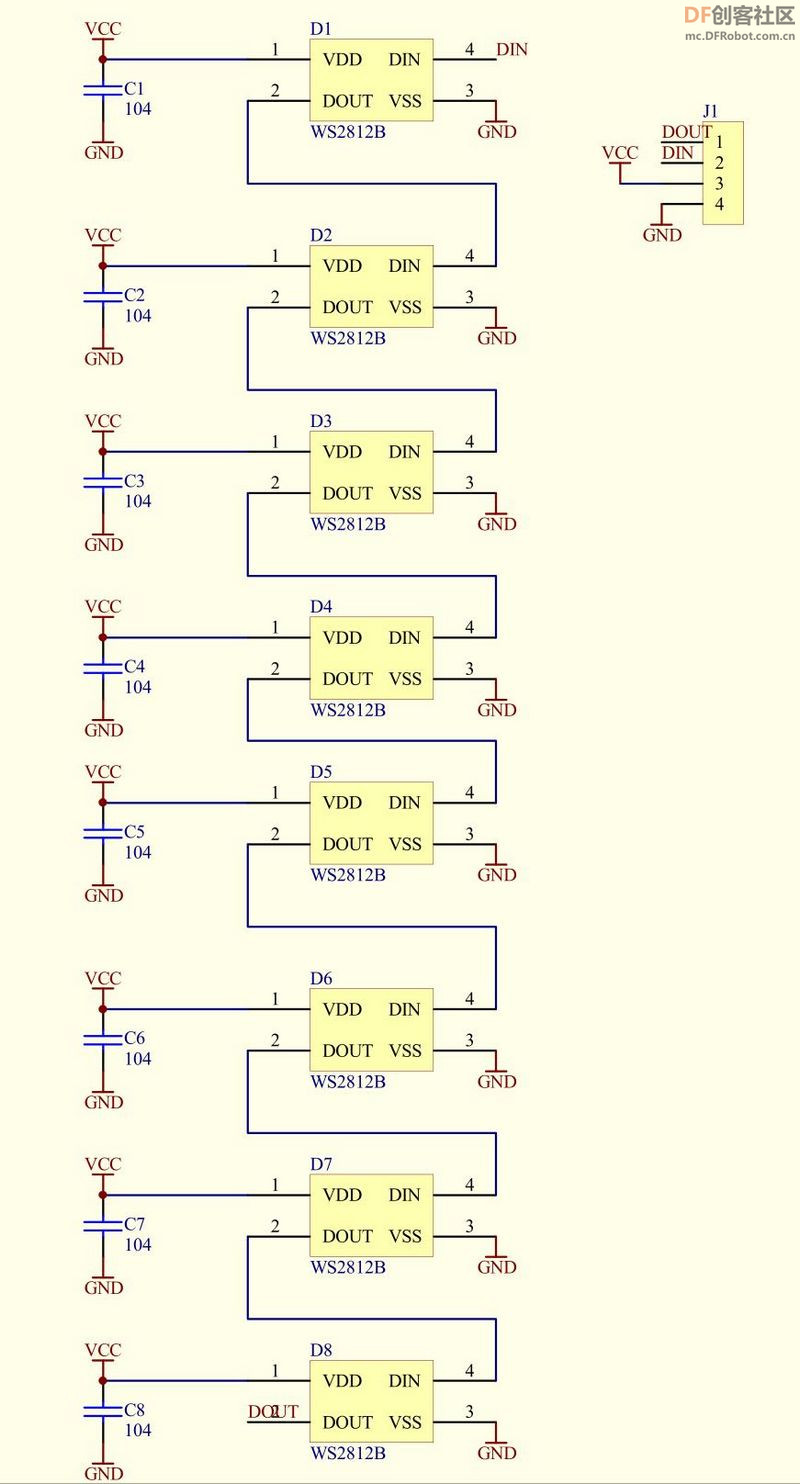
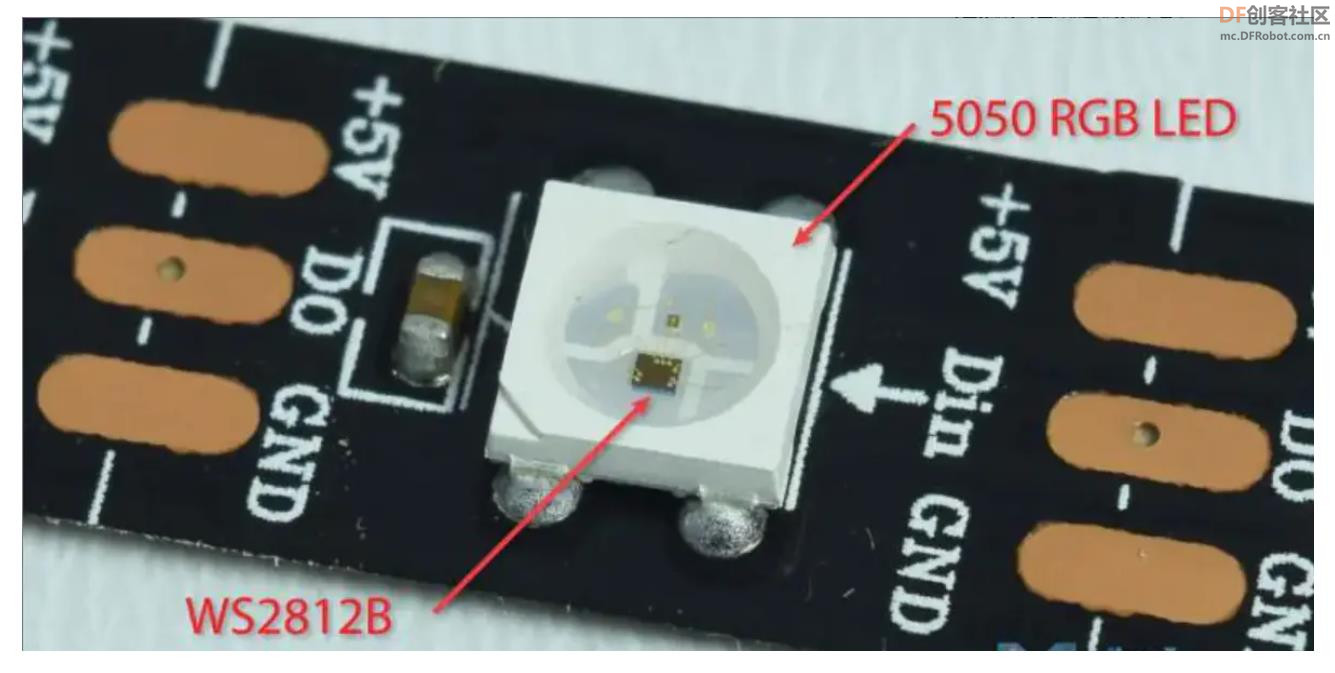
WS2812B 是一个集控制电路与发光电路于一体的智能外控LED光源。其外型与一个5050LED灯珠相同,每个元件即为一个像素点。像素点内部包含了智能数字接口数据锁存信号整形放大驱动电路,还包含有高精度的内部振荡器和12V高压可编程定电流控制部分,有效保证了像素点光的颜色高度一致。数据协议采用单线归零码的通讯方式,像素点在上电复位以后,DIN端接受从控制器传输过来的数据,首先送过来的24bit数据被第一个像素点提取后,送到像素点内部的数据锁存器,剩余的数据经过内部整形处理电路整形放大后通过DO端口开始转发输出给下一个级联的像素点,每经过一个像素点的传输,信号减少24bit。像素点采用自动整形转发技术,使得该像素点的级联个数不受信号传送的限制,仅仅受限信号传输速度要求。 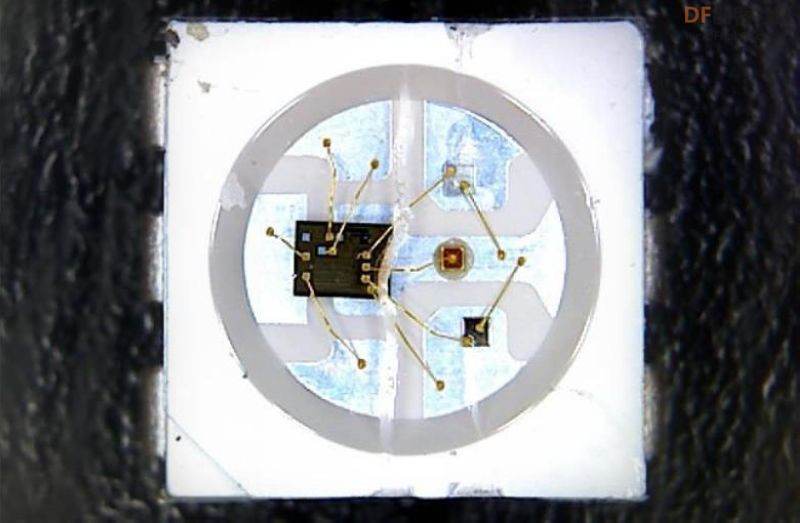 |
|
主要特点 1、智能反接保护,电源反接不会损坏IC。 2、IC控制电路与LED点光源公用一个电源。 3、控制电路与RGB芯片集成在一个5050封装的元器件中,构成一个完整的外控像素点。 4、内置信号整形电路,任何一个像素点收到信号后经过波形整形再输出,保证线路波形畸变不会累加。 5、内置上电复位和掉电复位电路。 6、每个像素点的三基色颜色可实现256级亮度显示,完成16777216种颜色的全真色彩显示,扫描频率不低于400Hz/s。 7、串行级联接口,能通过一根信号线完成数据的接收与解码。 8、任意两点传传输距离在不超过5米时无需增加任何电路。 9、当刷新速率30帧/秒时,级联数不小于1024点。 10、数据发送速度可达800Kbps。 11、光的颜色高度一致,性价比高。 应用领域 具有低电压驱动,环保节能,亮度高,散射角度大,一致性好,超低功率,超长寿命等优点。将控制电路集成于LED上面,电路变得更加简单,体积小,安装更加简便。主要应用领域,LED全彩发光字灯串,LED全彩模组, LED全彩软灯条硬灯条,LED护栏管。LED点光源,LED像素屏,LED异形屏,各种电子产品,电器设备跑马灯等。  |


 沪公网安备31011502402448
© 2013-2026 Comsenz Inc. Powered by Discuz! X3.4 Licensed

 置顶卡
置顶卡 变色卡
变色卡 千斤顶
千斤顶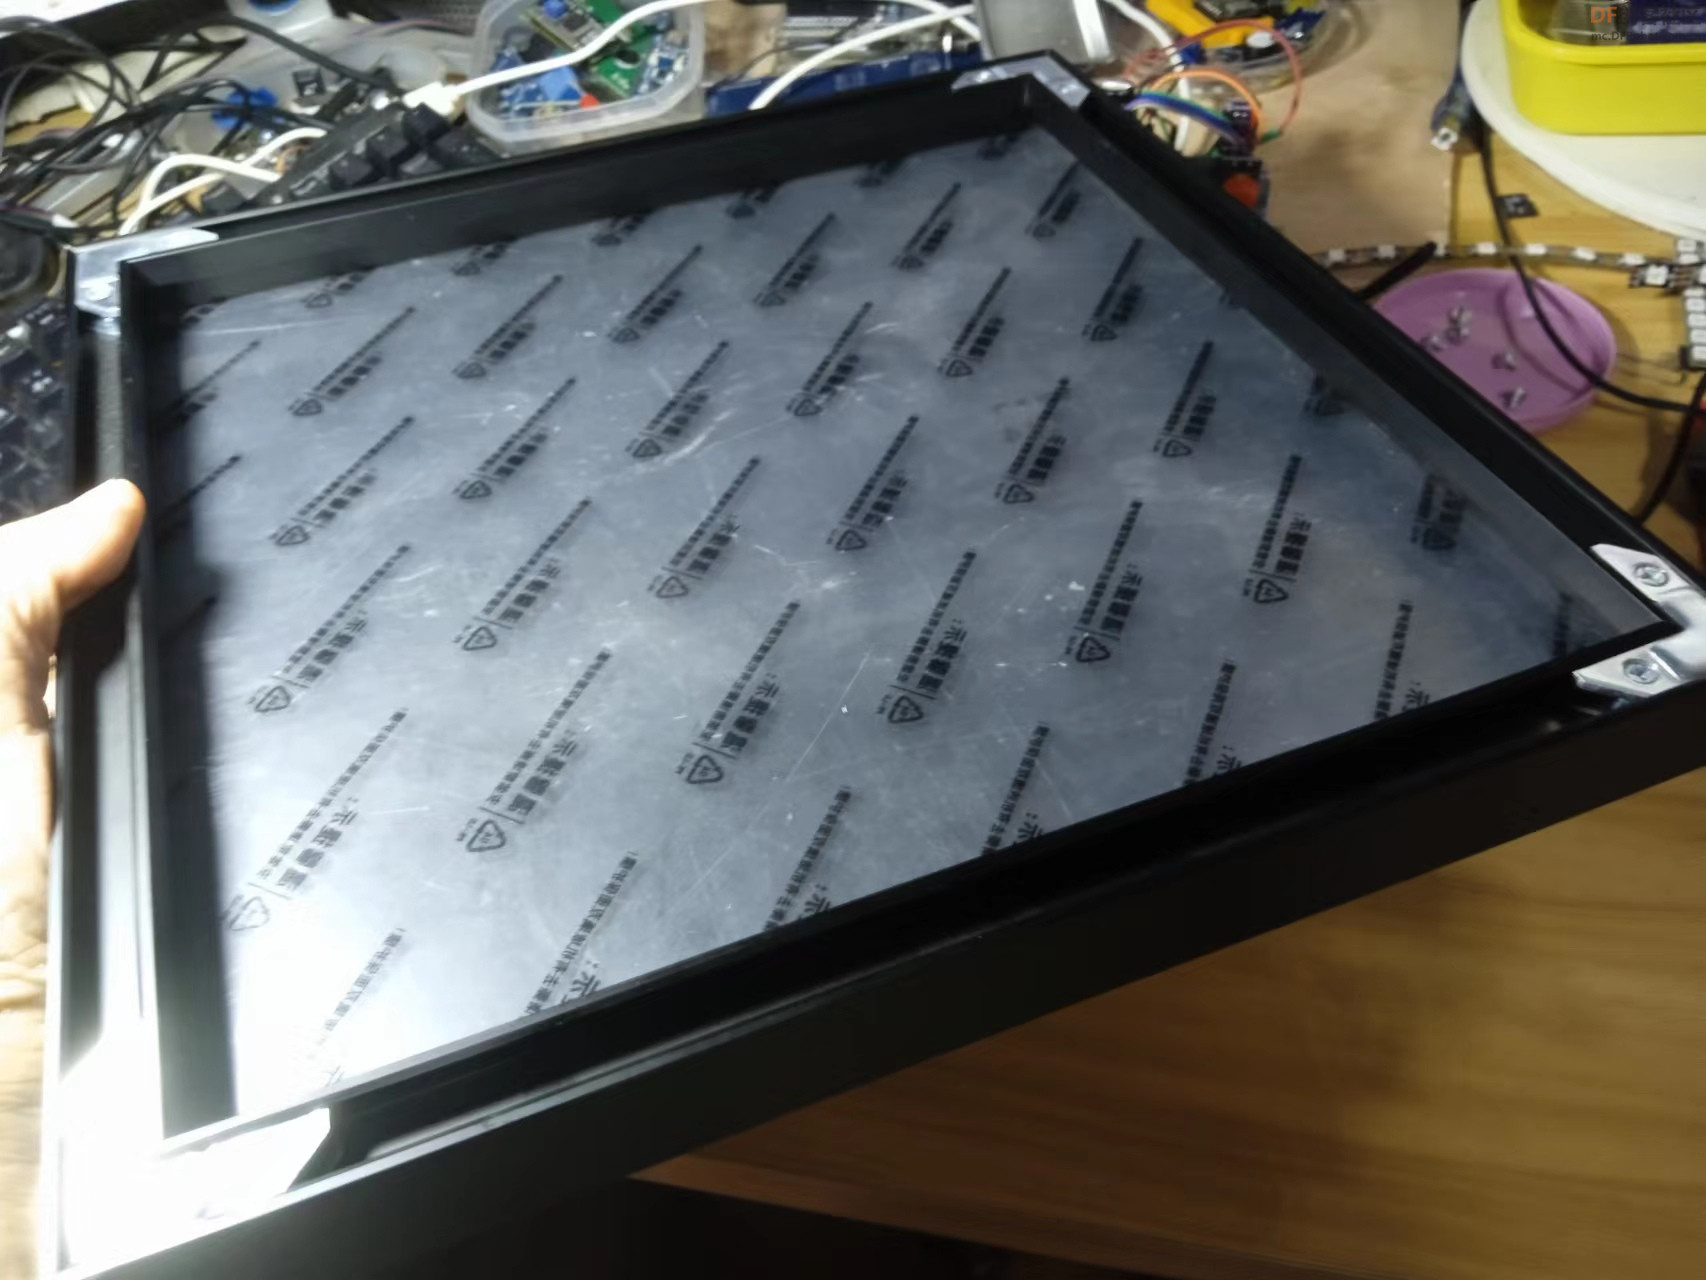


 萌萌哒新人
萌萌哒新人
 活跃会员
活跃会员
 宣传大使
宣传大使
 牛X认证
牛X认证
 创作达人
创作达人
 ARD DAY
 摸鱼团员
摸鱼团员
 志“童”道合
 编辑选择奖
编辑选择奖


