【Arduino】189种传感器模块系列实验(资料代码+仿真编程+图形编程)
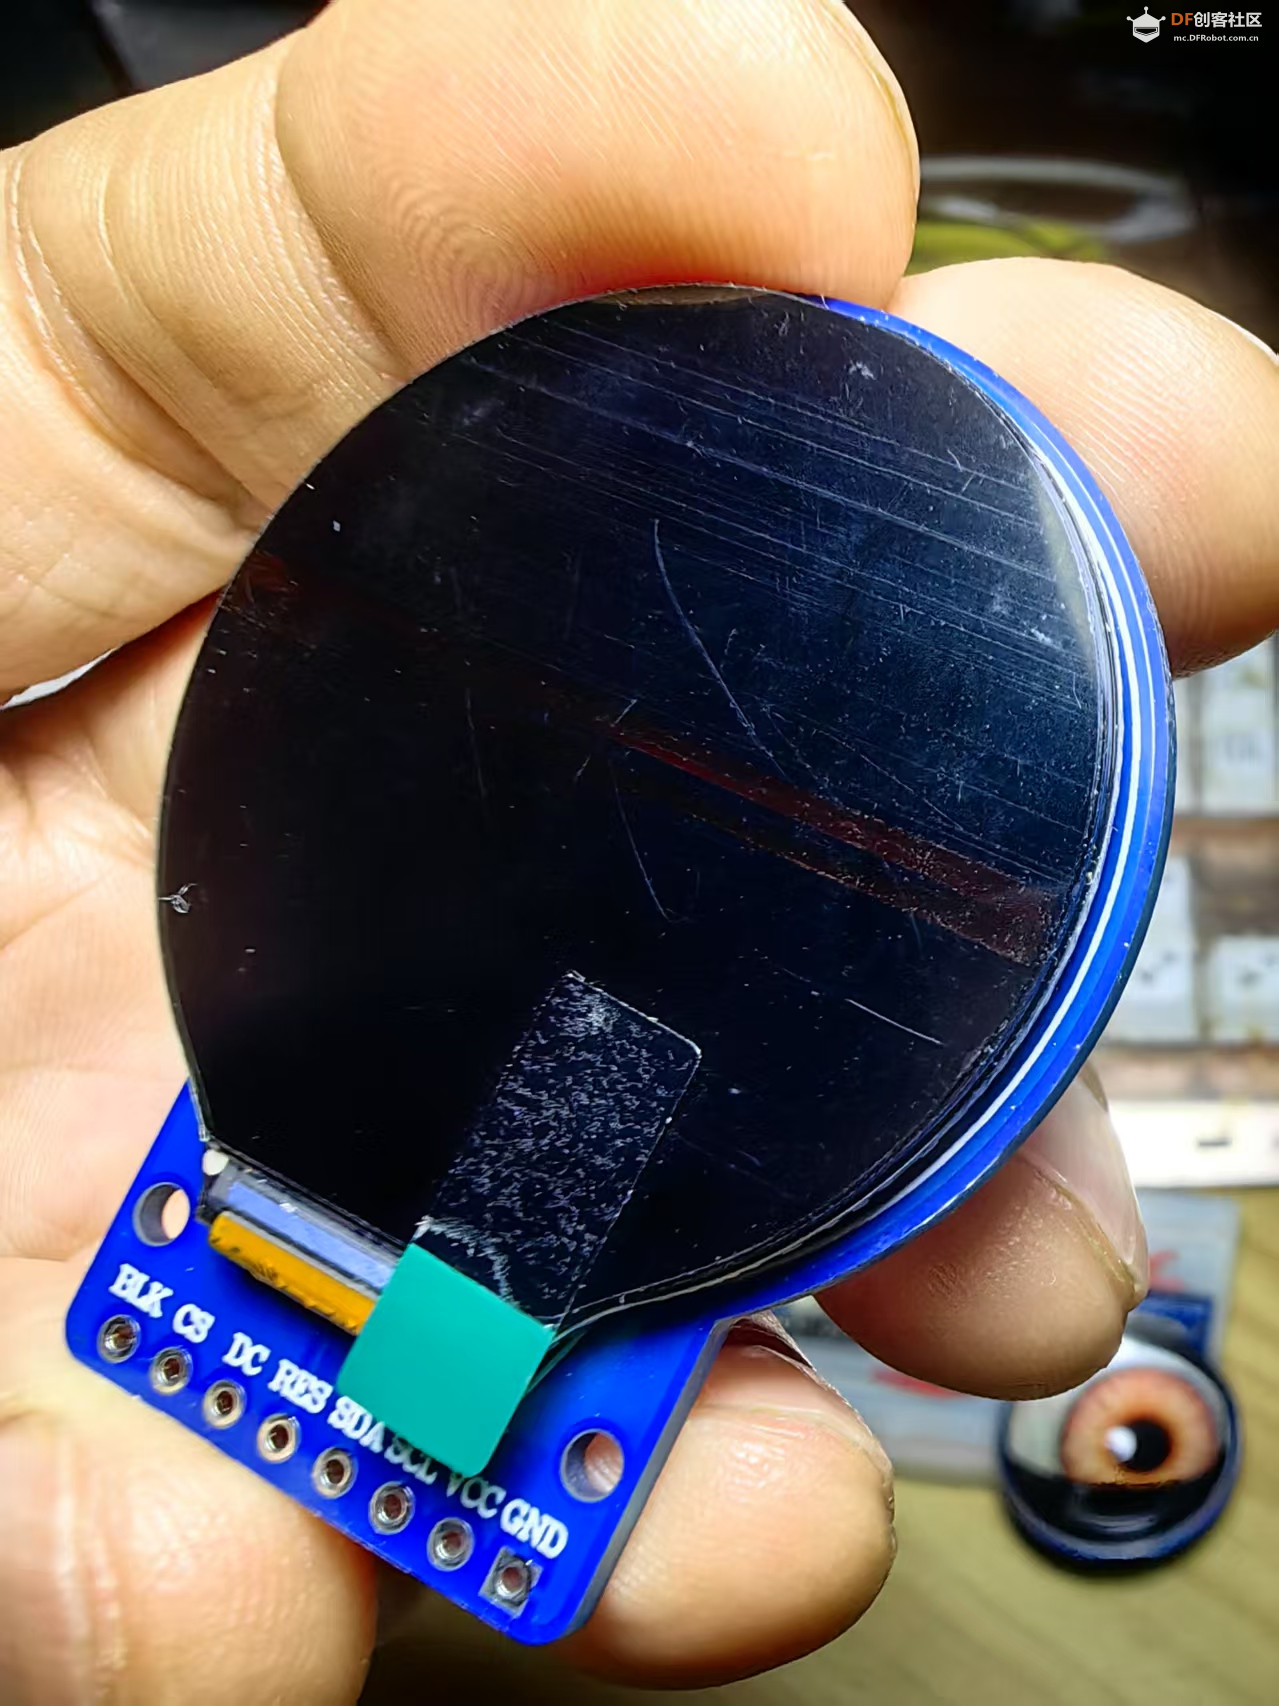
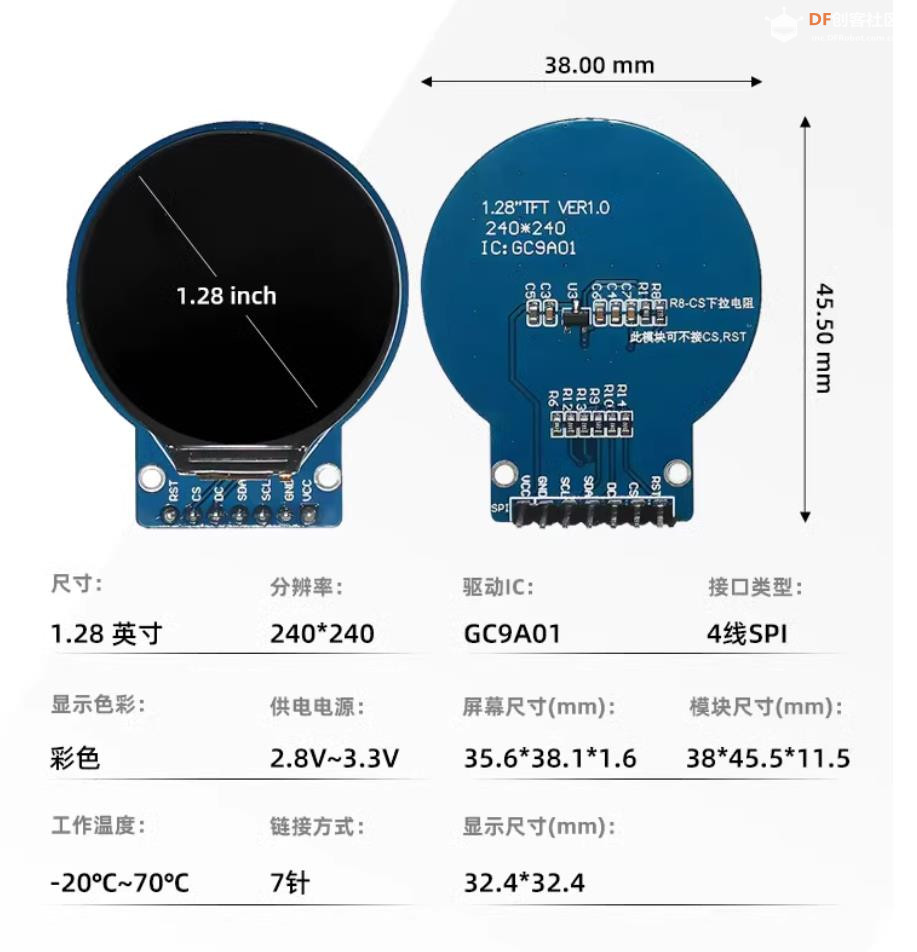
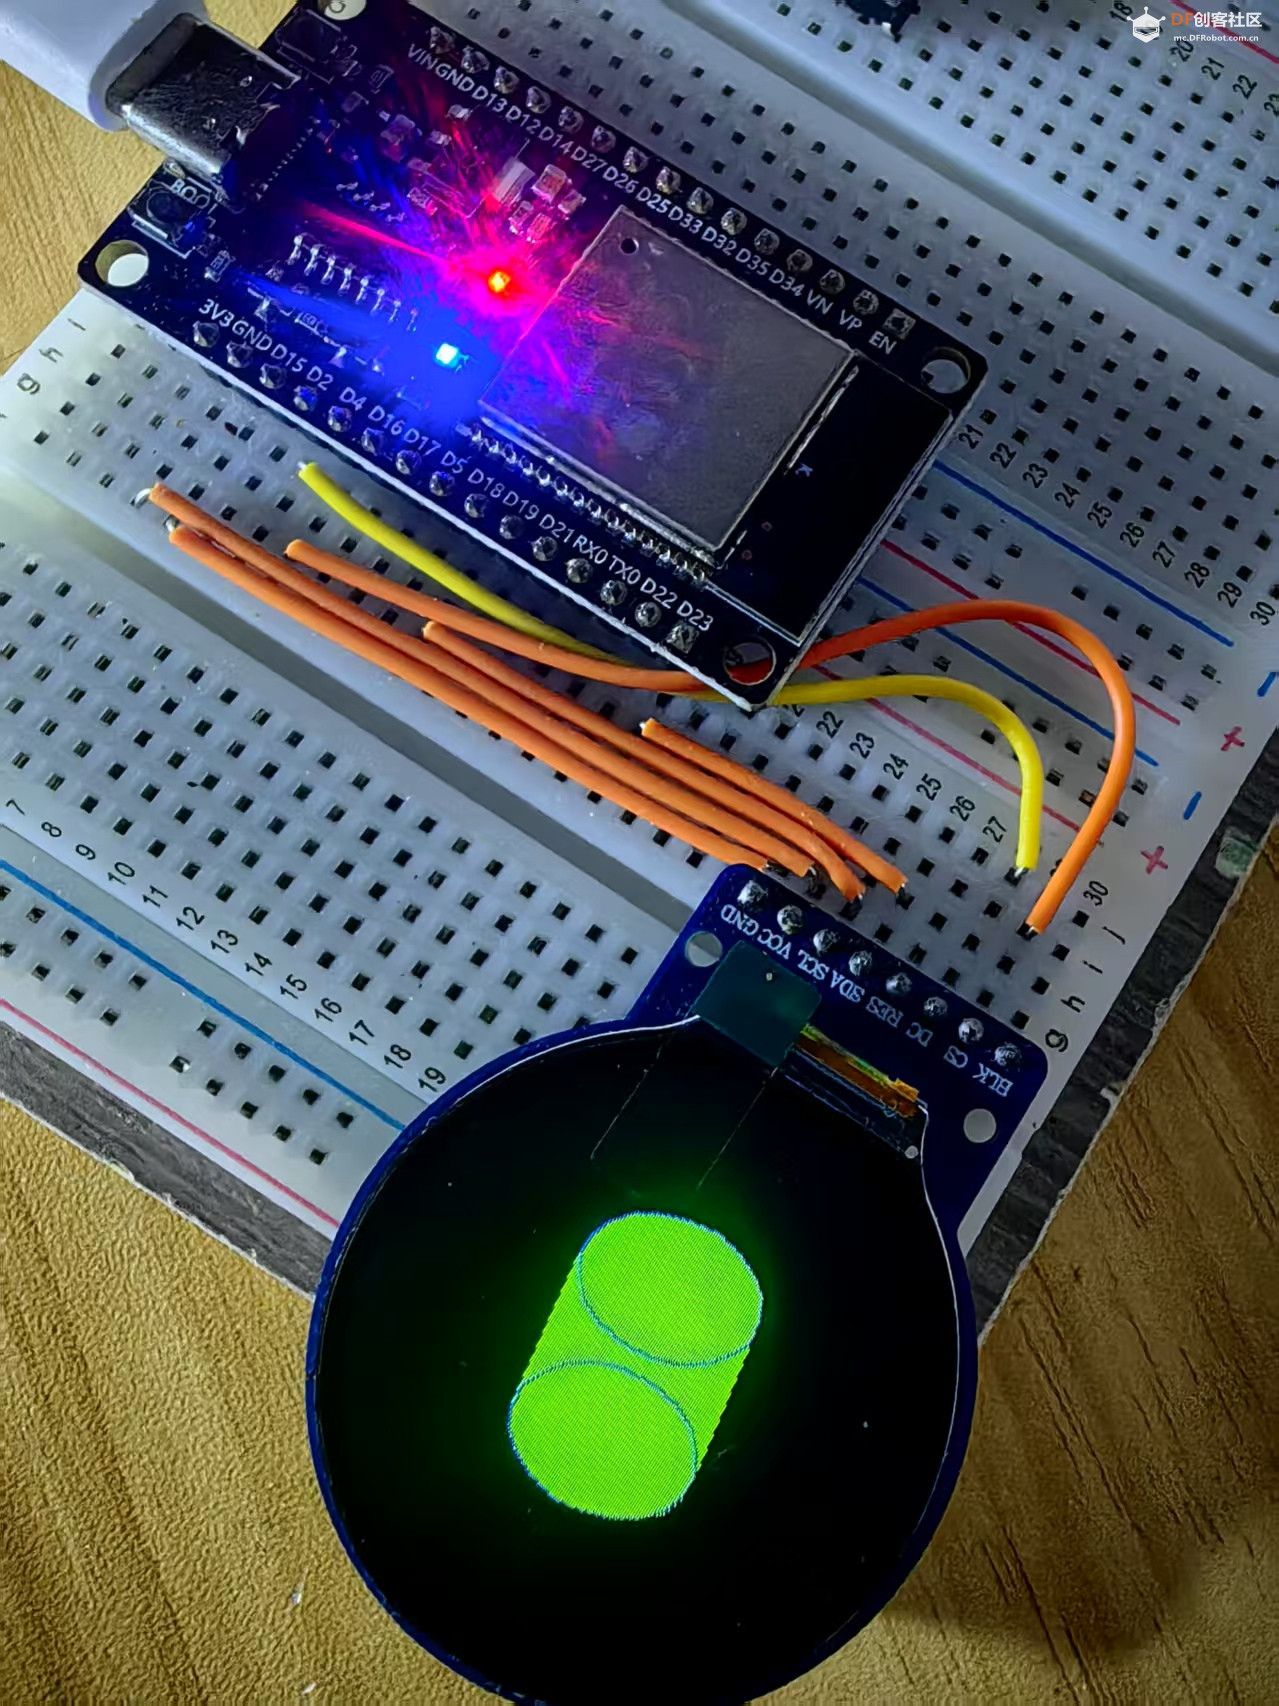
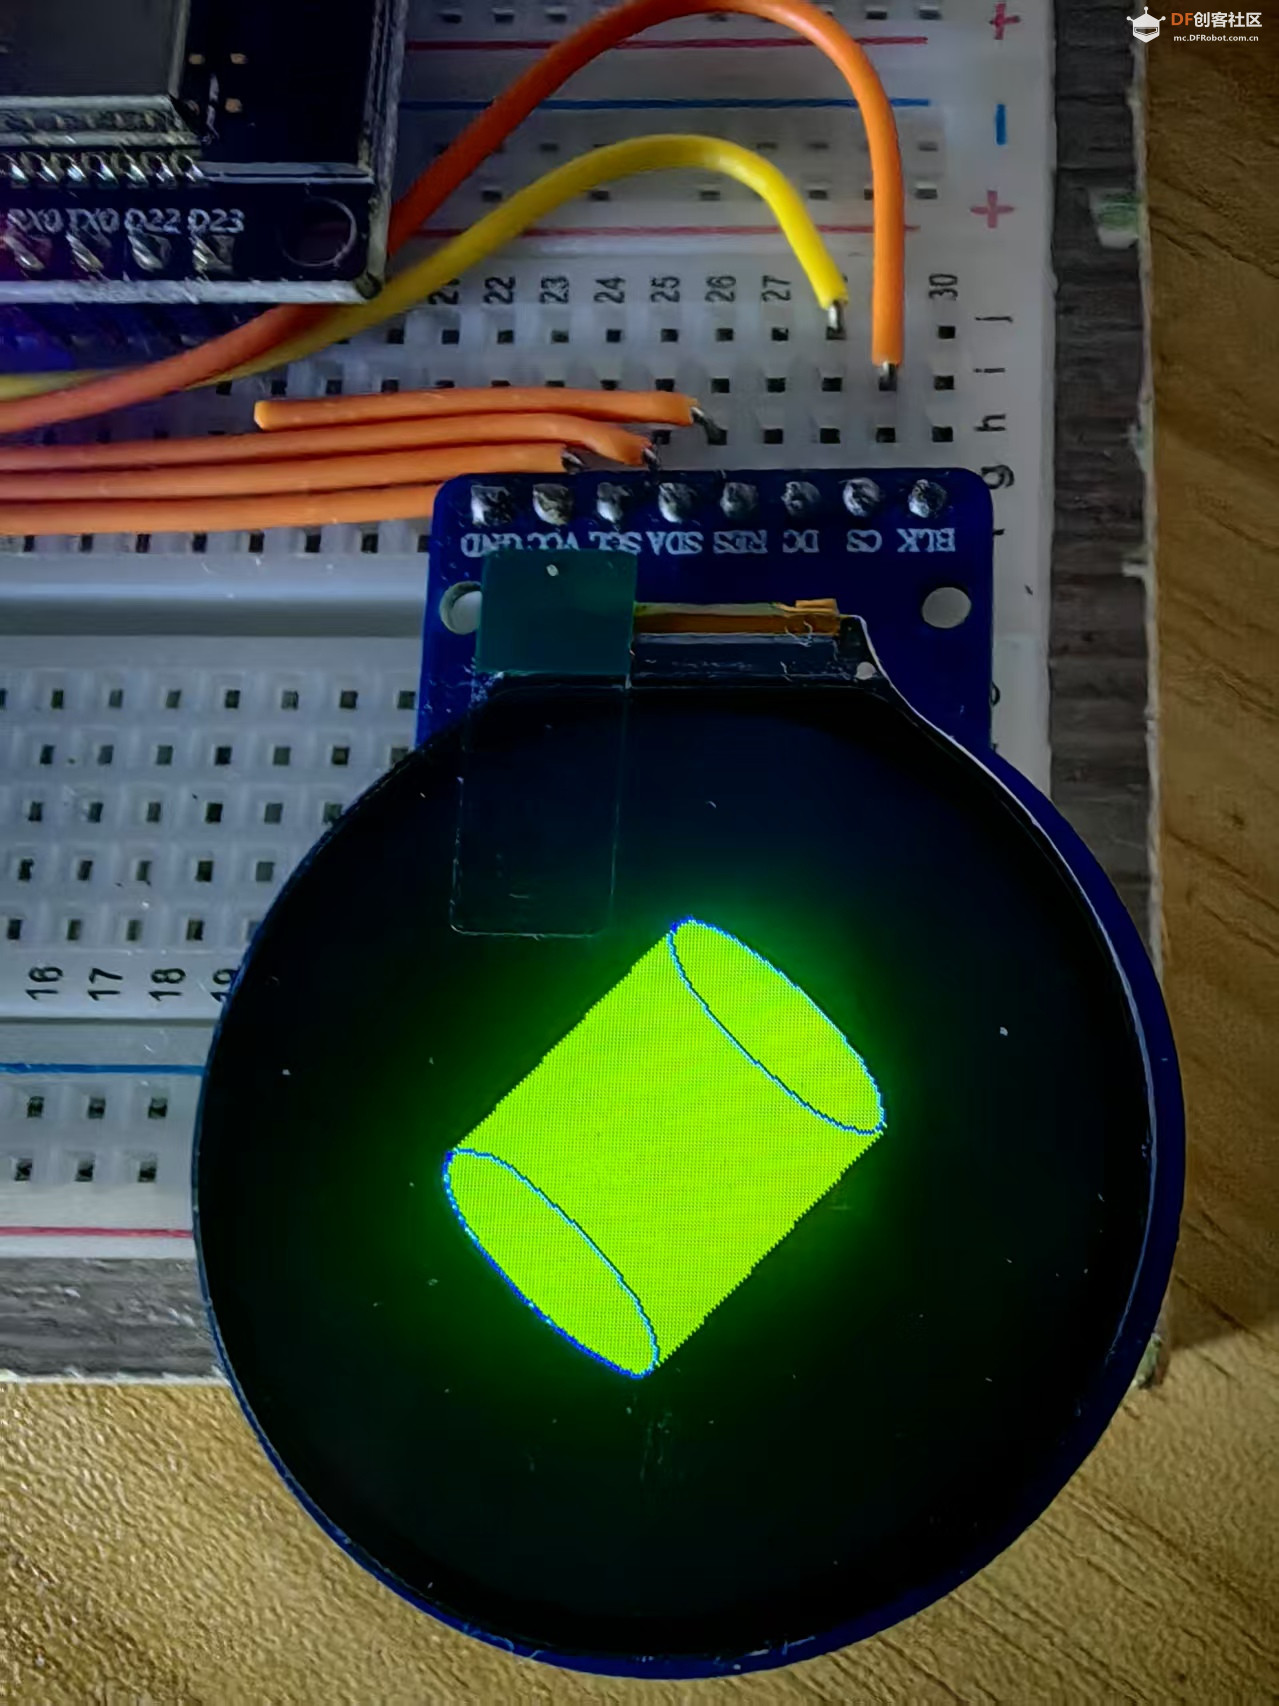
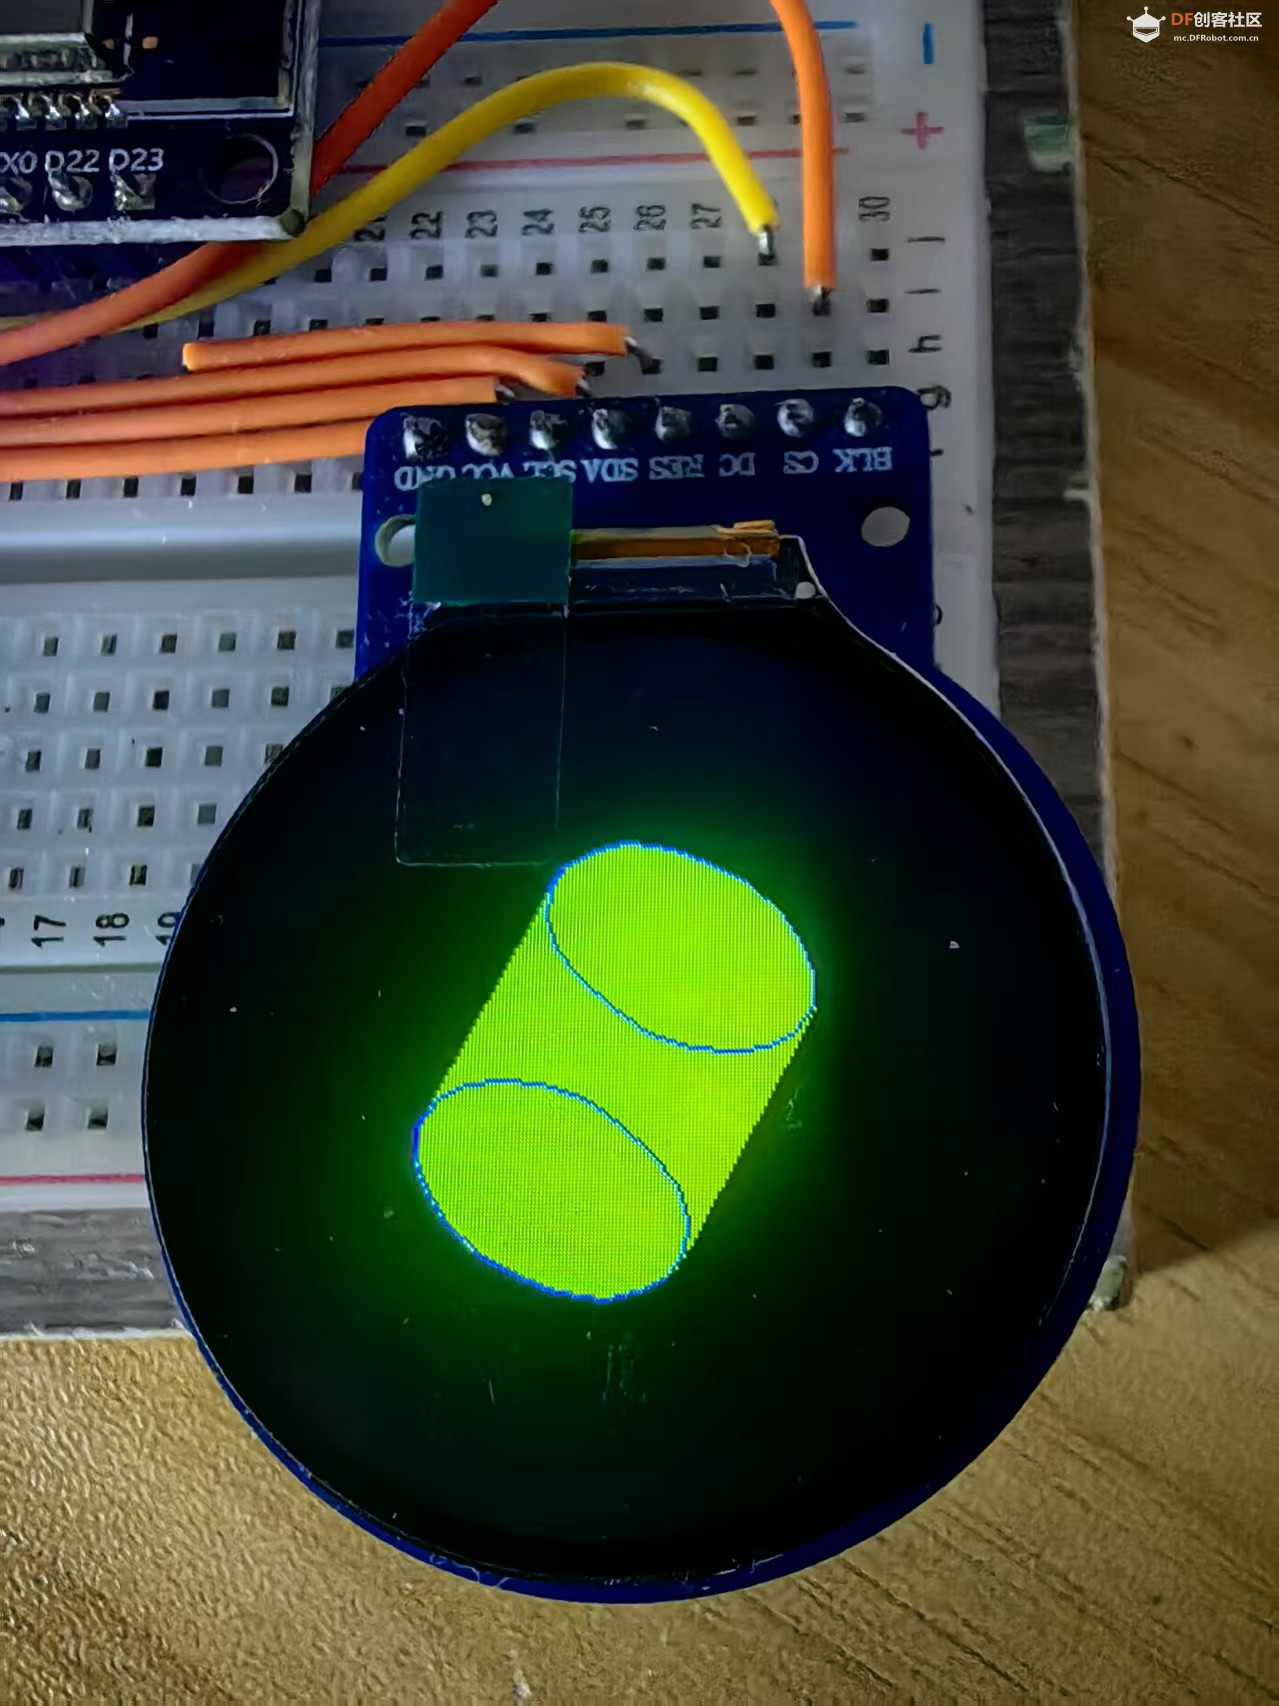
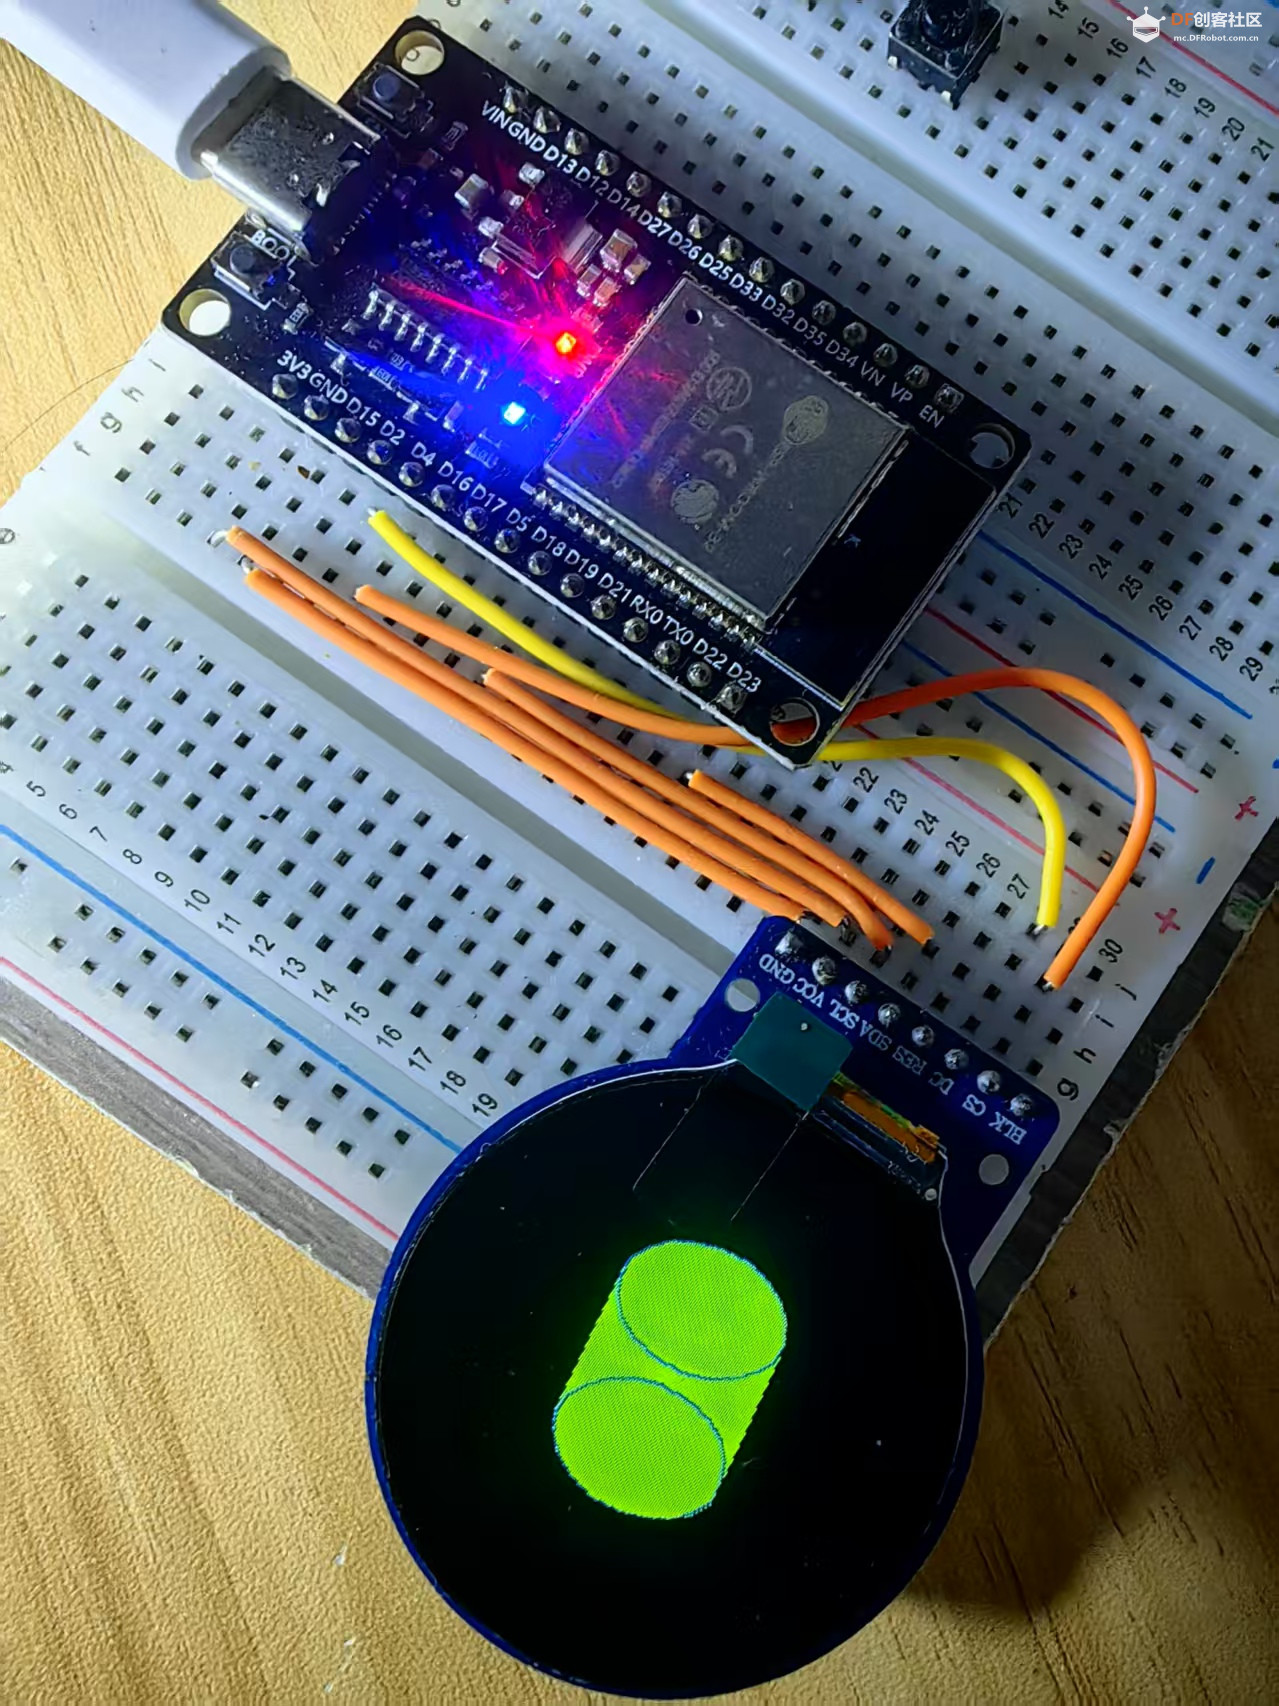
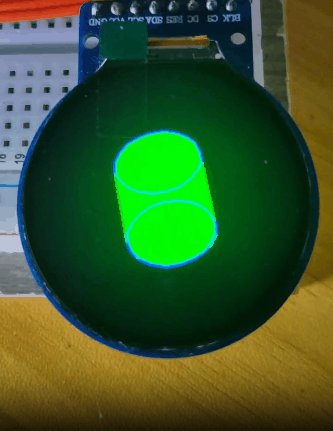
实验二百四十九:1.28寸圆形彩色TFT显示屏 高清IPS 模块 240*240 SPI接口GC9A01驱动
项目之六十六:GC9A01园屏之倾斜 45 度且会旋转的绿色圆柱体动画
实验开源代码
- /*
- 【Arduino】189种传感器模块系列实验(资料代码+仿真编程+图形编程)
- 实验二百四十九:1.28寸圆形彩色TFT显示屏 高清IPS 模块 240*240 SPI接口GC9A01驱动
- 项目之六十六:GC9A01园屏之倾斜 45 度且会旋转的绿色圆柱体动画
- */
-
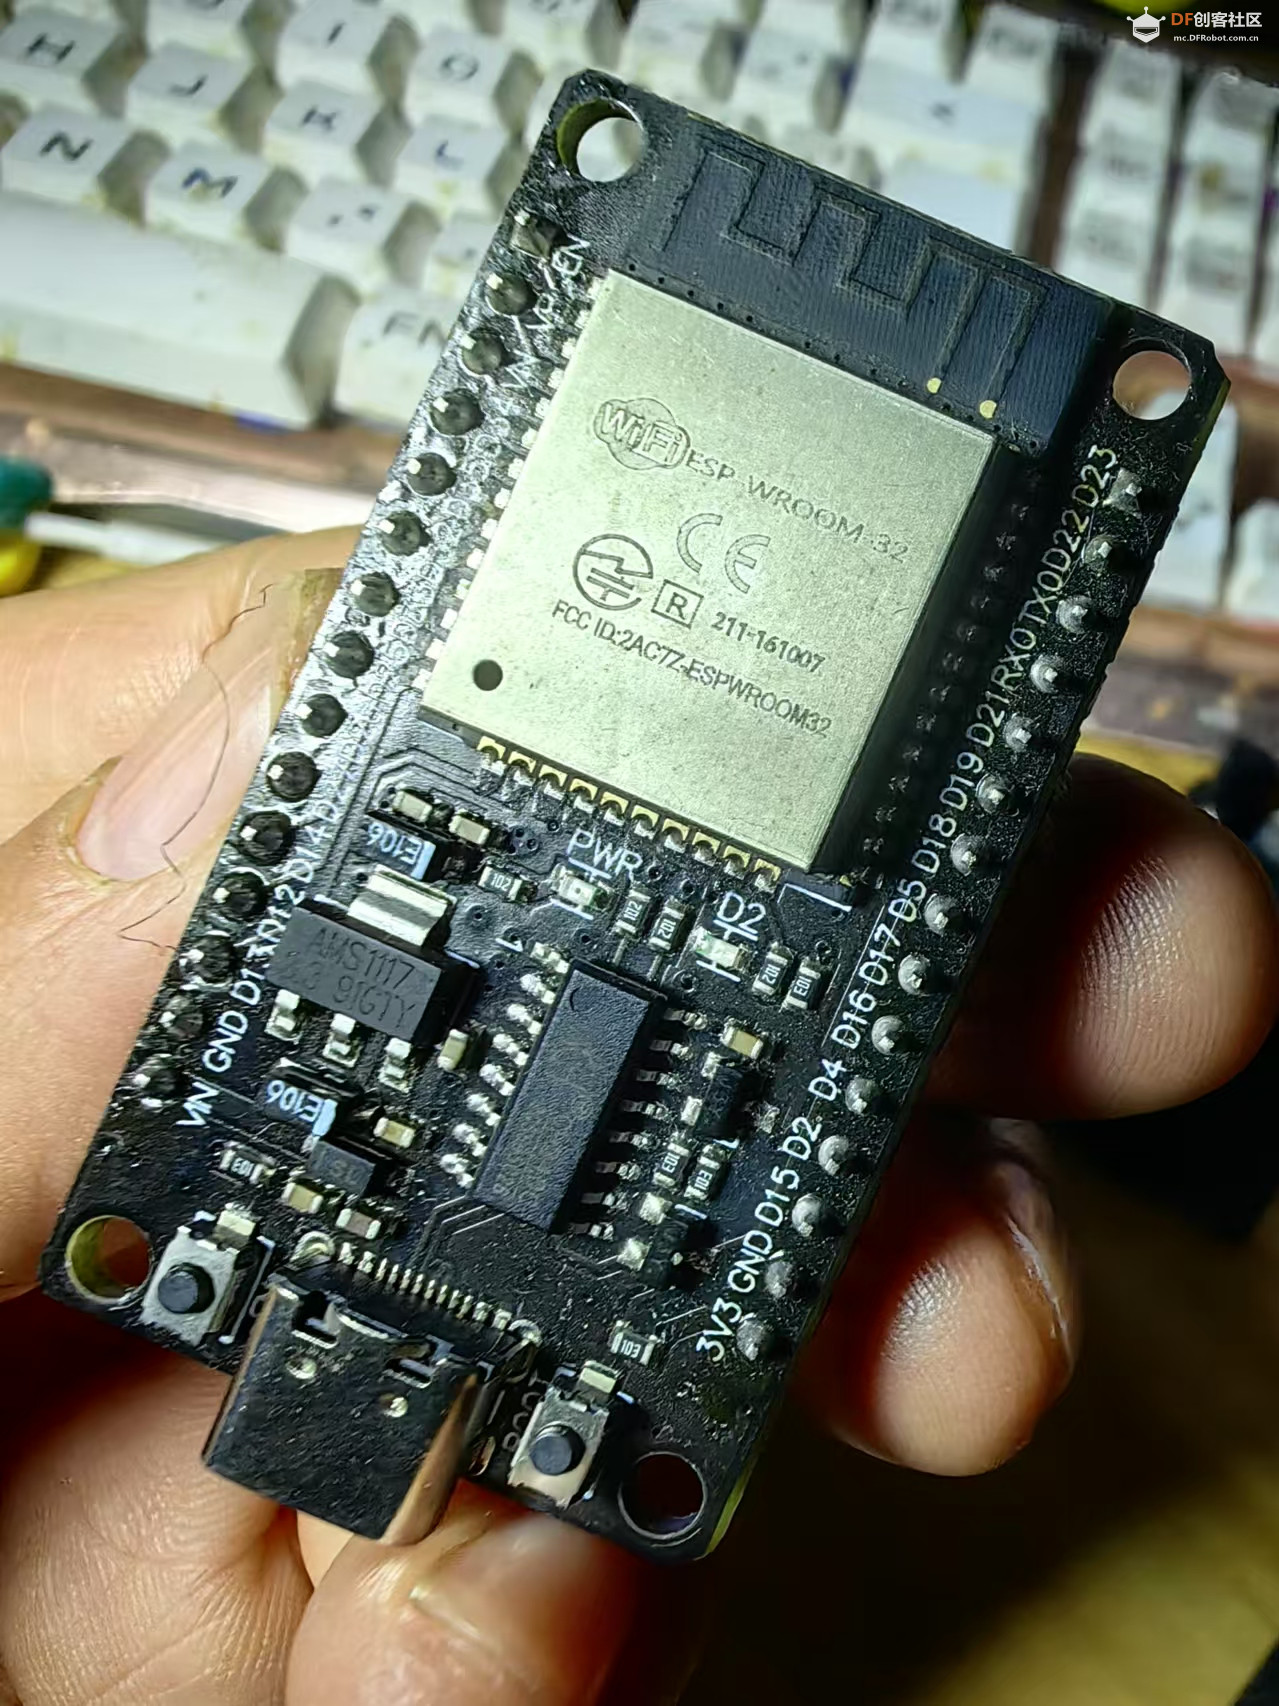
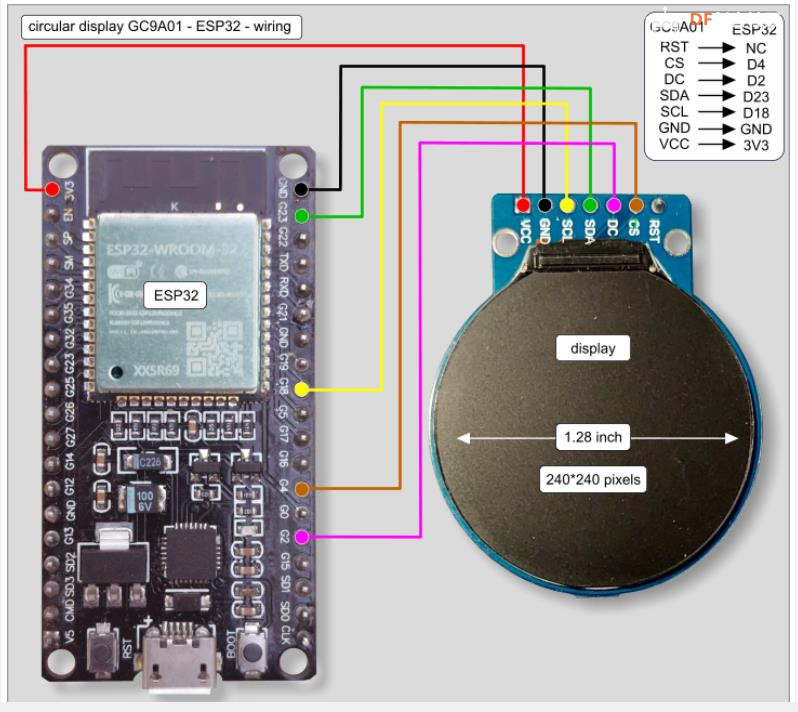
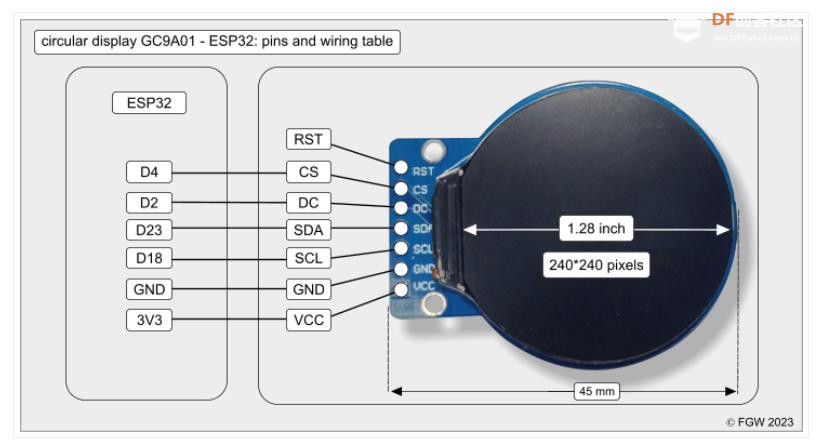
- // GC9A01---------- ESP32
- // RST ------------ NC(复位引脚,此处未连接)
- // CS ------------- D4(片选引脚,连接到ESP32的D4引脚)
- // DC ------------- D2(数据/命令选择引脚,连接到ESP32的D2引脚)
- // SDA ------------ D23 (green)(主数据输出引脚,连接到ESP32的D23引脚,绿色线)
- // SCL ------------ D18 (yellow)(时钟信号引脚,连接到ESP32的D18引脚,黄色线)
- // GND ------------ GND(接地引脚,连接到ESP32的接地端)
- // VCC -------------3V3(电源引脚,连接到ESP32的3.3V电源)
-
- #include "SPI.h" // **包含 SPI 库,用于 TFT 屏幕通信**
- #include "Adafruit_GFX.h" // **包含 Adafruit GFX 图形库,用于绘制图形**
- #include "Adafruit_GC9A01A.h" // **包含 GC9A01A 屏幕驱动库**
-
- #define TFT_CS 4 // **定义 TFT 屏幕片选引脚**
- #define TFT_DC 2 // **定义 TFT 屏幕数据/命令选择引脚**
- #define TFT_RST -1 // **屏幕复位引脚(-1 表示未使用)**
-
- Adafruit_GC9A01A tft = Adafruit_GC9A01A(TFT_CS, TFT_DC, TFT_RST); // **创建 TFT 屏幕对象**
-
- #define SCREEN_WIDTH 240
- #define SCREEN_HEIGHT 240
- #define CENTER_X SCREEN_WIDTH / 2
- #define CENTER_Y SCREEN_HEIGHT / 2
- #define CYLINDER_RADIUS 40
- #define CYLINDER_HEIGHT 90
- #define ROTATION_SPEED 0.03
- #define TILT_ANGLE 45 * M_PI / 180
-
- float angle = 0;
- uint16_t fillColor = tft.color565(0, 255, 0);
- uint16_t edgeColor = tft.color565(0, 0, 255);
-
- #define NUM_POINTS 20
- float topVertices[NUM_POINTS][3];
- float bottomVertices[NUM_POINTS][3];
-
- // 初始化圆柱体顶点坐标
- void initCylinderVertices() {
- for (int i = 0; i < NUM_POINTS; i++) {
- float theta = (float)i / NUM_POINTS * 2 * M_PI;
- topVertices[i][0] = CYLINDER_RADIUS * cos(theta);
- topVertices[i][1] = CYLINDER_HEIGHT / 2;
- topVertices[i][2] = CYLINDER_RADIUS * sin(theta);
-
- bottomVertices[i][0] = CYLINDER_RADIUS * cos(theta);
- bottomVertices[i][1] = -CYLINDER_HEIGHT / 2;
- bottomVertices[i][2] = CYLINDER_RADIUS * sin(theta);
- }
- }
-
- // 绘制填充的圆柱体面
- void drawCylinderFace(int a, int b, int c, float transformedVertices[NUM_POINTS][2], uint16_t color) {
- tft.fillTriangle(transformedVertices[a][0], transformedVertices[a][1],
- transformedVertices[b][0], transformedVertices[b][1],
- transformedVertices[c][0], transformedVertices[c][1], color);
- }
-
- // 绘制圆柱体边框
- void drawCylinderEdge(int i, int j, float transformedVertices[NUM_POINTS][2], uint16_t color) {
- tft.drawLine(transformedVertices[i][0], transformedVertices[i][1],
- transformedVertices[j][0], transformedVertices[j][1], color);
- }
-
- // 绘制圆柱体侧面
- void drawCylinderSide(int i, float transformedTopVertices[NUM_POINTS][2], float transformedBottomVertices[NUM_POINTS][2], uint16_t color) {
- int j = (i + 1) % NUM_POINTS;
- // 用两个三角形近似填充侧面
- drawCylinderFace(i, j, j + NUM_POINTS, transformedTopVertices, color);
- drawCylinderFace(i, j + NUM_POINTS, i + NUM_POINTS, transformedTopVertices, color);
- }
-
- void setup() {
- Serial.begin(115200);
- tft.begin();
- tft.setRotation(2);
- tft.fillScreen(tft.color565(0, 0, 0));
- initCylinderVertices();
- }
-
- void loop() {
- tft.fillScreen(tft.color565(0, 0, 0));
-
- float transformedTopVertices[NUM_POINTS][2];
- float transformedBottomVertices[NUM_POINTS][2];
-
- for (int i = 0; i < NUM_POINTS; i++) {
- float xTop = topVertices[i][0];
- float yTop = topVertices[i][1];
- float zTop = topVertices[i][2];
-
- float xBottom = bottomVertices[i][0];
- float yBottom = bottomVertices[i][1];
- float zBottom = bottomVertices[i][2];
-
- float tiltedYTop = yTop * cos(TILT_ANGLE) - zTop * sin(TILT_ANGLE);
- float tiltedZTop = yTop * sin(TILT_ANGLE) + zTop * cos(TILT_ANGLE);
-
- float tiltedYBottom = yBottom * cos(TILT_ANGLE) - zBottom * sin(TILT_ANGLE);
- float tiltedZBottom = yBottom * sin(TILT_ANGLE) + zBottom * cos(TILT_ANGLE);
-
- float rotatedXTop = xTop * cos(angle) - tiltedZTop * sin(angle);
- float rotatedZTop = xTop * sin(angle) + tiltedZTop * cos(angle);
-
- float rotatedXBottom = xBottom * cos(angle) - tiltedZBottom * sin(angle);
- float rotatedZBottom = xBottom * sin(angle) + tiltedZBottom * cos(angle);
-
- transformedTopVertices[i][0] = CENTER_X + rotatedXTop;
- transformedTopVertices[i][1] = CENTER_Y + tiltedYTop;
-
- transformedBottomVertices[i][0] = CENTER_X + rotatedXBottom;
- transformedBottomVertices[i][1] = CENTER_Y + tiltedYBottom;
- }
-
- // 绘制圆柱体上下底面
- for (int i = 0; i < NUM_POINTS; i++) {
- int j = (i + 1) % NUM_POINTS;
- drawCylinderFace(i, j, (j + 1) % NUM_POINTS, transformedTopVertices, fillColor);
- drawCylinderFace(i, j, (j + 1) % NUM_POINTS, transformedBottomVertices, fillColor);
- }
-
- // 绘制圆柱体侧面
- for (int i = 0; i < NUM_POINTS; i++) {
- drawCylinderSide(i, transformedTopVertices, transformedBottomVertices, fillColor);
- }
-
- // 绘制圆柱体圆形端面边框
- // 绘制上底面边框
- for (int i = 0; i < NUM_POINTS; i++) {
- int j = (i + 1) % NUM_POINTS;
- drawCylinderEdge(i, j, transformedTopVertices, edgeColor);
- }
- // 绘制下底面边框
- for (int i = 0; i < NUM_POINTS; i++) {
- int j = (i + 1) % NUM_POINTS;
- drawCylinderEdge(i, j, transformedBottomVertices, edgeColor);
- }
-
- angle += ROTATION_SPEED;
- delay(300);
- }
|


 沪公网安备31011502402448
 置顶卡
置顶卡 变色卡
变色卡 千斤顶
千斤顶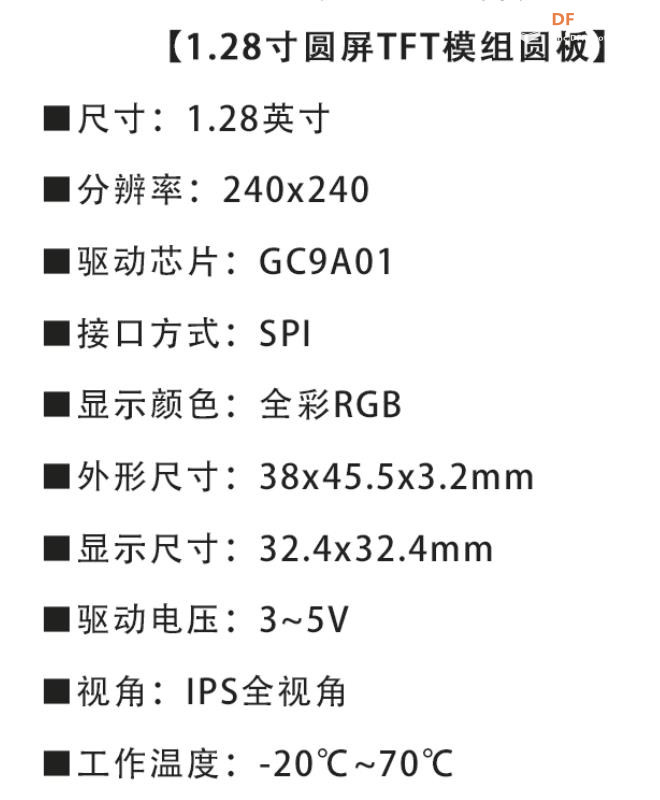

 萌萌哒新人
萌萌哒新人
 活跃会员
活跃会员
 宣传大使
宣传大使
 牛X认证
牛X认证
 创作达人
创作达人
 ARD DAY
 摸鱼团员
摸鱼团员
 志“童”道合
 编辑选择奖
编辑选择奖


