本帖最后由 驴友花雕 于 2021-11-22 07:28 编辑
【花雕动手做】有趣好玩的音乐可视化系列小项目(08)---四位32段点阵屏
项目之二:多档arduinoFFT浮点32段频谱仪
实验视频剪辑 5
https://v.youku.com/v_show/id_XN ... hcb.playlsit.page.5
https://v.youku.com/v_show/id_XNTgyMTM5MTA1Mg==.html?spm=a2hcb.playlsit.page.5
实验场景动态图
本帖最后由 驴友花雕 于 2021-11-22 11:09 编辑
【花雕动手做】有趣好玩的音乐可视化系列小项目(08)---四位32段点阵屏 项目之二:多档arduinoFFT浮点32段频谱仪
实验视频剪辑 6
https://v.youku.com/v_show/id_XNTgyMTY3NTQwNA==.html?spm=a2hcb.playlsit.page.1
https://v.youku.com/v_show/id_XNTgyMTY3NTQwNA==.html
实验场景动态图
【花雕动手做】有趣好玩的音乐可视化系列小项目(08)---四位32段点阵屏
项目之二:多档arduinoFFT浮点32段频谱仪
实验视频剪辑 7
https://v.youku.com/v_show/id_XNTgyMjA0MTI1Mg==.html?spm=a2hcb.playlsit.page.1
https://v.youku.com/v_show/id_XNTgyMjA0MTI1Mg==.html
实验场景动态图7
【花雕动手做】有趣好玩的音乐可视化系列小项目(08)---四位32段点阵屏
项目之二:多档arduinoFFT浮点32段频谱仪
实验视频剪辑 8
https://v.youku.com/v_show/id_XNTgyMjA0MTM2MA==.html?spm=a2hcb.playlsit.page.1
实验场景动态图 8
【花雕动手做】有趣好玩的音乐可视化系列小项目(08)---四位32段点阵屏
项目之三:红绿色32段级联频谱点阵屏灯(FFT算法)
实验开源代码
/*
【花雕动手做】有趣好玩的音乐可视化系列小项目(08)---四位32段点阵屏
项目之三:红绿色32段级联频谱点阵屏灯(FFT算法)
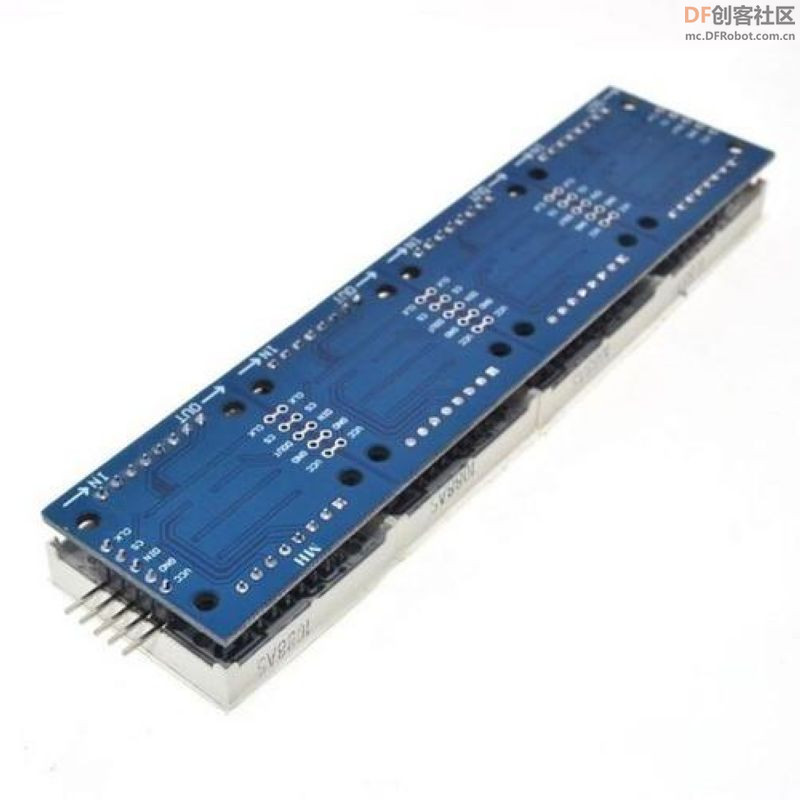
接脚连线:MAX9814 接A0
MAX7219 UNO
VCC →→→→→ 5V
GND →→→→→ GND
DIN →→→→→ D11(数据,数据接收引脚)
CS →→→→→ D10(负载,命令接收引脚)
CLK →→→→→ D13(时钟,时钟引脚)
*/
#include <arduinoFFT.h>
#include <MD_MAX72xx.h>
#include <SPI.h>
MD_MAX72XX disp = MD_MAX72XX(MD_MAX72XX::FC16_HW, 10, 1);
arduinoFFT FFT = arduinoFFT();
double realComponent;
double imagComponent;
int spectralHeight[] = {0b00000000, 0b10000000, 0b11000000,
0b11100000, 0b11110000, 0b11111000,
0b11111100, 0b11111110, 0b11111111
};
int index, c, value;
void setup()
{
disp.begin();
Serial.begin(9600);
}
void loop()
{
int sensitivity = map(analogRead(A0), 0, 1023, 50, 100);
Serial.println (analogRead(A0));
for (int i = 0; i < 64; i++)
{
realComponent = analogRead(A7) / sensitivity;
imagComponent = 0;
}
FFT.Windowing(realComponent, 64, FFT_WIN_TYP_HAMMING, FFT_FORWARD);
FFT.Compute(realComponent, imagComponent, 64, FFT_FORWARD);
FFT.ComplexToMagnitude(realComponent, imagComponent, 64);
for (int i = 0; i < 32; i++)
{
realComponent = constrain(realComponent, 0, 80);
realComponent = map(realComponent, 0, 80, 0, 8);
index = realComponent;
value = spectralHeight;
c = 31 - i;
disp.setColumn(c, value);
}
}
【花雕动手做】有趣好玩的音乐可视化系列小项目(08)---四位32段点阵屏
项目之三:红绿色32段级联频谱点阵屏灯(FFT算法)
实验视频剪辑 1
https://v.youku.com/v_show/id_XNTgyMjA0Mjg0NA==.html?spm=a2hcb.playlsit.page.3
https://v.youku.com/v_show/id_XNTgyMjA0Mjg0NA==.html
实验场景动态图
【花雕动手做】有趣好玩的音乐可视化系列小项目(08)---四位32段点阵屏
项目之三:红绿色32段级联频谱点阵屏灯(FFT算法)
实验视频剪辑 2
https://v.youku.com/v_show/id_XNTgyMTc1NTk2OA==.html?spm=a2hcb.playlsit.page.1
实验场景动态图
【花雕动手做】有趣好玩的音乐可视化系列小项目
项目之四:FFT算法的双点阵屏的动态频谱仪
实验视频剪辑
https://v.youku.com/v_show/id_XNTgyMjEwNjcwMA==.html?spm=a2hcb.playlsit.page.1
实验场景动态图
【花雕动手做】看见声音,基于Arduino系列音乐可视器(1)---LED节奏灯
https://mc.dfrobot.com.cn/thread-311167-1-1.html
【花雕动手做】看见声音,基于Arduino系列音乐可视器(2)---OLED频谱灯
https://mc.dfrobot.com.cn/thread-311174-1-1.html
【花雕动手做】看见声音,基于Arduino系列音乐可视器(3)---RGB律动灯
https://mc.dfrobot.com.cn/thread-311183-1-1.html
【花雕动手做】看见声音,基于Arduino系列音乐可视器(4)---WS2812条灯
https://mc.dfrobot.com.cn/thread-311190-1-1.html
【花雕动手做】看见声音,基于Arduino系列音乐可视器(5)---WS2812柱跳灯
https://mc.dfrobot.com.cn/thread-311192-1-1.html
【花雕动手做】看见声音,基于Arduino系列音乐可视器(6)---点阵频谱灯
https://mc.dfrobot.com.cn/thread-311201-1-1.html
【花雕动手做】看见声音,基于Arduino系列音乐可视器(7)---大方格频谱灯
https://mc.dfrobot.com.cn/thread-311364-1-1.html
【花雕动手做】看见声音,基于Arduino系列音乐可视器(8)---四位32段点阵屏
https://mc.dfrobot.com.cn/thread-311490-1-1.html
【花雕动手做】看见声音,基于Arduino系列音乐可视器(9)---X Music Spectrum
https://mc.dfrobot.com.cn/thread-311627-1-1.html
【花雕动手做】看见声音,基于Arduino系列音乐可视器(10)---WS2812硬板屏
https://mc.dfrobot.com.cn/thread-311641-1-1.html
【花雕动手做】看见声音,基于Arduino系列音乐可视器(11)---WS2812幻彩灯带
https://mc.dfrobot.com.cn/thread-313648-1-1.html
【花雕动手做】看见声音,基于Arduino系列音乐可视器(12)---米管快速节奏灯
https://mc.dfrobot.com.cn/thread-313708-1-1.html
【花雕动手做】看见声音,基于Arduino系列音乐可视器(13)---有机棒立柱灯
https://mc.dfrobot.com.cn/thread-313723-1-1.html
【花雕动手做】看见声音,基于Arduino系列音乐可视器(14)---水杯水瓶灯
https://mc.dfrobot.com.cn/thread-313803-1-1.html
【花雕动手做】看见声音,基于Arduino系列音乐可视器(15)--横排LED方管灯
https://mc.dfrobot.com.cn/thread-313811-1-1.html
【花雕动手做】看见声音,基于Arduino系列音乐可视器(16)--热干胶棒棒灯
https://mc.dfrobot.com.cn/thread-313844-1-1.html
【花雕动手做】有趣好玩音乐可视化系列(17)--光导纤维灯
https://mc.dfrobot.com.cn/thread-313867-1-1.html
【花雕动手做】看见声音,基于Arduino系列音乐可视器(18)--LED平面板灯
https://mc.dfrobot.com.cn/thread-313951-1-1.html
【花雕动手做】看见声音,基于Arduino系列音乐可视器(19)--通体光纤灯
https://mc.dfrobot.com.cn/thread-313962-1-1.html
【花雕动手做】看见声音,基于Arduino系列音乐可视器(20)--首饰盒镜子灯
https://mc.dfrobot.com.cn/thread-313969-1-1.html
【花雕动手做】看见声音,基于Arduino系列音乐可视器(21)--CD 光盘灯
https://mc.dfrobot.com.cn/thread-313984-1-1.html
【花雕动手做】看见声音,基于Arduino系列音乐可视器(22)--LED无限魔方
https://mc.dfrobot.com.cn/thread-313994-1-1.html
【花雕动手做】有趣好玩的音乐可视化(23)--3合1闪点光纤
https://mc.dfrobot.com.cn/thread-314168-1-1.html
【花雕动手做】有趣好玩的音乐可视化(24)--无限LED镜子灯
https://mc.dfrobot.com.cn/thread-314180-1-1.html
【花雕动手做】有趣好玩音乐可视化(25)--水龙卷旋涡灯
https://mc.dfrobot.com.cn/thread-314231-1-1.html
【花雕动手做】有趣好玩音乐可视化系列(26)--LED 超立方体
https://mc.dfrobot.com.cn/thread-314244-1-1.html
【花雕动手做】有趣好玩的音乐可视化(27)--磁搅LED水旋灯
https://mc.dfrobot.com.cn/thread-314273-1-1.html
程序说明:
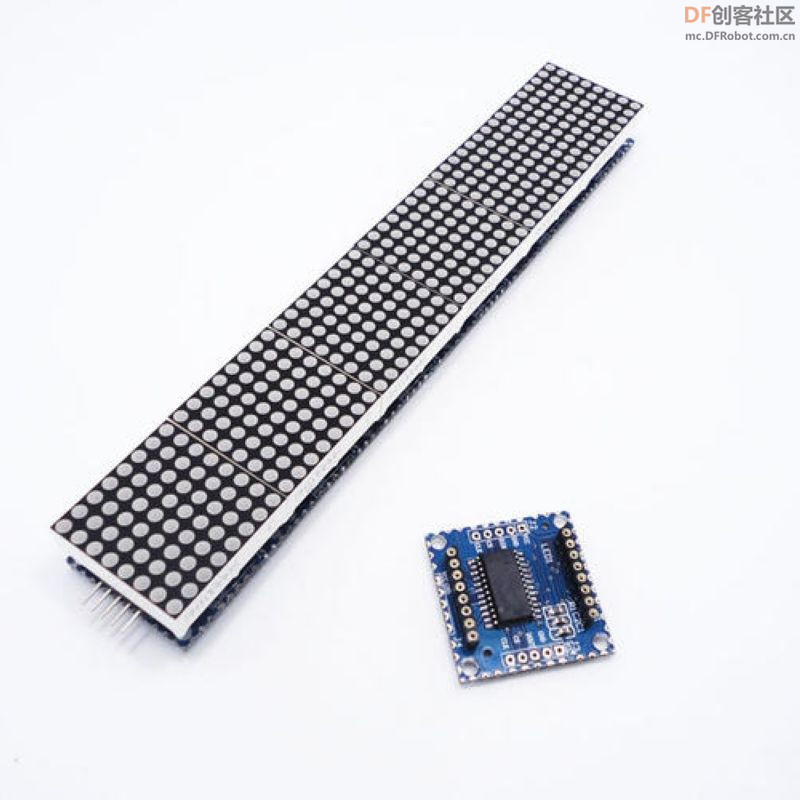
安装所有必需的库后,通过包含库来启动代码。ArduinoFFT库用于将输入模拟信号转换为频谱。MD_MAX72xx库用于控制显示并在显示器上绘制音频频谱。而SPI库用于在Arduino和点阵显示器之间建立SPI通信。
<div>#include <arduinoFFT.h></div><div>#include <MD_MAX72xx.h></div><div>#include <SPI.h></div>
接下来,使用函数 MD_MAX72XX () 为MD_MAX72XX创建一个实例。此功能需要三个参数,第一个是硬件类型,第二个是CS引脚,第三个是连接设备的最大数量。另外,使用 arduinoFFT() 函数为 arduinoFFT 创建一个实例。
<div>MD_MAX72XX disp = MD_MAX72XX(MD_MAX72XX::FC16_HW, 10, 4);</div><div>arduinoFFT FFT = arduinoFFT();</div>
然后在下一行中,定义两个新数组来存储频谱的实部和虚部的 64 位频谱分量。
<div>double realComponent;</div><div>double imagComponent;</div>
现在,在 setup() 函数中,以 9600 的波特率初始化串行监视器以进行调试。另外,使用 disp.begin() 函数初始化点阵显示。
<p>void setup()</p><p>{</p><p>disp.begin();</p><p>Serial.begin(9600);</p><p>}</p>
现在,在循环函数中,我们将使用 for 循环通过 Arduino nano 的 A7 引脚采集 64 个麦克风读数样本,并存储到我们之前定义的“realComponent”数组中。
<p>for (int i=0; i<64; i++)</p><p>{</p><p> realComponent = analogRead(A7)/sensitivity;</p><p> imagComponent = 0;</p><p>}</p><p></p>
从麦克风获得 64 个频谱值后,我们通过 FFT 算法将它们传递,以计算实部和虚部信号的 64 个频谱分量。然后在接下来的几行中,我们通过了这些阅读 FFT。ComplexToMagnitude() 函数用于计算 64 个光谱分量的星等。
<p>FFT.Windowing(realComponent, 64, FFT_WIN_TYP_HAMMING, FFT_FORWARD);</p><p>FFT.Compute(realComponent, imagComponent, 64, FFT_FORWARD);</p><p>FFT.ComplexToMagnitude(realComponent, imagComponent, 64);</p>
现在,在接下来的几行中,我们使用 for 循环来控制 LED 矩阵的所有 32 列。在此循环中,我们首先将这些读数转换为已知范围,然后使用 map 函数将这些读数映射到 0 到 8 的范围。零表示该特定列的所有 LED 都将低电平,反之亦然。
<p>for(int i=0; i<32; i++)</p><p>{</p><p> realComponent = constrain(realComponent,0,80);</p><p> realComponent = map(realComponent,0,80,0,8);</p><p> index = realComponent;</p><p> value = spectralHeight;</p><p> c = 31 - i;</p><p> disp.setColumn(c, value);</p><p>}</p>
实验的视频记录
优酷:https://v.youku.com/v_show/id_XNTkyNjUyOTU0NA==.html?spm=a2hcb.playlsit.page.1
B站:https://www.bilibili.com/video/BV1iP4y1Q7o9/?vd_source=98c6b1fc23b2787403d97f8d3cc0b7e5
https://www.bilibili.com/video/BV1iP4y1Q7o9/?vd_source=98c6b1fc23b2787403d97f8d3cc0b7e5
本帖最后由 驴友花雕 于 2022-12-6 20:03 编辑
实验的视频记录之二
优酷:
B站:https://www.bilibili.com/video/B ... 87403d97f8d3cc0b7e5
https://www.bilibili.com/video/BV1e44y1S7gi/?vd_source=98c6b1fc23b2787403d97f8d3cc0b7e5
页:
1
[2]